Share
NetApp FlexCache® gives users a way to create writable, persistent cached copies of data volumes which can be stored in remote locations that are true to the originals. In conjunction with NetApp Cloud Volumes ONTAP®, that data can be brought closer to users while avoiding the time and consumption costs of lengthy data migrations. This can be a major benefit especially in hybrid cloud management scenarios.
In this post we’ll show you how to start using FlexCache as part of your Cloud Volume ONTAP deployment on Google Cloud.
Jump down below to find out more on:
- Getting to Know FlexCache and Cloud Volumes ONTAP
- Setting Up FlexCache in Google Cloud
- Further Reading
Getting to Know FlexCache and Cloud Volumes ONTAP
With FlexCache, NetApp has created a technology that allows users to take data volumes and easily create persistent, writable, cached copies of them. These copies can be kept anywhere they’re needed, but this is especially useful to get the data closer to remote locations. That makes data more readily available for use across large, dispersed operations no matter where they are located.
But FlexCache copies go beyond your typical cached copies. These aren’t just duplicate copies of the original data—FlexCache copies are intelligent sparse containers. To applications, these copies are no different from the source data, however, initially it’s just the file metadata that is cached, not the data itself. That data is only retrieved from the source when it’s requested, a process which takes place dynamically and completely behind the scenes. This reduces the amount of data that must migrate between the source repository and the destination and also completely avoids duplicate data transfer.
Using Cloud Volumes ONTAP, NetApp’s data management platform on Google Cloud, AWS, and Azure, your FlexCache copies also benefit from all the space and cost efficiencies that are NetApp’s calling card as well as the ability to burst to the cloud to get data to remote sites easier.
Setting Up FlexCache in Google Cloud
Before You Get Started: Prerequisites
Make sure that everything listed below is in place before you proceed with the rest of the steps covered in this walkthrough.
You’ll need:
- An active subscription to Google Cloud with
- appropriate privileges
- a NetApp Cloud Manager connector set up
- An on-prem ONTAP cluster
- running ONTAP 9.6 or higher
- with administrator privileges for the cluster and SVM
- equipped with a NetApp FlexCache license
- A Cloud Volumes ONTAP for Google Cloud instance
- with full access to Cloud Manager
- a volume that is actively deployed in a Google Cloud region. Find out how to set up a volume here.
- Network connectivity
- There needs to be a VPN connection set up between the cloud-based instance in Google Cloud and the on-premises ONTAP cluster.
For more details, check out the ONTAP documentation.
You can also read more information about FlexCache sizing guidelines here.
1. Creating a Peering Relationship Between Clusters
Our first step is to set up a peering relationship between the Google Cloud-based Cloud Volumes ONTAP and the on-prem ONTAP cluster.
1.1 Head to Cloud Manager, which is the starting destination for all your cloud-based NetApp activities and services. On the Canvas starting page, find and select your preferred Cloud Volumes ONTAP instance.
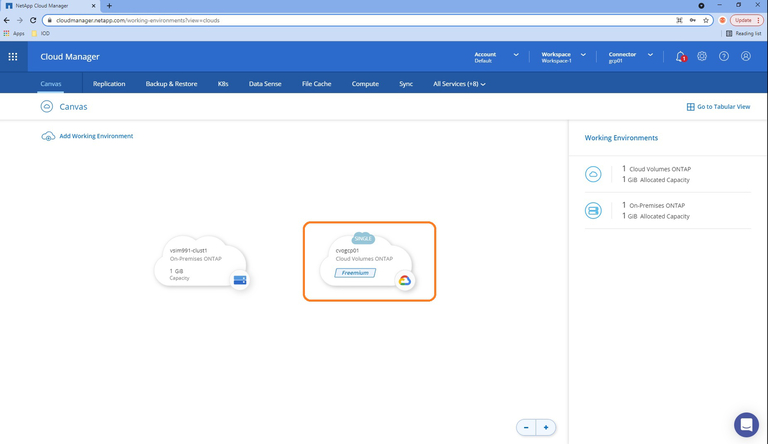
1.2 In the Cloud Volumes ONTAP page, select the burger icon menu to the upper right, as indicated in the screenshot below.
From the drop-down menu that’s presented, select the “Advanced” option. From the options presented, select “System Manager” to open NetApp System Manager view.

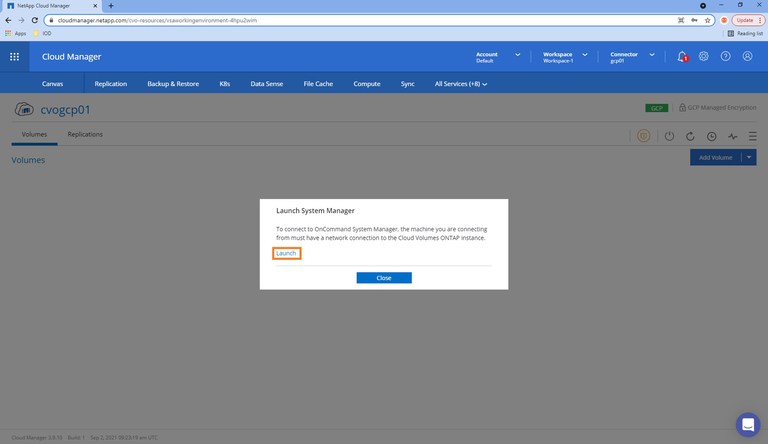
1.3 In the pop-up box, click on “Launch.” Make sure that networking connectivity is in place between your on-prem and cloud-based ONTAP instances.
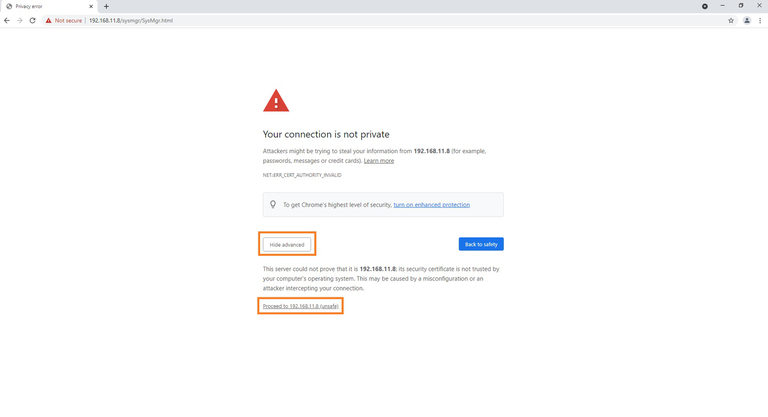
1.4 You may be alerted to an insecure connection because of default SSL certificates. Just click “Proceed” as shown below.
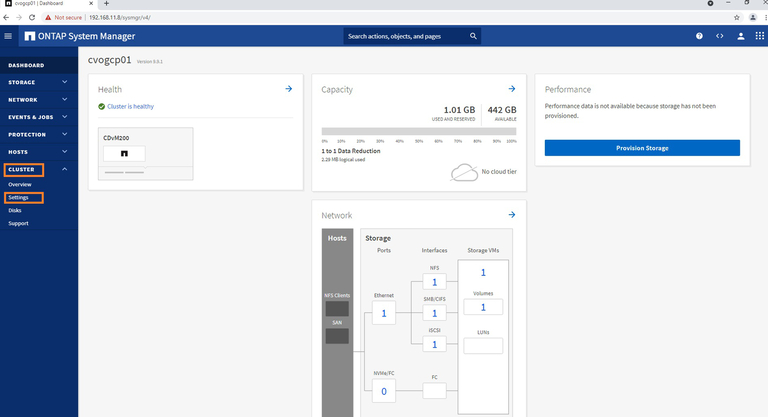
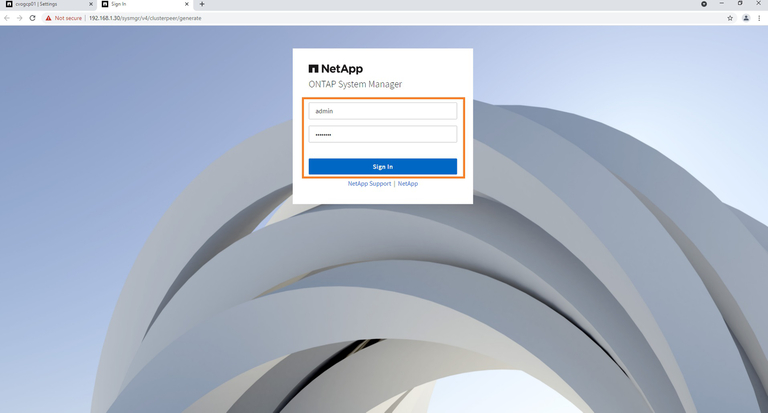
1.5 You will be brought to the login page for System Manager. Sign in with the appropriate credentials.

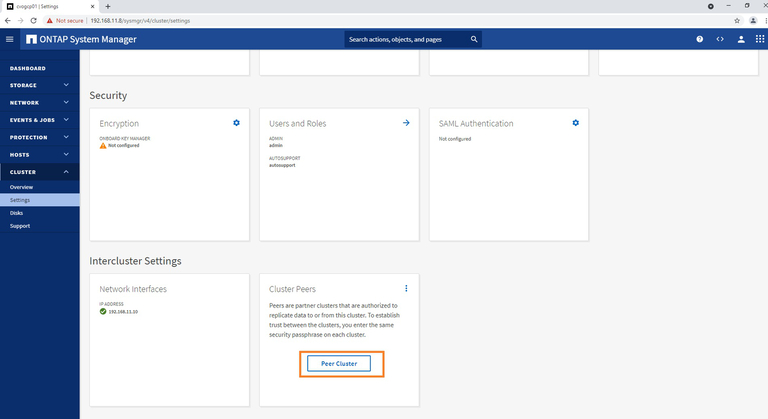
1.6 When ONTAP System Manager opens, head to the menu on the left-hand side. Find the “Cluster” option and click on it. In the submenu presented, select “Settings”.
1.7 You’ll now be on the Settings screen. At the bottom of the page, you’ll find an option for “Intercluster Settings.” To start setting up the peering relationship, click the button labeled “Peer Cluster.”
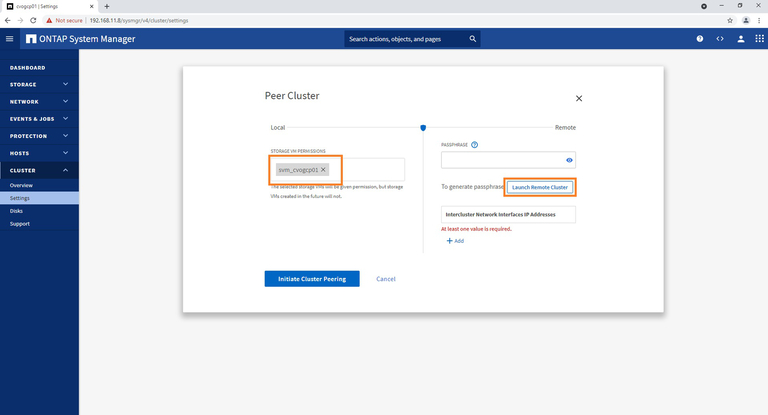
1.8 The Peer Cluster window will open. Here, find and select the SVM you want to use with Cloud Volumes ONTAP.
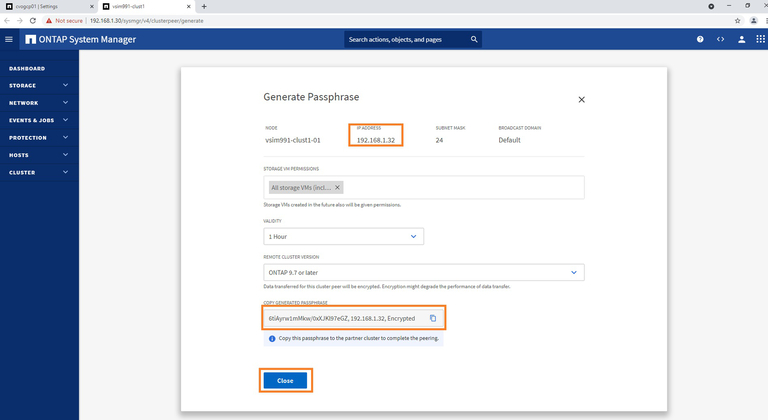
Next, click “Launch Remote Cluster.” This will bring you back to the System Manager view for your on-prem cluster and provide you with an authentication passphrase.
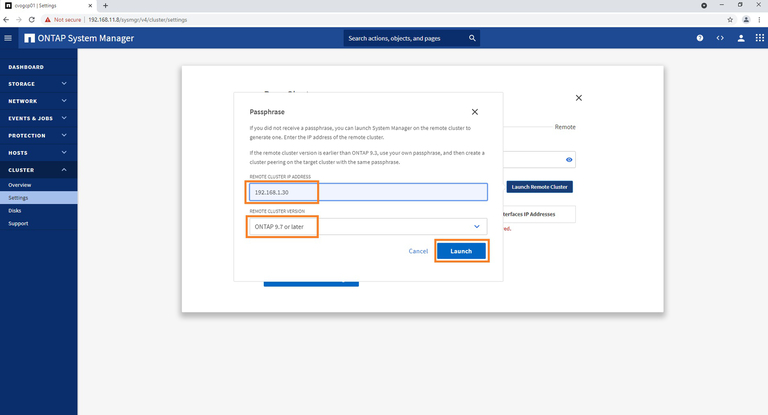
1.9 In the passphrase screen, enter your on-premises cluster’s IP address and then indicate the version of ONTAP used by the cluster.
Keep in mind that the IP address is the same address as the on-prem cluster’s cluster management IP. It also needs to be fully accessible to the Cloud Volumes ONTAP instance in Google Cloud.
Click “Launch” when you’re done to proceed.
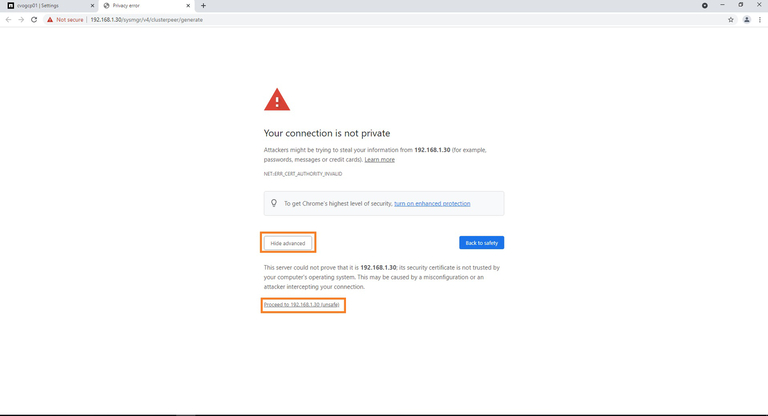
1.10 You may again be asked to confirm an insecure connection. Like before, click “Proceed.”
1.11 Log into System Manager again.
1.12 In the System Manager view for the on-prem instance, copy down both the Cluster Management LIF IP and the passphrase generated by System Manager.
You’re going to need both of these numbers in the proceeding steps.
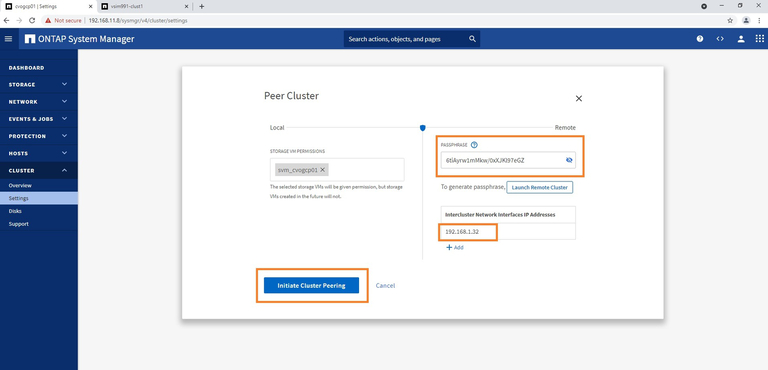
1.13 Go back to the System Manager view of the Cloud Volumes ONTAP instance. Enter the passphrase that was generated in the previous step.
You will also add or verify the IP address for the intercluster network interface. When you’re done, click the “Initiate Cluster Peering” button.
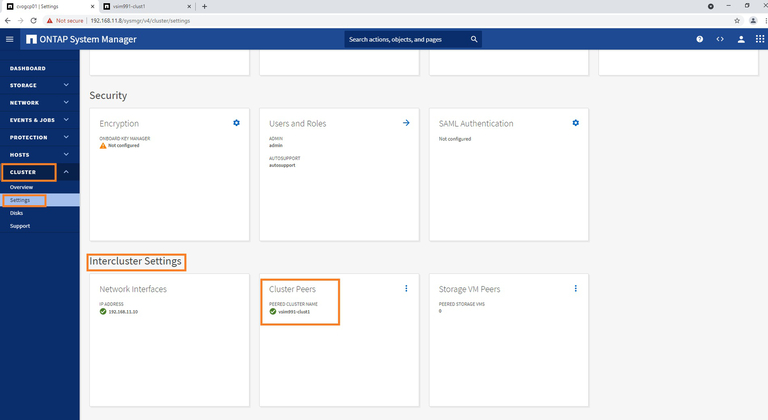
1.14 Now verify that the previous steps were successful, and that peering is set up by heading back to the Intercluster Settings section of System Manager.
You should see a check mark, as shown below.
2. Creating the Storage Virtual Machine Peering Relationship
Now we will need to set up peering between the Storage Virtual Machine (SVM) and the two ONTAP clusters.
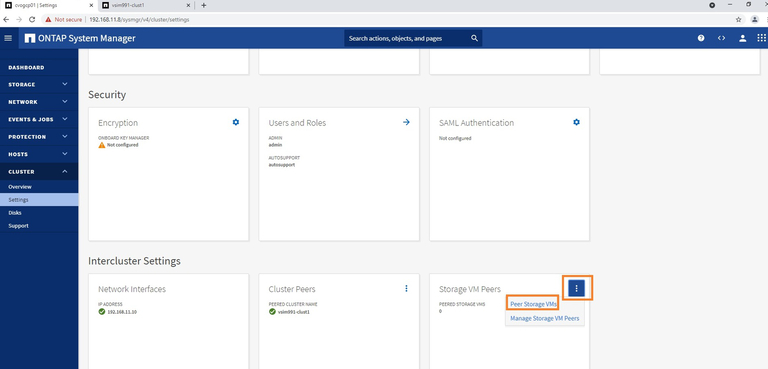
2.1 In the Settings panel of Systems Manager, head down to “Intercluster Settings” and find the one for “Storage VM Peers.”
Open up the menu by clicking the three vertical dots, then select “Peer Storage VMs.”
2.2 Find and select the VM names for the cloud-based and on-prem ONTAP instances from the available options that drop down. Next, click “Peer Storage VMs.”

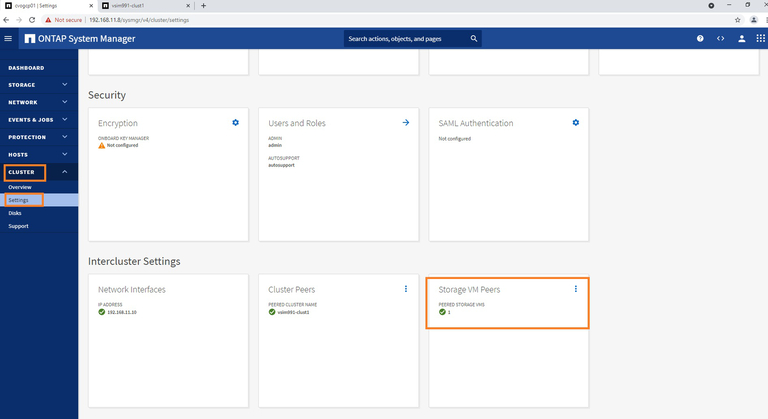
2.3 To confirm that the storage has been peered, go to the System Manger menu on the right and select Cluster, then Settings, and then Intercluster Settings.
You will see a checkmark under the Storage VM Peers option.
3. Verify FlexCache Application Settings
The next step is verification for FlexCache to use the SVM peering relationship we just set up.
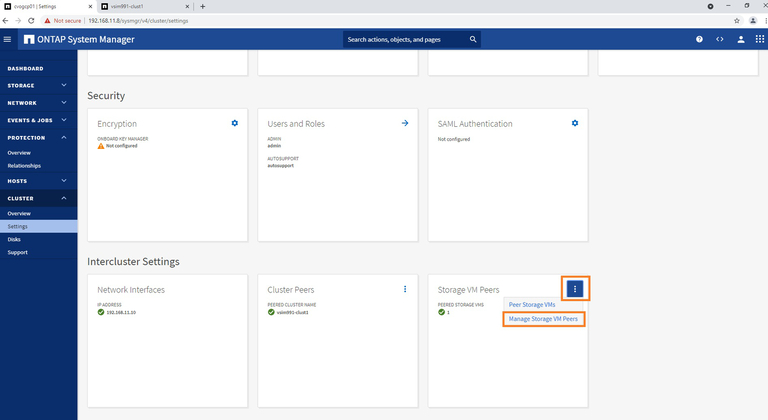
3.1 Go to System Manager’s Settings page. Under “Intercluster Settings,” find the “Storage VM Peers” option.
Use the three vertical dots to expand the menu options and choose “Manage Storage VM Peers.”
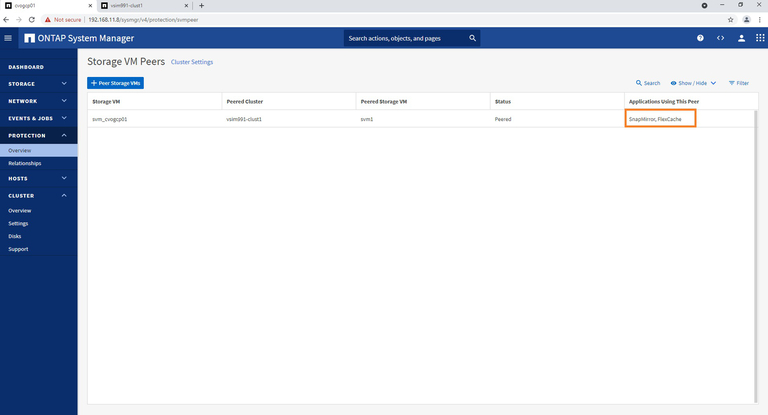
3.2 You will now be situated in the Storage VM Peers screen. As shown below, you can verify your FlexCache volume is listed as a valid application for SVM peering.
4. Setting Up a FlexCache Volume with Cloud Volumes ONTAP
With SVM and cluster peering in place, now it is time to set up the FlexCache volume with Cloud Volumes ONTAP for Google Cloud.
4.1 In the Cloud Volumes ONTAP System Manager, click on “Storage” on the menu to the left.
Select “Volumes” from the options in the expanded menu.
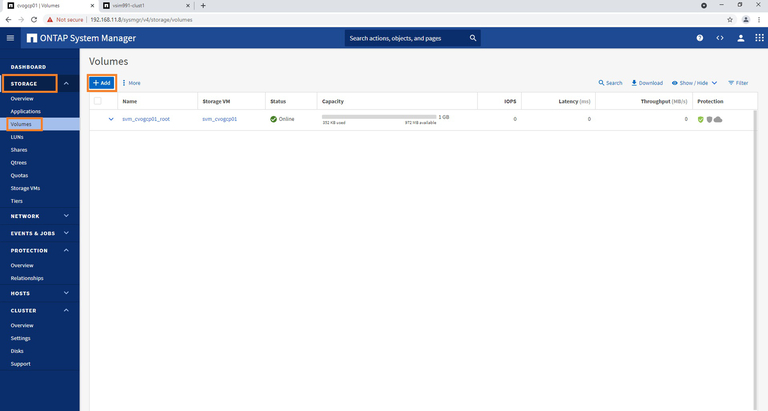
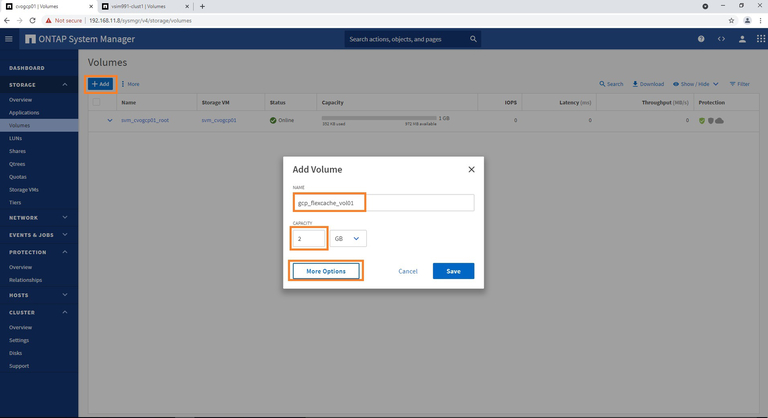
4.2 In the Add Volume pop-up window, click “+Add.” Name your FlexCache volume in the appropriate field. Your volume size should be in line with the sizing considerations that were covered in the prerequisites covered above.
When all the information is entered, click “More Options” to proceed.
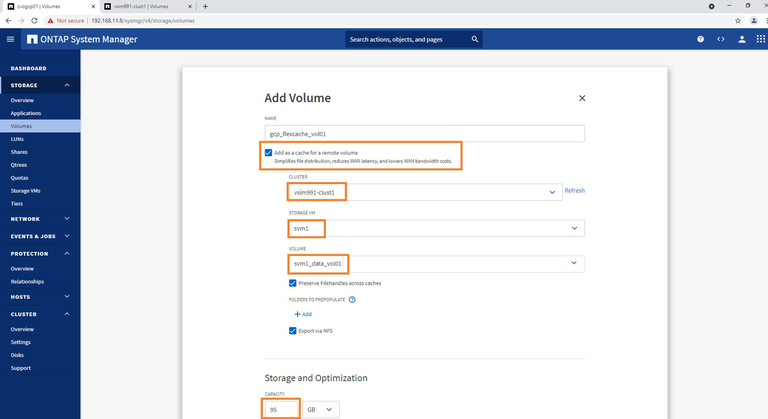
4.3 Tick the first box. This indicates the FlexCache volume will be for a remote volume and make it possible to enter all of the details for the rest of your setup: the name of your on-prem cluster, SVM name, and the SVM source volume the FlexCache copy will be based on.
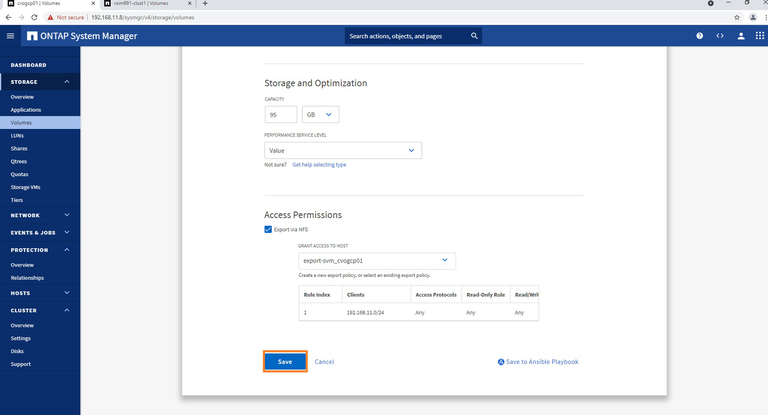
4.4 Scrolling down, you will find some more settings that can be adjusted per your specific deployment. In this example, we are leaving the default settings.
Click “Save” to proceed.
4.5 Your FlexCache volume will now be in place. To verify, go back to System Manager and click the “Settings” option in the menu to the left. From there, go to “Volumes.”
The FlexCache volume will be indicated by a checkmark.
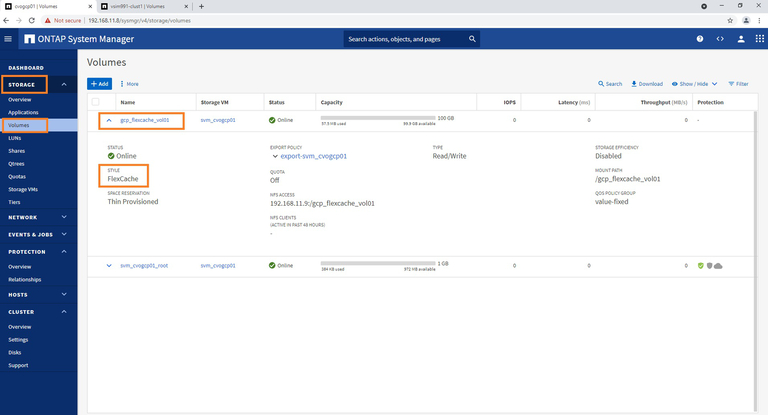
Your FlexCache volume for NetApp Cloud Volumes ONTAP is now up and running in your Google Cloud environment.
Further Reading
You’ve now seen how NetApp Cloud Volumes ONTAP on Google Cloud and FlexCache can be set up. You’ll have an easy way to get your data throughout your organization with no need to carry out a costly and time consuming Google Cloud migration between repositories, whether you’re carrying out an initial Google Cloud migration or transferring data across a multicloud storage architecture.
For more details on FlexCache, we suggest reviewing NetApp Technical Report 4743. To get a better idea of how Cloud Volumes ONTAP is being used in Google Cloud deployments, check out these case studies.
