Share
Kubernetes is the leading managed container orchestration platform preferred by customers deploying microservices-based architectures in the cloud. Azure Kubernetes Service offers Kubernetes as a managed service, where the container orchestration platform is handled by Azure, enabling customers to focus on the developments of applications. But how does AKS meet Kubernetes storage demands?
Containers are stateless, which means data is not stored locally—these containers depend on attached persistent volumes to handle the data lifecycle. This blog will walk through the steps required for provisioning persistent volumes and configuring them to be used by containers in Azure Kubernetes Service clusters.
What is Persistent Storage?
By default, the storage associated with pods is deleted when the pod lifecycle ends. For stateful applications, however, storage is expected to be persistent so that the data can remain available every time the pods gets recreated in the cluster. Container persistent storage in a Kubernetes cluster is provisioned using the PersistentVolume subsystem, which provides PersistentVolume and PersistentVolumeClaim API resources.
The PersistentVolumeClaim requests for a specific storage class, say Azure disks or Azure Files, and the underlying storage resource gets provisioned. This PersistentVolumeClaim is referenced in the pod definition so that the provisioned storage is mounted to the pod. In this way the PersistentVolume is linked to the PersistentVolumeClaim whenever the provisioned storage is mounted to the pod requesting the resource.
Provision Persistent Storage Using Azure Disks
There are four major steps in creating and attaching persistent storage using Azure disks in Azure Kubernetes Service.
- The definition of storage class.
- The configuration of persistent volume claim using this storage class.
- Create the persistent volume claim and provision the volume.
- Attaching the provisioned volume to the pod by referencing the specific pod in the pod definition file.
Let’s explore this process in detail with sample configuration files.
Note: The following steps will assume that the AKS cluster is already provisioned and that the administrator has access to execute the commands listed in this blog. For details of provisioning AKS cluster and connecting to it, please refer to this resource document from Microsoft.
How AKS Uses Azure Disk Storage Classes
Customers can choose from premium or standard Azure disks to create the persistent volumes they attach to pods. These volumes are defined as premium or standard based on the Storage Class. There are two pre-built storage classes in AKS: default and managed-premium.
Default: This storage class uses the standard Azure storage which leverages HDDs in the backend.
Managed-premium: This storage class uses premium Azure storage which leverages high performance SSD and can be used for production workloads that need higher IOPS and throughput.
There are certain limitations associated with the built-in storage classes. For example, while using the built-in storage classes (i.e., default and managed-premium) the volume size cannot be resized after provisioning. AKS provides an option to edit the built-in storage classes to alter these default characteristics. One way to work around these defaults is to create your own custom storage classes.
Creating Custom Storage Classes
In this section we’ll show you how users can create custom storage classes to suit their specific requirements.
1. Connect to the AKS cluster from your management tool of choice. For this demonstration we will be using Azure CL. From the Azure CLI, save the following manifest as storage-class.yaml
kind: StorageClass
apiVersion: storage.k8s.io/v1
metadata:
  name: managed-premium-custom
provisioner: kubernetes.io/Azure-disk
reclaimPolicy: Retain
allowVolumeExpansion: true
parameters:
  storageaccounttype: Premium_LRS
  kind: Managed
This file can be used to create a storage class that uses Premium_LRS managed disks. The reclaimPolicy is set to retain so that the persistent volume is not deleted even if the pod to which it is attached gets deleted. With the parameter allowVolumeExpansion set to true, the volume can now be resized even after provisioning.
2. Apply the yaml file using the following command
$ kubectl apply -f storage-class.yaml
Upon successful execution, you will get a message that the storage class has been created.

Create Persistent Volume Claim and Persistent Volume
The next step is to create a persistent volume claim (PVC), which uses the storage class defined in the above to provision an Azure disk as a persistent volume.
- Create Azure-pvc.yaml file in the Azure CLI window describing the PVC, as given below:
apiVersion: v1
kind: PersistentVolumeClaim
metadata:
  name: Azure-managed-disk
spec:
  accessModes:
  - ReadWriteOnce
  storageClassName: managed-premium-custom
  resources:
    requests:
      storage: 10Gi
The PVC will request for an Azure disk of 10 GB with accessmode as ReadWriteOnce. That means only one node can mount the volume as read-write.
2. To create the volume itself, run the following command:
$ kubectl apply -f Azure-pvc.yaml
On successful execution you will see a message that the persistent volume claim has been created.

After creation, the provisioned volume can also be seen from the Azure portal. Browse to the resource group where the AKS nodes are created to find the newly provisioned disk listed there.
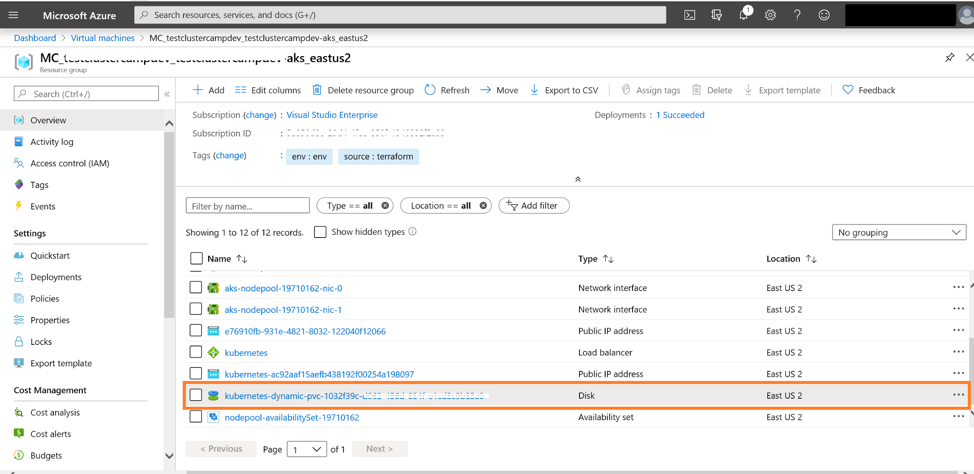
You can also run the following command to list the pvc status. It will be listed as “bound” to the created persistent volume:

Attach a Persistent Volume to AKS
After creating the persistent volume claim and the Azure disk, it can be attached to a new pod by referencing the name of the persistent volume claim.
1. Create file Nginx.yaml with the following content
kind: Pod
apiVersion: v1
metadata:
  name: nginx
spec:
  containers:
    - name: nginxfrontend
      image: nginx
      volumeMounts:
      - mountPath: "/mnt/Azure"
        name: volume
  volumes:
    - name: volume
      persistentVolumeClaim:
        claimName: Azure-managed-disk
The volume is mounted at /mnt/Azure as specified by the mountpath parameter
Note that the image for the container is taken from a public registry. Alternatively, it can also be downloaded from the Azure container registry.
2. Next, create the pod using the following command:
$ kubectl apply -f Nginx.yaml
When successfully executed, the pod will be created.

3. Verify that the persistent volume is attached to the pod by using the following command:
$kubectl describe pod nginx
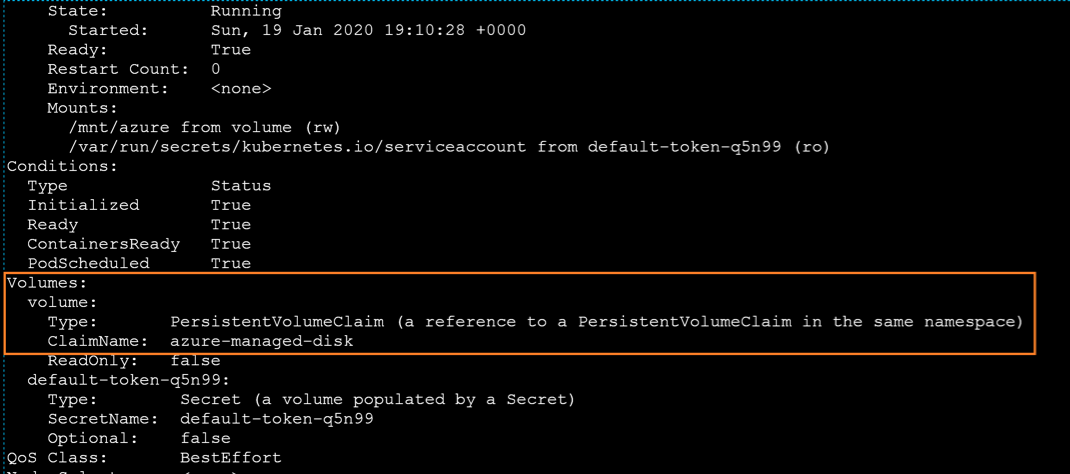
You can see that the volume is listed and and uses the claim name “Azure-managed-disk.”
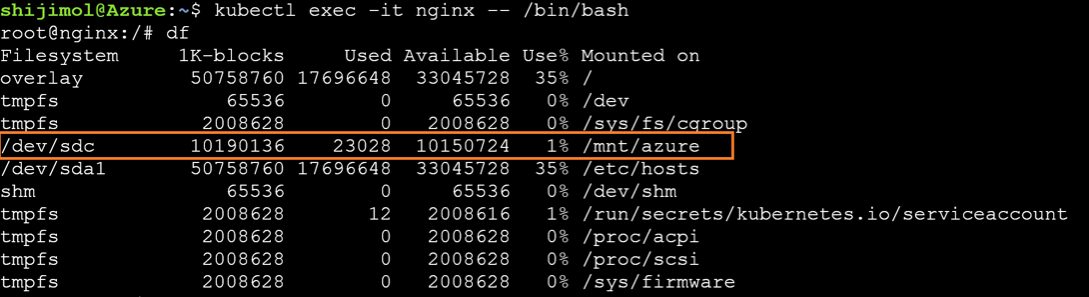
4. To connect to the running Azure container instance, use the following command and run the df command to view the volumes:
$kubectl exec -it nginx -- /bin/bash
#df
Cloud Volumes ONTAP: Gain More from Your Persistent Volumes
While Azure disks can provide AKS with persistent volumes for use in containers, NetApp Cloud Volumes ONTAP helps Kubernetes users leverage enterprise class data management features not otherwise available in Azure.
Cloud Volumes ONTAP offers file and block level storage service for workloads in Azure, serving data over NFS, SMB/CIFS, and iSCSI protocols. Cloud Volumes ONTAP can be used for provisioning persistent volumes in Kubernetes clusters through NetApp Trident, which is an open source project maintained by NetApp designed to help customers with the container storage requirements, whether for persistent storage for Docker, Kubernetes, OpenShift, or any other container platform.
NetApp Trident integrates with Kubernetes persistent volume subsystem to provision and manage volumes using Cloud Volumes ONTAP that can be mounted as persistent volumes in containers running on AKS.
Cloud Volumes ONTAP uses Azure storage in the backend, but provides much more value add to connected workloads through data management capabilities for persistent volumes and containerized workloads, including
- Point in time recovery of volumes and data protection through proprietary NetApp Snapshot™and SnapRestore® technology.
- Reduced storage footprint through thin provisioning, data duplication and compression that helps reduce the monthly cloud data storage costs.
- Dual-node deployment that ensures Azure high availability of volumes attached to containers to assure RTO<60 sec and RPO=0.
- Rapid data cloning of persistent volumes through NetApp FlexClone® technology, which helps in quick deployment of environments for testing and development.
Conclusion
Persistent volume configuration is an integral part of container deployment in AKS, as stateful sets need the data to be stored outside of the pod lifecycle. Along with options like Azure disks and Azure files, Cloud Volumes ONTAP can also be used to meet the requirements of such workloads. Cloud Volumes ONTAP helps extends the advantages of ONTAP technology to containers by offering highly available, durable and reliable persistent storage for Azure microservices deployed in AKS.
To read more about Kubernetes storage, check out the rest of the blogs on our hub:
- An inside-and-out Kubernetes introduction to get you started.
- More on persistent volume provisioning for Kubernetes.
- How to manage stateful applications that need PVs.
- Get insights details on how developers are using Kubernetes.
- Comparing Amazon ECS vs Kubernetes.
- And all of the details on how to use Cloud Volumes ONTAP and Kubernetes for data protection for persistent volumes, storage efficiencies to cut down persistent volume storage costs, and instant persistent volume cloning.

