Share
Kubernetes has revolutionized container workload orchestration and is undoubtedly the most popular container management platform in the cloud. Azure Kubernetes Service (AKS) delivers Kubernetes as a managed service in Azure, from provisioning the underlying Kubernetes storage to deploying your cluster.
AKS helps customers to focus on developing and deploying their applications, while the control plane of Kubernetes is managed by the platform. AKS also provides the flexibility of leveraging the container ecosystem in Azure to enable scalability of workloads. AKS can be integrated with Azure Container Instances (ACI) to rapidly scale the pods in a cluster without deploying additional nodes.
This blog will explain how to deploy AKS, and then provide an Azure Kubernetes Service tutorial on how to integrate AKS with ACI and use it as a logical extension of the Azure Kubernetes cluster for scalability.
Get started with the Azure Kubernetes Service tutorial with the links below:
- Prerequisites
- Setting Up an AKS Deployment
- Enable Virtual Nodes
- Sample App Deployment to Integrated ACI
What Is Azure Kubernetes Service
Azure Kubernetes Service (AKS) is a managed Kubernetes service that runs on Azure resources. With the managed Kubernetes model in AKS, there is a clear distinction between the control plane and the nodes where the workloads run. The control plane is abstracted from the user, and it runs core Kubernetes components, such as the API Server, scheduler, and controller manager. The configuration and management of the control plane and operational aspects like upgrades and high availability are managed by the platform. The visibility to the control plane is only through logs accessible via Azure Monitor.
The workloads are deployed in Kubernetes nodes that host the node components and container runtime. The “kubelet” service intercepts the messages from the control plane and schedules containers in available nodes. The nodes also run the “kube-proxy” service for network connectivity and IP address management. Customers have the flexibility to configure the CPU, memory, and the storage used by the nodes based on their application requirements.
The Azure Kubernetes Service Ecosystem
The benefit of using AKS mostly lies in the ecosystem of supporting services in Azure that can be easily integrated with your cluster. Some of the key features of AKS include:
- AKS clusters can be upgraded to the latest available Kubernetes version through a non-disruptive cordon and drain process.
- Integration with Azure monitor and log analytics for logging and monitoring containers, nodes, and control plane health.
- Integration with Azure Active Directory to use existing Azure AD accounts and groups for implementing role-based access control (RBAC) in Kubernetes.
- Leverage GPU enabled VMs in AKS node pools to host compute and graphic-intensive workloads.
- Containers in AKS can be connected to Azure disks or Azure Files for persistent storage access.
Scalability Options in AKS
AKS offers scalability to your workloads, where the compute resources available for containers can be increased or decreased on demand. There are some different options available for scaling. Customers can manually scale applications by defining the number of pods or nodes to be used. Horizontal scaling can be achieved through pod autoscaler that increases the number of replicas based on defined metrics or by increasing the node count through cluster autoscaler. Deployment of additional nodes for scaling the cluster might take some time, and Azure Container Instances can be leveraged here for rapid scaling.
Azure Container Instances (ACI) is a serverless container hosting service that enables customers to run containerized applications in Azure without having to deploy or manage VMs, effectively offering start up times in seconds. ACI acts as a virtual extension of the AKS cluster where you can securely deploy your container workloads. The process uses Virtual Kubelet implementation that helps to leverage serverless container hosting services to extend Kubernetes service. The implementation of Virtual Kubelet for AKS is called Virtual nodes add-on. The service requires the AKS cluster to be created with advanced networking, i.e., Azure Container Networking Interface (Azure CNI). Virtual nodes act as the bridge that enables communication between pods in AKS and the pods deployed in ACI for scalability.
Integrate AKS with Azure Container Instance
In this Azure Kubernetes Service tutorial we will show you how you can create an AKS cluster and scale it to ACI through a few simple steps.
Prerequisites:
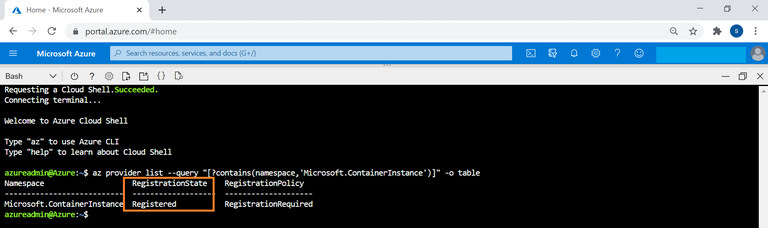
Before you can begin the Azure Kubernetes Service tutorial, there are a few prerequisites to have in order first. The AZ CLI commands in this guide can be run from Cloud Shell or after installing Azure CLI. You will also need contributor access to create both the AKS cluster and the resource group. To enable the integration, your ACI provider should be registered in the subscription. This can be checked using the following command. The status should be shown as “Registered”:
$az provider list --query
"[?contains(namespace,'Microsoft.ContainerInstance')]" -o table
If the provider is not registered, then the provider can be registered with the following command:
$az provider register --namespace Microsoft.ContainerInstance
Setting Up an AKS Deployment
In this section of the Azure Kubernetes Service tutorial, we’ll show you how to set up the AKS deployment itself.
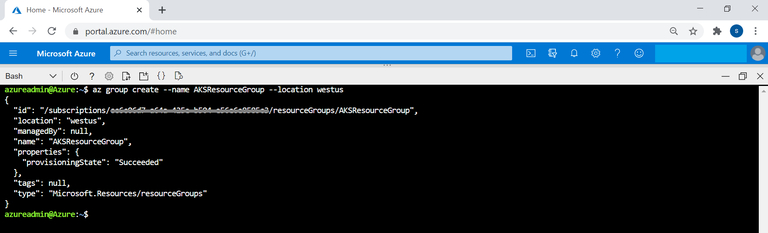
- To get started, use this Azure CLI command to create a resource group for deploying the AKS cluster:
az group create --name <resource group name> --location <Azure region>
Replace the highlighted values with the name of the resource group and Azure region where you want to deploy the resource group. Below you can see a sample command to show you how this will look:
az group create --name AKSResourceGroup --location westus
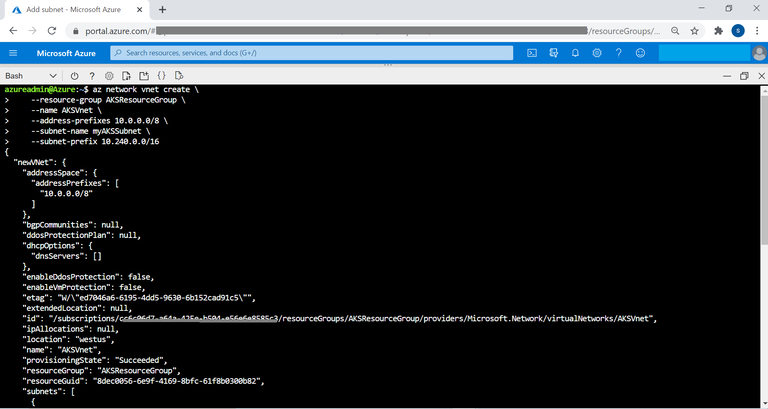
- Now create a Virtual Network and subnet for the AKS cluster:
az network vnet create \
 --resource-group <resource group name> \
 --name <VNet name> \
 --address-prefixes <VNet address space> \
 --subnet-name <Subnet Name> \
 --subnet-prefix <Subnet address space>
Replace the highlighted values with the following, in order:
- Name of resource group created in step 1
- Name of VNet
- Address space of the VNet
- Name of AKS subnet
- CIDR of the subnet
To get a better idea of what this will look like when you’re done, check out this sample command:
--resource-group AKSResourceGroup \
    --name AKSVnet \
    --address-prefixes 10.0.0.0/8
    --subnet-name myAKSSubnet \
    --subnet-prefix 10.240.0.0/16
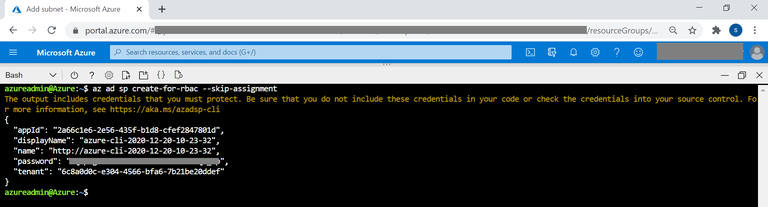
- Now create Azure AD service principal that will be used by AKS cluster to interact with other resources available on Azure. The appid and password will be used during AKS cluster deployment:
az ad sp create-for-rbac --skip-assignment
- For the AKS cluster to connect to the VNet created in step 2, the service principal should be granted access to it.
Using this command, you can get the virtual network id:
az network vnet show --resource-group AKSResourceGroup --name AKSVnet --query id -o tsv

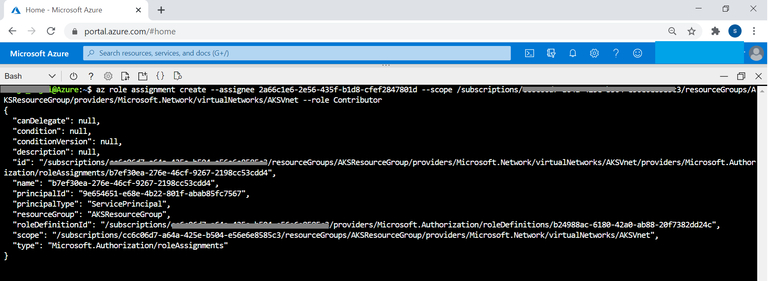
- Assign contributor rights for the AKS service principle to the virtual network:
az role assignment create --assignee <appId> --scope <vnetId> --role Contributor
Replace appid with the id of the service principal created in step 3 and vnetId with the value from step 4.
- Get the ID of the subnet created for the AKS cluster using the following command and save the output. The value will be required when you’re creating your AKS cluster:
az network vnet subnet show --resource-group
AKSResourceGroup --vnet-name myVnet --name myAKSSubnet --query id -o tsv

- Now create your AKS cluster using the following command:
az aks create \
    --resource-group AKSResourceGroup \
    --name AKSTestCluster \
    --node-count 1 \
    --network-plugin azure \
    --service-cidr 10.0.0.0/16 \
    --dns-service-ip 10.0.0.10 \
    --docker-bridge-address 172.17.0.1/16 \
    --vnet-subnet-id <subnetId>  \
    --service-principal <appId> \ \
    --client-secret <password>
    --generate-ssh-keys
Replace the highlighted values with the following, in order:
- ID of the AKS subnet from step number 6
- Service principal id from step number 3
- Password of the service principal as obtained in step number 3
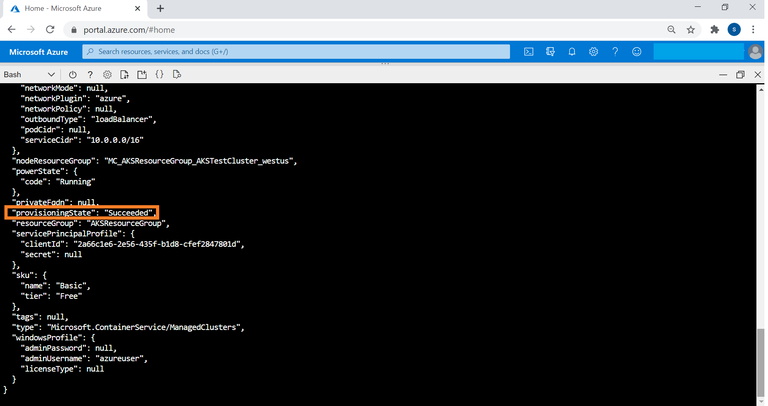
Once deployment is completed, the provisioning status will be shown as “Succeeded” in the output field.
Enable Virtual Nodes
In this section we’ll show you how to enable your virtual nodes in AKS. These nodes will help to scale your AKS cluster with ACI.
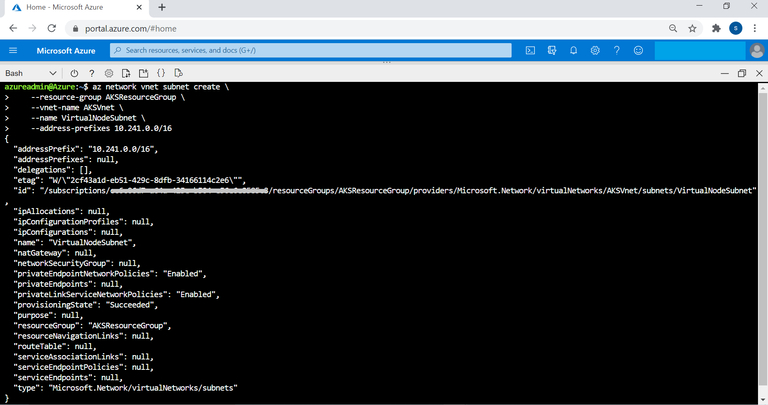
- Start by setting up another subnet for integrating with virtual nodes in the same VNet for ACI integration:
az network vnet subnet create \
 --resource-group\ <resource group name> \
 --vnet-name <VNet name> \
 --name <Virtual node subnet> \
 --address-prefixes <Subnet address space>
Replace the highlighted values with the following, in order:
- Name of resource group created in step 1
- Name of VNet created in step 2
- Name of subnet to be created for the virtual node
- CIDR of the virtual node subnet
You can see how all this will look when complete in this sample command below:
az network vnet subnet create \
 --resource-group AKSResourceGroup \
 --vnet-name AKSVnet \
 --name VirtualNodeSubnet \
 --address-prefixes 10.241.0.0/16
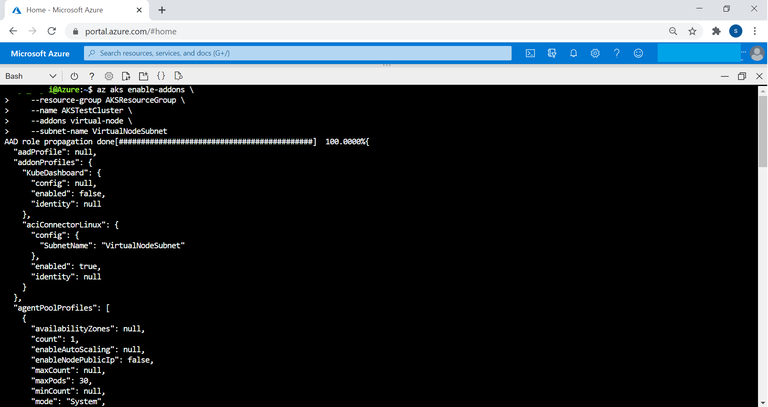
- Enable the virtual nodes add-on for the provisioned AKS cluster and use the subnet created back in Step 1. Note that you have to be an owner of the subscription to run this command:
az aks enable-addons \
 --resource-group AKSResourceGroup \
 --name AKSTestCluster \
 --addons virtual-node \
 --subnet-name VirtualNodeSubnet
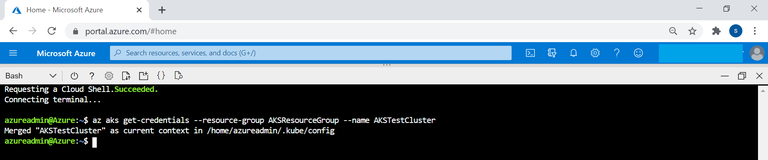
- Get AKS credentials to connect to the cluster:
$az aks get-credentials --resource-group AKSResourceGroup --name AKSTestCluster
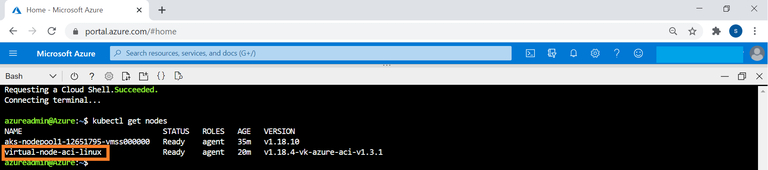
- Check the nodes of the AKS cluster using the following command:
$kubectl get nodes
You can see that the virtual node for the AKS cluster is also listed as virtual-node-aci-linux.
Sample App Deployment to Integrated ACI
In this step we will show you how to deploy a sample application to the ACI instance that is integrated to your AKS cluster for scaling.
- Copy the content below and create an application definition file app.yaml in cloudshell:
apiVersion: apps/v1
kind: Deployment
metadata:
  name: aci-demo
spec:
  replicas: 1
  selector:
matchLabels:
   app: aci-demo
  template:
metadata:
   labels:
     app: aci-demo
spec:
   containers:
   - name: aci-demo
     image: mcr.microsoft.com/azuredocs/aci-helloworld
     ports:
     - containerPort: 80
 nodeSelector:
     kubernetes.io/role: agent
 beta.kubernetes.io/os: linux
 type: virtual-kubelet
 tolerations:
  - key: virtual-kubelet.io/provider
  operator: Exists
   - key: azure.com/aci
  effect: NoSchedule
* Note that the colored sections above for nodeSelector and tolerations define that the container should be deployed to ACI.
- Run the application using the following command
$kubectl apply -f aci.yaml

- Run the following command to get status of the pod and the node on which it is scheduled:
$kubectl get pods -o wide

Congrats, you’re done! You can see that the pod is now deployed in the virtual-node-aci-linux node.
Conclusion
Scaling up Azure Kubernetes Service using ACI helps meet your application requirements without having to pay for additional VM running costs. Managing persistent storage for pods in your AKS cluster is another key design aspect while planning for your containerized workloads. But there are some other ways to do this.
Cloud Volumes ONTAP, along with other native container ecosystem services such as Azure Container Instances and Azure Container Registry complements the container orchestration capabilities delivered by AKS.
Cloud Volumes ONTAP is an enterprise class storage management solution that augments the features of Azure storage while connected to pods in AKS for persistent storage. In the backend, dynamic Kubernetes storage provisioning is carried out by NetApp Trident using Cloud Volumes ONTAP to allocate Azure disk storage as persistent volumes.
Cloud Volumes ONTAP also provides additional features for your containerized workloads on AKS. Storage efficiency features such as thin provisioning, deduplication, and compression reduce total storage footprint and cost by up to 70%. Using FlexClone® technology, Cloud Volumes ONTAP creates writable clones of persistent data that reduce the costs and increase the speed of CI/CD pipelines. Data protection with application-aware NetApp Snapshot™ copies makes point-in-time recovery in the event of data loss of corruption possible. With the Cloud Volumes ONTAP High Availability configuration, you can go a step further to guaranteeing business continuity by deploying data copies across availability zones, ensuring zero data loss and minimal downtime in outages.

