Share
Elasticsearch is a popular, open-source Apache Lucene based distributed search and analytics engine that has become the de facto standard for various enterprise analytics and search use cases such as log analytics and full text search. How can NetApp users take advantage of Elasticsearch?
When running Elasticsearch deployed on EC2 instances, adding the benefits of Cloud Volumes ONTAP, NetApp’s flagship cloud native data storage platform, gives users more control and optimization with Elasticsearch.
In this post we’ll show you how to integrate an Elasticsearch domain with Cloud Volumes ONTAP storage on AWS in these steps:
- Prerequisites
- Prepare the Elasticsearch EC2 instance
- Provisioning a Cloud Volumes ONTAP iSCSI LUN
- Present NetApp storage to Elasticsearch node running on EC2
- Configure the Elasticsearch service to use the new NetApp storage
Deployment Prerequisites
Deploying Amazon Elasticsearch with Cloud Volumes ONTAP requires a valid AWS subscription as well as a number of Elasticsearch and Cloud Volumes ONTAP provisioning prerequisites:
Elasticsearch Deployment
The steps involved in deploying an Elasticsearch domain on Amazon EC2 are similar to deploying Elasticsearch in a customer's own data center (on virtual machines or physical servers). Refer to this step-by-step on Elasticsearch implementation instructions using Amazon EC2.
Ensure that you have an Elasticsearch cluster deployed on suitable Amazon EC2 instances with the nodes having network access to the VPC with Cloud Volumes ONTAP instance.
NetApp BlueXP Console Deployment
Refer to these step-by-step instructions on provisioning BlueXP Console on AWS Cloud. Or check out this interactive step-by-step walkthrough.
Cloud Volumes ONTAP Deployment
Please refer to these step-by-step instructions on provisioning a Cloud Volumes ONTAP on AWS.
Ensure that these steps are fully completed and a working BlueXP Console and a suitable Cloud Volumes ONTAP instance is deployed and ready to provision storage volumes prior to proceeding with the instructions in the next section.
The following section will focus on provisioning an iSCSI LUN from the Cloud Volumes ONTAP instance, presenting that to an Elasticsearch node, and configuring the Elasticsearch service to utilize the new storage.
Prepare the Elasticsearch EC2 Instance
In this section, we will prepare the EC2 instance running Elasticsearch service to be able to mount iSCSI LUNs from Cloud Volumes ONTAP. Detailed instructions can be found in the blog article here. However, we will highlight the key steps below.
1. Log in to the EC2 instance running Elasticsearch via your SSH client (we are using PuTTY for this illustration).
2. Install the iSCSI initiator utilities on the EC2 instance using this command: yum install iscsi-initiator-utils 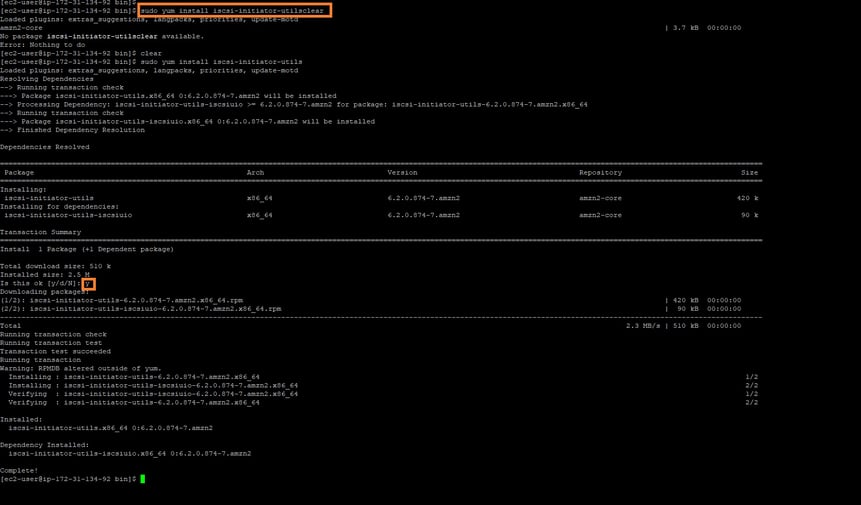
3. Capture the iSCSI initiator name (which will be required during the step below) using the following command: cat /etc/iscsi/initiatorname.iscsi 
Provisioning a Cloud Volumes ONTAP iSCSI LUN
In this section, we will show how to provision a new Cloud Volumes ONTAP iSCSI LUN.
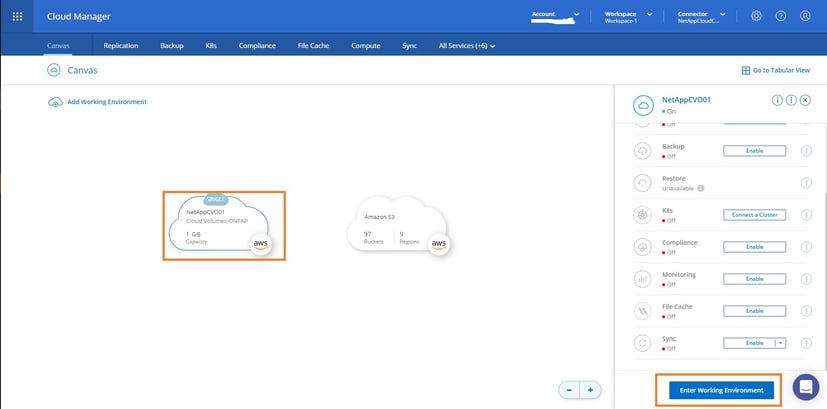
1. Log in to your BlueXP Console Canvas and click on the Cloud Volumes ONTAP working environment.
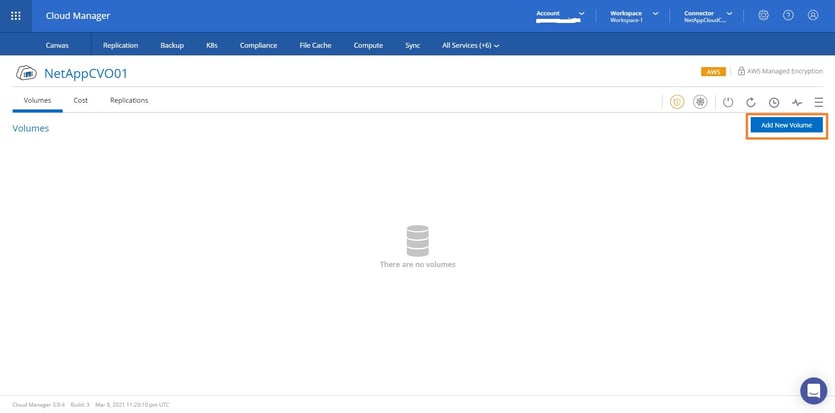
2. Click the Add New Volume button to start creating a new iSCSI volume.
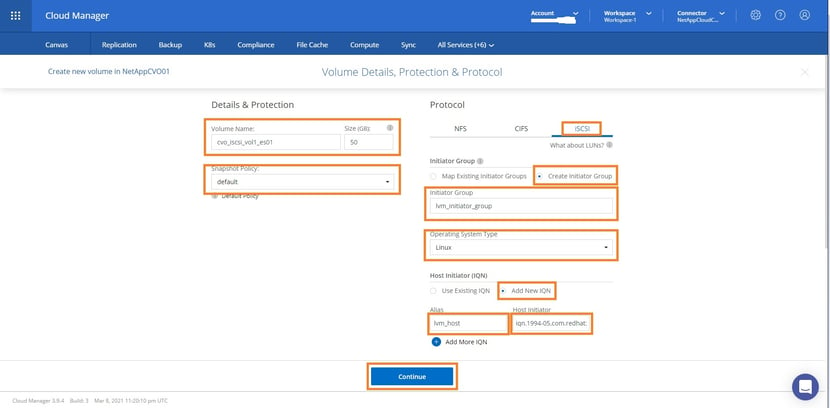
3. Now select a volume name, size, and the Snapshot policy for the volume.
When you are done, select “iSCSI” as the protocol, and create a new initiator group with an initiator group name and operating system type. Add a new host initiator group and copy and paste the iSCSI host initiator name captured in the “Prepare the Elasticsearch EC2 VM” section above. Refer to the screenshot below as an example.
Once complete, click Continue.
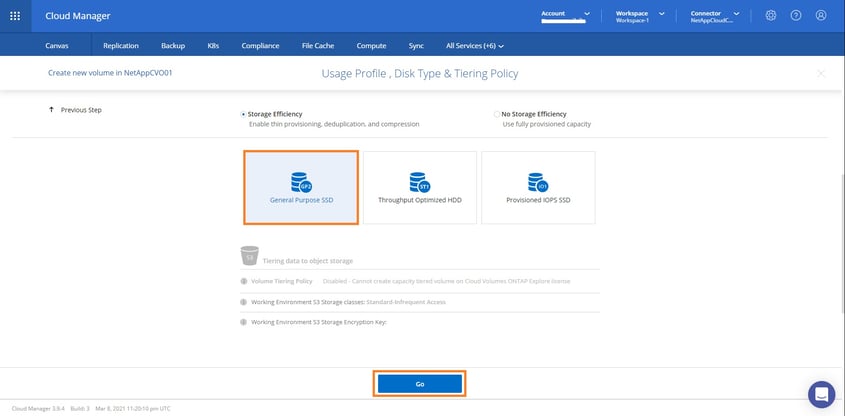
4. Select the appropriate storage type and click Go to proceed.
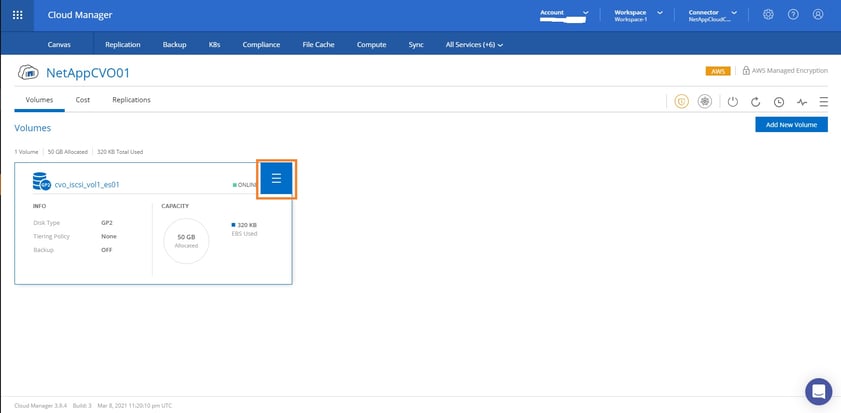
5. Once complete, verify the volume is ready. Once you do, mouse over the top right-hand corner of the volume and click on the Volume menu.
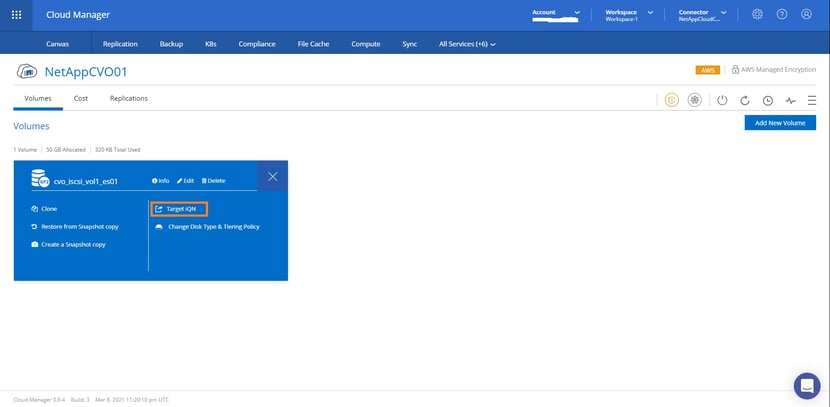
6. In the volumes options menu, click on the “Target IQN.”
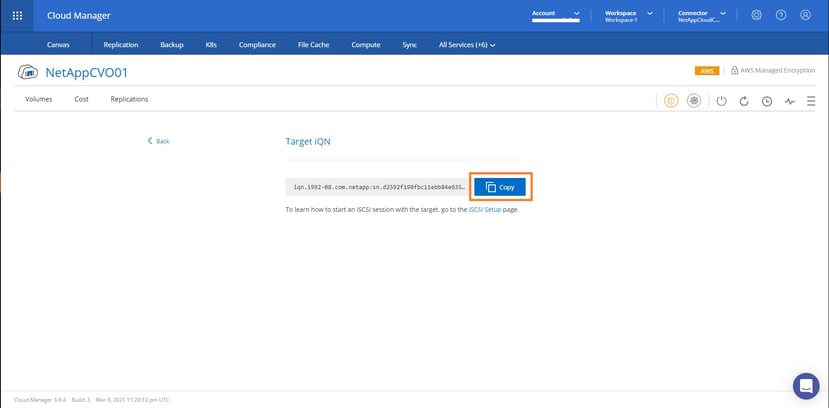
7. Make a note of the Target IQN name as this will be required during the next section.
Present NetApp Storage to an Elasticsearch Node Running on EC2
In this section, we will show you how to enable the iSCSI service on the EC2 instance and mount the Cloud Volumes ONTAP iSCSI LUN created during the previous step directly onto the operating system of the EC2 instance.
1. From the Cloud Volumes ONTAP instance home page, click on the burger menu on the top right-hand side of the screen and select the “Information” option.
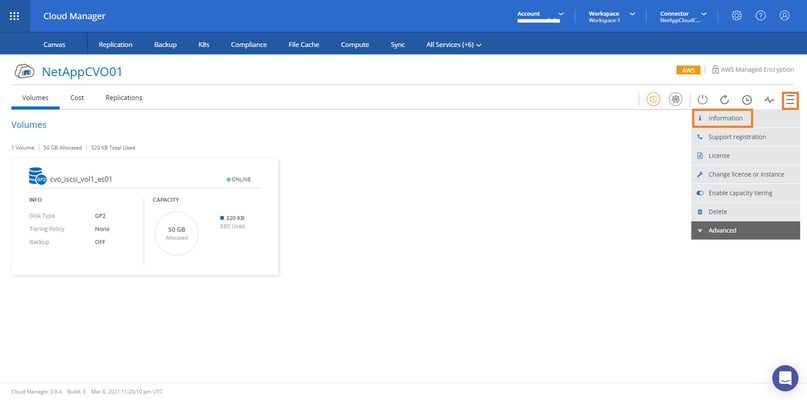
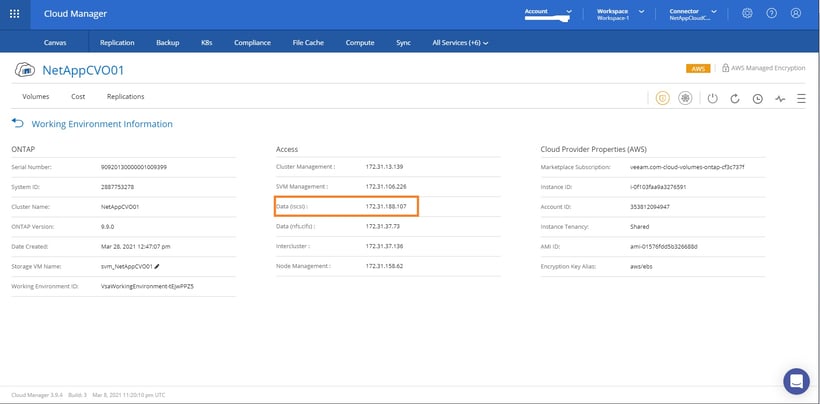
2. Make a note of the Cloud Volumes ONTAP iSCSI mount address that is shown “Data (iscsi):”
We are now ready to start mounting the Cloud Volumes ONTAP iSCSI LUN to the EC2 instance running the Elasticsearch service.
3. Go back to the SSH connection established to the EC2 instance via your SSH client (as before, we will continue to use PuTTY for this demonstration).
4. To make sure the iSCSI service automatically starts on boot, run the command: sudo systemctl enable iscsid 
5. To start the iSCSI service on the EC2 instance, run the command: sudo systemctl start iscsid 
6. Now we are ready to discover the available LUNs on the Cloud Volumes ONTAP instance. To do that, run the following command: iscsiadm --mode discovery --op update --type sendtargets --portal 172.31.188.107
Replace the IP address with the Cloud Volumes ONTAP Data (iscsi) address captured above in your environment.
Verify the newly created iSCSI LUN is visible in the output. If this is not visible, there may be networking issues between the EC2 instance and the Cloud Volumes ONTAP instance. Make sure that both are deployed in the same AWS VPC and have the appropriate routing configuration in place.

7. Now to make a connection to all LUNs this EC2 instance has access to, run the following command: run the “iscsiadm --mode node -l all” command t
Ensure the connection is made successfully as illustrated in the screen output below.

8. Now verify that the iSCSI session has started using the command: iscsiadm --mode session 
9. Now that we have successfully established an iSCSI session from the Amazon EC2 instance running Elasticsearch service to the Cloud Volumes ONTAP instance with the appropriate iSCSI LUN mapped, we should see a new physical device on the EC2 instance. Please verify this using the following command on the EC2 instance: sudo fdisk -l 
We have now completed all the prerequisite steps to configure creating a Cloud Volumes ONTAP iSCSI LUN and mapping that LUN via an iSCSI initiator from the guest OS of the EC2 instance directly where the LUN is now available on the Linux operating system to use as a physical device.
We will now create the Linux file system on the new LUN.
10. Create a new LVM physical volume using the new LUN via this command: sudo pvcreate /dev/sda 
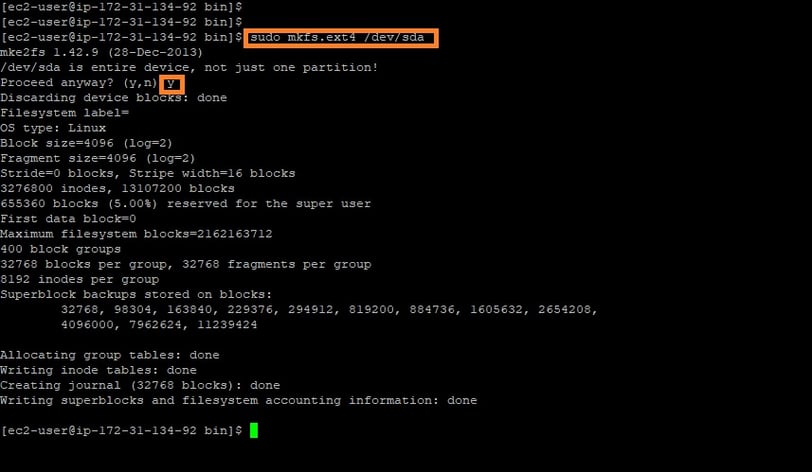
11. Now format the new iSCSI volume using this command: sudo mkfs.ext4 /dev/sda
For the purpose of this illustration, we are formatting the entire iSCSI LUN device rather than creating a logical partition. However, please follow your internal storage best practices when configuring in your production environment.
12. We will now create a new directory to mount the new iSCSI LUN on the EC2 instance. We will call it esdata for the purpose of this walkthrough. Run the command: sudo mkdir -p esdata 
13. Now mount the new physical volume via esdata using this command: sudo mount /dev/sda esdata 
14. Verify that the newly created drive is now visible within the Linux file system using the command: df 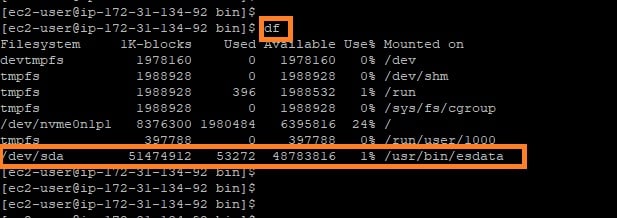
If running these in production, you may need to update /etc/fstab to make the drive mount persist after reboots as required.
15. Now provide the appropriate permissions to the newly mounted drive. For the purpose of this illustration, we will use the chmod 777 option, however, please note that this is not recommended for production deployments. Use the appropriate permission as per your organization's Linux best practice in production.

16. Now verify that the new location can be accessible and written to by creating a test file. We will create a new file called mytestfile.txt using the following command: sudo echo “Test data created and stored within MyTestFile.txt” >> /usr/bin/esdata/MyTestFile.txt 
Use the command cat /usr/bin/esdata/MyTestFile.txt to verify the file is created and contain the text as written, in order to verify the permission change has taken effect.

So to summarize, in this section, we mounted the newly created iSCSI LUN from the Cloud Volumes ONTAP instance to the Amazon EC2 instance directly using the iSCSI initiator utilities in the guest. We have also verified that this new drive can have data written to it by creating a test file.
In the next section, we will look at configuring the Elasticsearch service to use this new location for storing data.
Configure the Elasticsearch Service to Use the New NetApp Storage Volume
In this section, we will configure the Elasticsearch service to use the new Cloud Volumes ONTAP iSCSI LUN for data storage by editing the Elasticsearch configuration file stored by default at /etc/elasticsearch/elasticsearch.yml.
Changing the default Elasticsearch data location involves changing the data: parameter within the YAML file to point to the new location. Additional details can be found in the Elasticsearch documentation here.
For the sake of simplicity, we will use nano to edit the elasticsearch.yml file here.
1. Make sure that the Elasticsearch service is stopped on the EC2 instance(s) where the Elasticsearch service is running using this command: sudo systemctl stop elasticsearch.service
2. Launch nano editor and open the elasticsearch.yml file using: sudo nano /etc/elasticsearch/elasticsearch.yml 
3. Now change the default Elasticsearch data location from entry for data: /var/lib/elasticsearch to the newly created mount path, which is path.data: /usr/bin/esdata in our example here.
Save the file and exit.

We have now configured the Elasticsearch service to use the new esdata drive located on the Cloud Volumes ONTAP instance.
4. Now start the Elasticsearch service by running this command: sudo systemctl start elasticsearch.service 
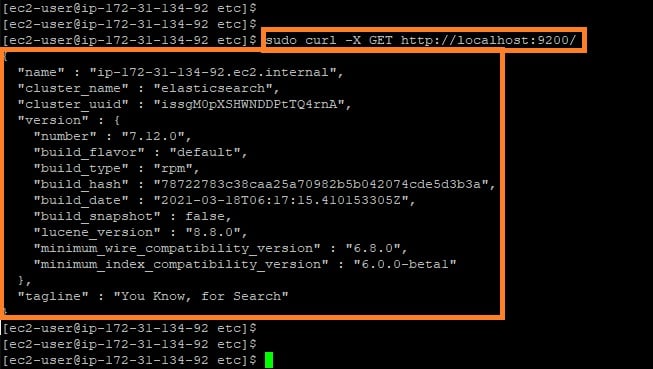
5. Verify there are no errors during the service start (no output would be shown if the service started successfully). The service status can be verified by running the command sudo curl -X GET http://localhost:9200/
This will produce an output similar to the screenshot below:
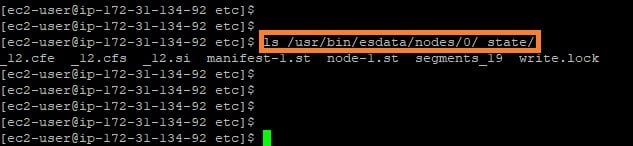
6. Additional verifications can be run by running the ls command to verify the Elasticsearch service specific runtime execution files are created within the new Cloud Volumes ONTAP drive as follows:
Now That You’re Set Up with Elasticsearch...
In an age powered by digital transformation where more and more electronic data is generated every day, the ability for fast and efficient analysis of data is a key requirement for many enterprises as well as cloud native startups. Cloud Volumes ONTAP can provide the high performant storage subsystem that can help enterprise deployments of Elasticsearch on the AWS cloud meet these requirements with 66% faster performance.
To find out more about Elasticsearch optimization with Cloud Volumes ONTAP, from enhanced performance to decreased storage costs, check out the full ebook here.

