Share
NetApp Cloud Volumes ONTAP is a fully-fledged version of ONTAP running natively in Google Cloud, AWS, and Azure that provides a homogeneous solution to meet enterprise storage needs across hybrid cloud architectures.
Cloud Volumes ONTAP brings ONTAP software’s broad value set to the cloud, including:
- A universal data platform with multiprotocol support
- Data management capabilities such as snapshots and clones.
- Data efficiency services such as thin provisioning, deduplication, compression, and storage tiering to Amazon S3.
As a key part of the NetApp Data Fabric, Cloud Volumes ONTAP enables enterprise customers meet various cloud requirements such as lift and shift data migrations, disaster recovery and backup, helping customers accelerate time to market and realize the true value of cloud within a short space of time.
NetApp BlueXP Console provides simplified, centralized, single-pane-of-glass management, monitoring and automation for the end-to-end hybrid and multicloud storage environments. From this centralized interface you can deploy and manage Cloud Volumes ONTAP and other NetApp cloud services.
This blog will walk you through the prerequisite considerations for setting up Cloud Volumes ONTAP on AWS from BlueXP Console.
Jump down below using these links to get started:
- Key Design Consideration
- AWS Marketplace Subscription
- AWS Account and Permission
- NetApp Cloud Volumes ONTAP Deployment
- Conclusion
Key Design Considerations
This section highlights the key design considerations which need to be understood and addressed prior to a Cloud Volumes ONTAP deployment.
- NetApp BlueXP account:
- You need a NetApp BlueXP account. If you don’t have one, sign up for a BlueXP account here.
- AWS subscription:
- Before you start the deployment of Cloud Volumes ONTAP on AWS, you need to have an active AWS subscription.
- If you don’t have an AWS subscription, sign up for an account here. Note that since this account must not be on the free tier, a PAYGO account is recommended.
- Supported AWS regions:
- Cloud Volumes ONTAP services are available in the AWS regions listed here.
- AWS Key pair:
- BlueXP Console deployment from NetApp BlueXP requires a valid AWS Key pair to be available within the region that the BlueXP Console appliance is being deployed.
- If a key pair does not exist within your AWS subscription, this needs to be created prior to proceeding with the steps outlined below.
- BlueXP Console Networking considerations:
- The web browser client machine using BlueXP Console has access to the following endpoints:
https://cloudmanager.cloud.netapp.com
https://auth0.com
https://cdn.auth0.com
https://netapp-cloud-account.auth0.com
https://services.cloud.netapp.com
https://widget.intercom.io
- The web browser client machine using BlueXP Console has access to the following endpoints:
Detailed product overview documentation for both BlueXP Console and Cloud Volumes ONTAP can be found here: NetApp BlueXP Console and Cloud Volumes ONTAP overview.
AWS Marketplace Subscription
In order for BlueXP Console to deploy Cloud Volumes ONTAP, users must be subscribed to Cloud Volumes ONTAP within the AWS Marketplace. This step is only required once, in order to accept and confirm the AWS EULA terms.
Watch here a demonstration of these steps.
- Log in to the AWS management console via an internet browser.
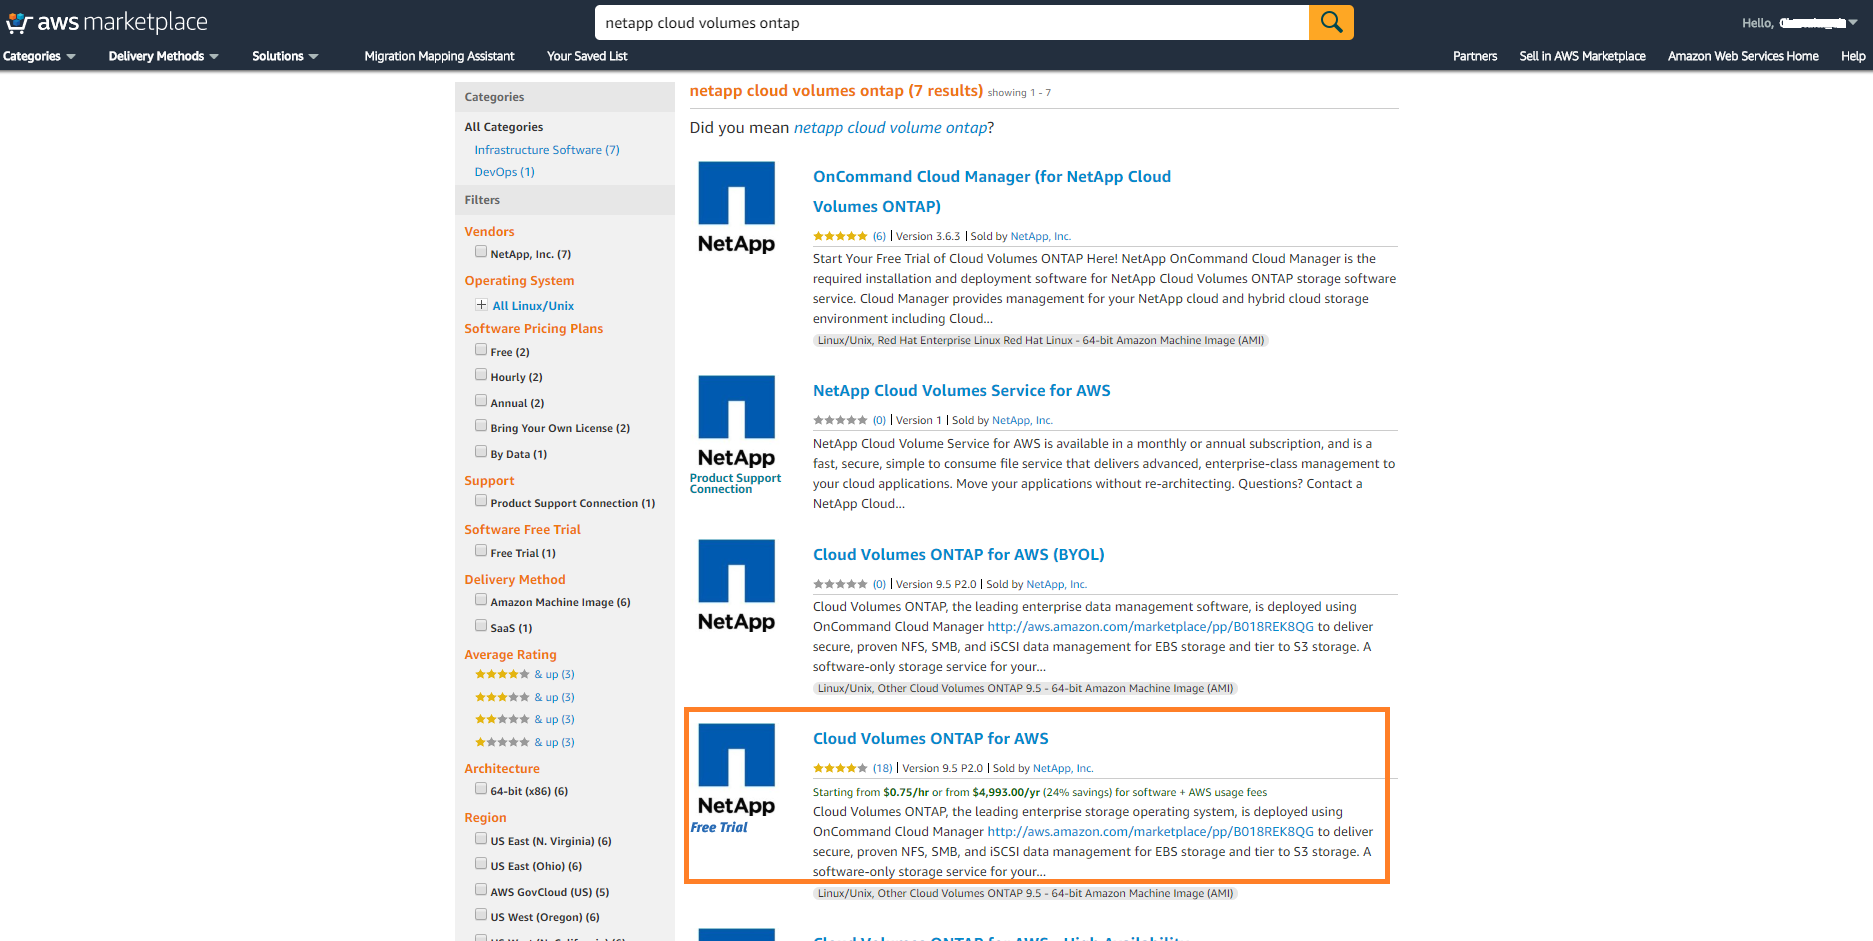
- Visit the NetApp Cloud Volumes ONTAP solution on the AWS Marketplace (on the same browser sharing the same session credentials). Select “Cloud Volumes ONTAP for AWS” (exact name):
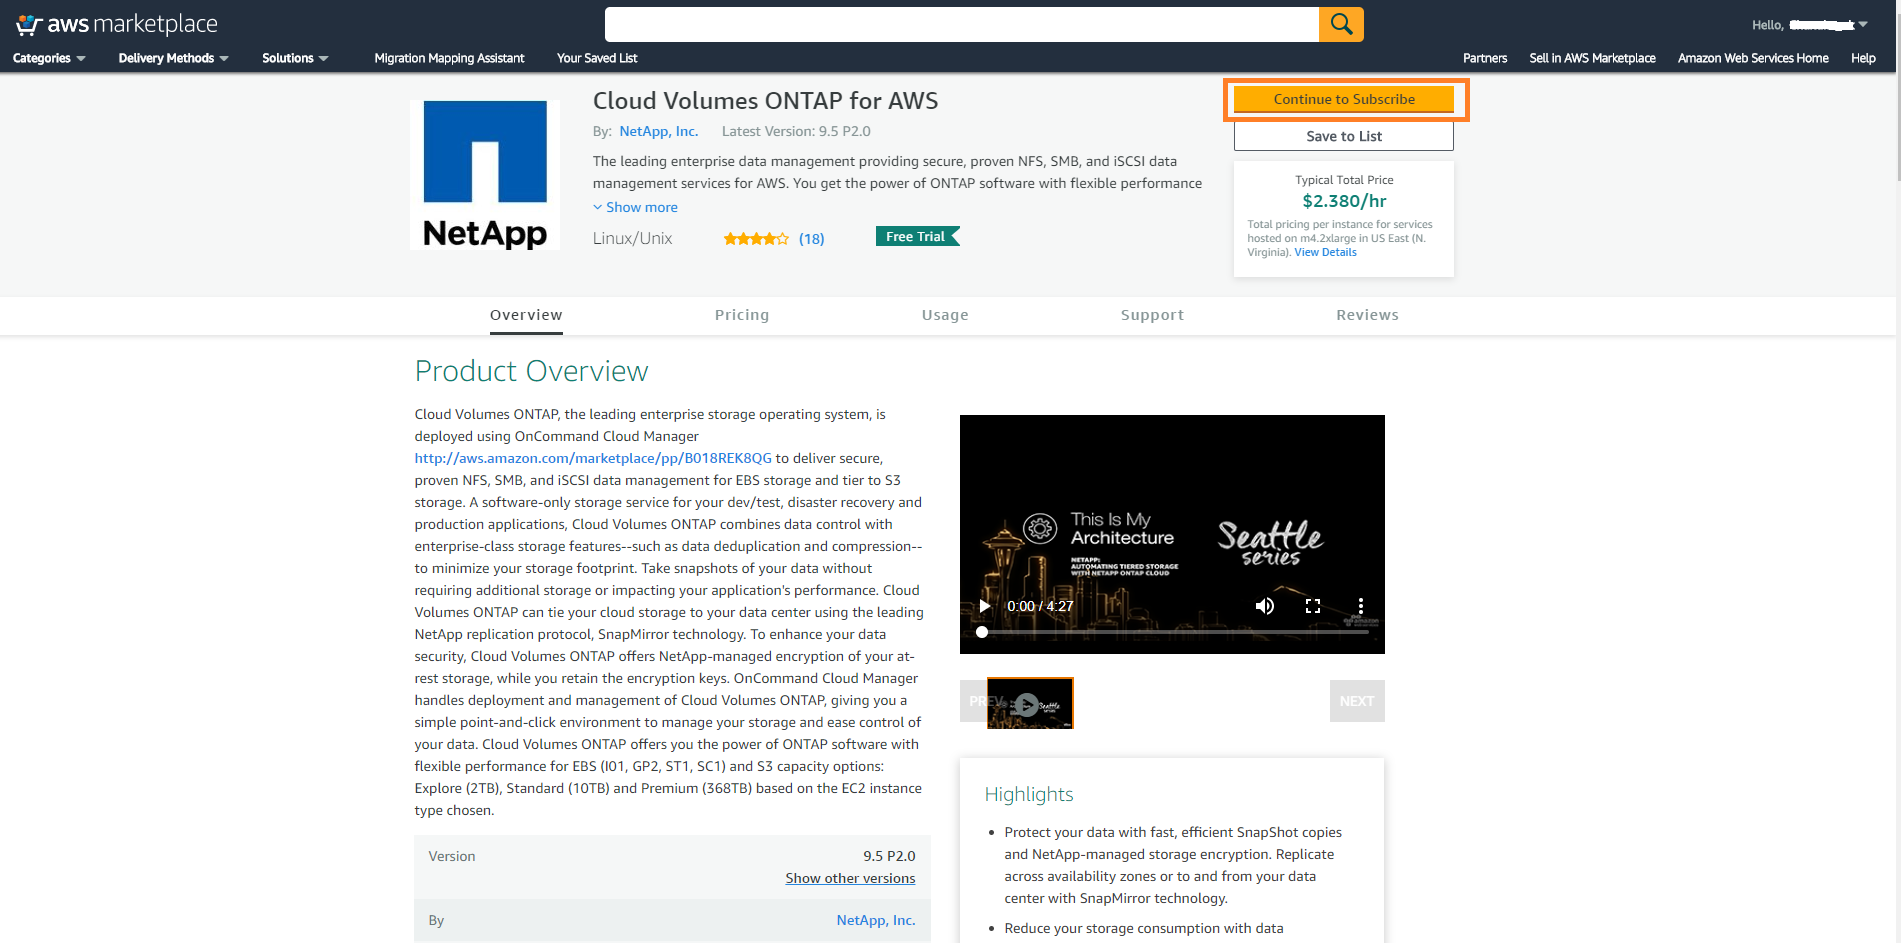
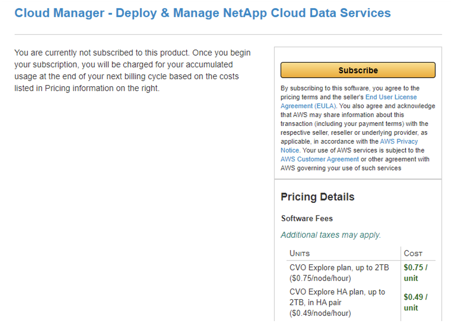
- Click “Continue to subscribe” at the top:
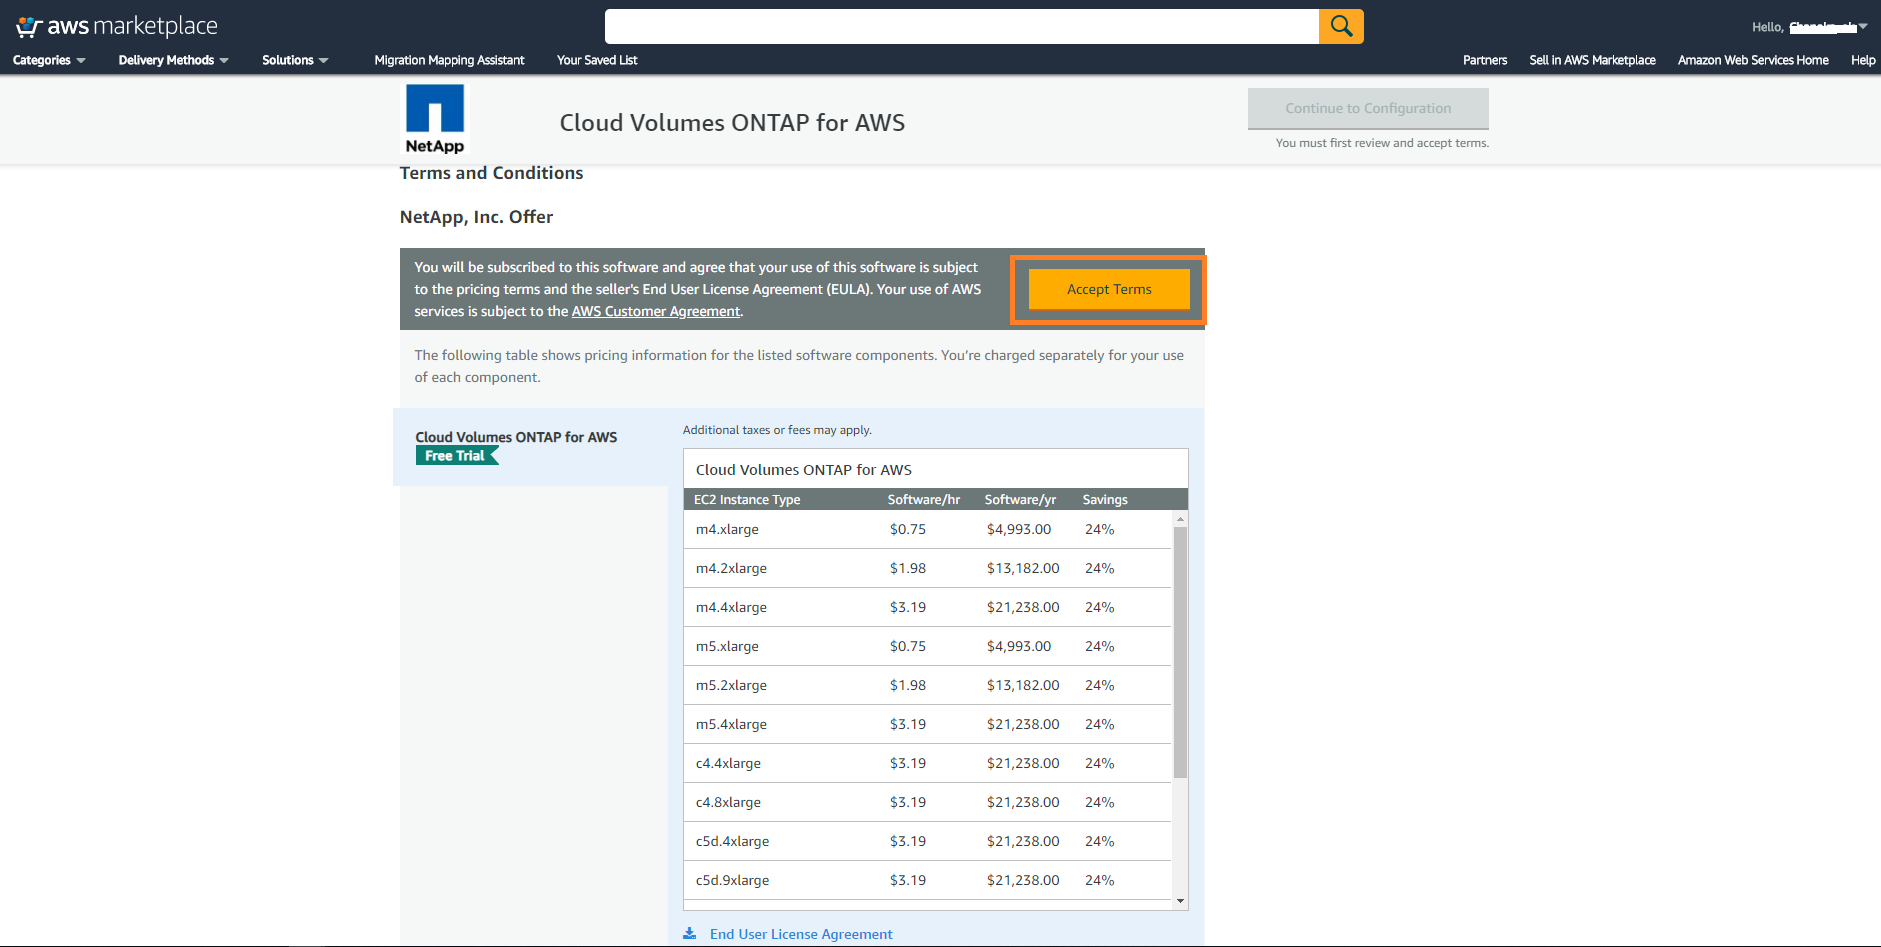
4. Click "Accept Terms":
5. Verify subscription confirmation and close the browser tab/window:
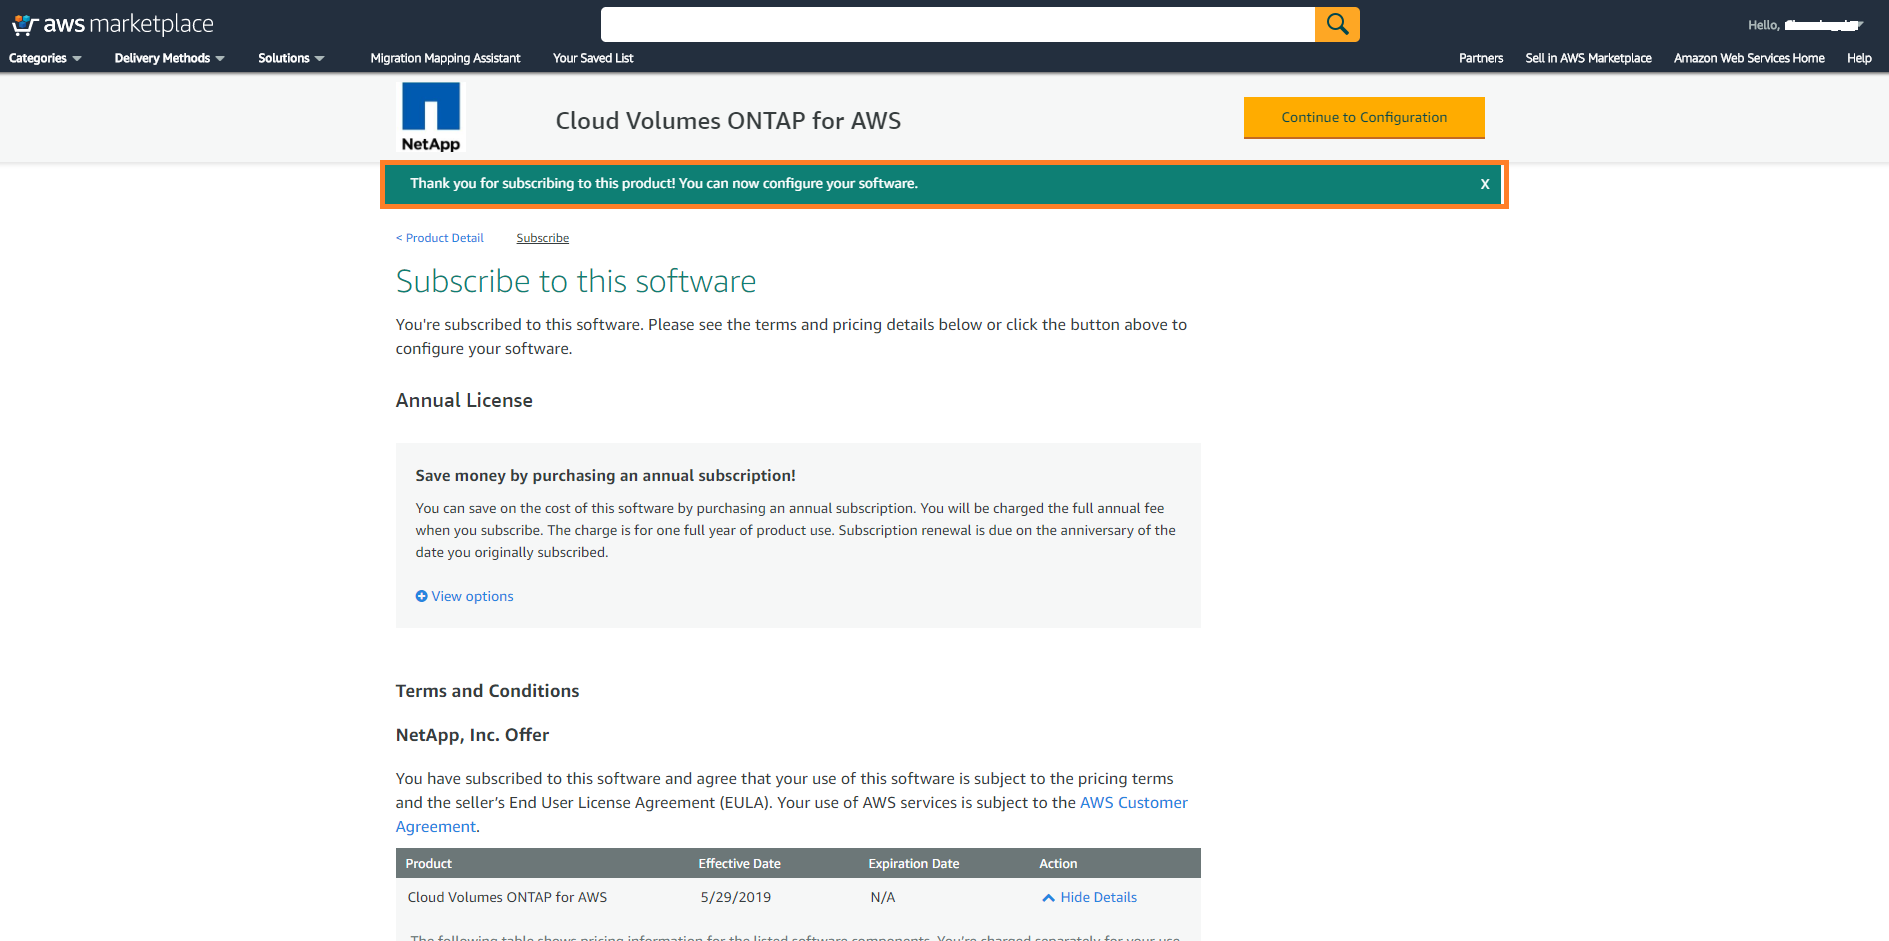
DO NOT click the “continue to configuration” option as Cloud Volumes ONTAP should only be deployed via BlueXP Console and not directly on the AWS Marketplace. All that is required here is to ensure the marketplace subscription is in place so that BlueXP Console has all the prerequisites required to automatically deploy the Cloud Volumes ONTAP appliance as needed.
AWS Account and Permissions
When deploying Cloud Volumes ONTAP from NetApp BlueXP, you need to use an AWS account that has sufficient permission within the AWS subscription to deploy the BlueXP Console instance.
In this section, we’ll show how to create an AWS account with the required IAM (Identity and Access Management) policy in order to prepare your AWS environment to deploy Cloud Volumes ONTAP.
- Go to the BlueXP Console policies for AWS & Azure page.
- Click the Connector deployment policy for AWS hyperlink
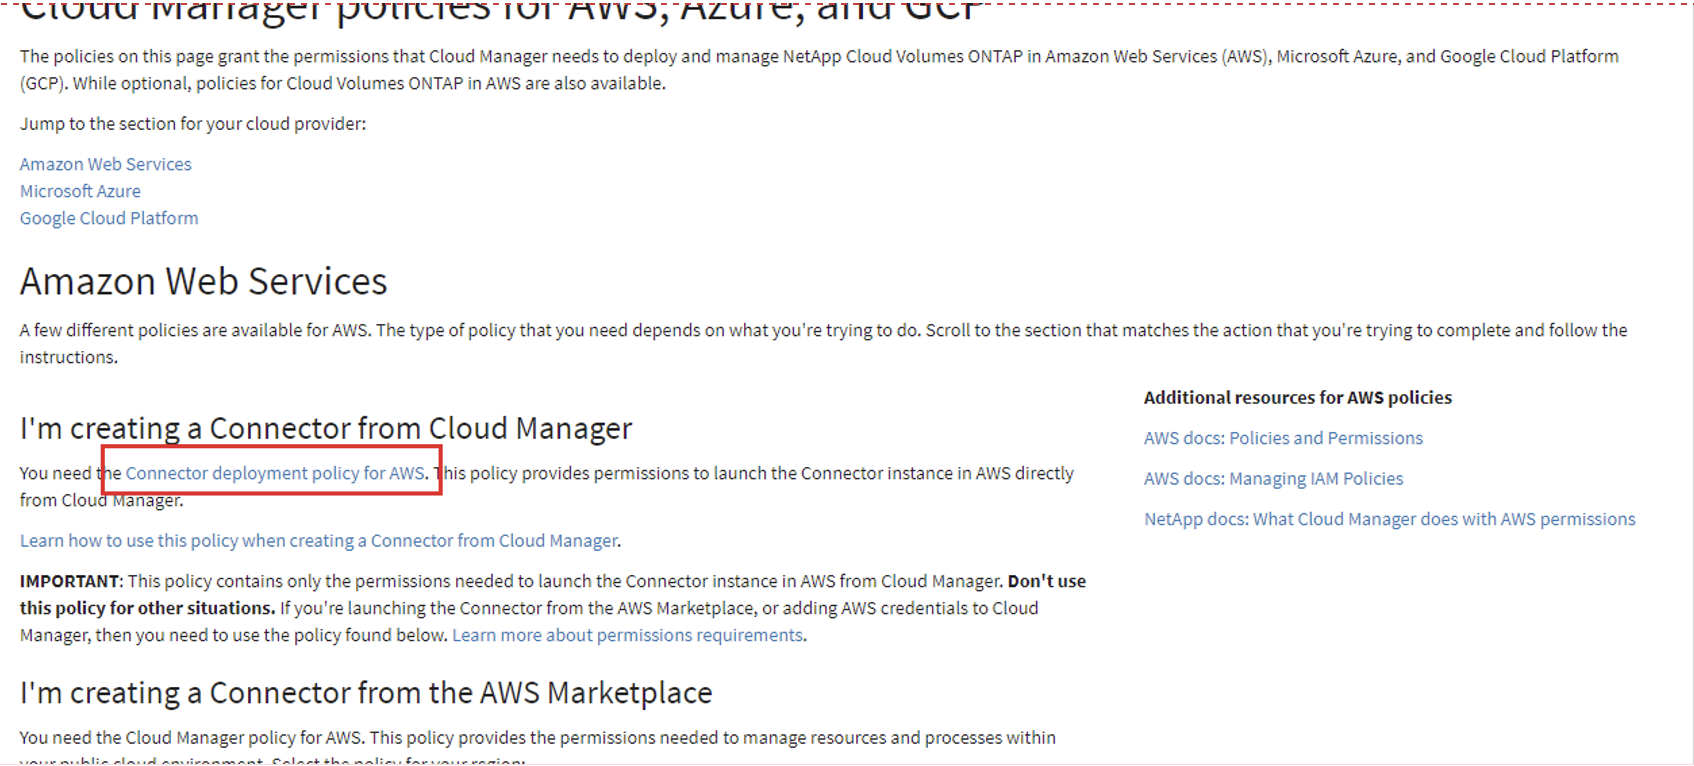
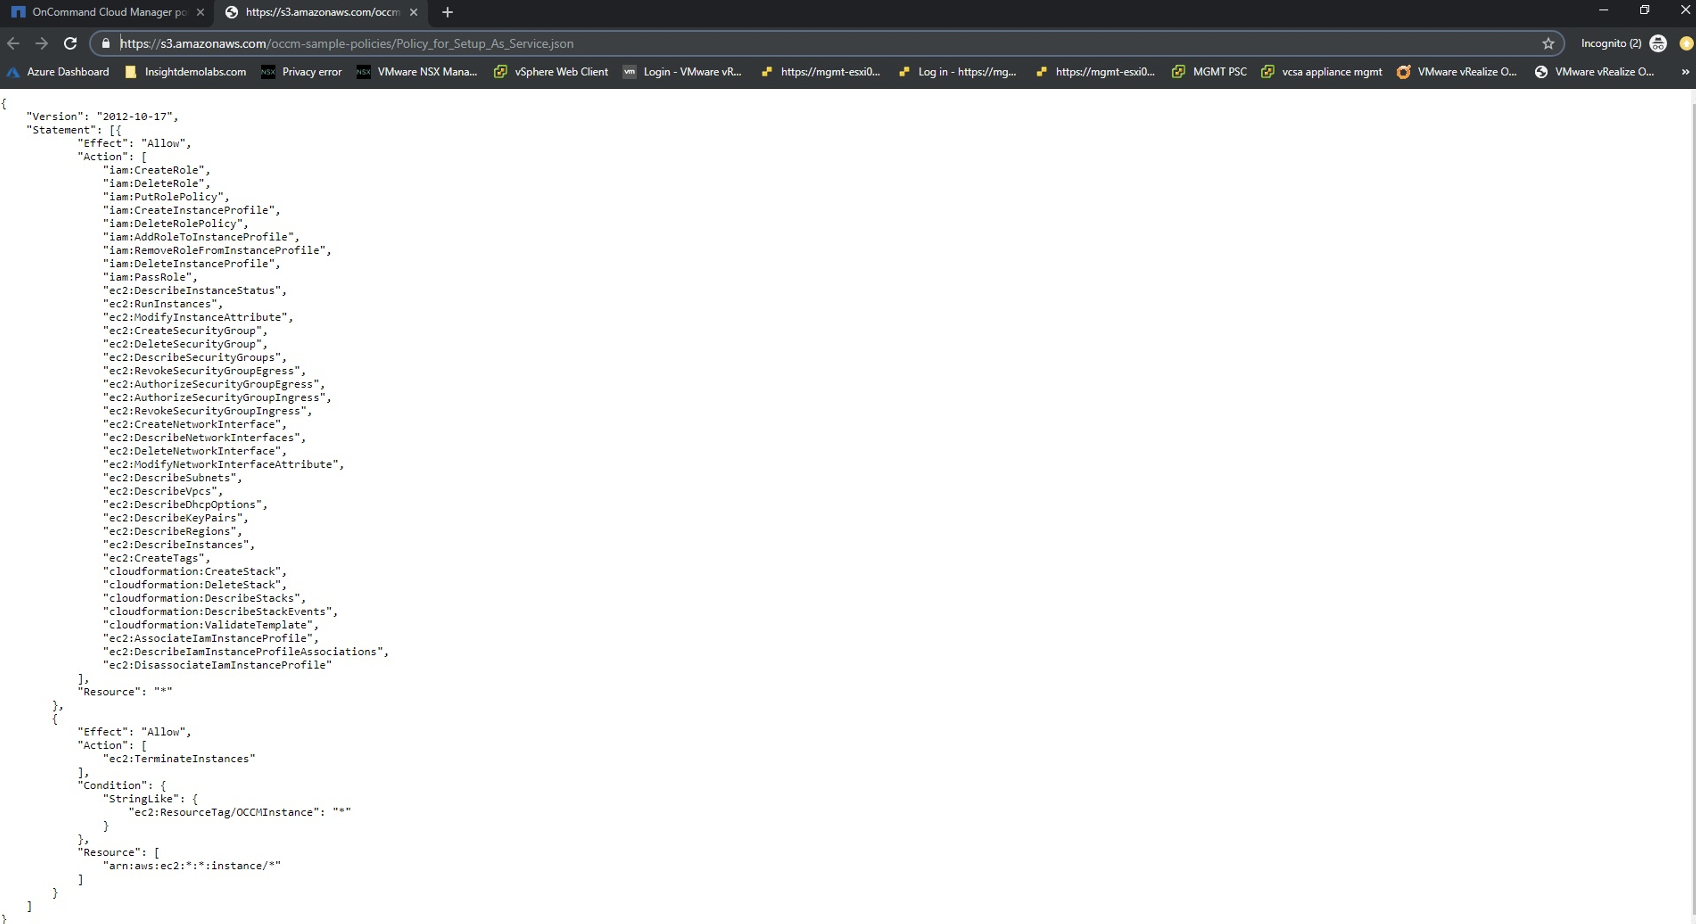
- Copy the content of the JSON file that is required to create the IAM access policy on AWS:
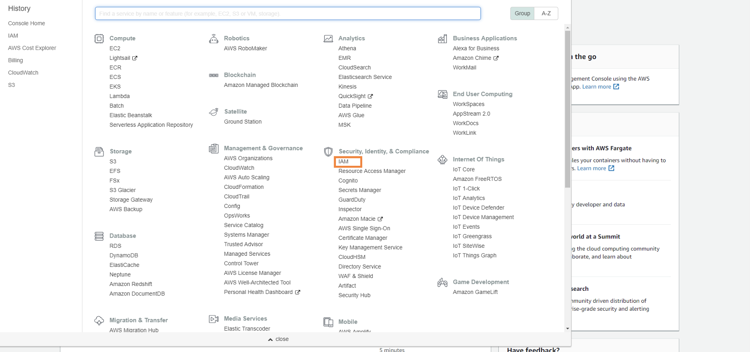
- Now go to the AWS management console and click on the “Services” menu at the top. Click on IAM under “Security, Identity & Compliance”:
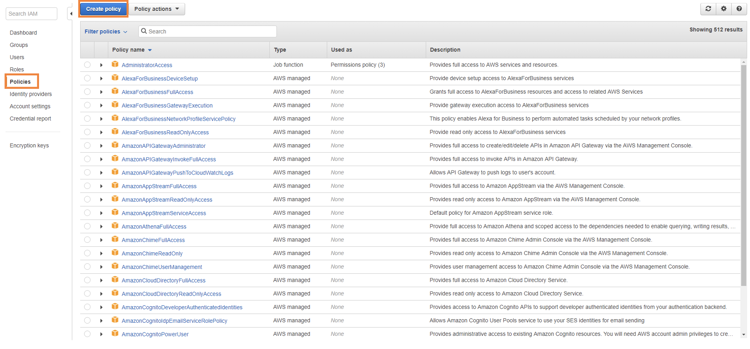
5. Go to Policies and click “Create Policy”:
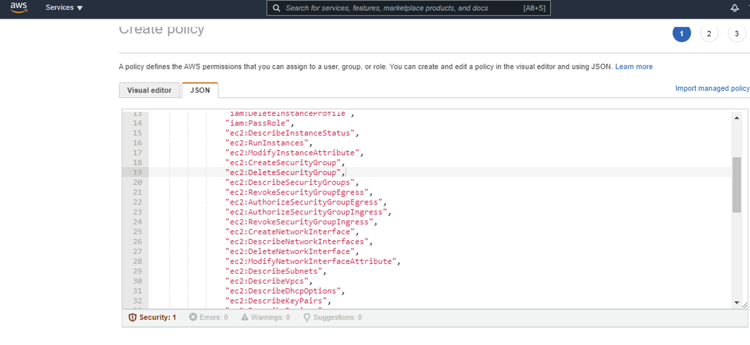
6. Click JSON and paste the content copied from the JSON file in step 4 above and click “Next: Tags.” (Ignore any policy validation warnings that appears):
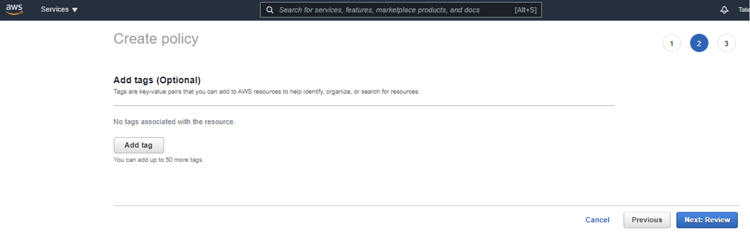
7. Create any tags if necessary and then click “Next:Review”:
8. Provide a unique policy name (staying in line with any best practice naming conventions) and a description and click “Create policy”:
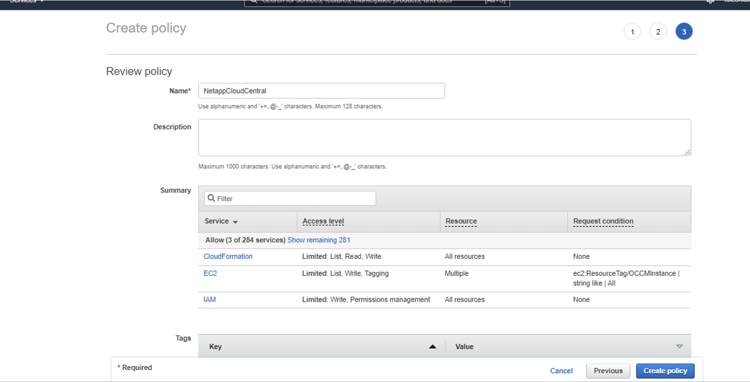
You now have an IAM access policy called “NetAppCloudCentral”.
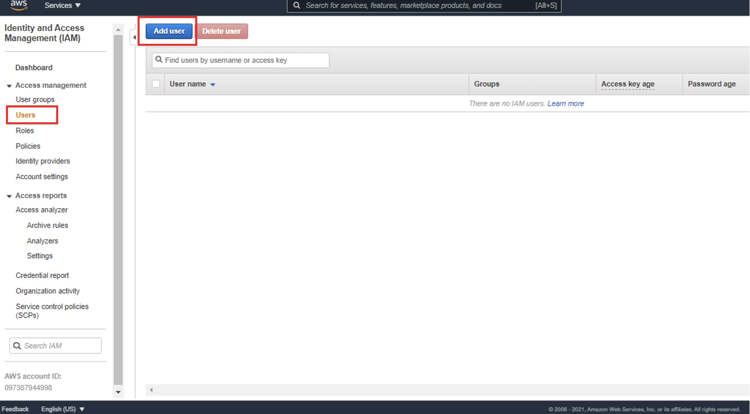
9. Next, we will define a new user and attach the policy to the new user. Go to the “Users” menu option on the left-hand side and click “Add user”:
10. Add a new user and select the “Programmatic Access” check box. Click “Next: Permissions” when complete:

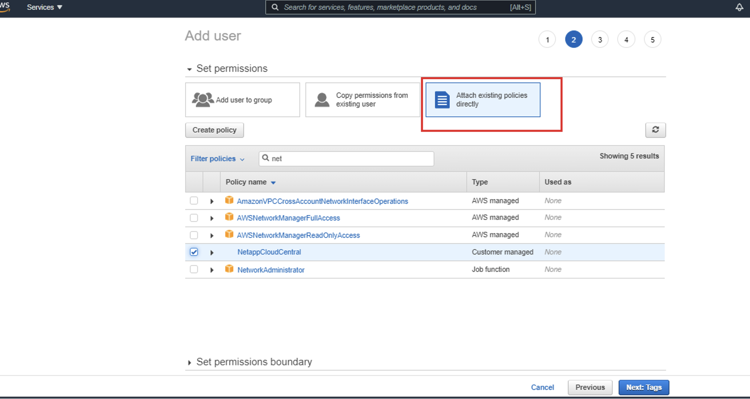
11. In the next window, select “Attach existing policies directly” and search for the policy created in Step 8 above and click “Next: Tags”:
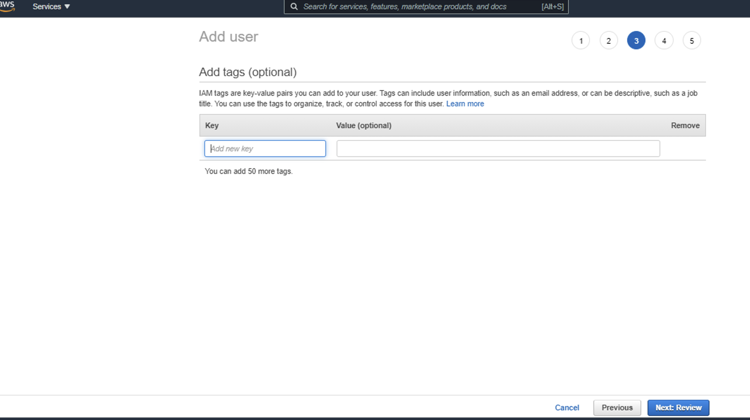
12. Click “Next: Review” on the next screen.
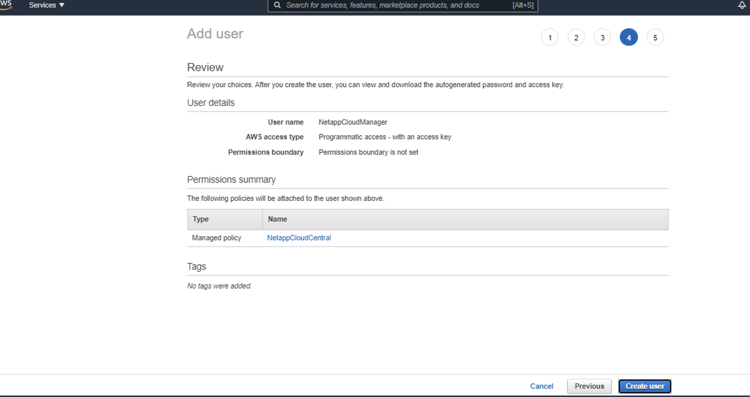
13. Click “Create user” on the final screen:
14. In the next window, please make sure to note the “Access key ID” as well as the “Secret access key,” as these will be required for the initial deployment of Cloud Volumes ONTAP. Alternatively, you can download the credentials as a .csv file and store in a secure location:
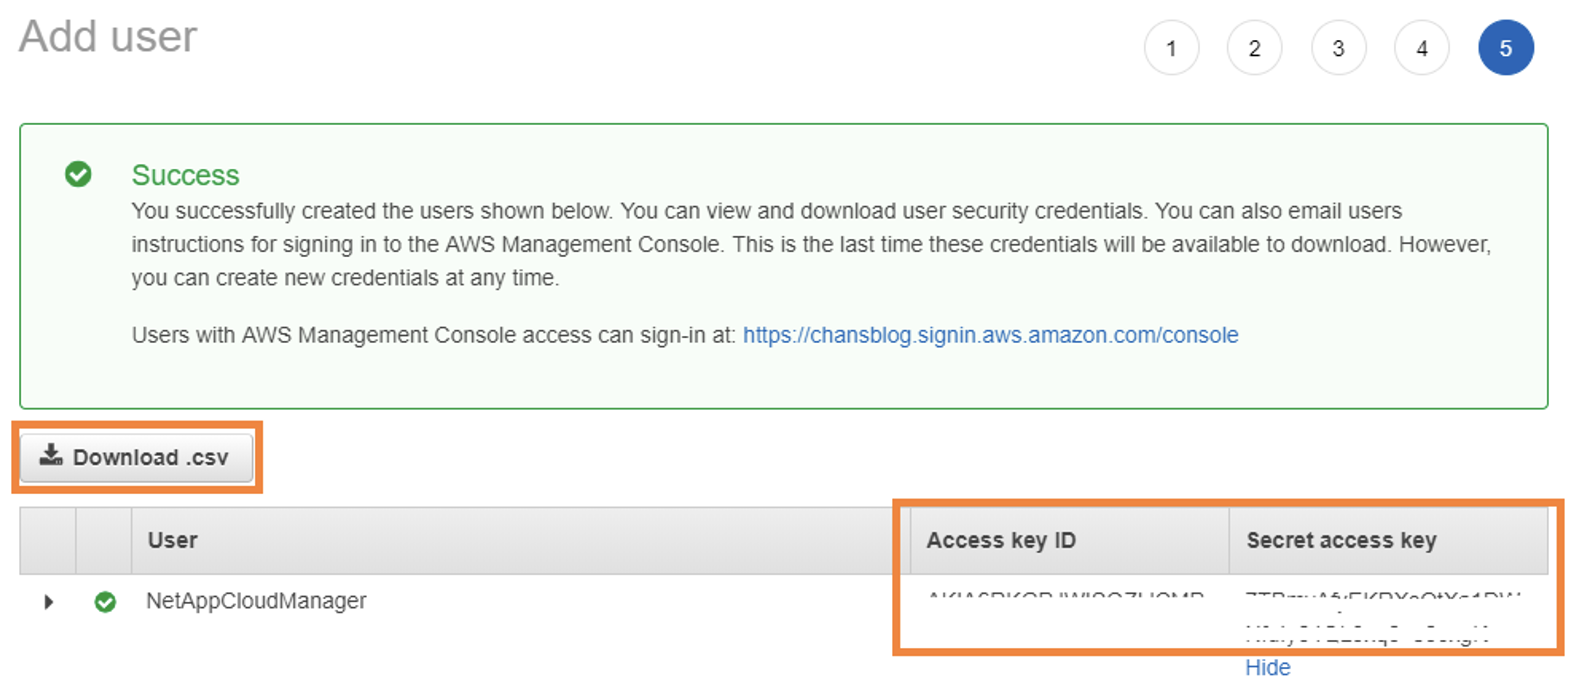
Your AWS subscription is now prepared with the appropriate user account and associated access policy, and ready for Cloud Volumes ONTAP to be deployed.
NetApp Cloud Volumes ONTAP Deployment
Now that the prerequisites in AWS are completed, we can initialize the deployment steps for Cloud Volumes ONTAP.
Choose a Cloud Provider
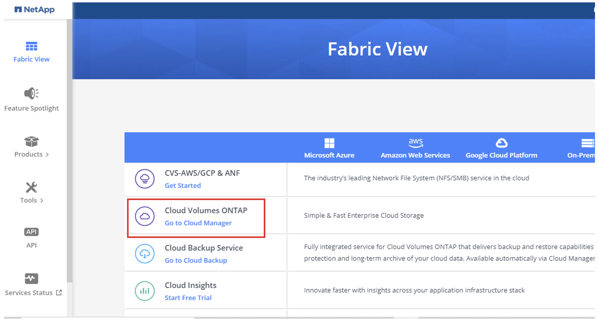
- Log in to NetApp BlueXP or sign up for a new account.
- In the Fabric View, click “Go to BlueXP Console” under Cloud Volumes ONTAP:
- Select "AWS":

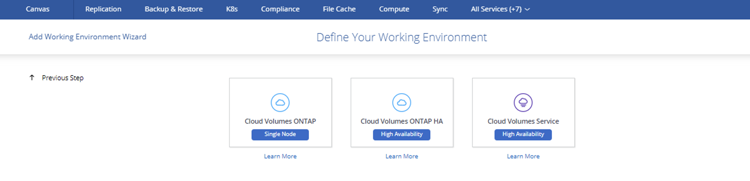
- Select between Cloud Volumes ONTAP Single node or Cloud Volumes ONTAP High Availability for redundancy and click “Continue”:
Connect to BlueXP Console
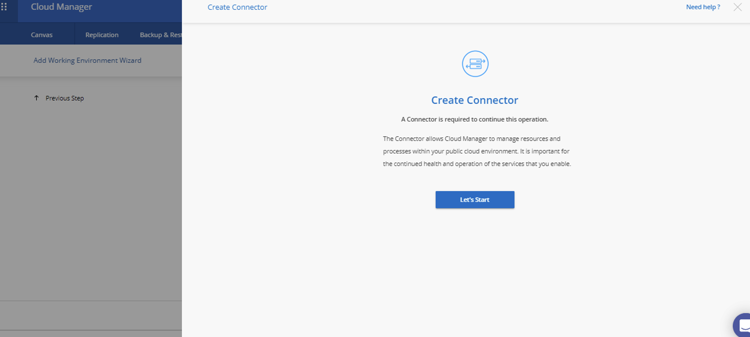
- The next step is where your Service Connector will be created. A Service Connector is basically an instance that needs to be deployed in AWS that acts like an agent working to provide communication between BlueXP Console and Cloud Volumes ONTAP.
The Connector only needs to be created once for a specific cloud environment. If you plan to launch other Cloud Volumes ONTAP nodes in the future, you can use this same Connector or create a new one in a separate AWS environment if needed. For more information about Service Connector please visit this link.
Click on “Let's Start”:
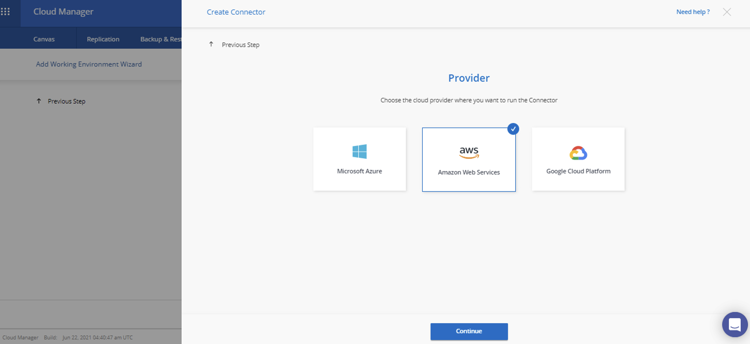
2. Select AWS and click “Continue”:
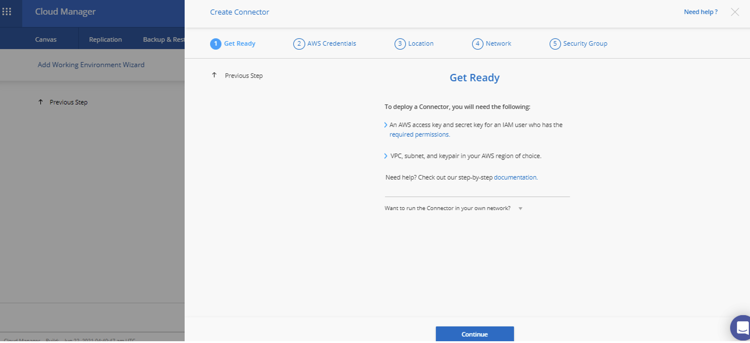
3. On this screen you will see some of the requirements already mentioned as prerequisites which were covered in the previous section of this article. Click “Continue” to proceed:
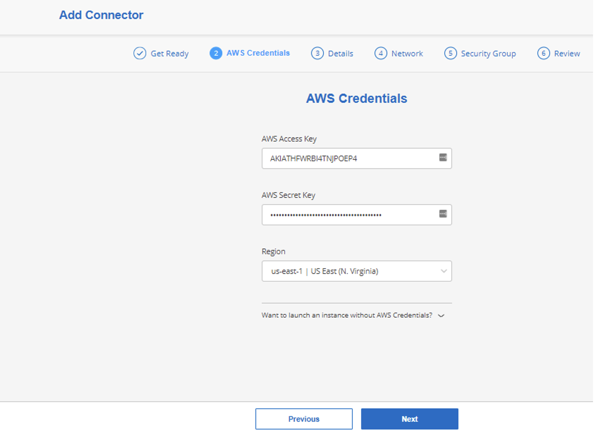
4. Now you need to select the region where the Service Connector instance is going to be deployed and enter an existing AWS public and secret key pair (which is one of the prerequisites from the previous section). When you are done, click “Continue”:
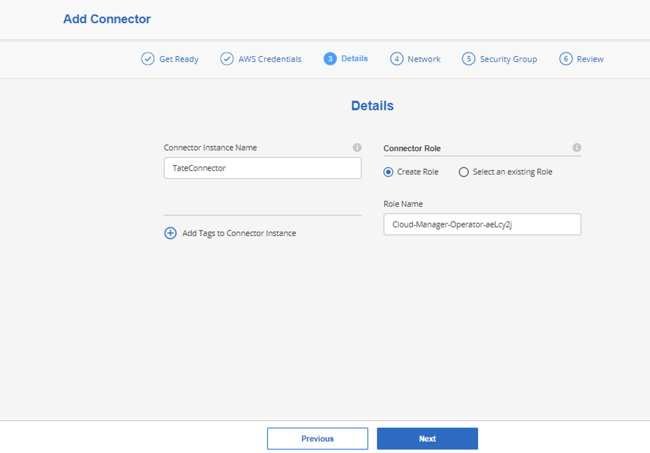
5. In the Details screen, provide the Service Connector with a name and either create a new role or choose an existing one.
BlueXP Console creates a role for you with the necessary requirements. If you go for an existing role, make sure it meets this set of policies. Click on “Next” when you are done:
6. This will take you to the Network screen. In this screen you need to define the following:
- VPC where the instance will be deployed
- Subnet
- Key Pair (you must create a key pair if you don’t have one)
- Enable or disable a public IP for access to the instance
- Proxy configuration if needed

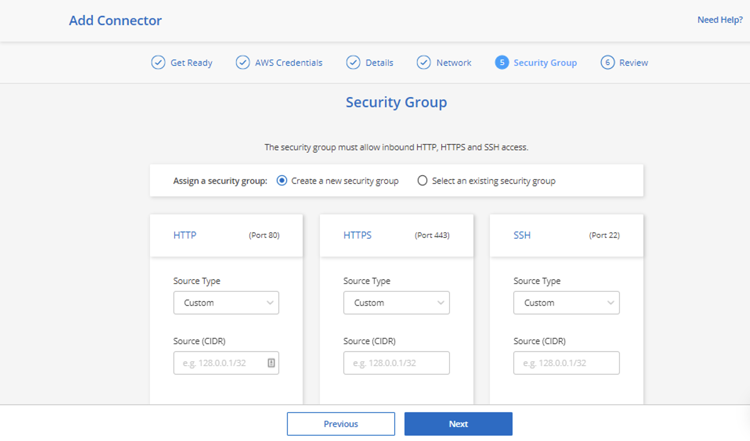
7. In this step you will create a new security group to be used by BlueXP Console or select an existing security group.
For the purpose of this article, we will create a new security group and set communication permission from anywhere to the Service Connector Instance. The Service Connector requires HTTP, HTTPS, and SSH inbound connections to be permitted as these are the protocols used by BlueXP Console. In a production deployment however, it is highly recommended to set strict access control to limit the network communication only to specific hosts that need it.
When you are done, click on “Next”:
8. In the Review screen, go through all the information previously entered and when ready click on Add:
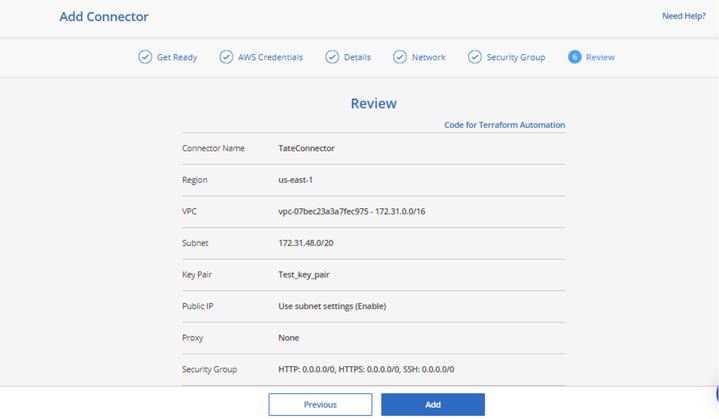
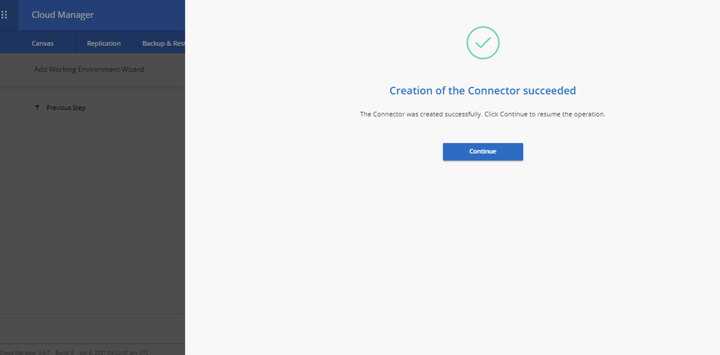
The creation process takes around 7 minutes after which you will get the screen below:
Define Cloud Volumes ONTAP
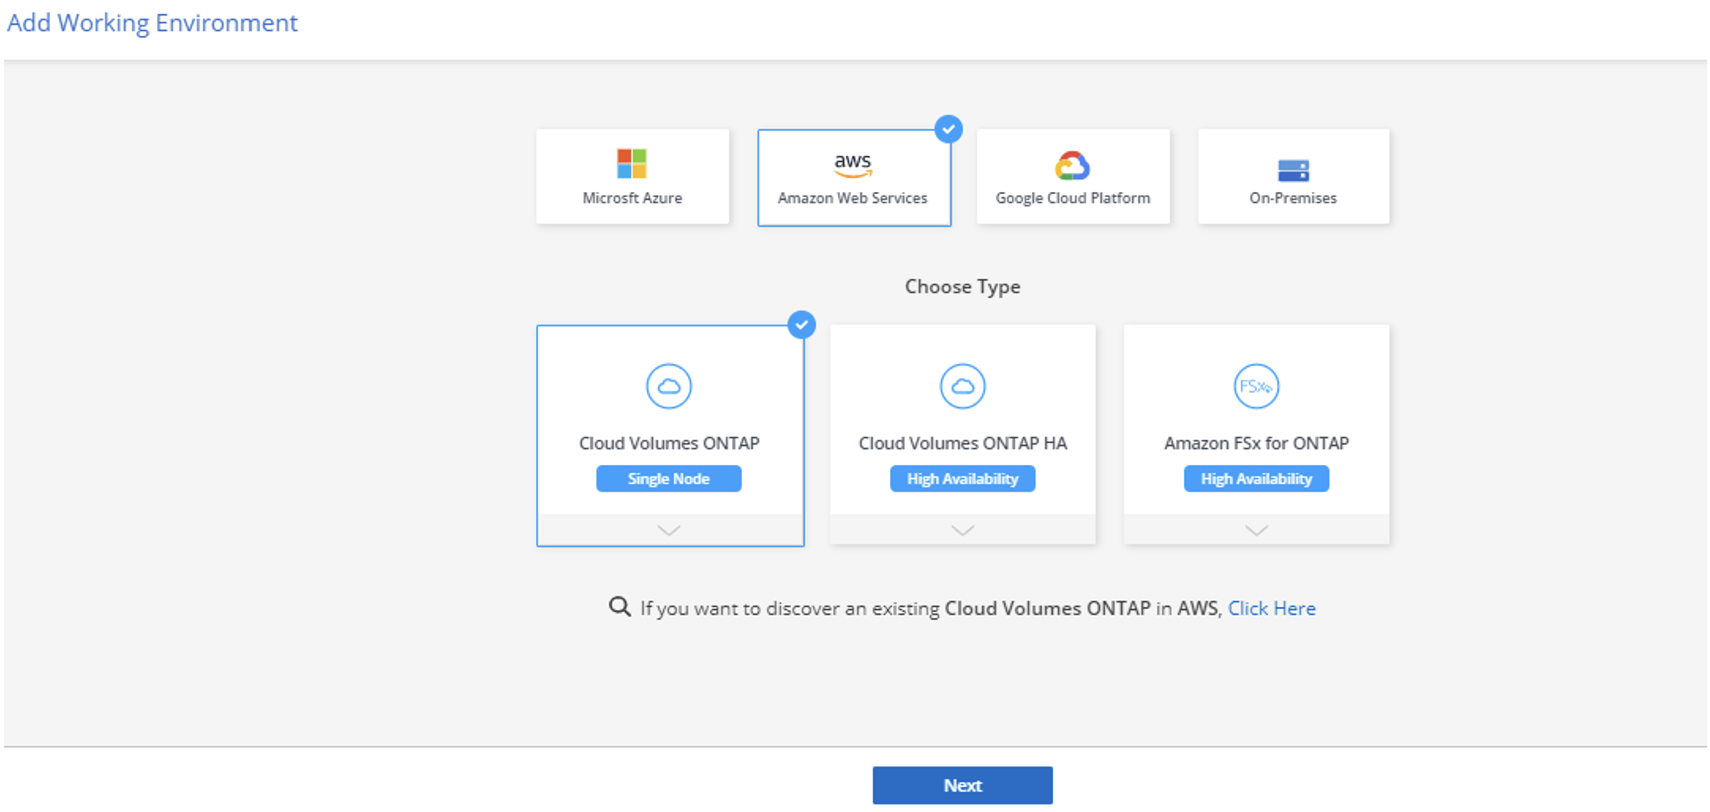
1. Now that the Service Connector has been created, it's time to complete the Cloud Volumes ONTAP deployment. You will land back to the Cloud Volumes ONTAP creation screen where you need to choose your deployment model, either single node or HA:
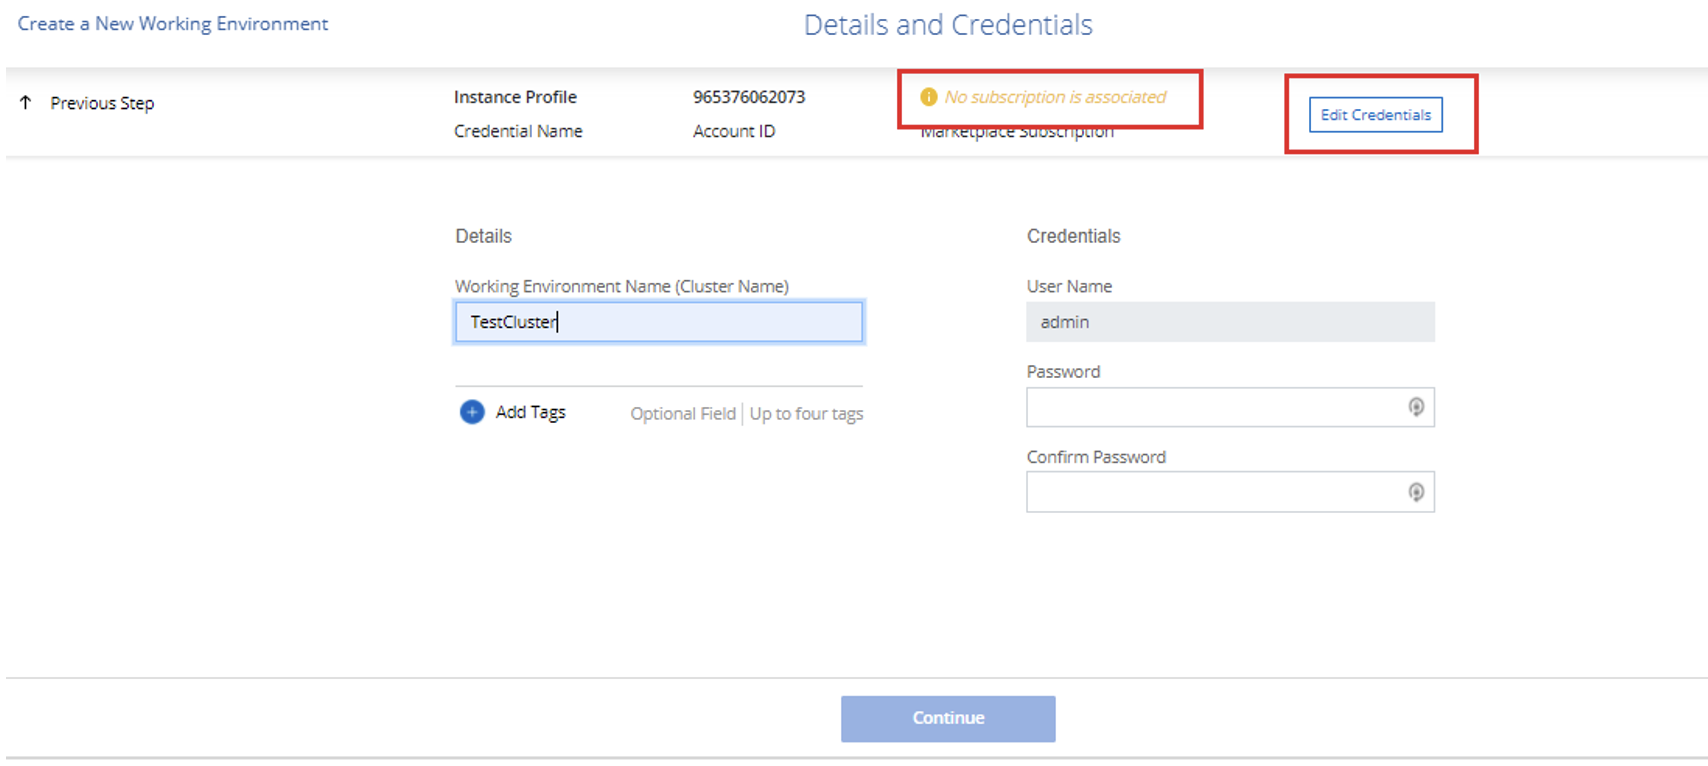
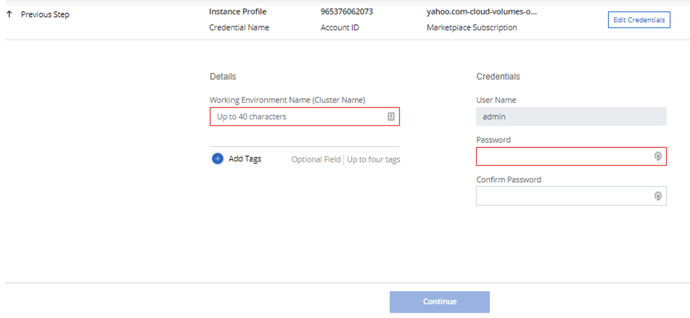
 2. In the Details and Credentials step you need to provide your ONTAP cluster with a name and the admin credentials that will be used to access the cluster.
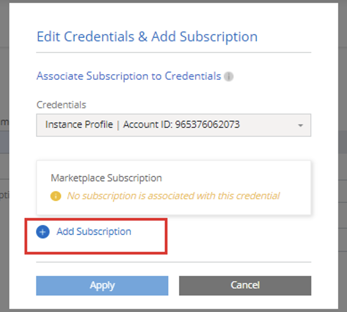
Also, this is where you associate your AWS Cloud Volumes ONTAP Marketplace subscription (mentioned in the previous section of this article) to your BlueXP Console Account. We will cover this in the next step. Click on the “Edit Credentials” button at the upper right of the wizard:
3. In this thread, we'll show how to set up a BlueXP Console subscription in the AWS Marketplace.
In the Edit Credentials & Add Subscription pop-up screen click on “Add Subscription”:
3.1. Choose the payment model, then click “Continue” to proceed:
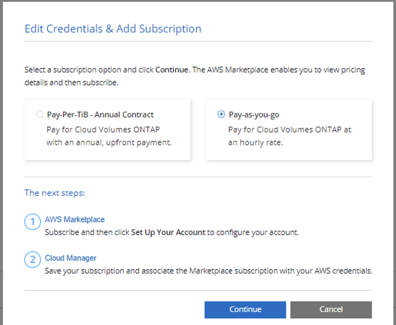
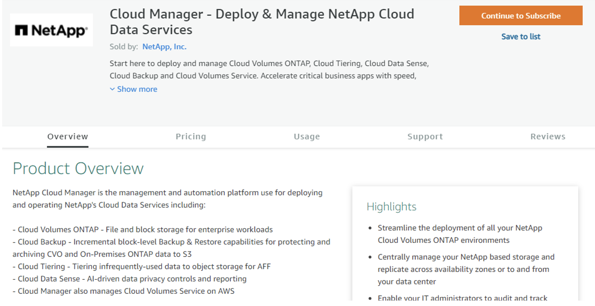
3.2. You will be taken to a separate AWS tab in order to confirm your BlueXP Console subscription. Click on “Continue to Subscribe”:
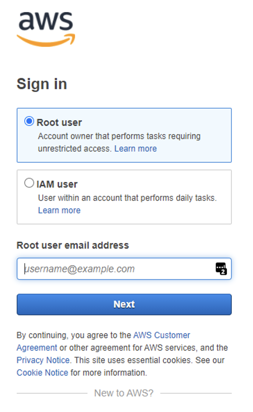
3.3. You'll now be taken to the AWS login screen. Provide your AWS credentials and log in:
3.4. After logging in you will land into the subscription page. When you get there, click on “Subscribe”:
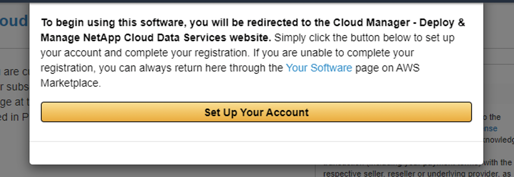
3.5. In the pop-up box, click on “Set up your Account”:
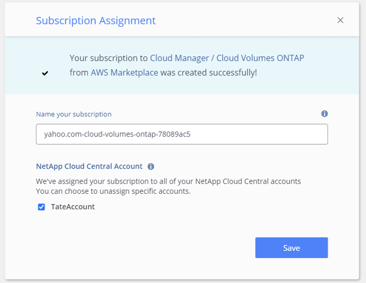
3.6. This will redirect you back to the BlueXP Console. In the Subscription Assignment screen, click on “Save”:
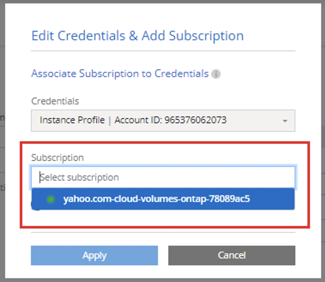
4. In your browser, go back to your BlueXP Console deployment wizard tab where we last left it in step 2 above.
Click on “Edit Credentials” and when the same pop-up box appears, you should now see your subscription available in the “Subscription” tab. Select it and click on “Apply”:
5. Now we’re back to where we were in step 2 above, only now we have the AWS Marketplace Subscription confirmed, and we can continue.
If you haven’t done so already, add a name for the working environment and your credentials. Click “Continue” when you’re done:
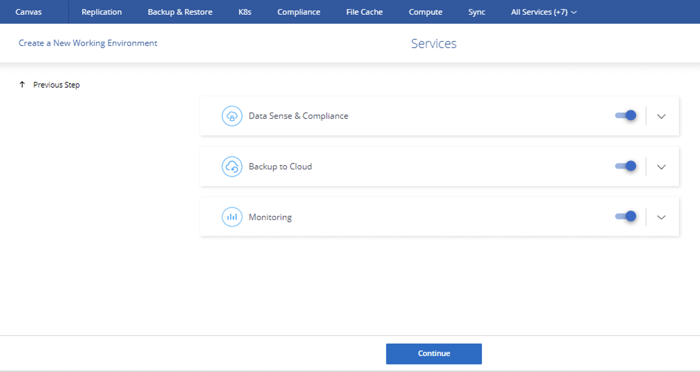
6. In the Services step you can choose to add additional services such as Cloud Data Sense and Cloud Backup:
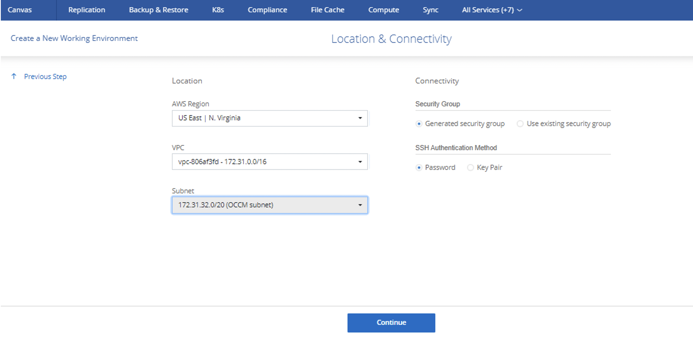
7. In the Location and Connectivity screen, you need to specify the following settings:
- AWS Region where Cloud Volumes ONTAP will be deployed
- VPC
- Subnet within the VPC
- Security Group: If you choose “Generated Security Group,” BlueXP Console creates the necessary inbound and outbound AWS rules for the proper functioning of Cloud Volumes ONTAP. If you select “Use Existing Security Group,” make sure it complies with the recommended settings listed here.
- SSH Authentication method in case you connect via SSH with the ONTAP cluster.
When you are done, click on “Continue”:
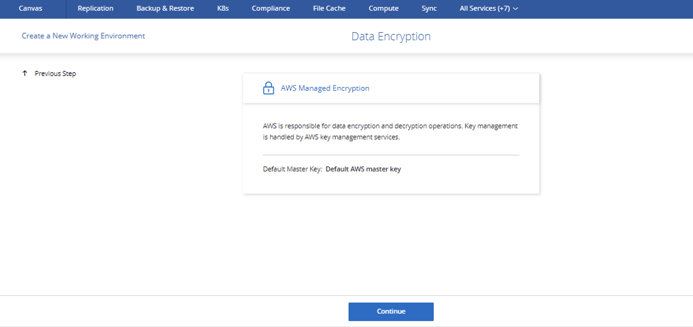
8. In this next step you have the option to apply AWS encryption keys to the data stored in Cloud Volumes ONTAP. If you don't have an existing key in AWS KMS, the default AWS Master Key is going to be used.
Select an existing key or simply click on “Continue”:
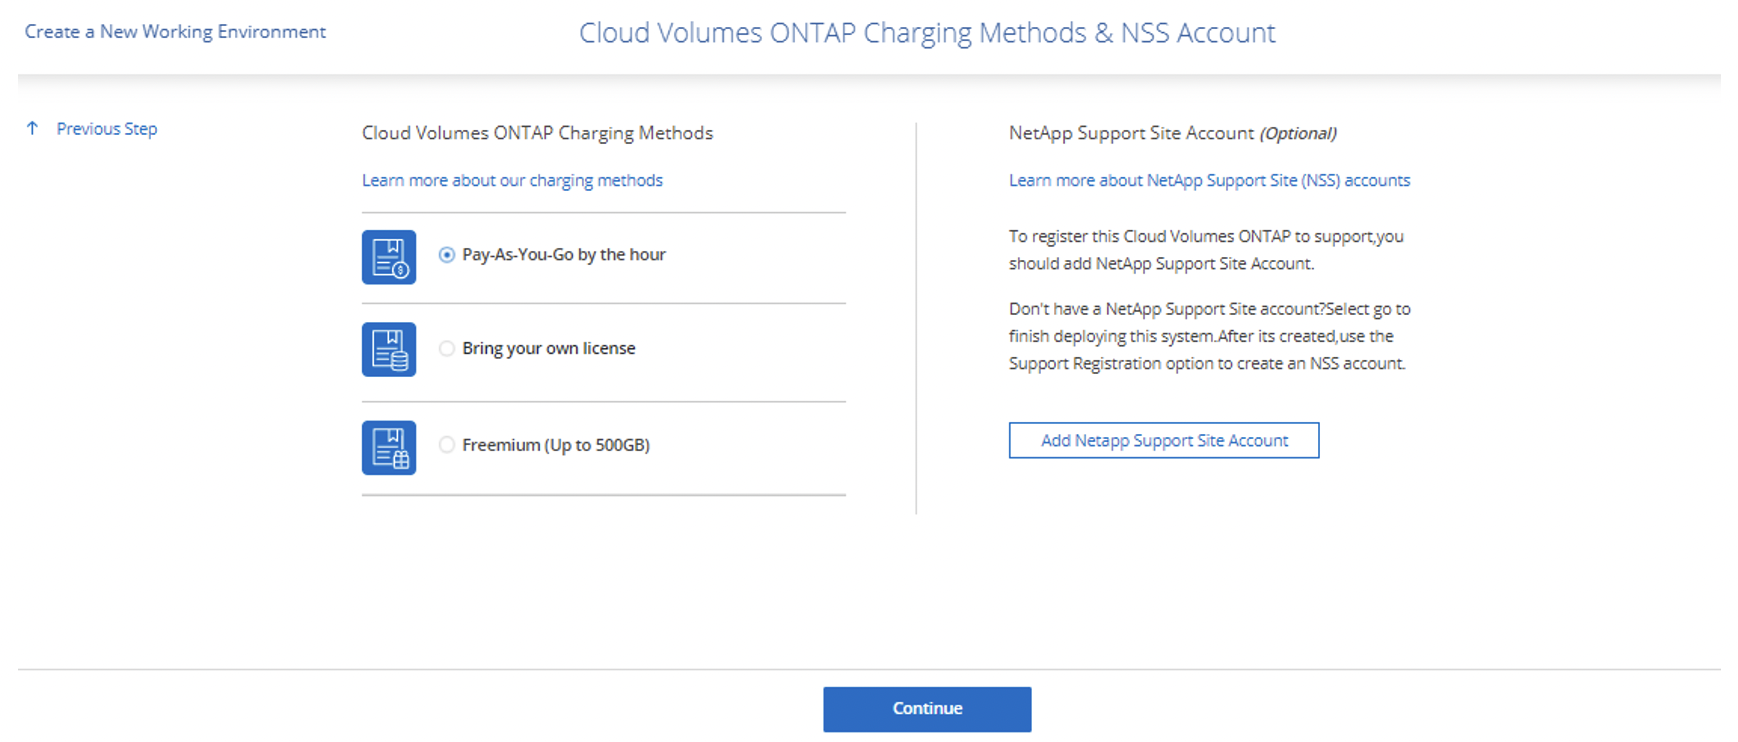
9. Now you need to choose the Licensing model, either Pay As You Go or BYOL. You will also need to click the link to subscribe to the NetApp Support Site Account, which is mostly required for BYOL purchases.
For more information about NetApp Service Site Accounts, you can click on the “Learn more about NetApp Support Site (NSS) accounts” link. When you are done, click on “Continue”:
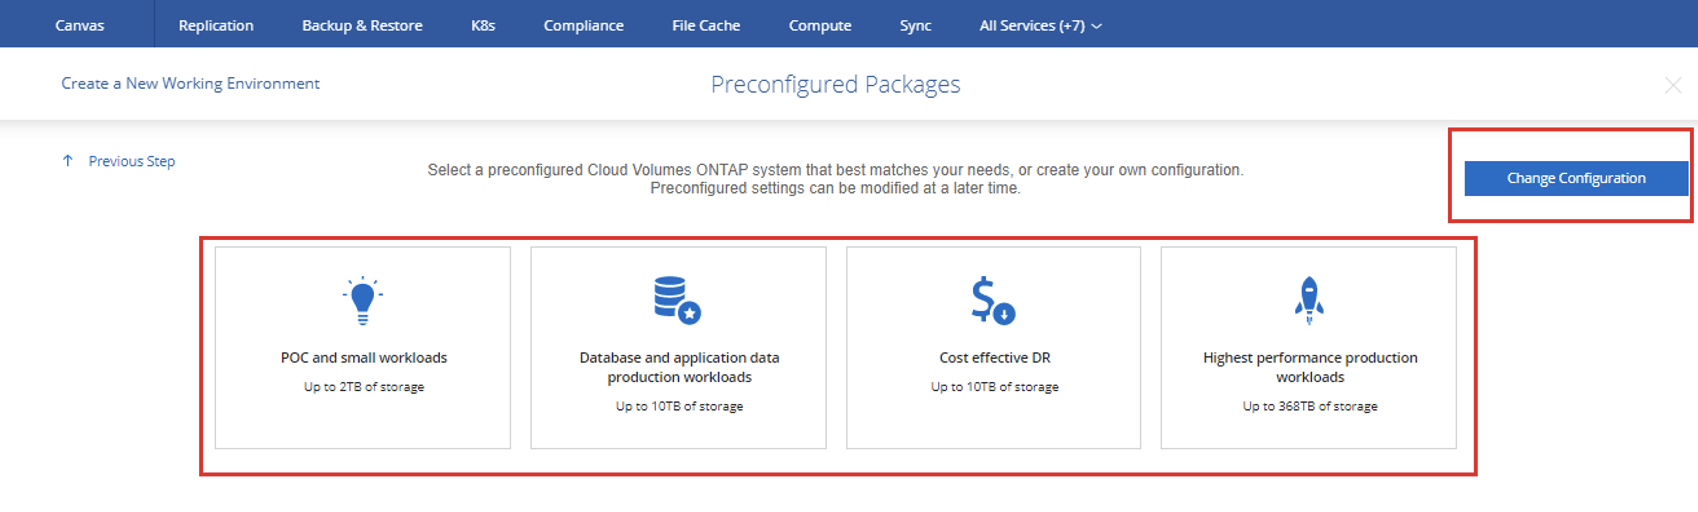
10. You are now presented with pre-configured Cloud Volumes ONTAP deployment options which offer pre-defined storage setups optimized for specific workloads. Select the option that best fits your needs, or go to the upper right option where it says “Change Configuration” to define your own setup:
Define a Volume
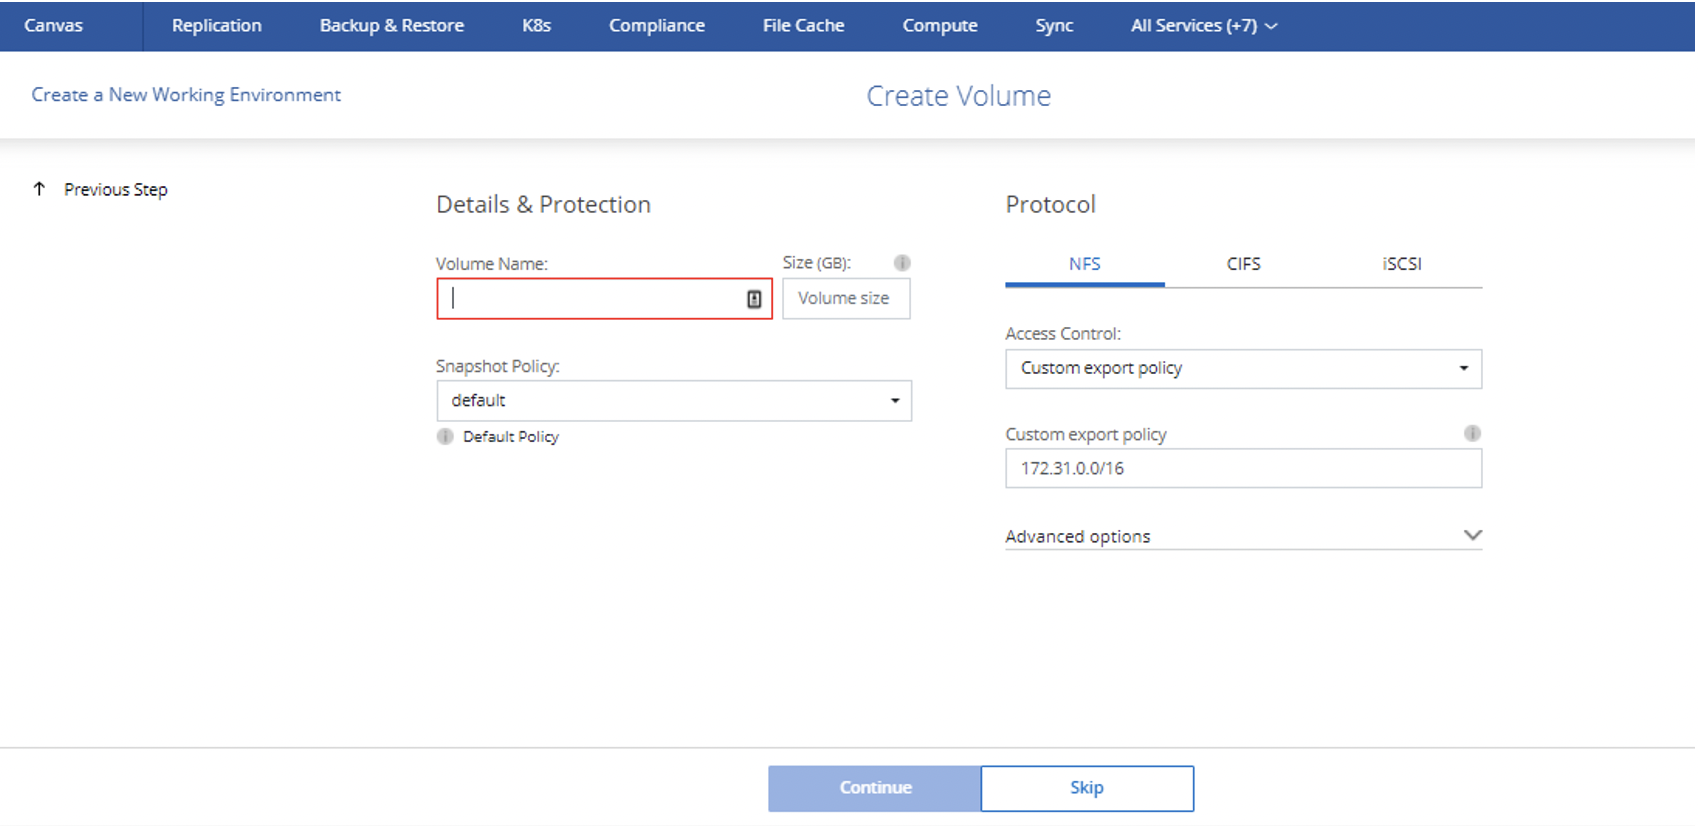
In the Create Volume step you are prompted to create your first volume within Cloud Volumes ONTAP.
- You need to provide the following details:
- Volume name and size
- Snapshot policy if any
- Protocol to be used by the volume (CIFS, NFS or iSCSI)
- Access Policy
Note that this step is optional and can be skipped if you don’t want to create a storage volume just yet.
If you are setting up a volume, enter all the preferred details and then click “Continue.” Click “Skip” if you’d rather not create a volume now.
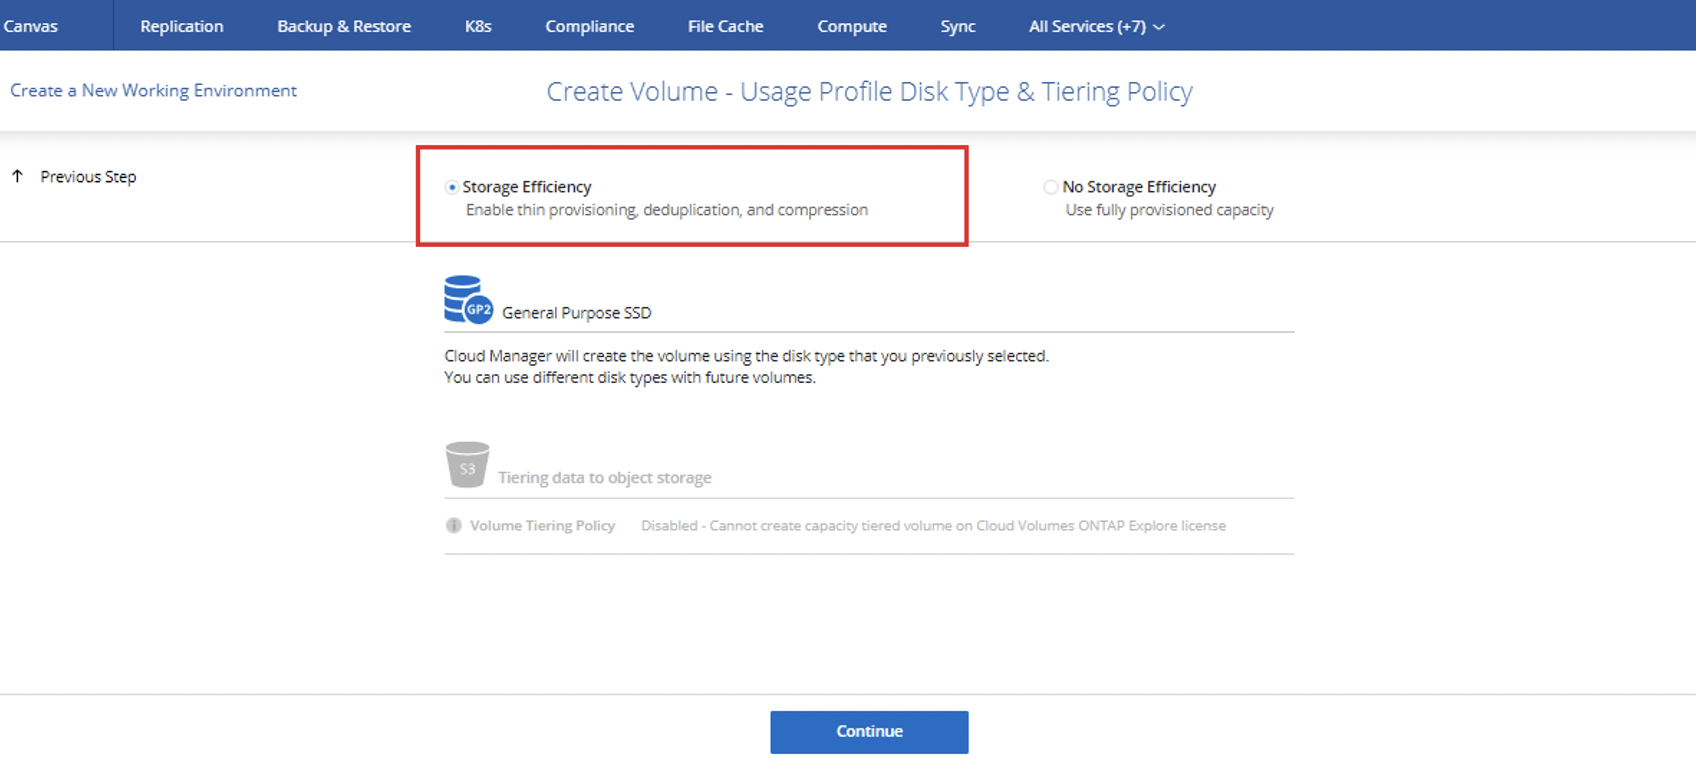
2. Now you are presented with the option of including the storage efficiency features in your Cloud Volumes ONTAP setup (deduplication, compression, thin provisioning) for a more efficient management of your storage resources.
Once you are done, click “Continue:”
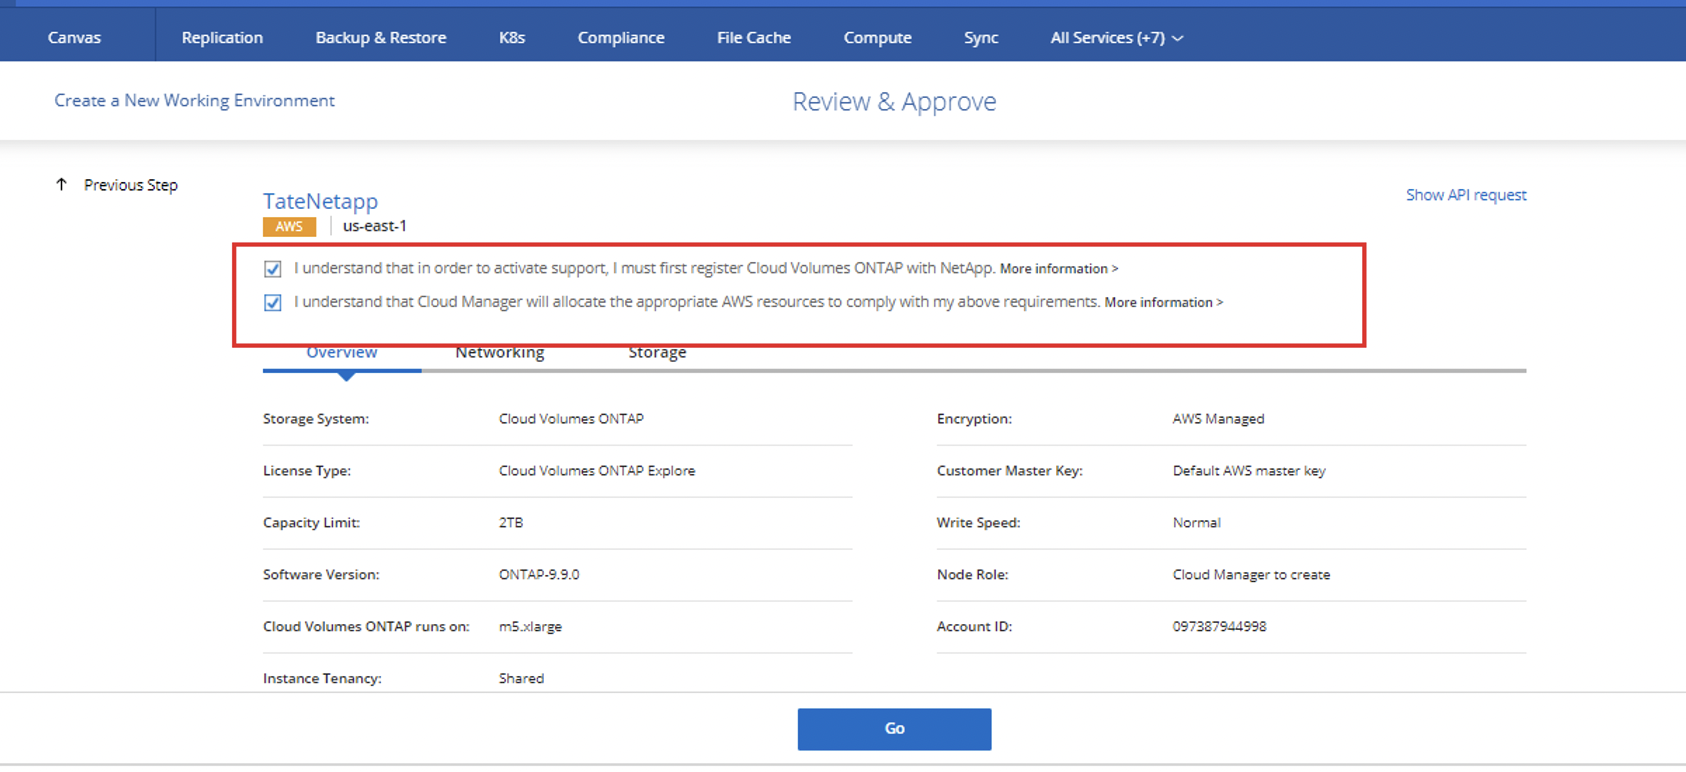
Approve and Complete
In this final screen you can review all the details you’ve entered up to this point and see the Networking and Storage options selected for your Cloud Volumes ONTAP instance in AWS.
- Go through the list to verify the details, tick the checkboxes, and then click on “Go” to proceed:
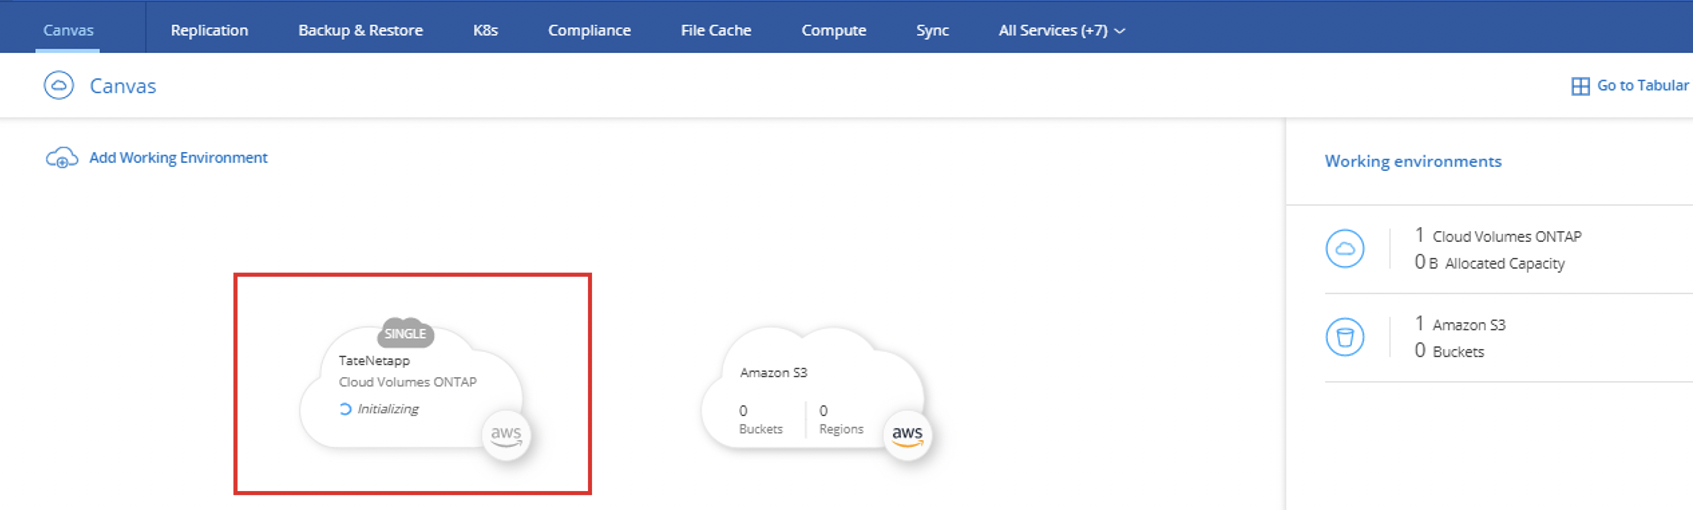
- You will now get redirected to the canvas and you'll be able to see the Cloud Volumes ONTAP instance initializing. It might take around 20 minutes for the instance to get up and running:
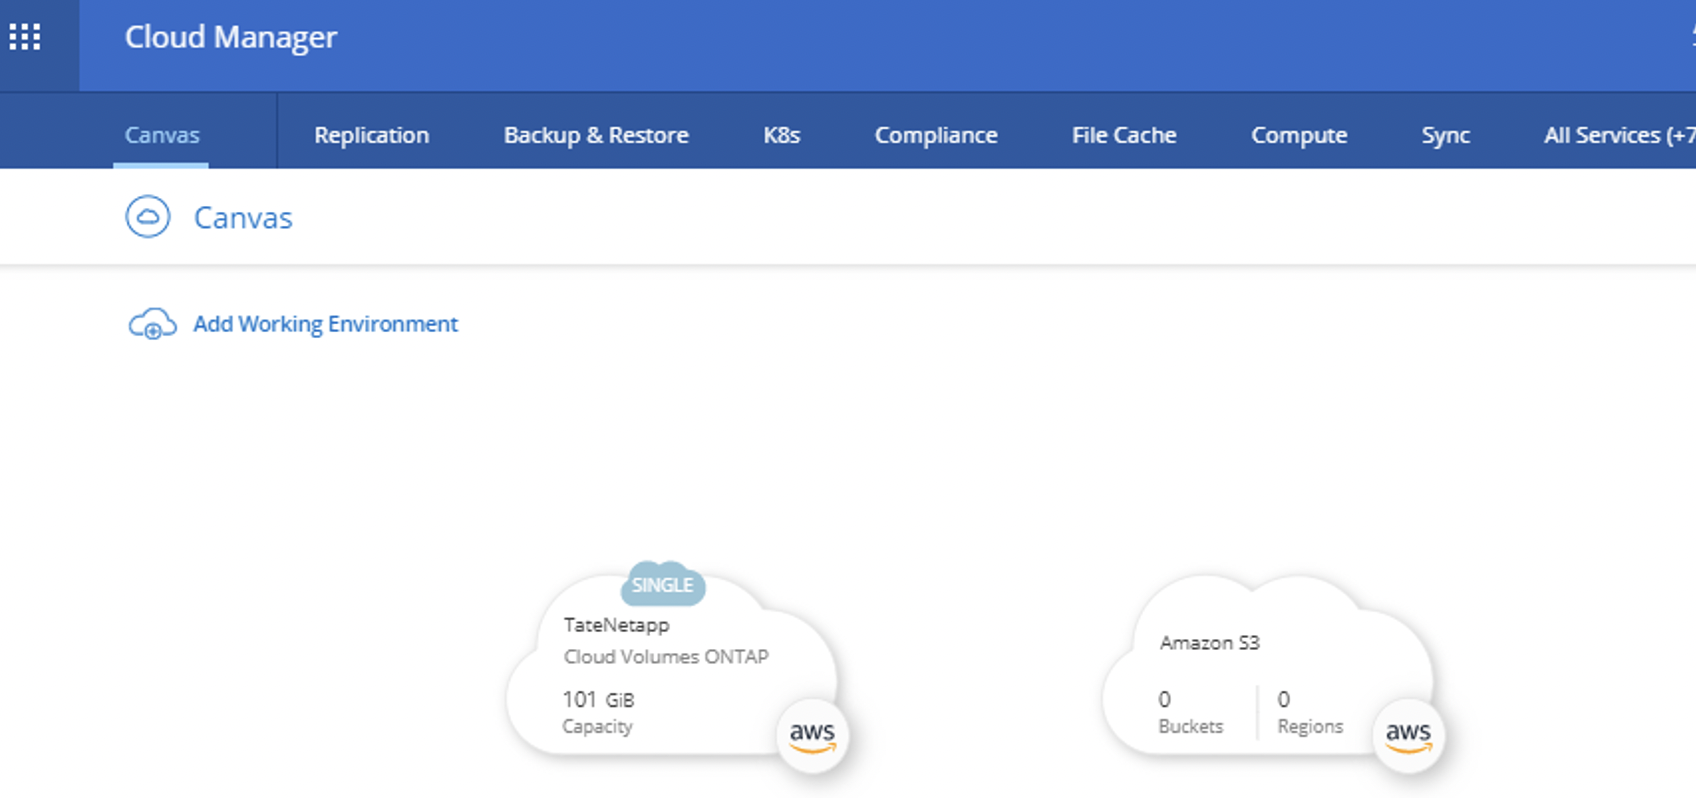
- Now the new Cloud Volumes ONTAP instance is ready:
Conclusion
Now that you have Cloud Volumes ONTAP in AWS you can start enjoying all the enterprise class data management features natively on AWS.
