Share
Databases are more stable and reliable than they used to be, but there's still a possibility that you can lose data due to a bug in the database engine. Another concern—one which probably won't be resolved anytime soon—is the reliability of the infrastructure you're using to host your database. Having Azure backup plans can be a big help here.
There are a number of different solutions for Azure backup SQL databases users can turn to. Hopefully, you'll never have to restore your backups, but in case that ever happens, you should always backup your data and verify it on a regular basis. In this post we'll show you how to do that using Azure storage as the target repository.
Azure Backup: for SQL Hosted Databases Step by Step
Backing up an SQL server is usually done with SQL Server Management Studio (SSMS). It's a straightforward process that hasn't changed much since SQL Server was released. Backup targets are usually disks or tapes, since such formats are still the preferred and most reliable “offline” methods for storing data.
A newer approach in Azure database backup is to back up your database directly to a cloud storage service. SQL Server enables you to back up your data to Azure Blob Storage, which is a fairly cheap storage service, frequently used for Azure cold storage. Azure Blob Storage stores your data redundantly in at least three locations inside the same Azure data center; the maximum amount of redundant storage available stores data redundantly across all the 38 Azure regions and data centers currently located around the globe. This dispersal is one of the clear benefits to cloud hosted databases.
Backing up your data to a URL is a feature that was introduced in SQL Server 2012 SP1 CU2.
Additional enhancements were introduced to this feature in SQL Server 2016 (13.x) that enables usage of block blobs for data storage, Shared Access Signatures for enhanced security, and striping for enhanced performance.
Let’s go through the steps required to configure backup for SQL database to Azure.
Prerequisite:
The Azure storage used for storing the SQL database backup should be created and configured as a prerequisite.
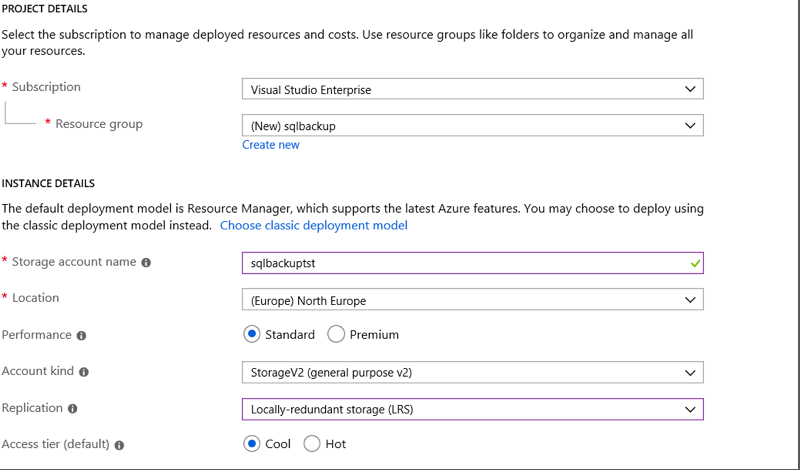
From the Azure management portal, go to “Create a Resource,” then select “Storage,” and then “Storage account.” Provide details such as resource group name, storage account name, and location based on your preference. Optimal settings for account type, replication, and access tier can be configured as shown below. When you’re done, click “Next.”
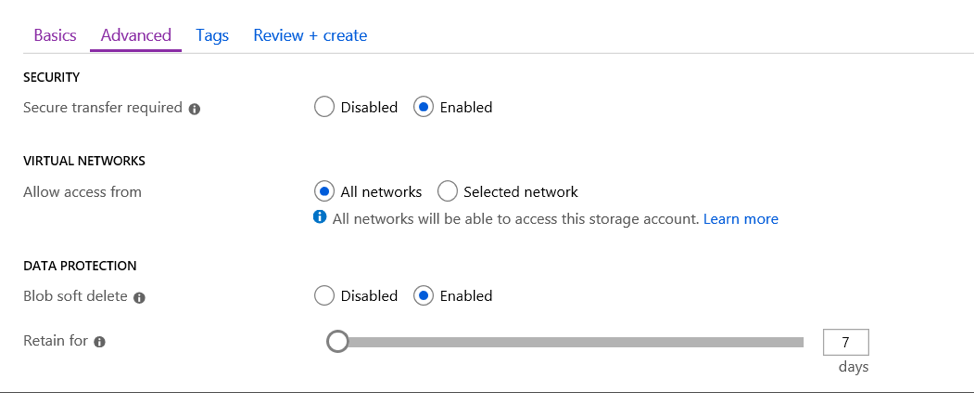
In the advanced section, configure the settings as you can see in the image below. Blob soft delete is enabled to ensure protection against accidental deletion of backup data from the storage account.
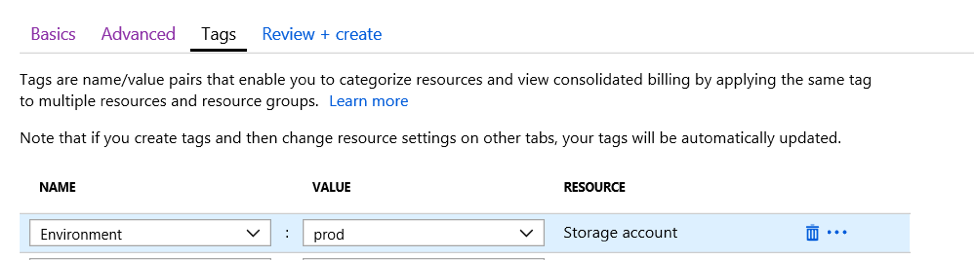
In the next step, add any tags that are relevant to your environment, as shown in the sample below.
Review the settings and proceed to create the storage account.

Once the storage volume is created, provision a container for storing the backup data. From the storage account, click on “+Container.” Provide a name for the container and set its access level to private.
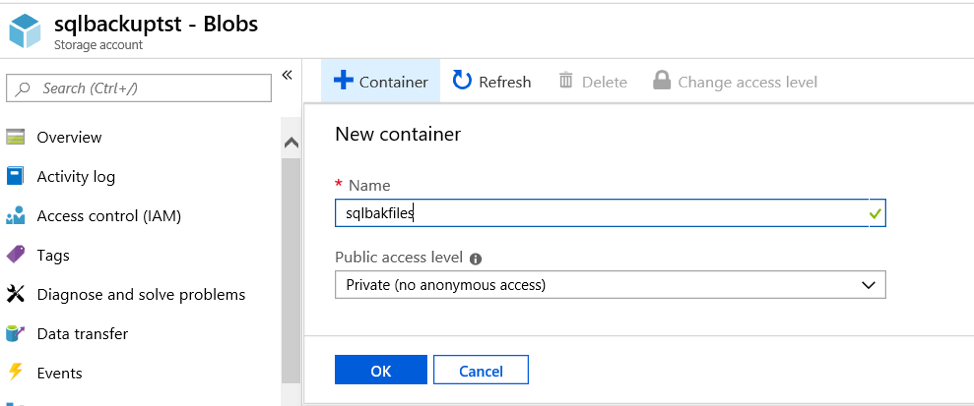
Backup files (.bak) will be uploaded to this container using storage keys or SaS access tokens for authentication.
Backup configuration:
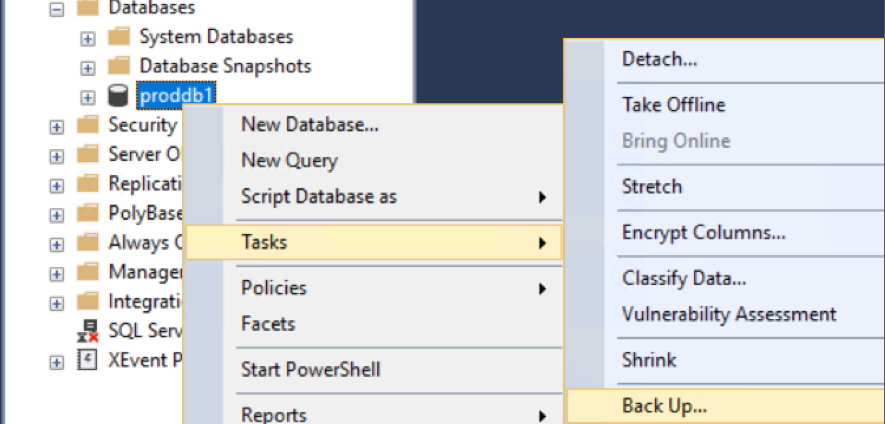
The following steps will show you how to back up a database. Use SQL management studio to connect to your SQL server. Right click on the DB to be backed up. Select “Tasks” and then choose ”Back Up”.
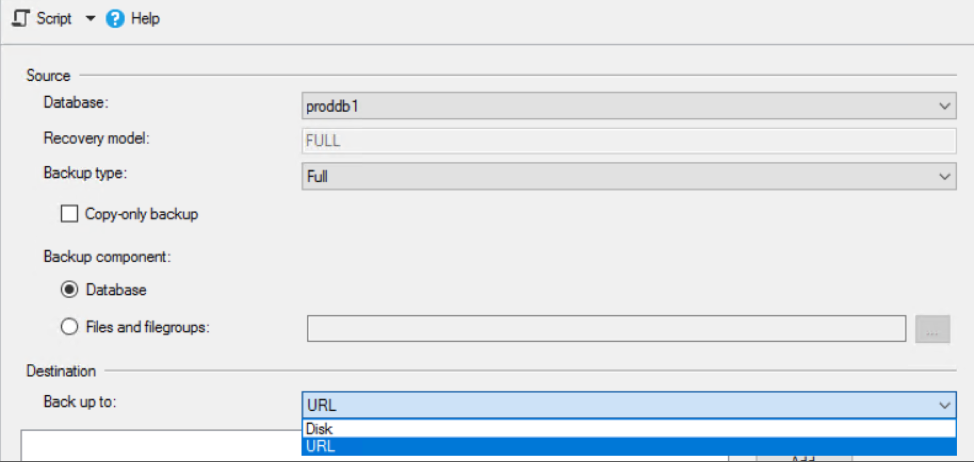
In the General page, select destination as “URL” from the drop-down menu.
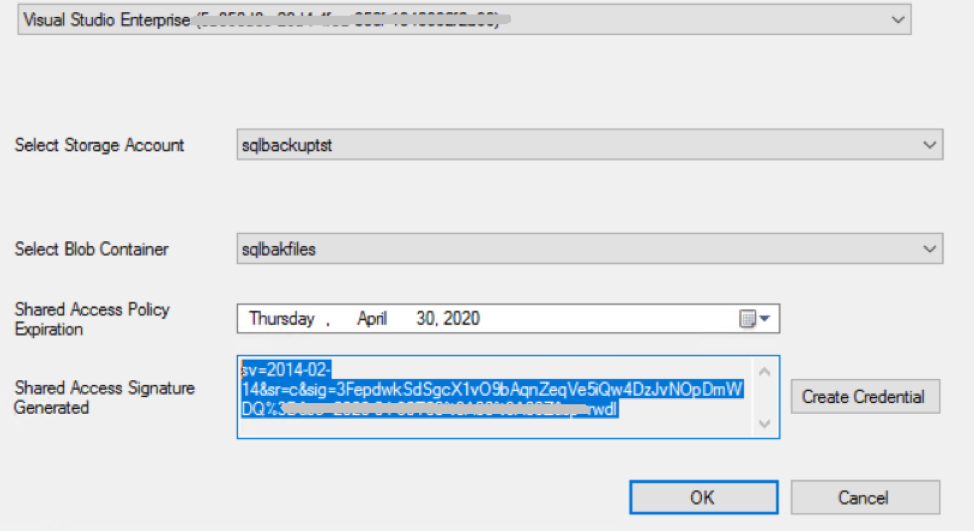
Click on “new container.”

You will get a prompt to sign into your Azure subscription. Select the container we had created earlier and create a credential. Click “OK” to proceed.
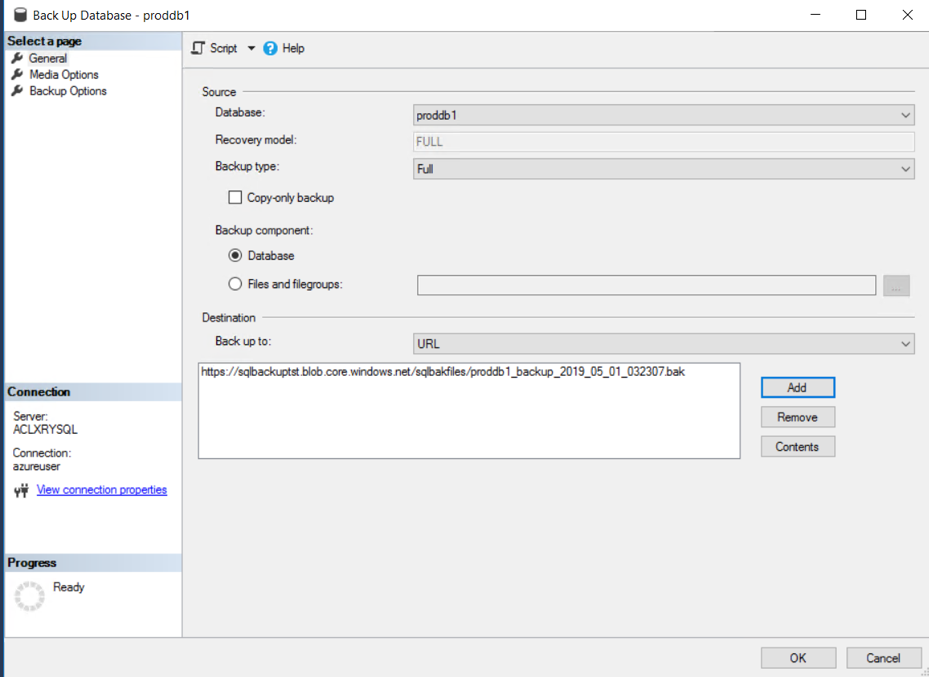
The backup URL will be listed in the wizard now. Click on “OK” to start the backup.
Once the backup is completed successfully, the following message will be displayed:

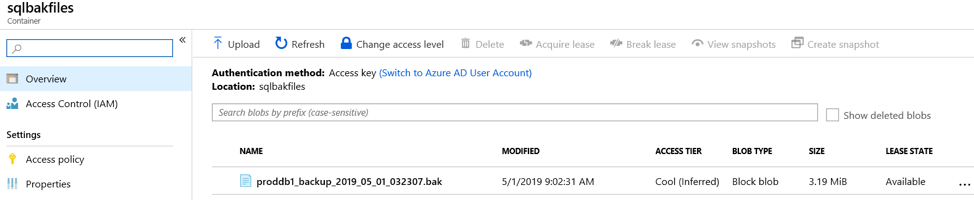
From the Azure portal, if you browse from the storage account to the container name, you can see the backup file has been uploaded:
Note: One problem that might come up when uploading directly to Azure or any other storage service on the Internet is that your upload speed may not be very fast. If that proves to be an issue, you should first backup to a drive, and then upload the data to the cloud later.
Archiving Hosted Databases to the Cloud
Your database is probably going to grow over time, and as it grows it will require more storage space. It will also require more storage space for full backups as well as more time to complete full backups.
A simple solution to solve these space requirements would be to delete all the data that you don't need. However, in most cases you can't do that, either because you may need that data at some future point in time, or because there are government regulations that oblige you to retain all the data for a specific period of time. In such cases, that is where archiving comes in handy.
The next section will cover some workflows that might suit your archiving needs. If, for some reason, your data needs to remain in the same database, you can move all that data to a separate table.
You should also make sure that that table is in a separate filegroup, possibly on a separate disk. As the users will probably want to access that “archived” data, you can create a view that “merges” all relevant tables, and then the queries should “aim” at the view instead of at the original table. This approach will allow you to perform maintenance jobs in less time, while allowing you to still serve all the data.
If you can afford to move the data to a separate database, you will save yourself some maintenance work on the primary database. The workflow is basically the same as in the example given above, except that you either need to link the SQL Servers to still provide all the data, or make the applications aware of the second SQL Server and query it directly, which isn't optimal since that second database will at that point begin to act as another production database.
In some scenarios, it won't be necessary to keep your data “online” in a database. On those occasions, you just need to back up your data, check at least once that you can restore it, and then delete the data from the database. If you'll ever need it, you can just restore the data from the backup file to the database.
To make things easier, with SQL Server 2016 Microsoft introduced a feature called Stretch Database. Stretch Database allows you to move all the data you don't need on your hosted database to an Azure SQL Database that will provide much cheaper storage, and where you don't need to worry about infrastructure.
You just need to create a policy on your hosted server indicating which data will be moved. The applications that use your primary database don't need to implement any changes, because SQL Server takes care of fetching the data from the Azure SQL Database.
Verifying and Restoring Azure Backups
When databases back up to Azure storage, you can select whether to create it “WITH CHECKSUMS” or without. After the backup is created, you can run the “RESTORE VERIFYONLY” command to see if there's a problem with the backup file. This isn't a required step, but it is a best practice to implement. You always have the option to restore the backup to another database and check the data there. This is a time-consuming process, and mostly unnecessary, so if you really want to do this, you can always use Azure Automation to run some scripts on each backup upload.
If you're trying to restore an Azure SQL Database, it will take you just a few clicks through the Azure Portal to restore it to a desired point in time. Just keep in mind that those backups are retained for either 7 or 35 days, depending on your service-tier. Restoring backups to an SQL Server is usually done with SQL Server Management Studio. The restoration process is straightforward, following these guidelines. If you're in a situation where you need to restore a transaction log backup because your last backup isn't covering all the transactions that took place before something went wrong, you can follow the steps outlined here.
Conclusion
With cloud computing and high-speed internet connectivity, it’s now easy to host backups on a reliable, geographically-dispersed infrastructure at a fraction of the price it costs to back up and host data using on-premises environments. But since that means databases are no longer being kept in-house, it is crucial to make sure that data is consistently backed up and secure.
Azure provides users with tools such as Stretch Database, Azure Blob Storage, and Azure Site Recovery that make the task of archiving, backing up, and hosting data easier than ever. Backing up databases in the cloud with Azure is a straightforward process that can be employed and customized as it suits your database.
Another way that users are backing up their cloud hosted databases is with Cloud Volumes ONTAP and SnapCenter®. Cloud Volumes ONTAP is NetApp’s solution for data management in the cloud, and relies on the same cost-saving storage efficiencies and highly-efficient snapshot technology that NetApp users have been relying on for database protection for years. These features provide some useful ways to avoid Azure backup limitations.
To learn more about the performance of Azure NetApp Files, NetApp’s fully managed cloud file service, check out our performance benchmarks for Azure NetApp Files.

