Share
What is Azure Backup Policy?
Azure Backup is Microsoft’s cloud-based data protection solution, which can protect workloads running both in the cloud and on-premises.
You can combine Azure Backup with Azure Policy, a governance engine that can help you enforce organizational standards and assess compliance in your environments. This service provides a compliance dashboard, and also lets you actively remediate new and existing resources to achieve compliance quickly.
Azure Policy provides built-in policies for Azure Backup. These policies give you control over two main aspects of your backups:
- Schedule—when and how frequently backups are created.
- Retention—defines the period of time during which backups are retained.
You can define your policy according to RTO/RPO requirements, the type of data you want to back up, regulatory and operational compliance requirements, and workload types like virtual machines (VMs), files, and databases.
In this article, you will learn:
- Azure Backup Built-In Policy Examples
- Tutorial: Create and Apply a Backup Policy to VMs
- Azure Backup Policy Best Practices
- Azure Backup with NetApp Cloud Backup
Azure Backup Built-In Policy Examples
Here are a few examples of the built-in backup policies provided by Azure Policy:
- Configure VM backups to a new Recovery Services vault—backup VMs that have a specific tag, and run the vault in the same resource group. This is useful for allowing different teams to manage backups for separate resources.
- Configure VM backups to an existing vault—enforce tagged backups for all VMs to an existing vault in the same location. This is useful if you have a central team to manage all backups for a subscription.
- Configure tagless VM backups a new vault—deploy a vault in the same resource group and location as the VM. This allows application teams to manage backups for the resources they are allocated.
- Configure tagless VM backups an existing vault—backup all virtual machines to an existing central vault in the same subscription as the VM. This allows a central team to manage all backups for a subscription.
- Use customer-managed keys to encrypt backup data—the default option in Azure Recovery Services vaults is to encrypt customer data with service-managed keys. You can use this policy to encrypt data with Azure Key Vault keys that you create, which gives you full control and may be required for compliance purposes.
- Use Azure Private Link—connect your network to Azure without public IP addresses. Private Link handles the connection between consumers and services and reduces the risk of data leakage by mapping endpoints to vaults.
- Configure private endpoints—connect your network to Azure via private endpoints (without a public IP). The mapping of these endpoints to vaults reduces the risk of data leakage.
Tutorial: Create and Apply a Backup Policy to VMs
Here are several steps that break down the process of applying a backup policy to Azure VMs:
-
In the Azure Portal, search for and navigate to Backup center. In the Overview tab, choose + Backup.
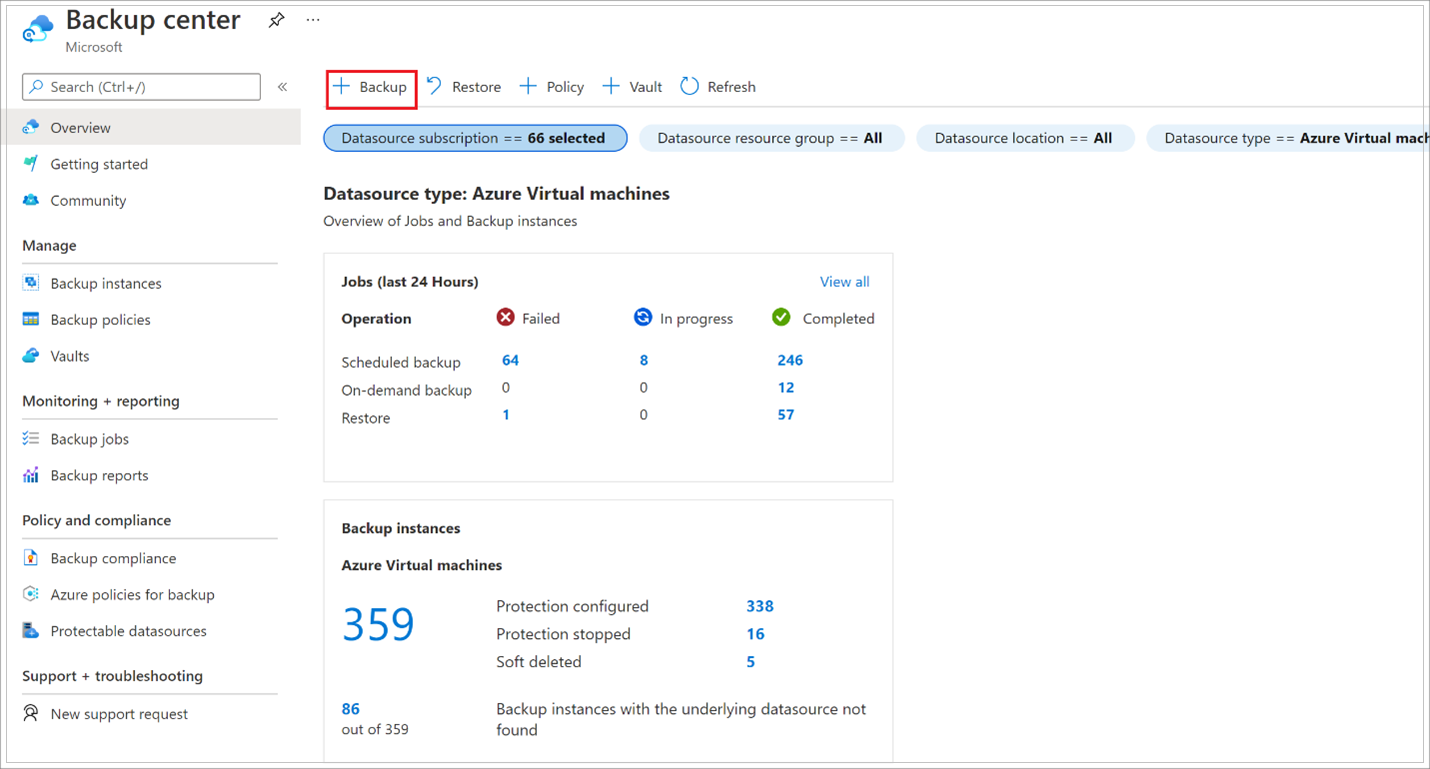 Image Source: Azure
 -
Choose Azure Virtual machines as your preferred Datasource type, and then choose the vault you created. Next, choose Continue.
-
Choose a default Backup policy to assign or configure a new one. To configure a custom policy, choose Create New, and follow the instructions in the next step.
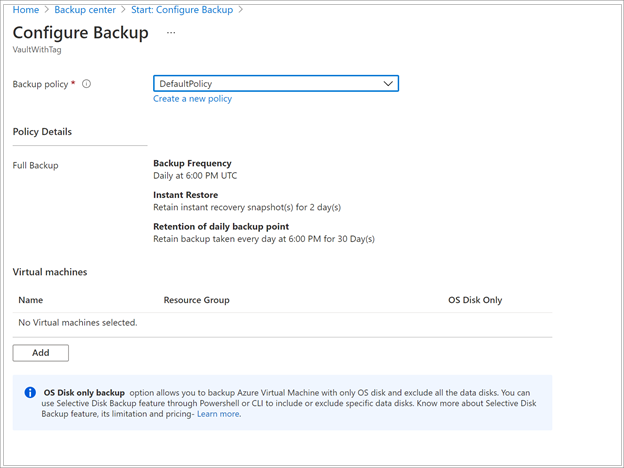 Image Source: Azure
 - Go to Virtual Machines, select the Add option, and choose a VM to back up with the new policy. Next, choose OK.
-
In the Backup menu, choose the Enable backup option. It deploys your new policy to the vault and VMs. Next, it installs a backup extension on a VM agent that runs on your Azure VM.
Create a Custom Policy
The dialog shown below allows you to create a custom backup policy. See below to learn how to fill out the details.
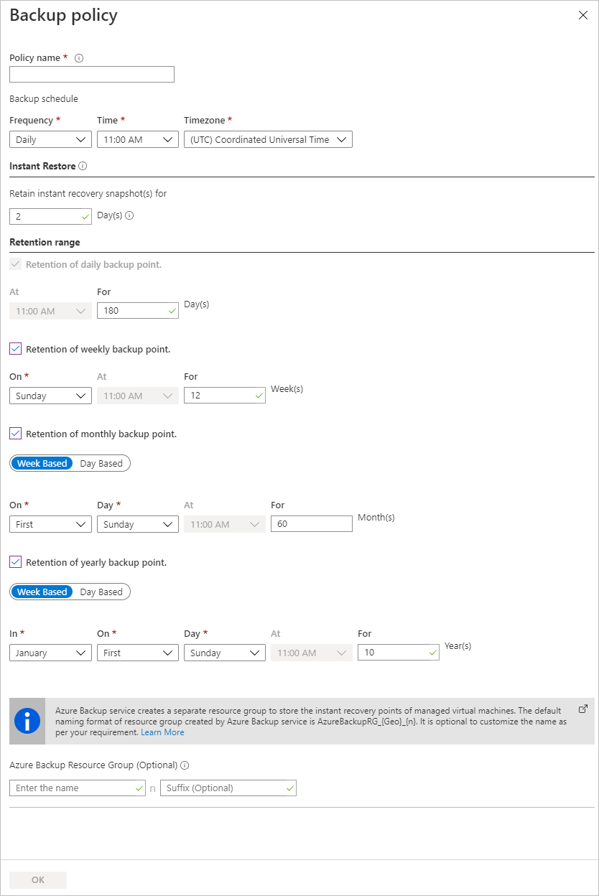 Image Source: Azure
- Go to Policy name, and define a meaningful name.
- Go to the Backup schedule settings, and define the time during which you want backups to be taken. This option lets you define either daily or weekly backups for your VMs.
- Go to Instant Restore, and define the time during which you want to locally retain snapshots for instant restore purposes. Take into account that snapshots used for instant restore are retained for two days by default (retention can be configured to 1-5 days).
- Go to Retention range, and select how long you want to keep weekly or daily backup points. You can define the retention period as a number of days or weeks.
- To save your policy, choose OK.
Azure Backup Policy Best Practices
Schedule Considerations
Here are several best practices to implement when defining schedules:
- Group together all VMs that have the same requirements defined within a policy, including frequency, retention settings, and schedule start time.
- Make sure that the scheduled start time of the backup is defined to run during non-peak production application time.
- When distributing backup traffic you should backup different VMs during different times of the day. This can help you ensure the times do not overlap.
Retention Considerations
Here are several best practices to implement when setting up retention policies:
- Short-term retention—you can define that backups should only be retained for a specified number of minutes or “daily”, if there are no compliance or operational requirements requiring long-term storage.
- Long-term retention—if there is a need to retain backups for longer periods, you can define a retention period on a weekly, monthly, or yearly basis. You can create planned long term retention for compliance purposes, if you know in advance this data will be needed in the future.
- On-demand backup with custom retention—use this option when you need to create ad hoc backups that were not scheduled through a backup policy. This option is ideal for backups that do not fit a scheduled policy, or for performing more than one VM backup per day, because scheduled backup only allows one daily backup. Retention policies do not apply to on-demand backups, and you need to define a custom retention period for each backup.
Update Your Backup Policy
Revisit your backup policy to respond to evolving business needs. For instance, you might adjust retention duration—if you extend retention, mark and keep existing recovery points, if you reduce retention, mark the recovery points to be cut. The retention rules you set apply to all recovery points (except on-demand retention points).
With Azure Backup, you can stop protection (i.e. cancel future backups) for a data source you want to decommission, while either retaining the data from that source or deleting it. Retention rules will apply when you restore protection, while expired recovery points are deleted.
When planning your policy, take into account the following limitations:
- Maximum number of objects per policy
- You cannot delete a specific recovery point
- Backup policies are scoped to specific vaults
- You cannot manage backup for a data source if you disable its scheduled backup
NetApp Cloud Backup - The Best Way to Protect Your ONTAP Data
NetApp understands ONTAP better than anyone else, which is why the best backup solution for ONTAP systems is NetApp Cloud Backup. Designed by NetApp specifically for ONTAP, Cloud Backup automatically creates block-level incremental forever backups. These copies are stored in object format and preserve all ONTAP’s storage efficiencies. Your backups are 100X faster to create, easy to restore, and much more reliable than with any other solution.
Cloud Backup simplifies the entire backup process. It’s intuitive, quick to deploy, and managed from the same console as the rest of the NetApp cloud ecosystem. Whether you’re looking for a less expensive way to store your backups, a faster, more capable technology than NDMP, or an easy way to enable a 3-2-1 strategy, Cloud Backup offers the best backup solution for ONTAP.

