Share
Amazon S3 objects are stored in buckets that offer virtually unlimited storage. But how mobile is this data?
While objects in S3 storage can be moved between different buckets owned by that same AWS account, but what if you want to move an object to a bucket owned by a different AWS account?
This article discusses a method to copy AWS S3 objects from a bucket in one AWS account to a bucket in another AWS account, the use cases where this is relevant, and show you the steps to get it done.
Use Cases for Cross-Account Copying
Copying objects between buckets within an AWS account is a standard, simple process for S3 users. To copy AWS S3 objects from one bucket to another you can use the AWS CLI. In its simplest form, the following command copies all objects from bucket1 to bucket2:
aws s3 sync s3://bucket1 s3://bucket2
But moving objects from one AWS account to a bucket owned by another account is a different matter because a bucket can only be written by its owner.
One use case is where multiple AWS accounts exist within a single organization, and control over the buckets needs to be consolidated under one of those accounts. Another use case example is company mergers. The companies will probably need to consolidate the objects in their different buckets under the control of a single account.
Copying AWS S3 Objects from One Account to Another
The first step is to change the permissions of the account. Managing permissions of AWS S3 objects and buckets can be done using Access Control Lists (ACLs) and bucket policies. The drawback is that object ACLs are not inherited from bucket ACLs. That’s why you should use a bucket policy that allows cross-account bucket copying. A bucket policy overrides ACLs.
First, let’s look at the setup requirements.
Setup Requirements
Two AWS accounts: For this walkthrough we need two AWS account entities with their account IDs.
Source and destination buckets: The first, source account, needs a bucket with objects. The second, destination account, will need a bucket that will receive the first account's objects.
IAM user: This AWS IAM user in the destination account will be responsible for copying the objects.
Permissions: The IAM user needs permissions to access both buckets in order to get objects from the source bucket and put objects in the destination bucket. These permissions are granted with the use of policies.
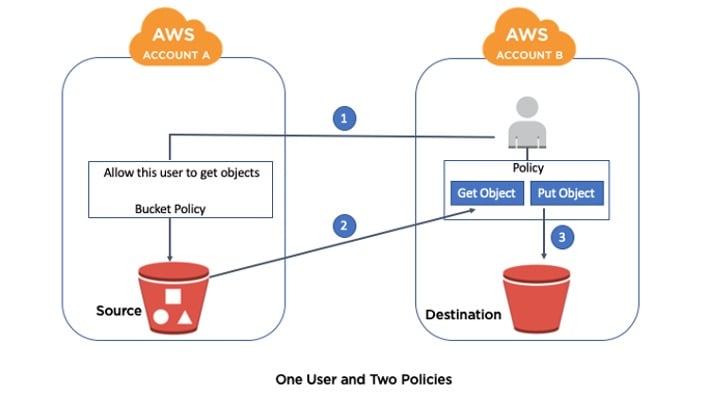
Copying objects between Amazon S3 buckets.
For this example we are going to assume that you already have two separate AWS accounts. The steps we’ll follow will include how to:
- Create two AWS S3 buckets in two separate accounts.
- Create an AWS IAM policy in the destination account that will allow reading the source bucket and writing the destination bucket.
- Create an IAM user in the destination account, and connect to the IAM policy.
- Create a bucket-policy that will allow the destination account to get objects from the source bucket.
- Copy the objects from the source bucket to the destination bucket, using the AWS CLI.
Copying an Object Between S3 Buckets Step by Step
This section will show you step by step how to copy objects from one S3 bucket in one account into an S3 bucket in another account.
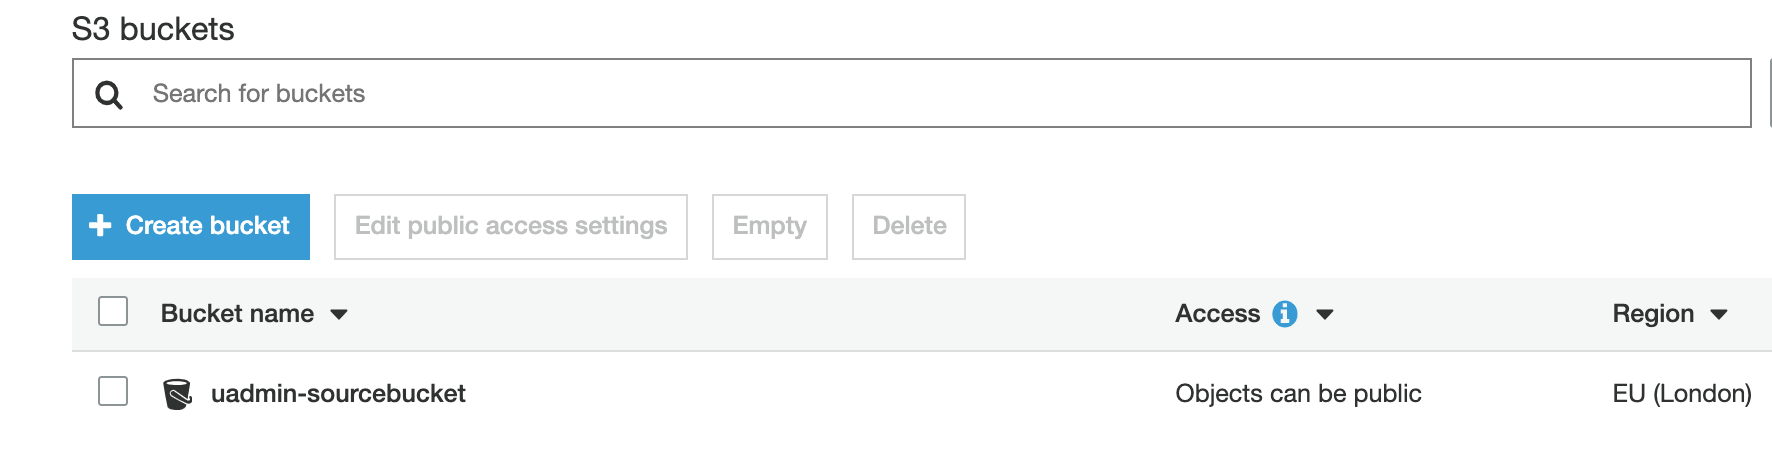
1. Create Two Buckets
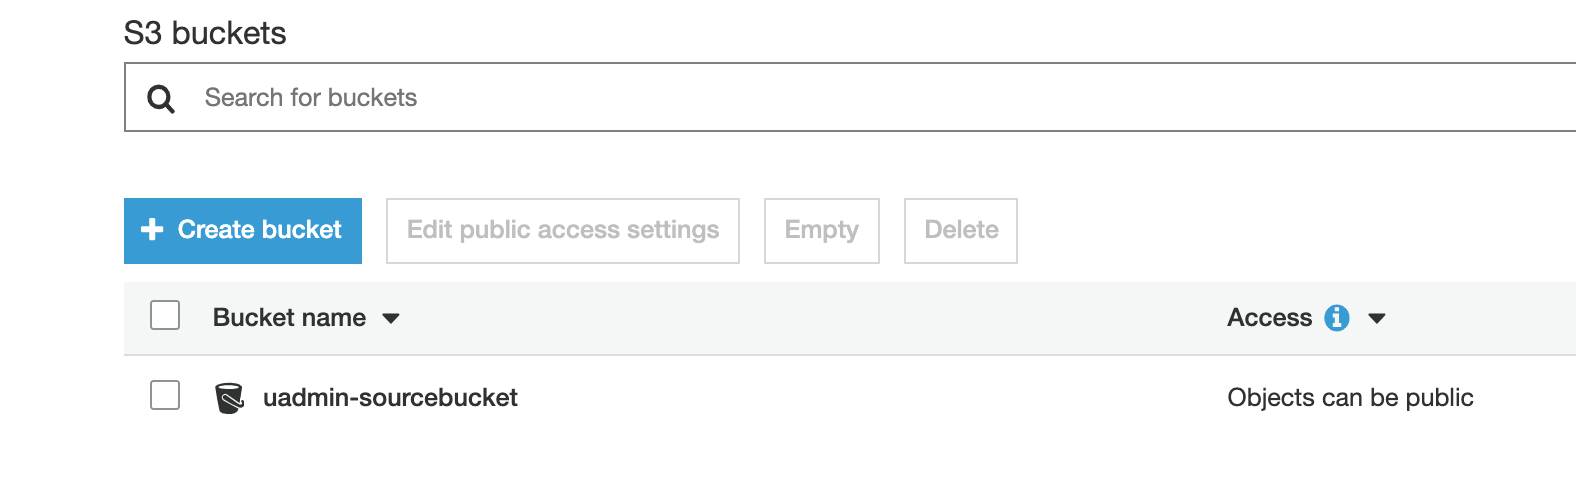
For the purposes of this example, our buckets will be named uadmin-sourcebucket and uadmin-destinationbucket.
1.1. Login to the AWS management console with the source account. Select Amazon S3 from the services and click “+ Create bucket.”

1.2. Give the bucket a globally unique name and select an AWS Region for it.

When you’re done, click “Next” twice.
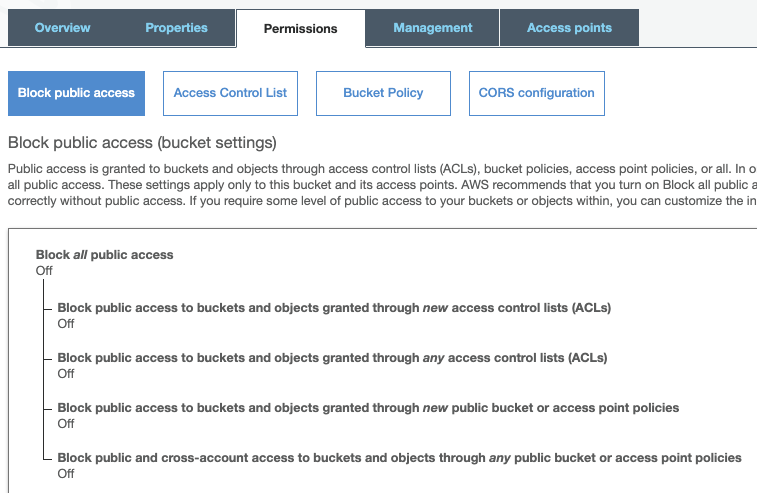
1.3. Deselect “Block all public access.” It’s important to make this change because it will allow you to create a bucket policy.
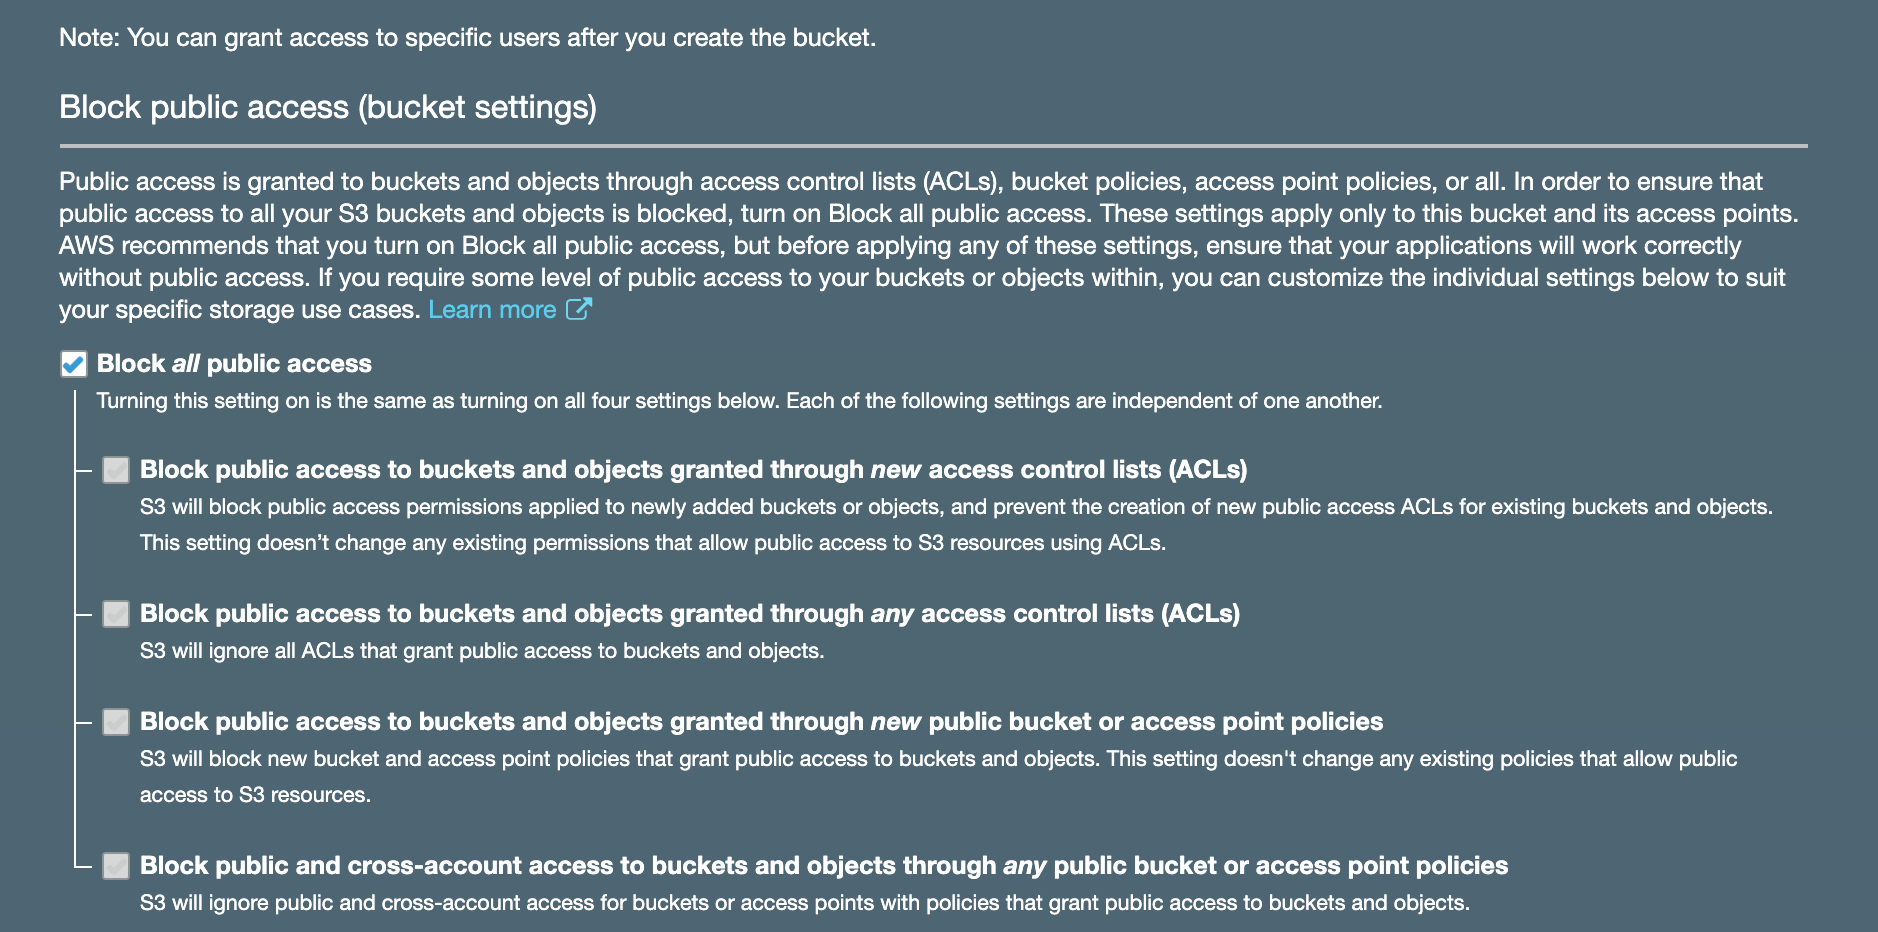
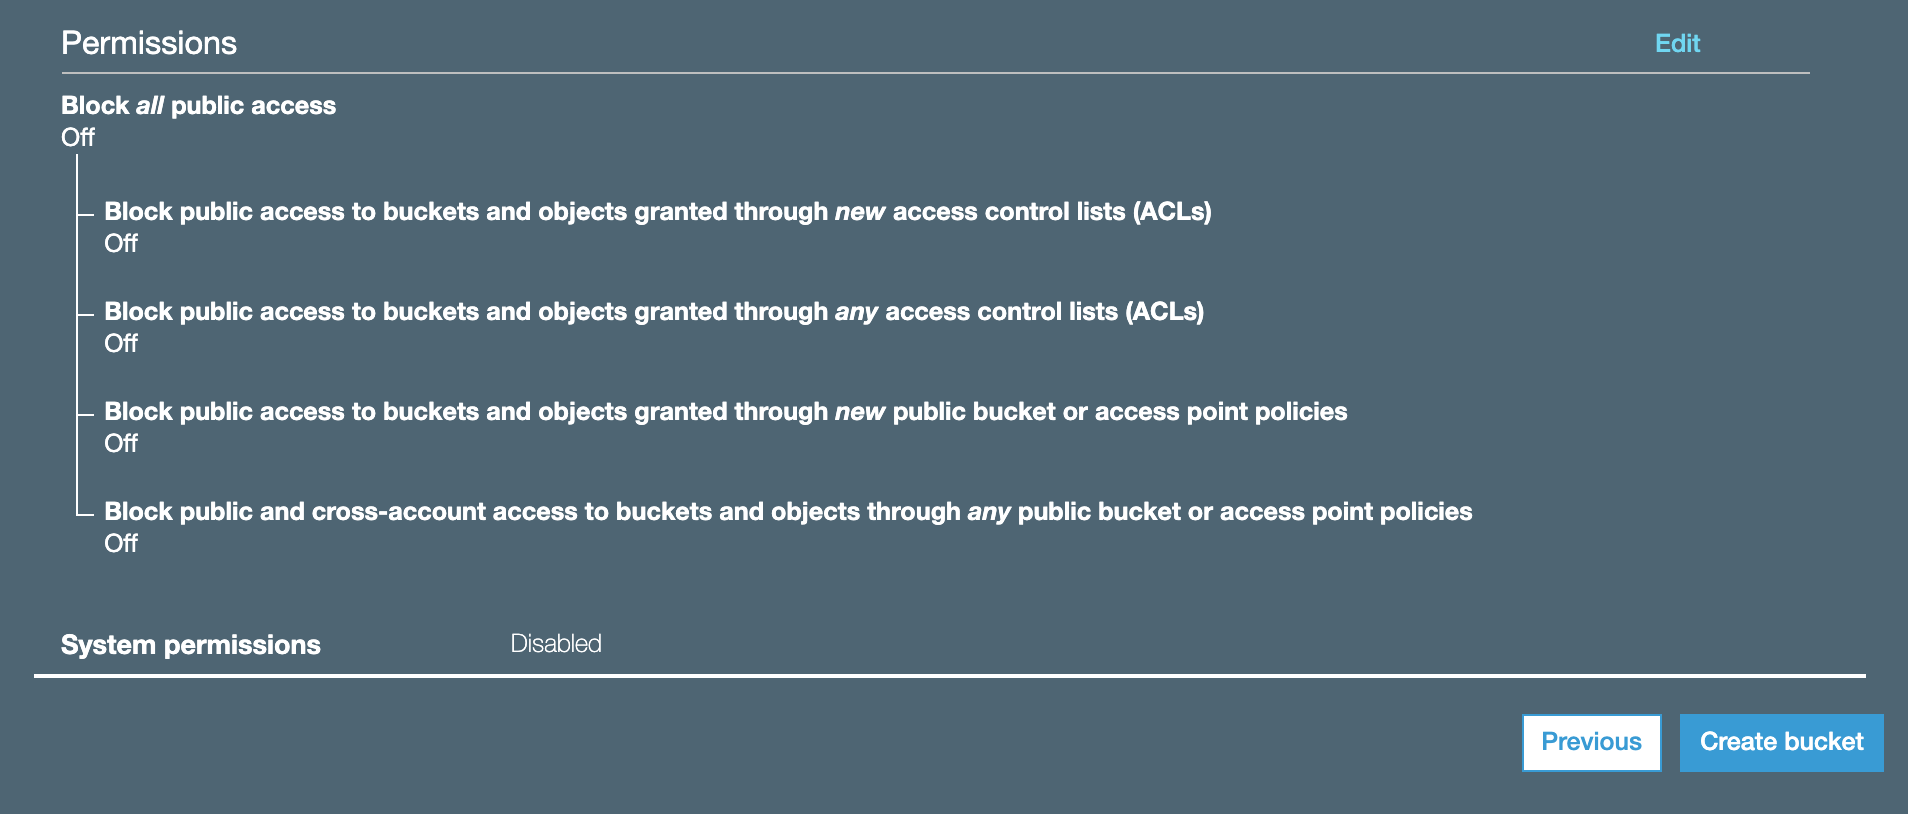
1.4. Acknowledge the current settings and click “Create bucket.”
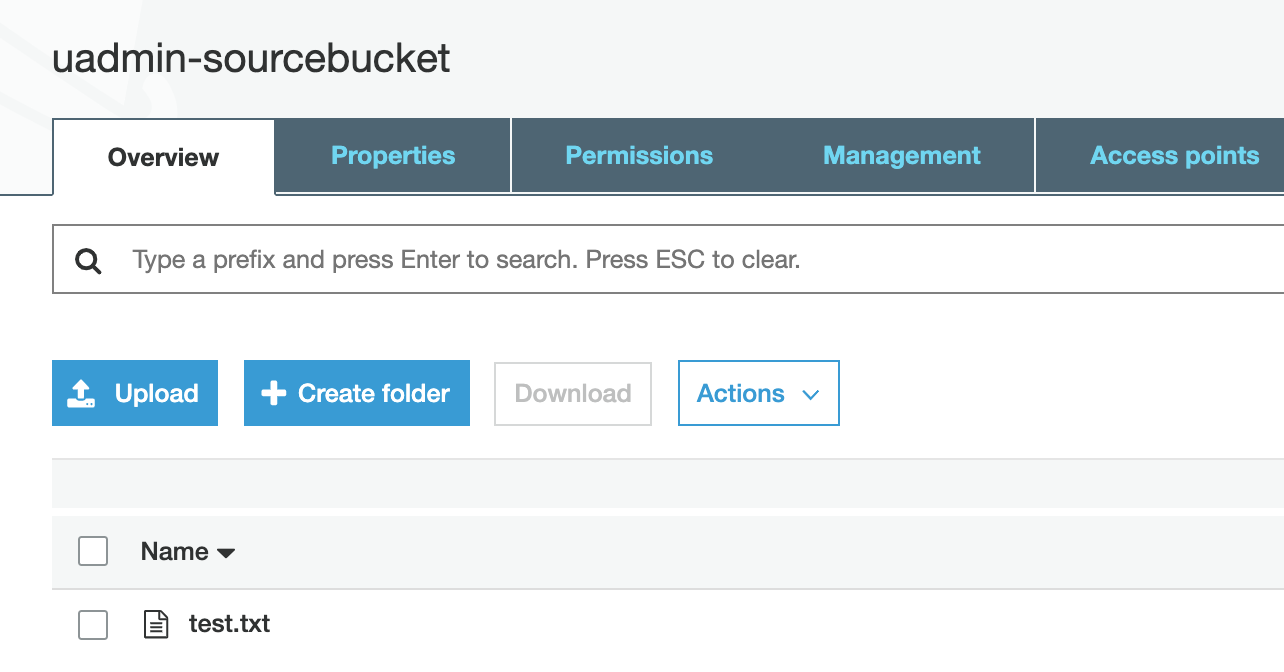
1.5. Open the bucket by clicking on it.
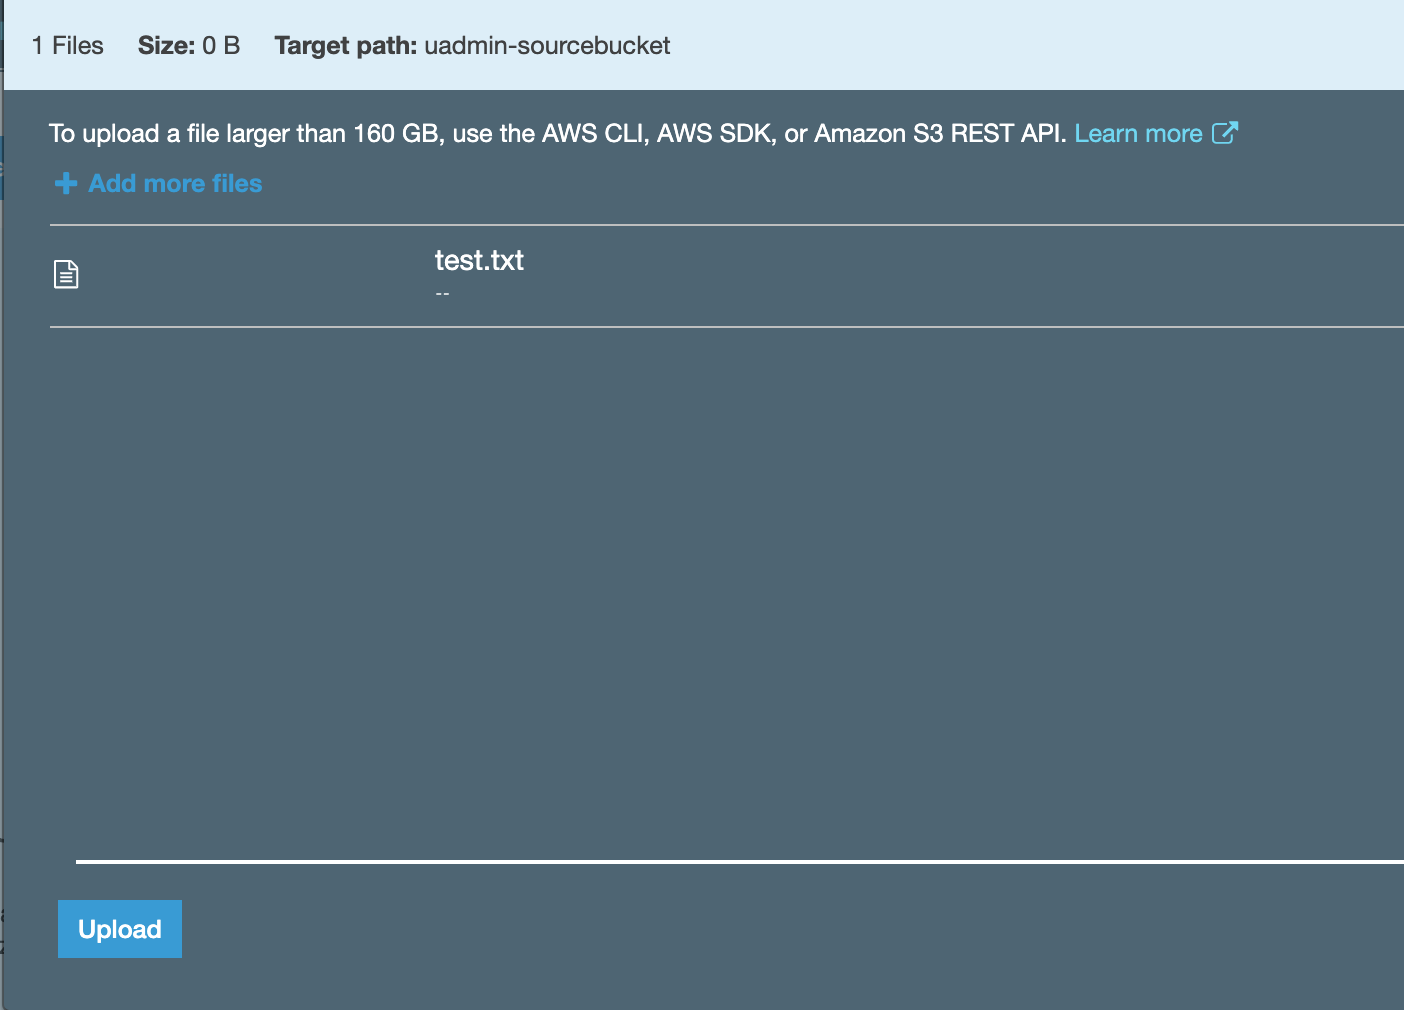
1.6. Now we want to add a file to our bucket. Click “Upload” and choose a single file from your local machine by clicking “Add files,” or just drag and drop the file here.

1.7. Once the file has been selected, click “Upload” to perform the actual upload.
1.8. Once the file is uploaded, log out of the source account.
1.9. Now log in to the AWS management console with the second, destination account. Create a destination bucket using the same procedure that we used to create the source bucket, with a globally unique name. The bucket can either be placed in the same or a different AWS Region.
2. Create an IAM Policy
Now that we have our two S3 buckets, we will create an IAM policy that gives read access to the source bucket and write access to the destination bucket.
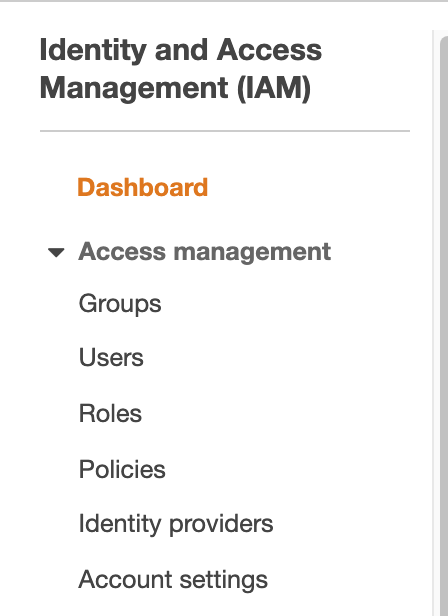
2.1. Go to the destination account’s Identity and Access Management (IAM) dashboard. From the Access management options, click “Policies.”
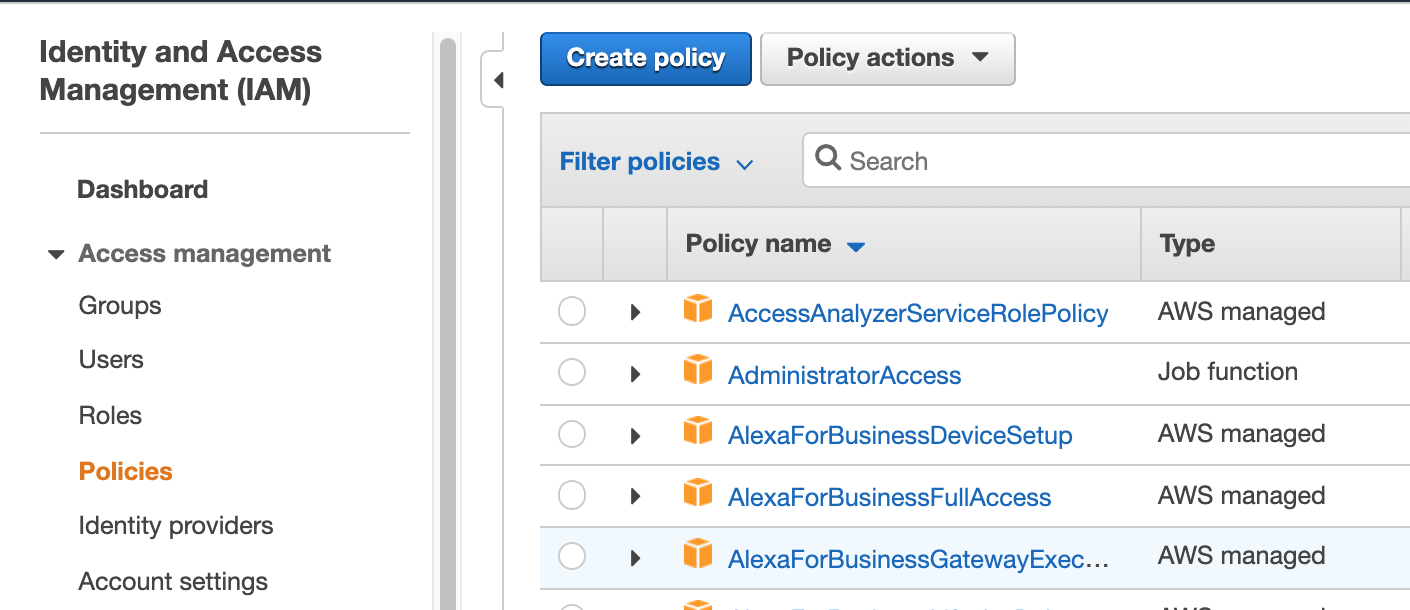
2.2. Click “Create policy” in the Policies window:
2.3. In the Create policy screen, select the “JSON” tab.

2.4. In the JSON editor, enter the following JSON code (make sure to use your source and destination bucket names):
{
  "Version": "2012-10-17",
           "Statement": [
     {
              "Effect": "Allow",
              "Action": [
                   "s3:ListBucket",
                   "s3:GetObject"
              ],
              "Resource": [
                 "arn:aws:s3:::uadmin-sourcebucket",
                 "arn:aws:s3:::uadmin-sourcebucket/*"
              ]
     },
     {
              "Effect": "Allow",
              "Action": [
                   "s3:ListBucket",
                   "s3:PutObject",
                   "s3:PutObjectAcl"
                 ],
                "Resource": [
                 "arn:aws:s3:::uadmin-destinationbucket",
                 "arn:aws:s3:::uadmin-destinationbucket/*"
                ]
           }
       ]
   }
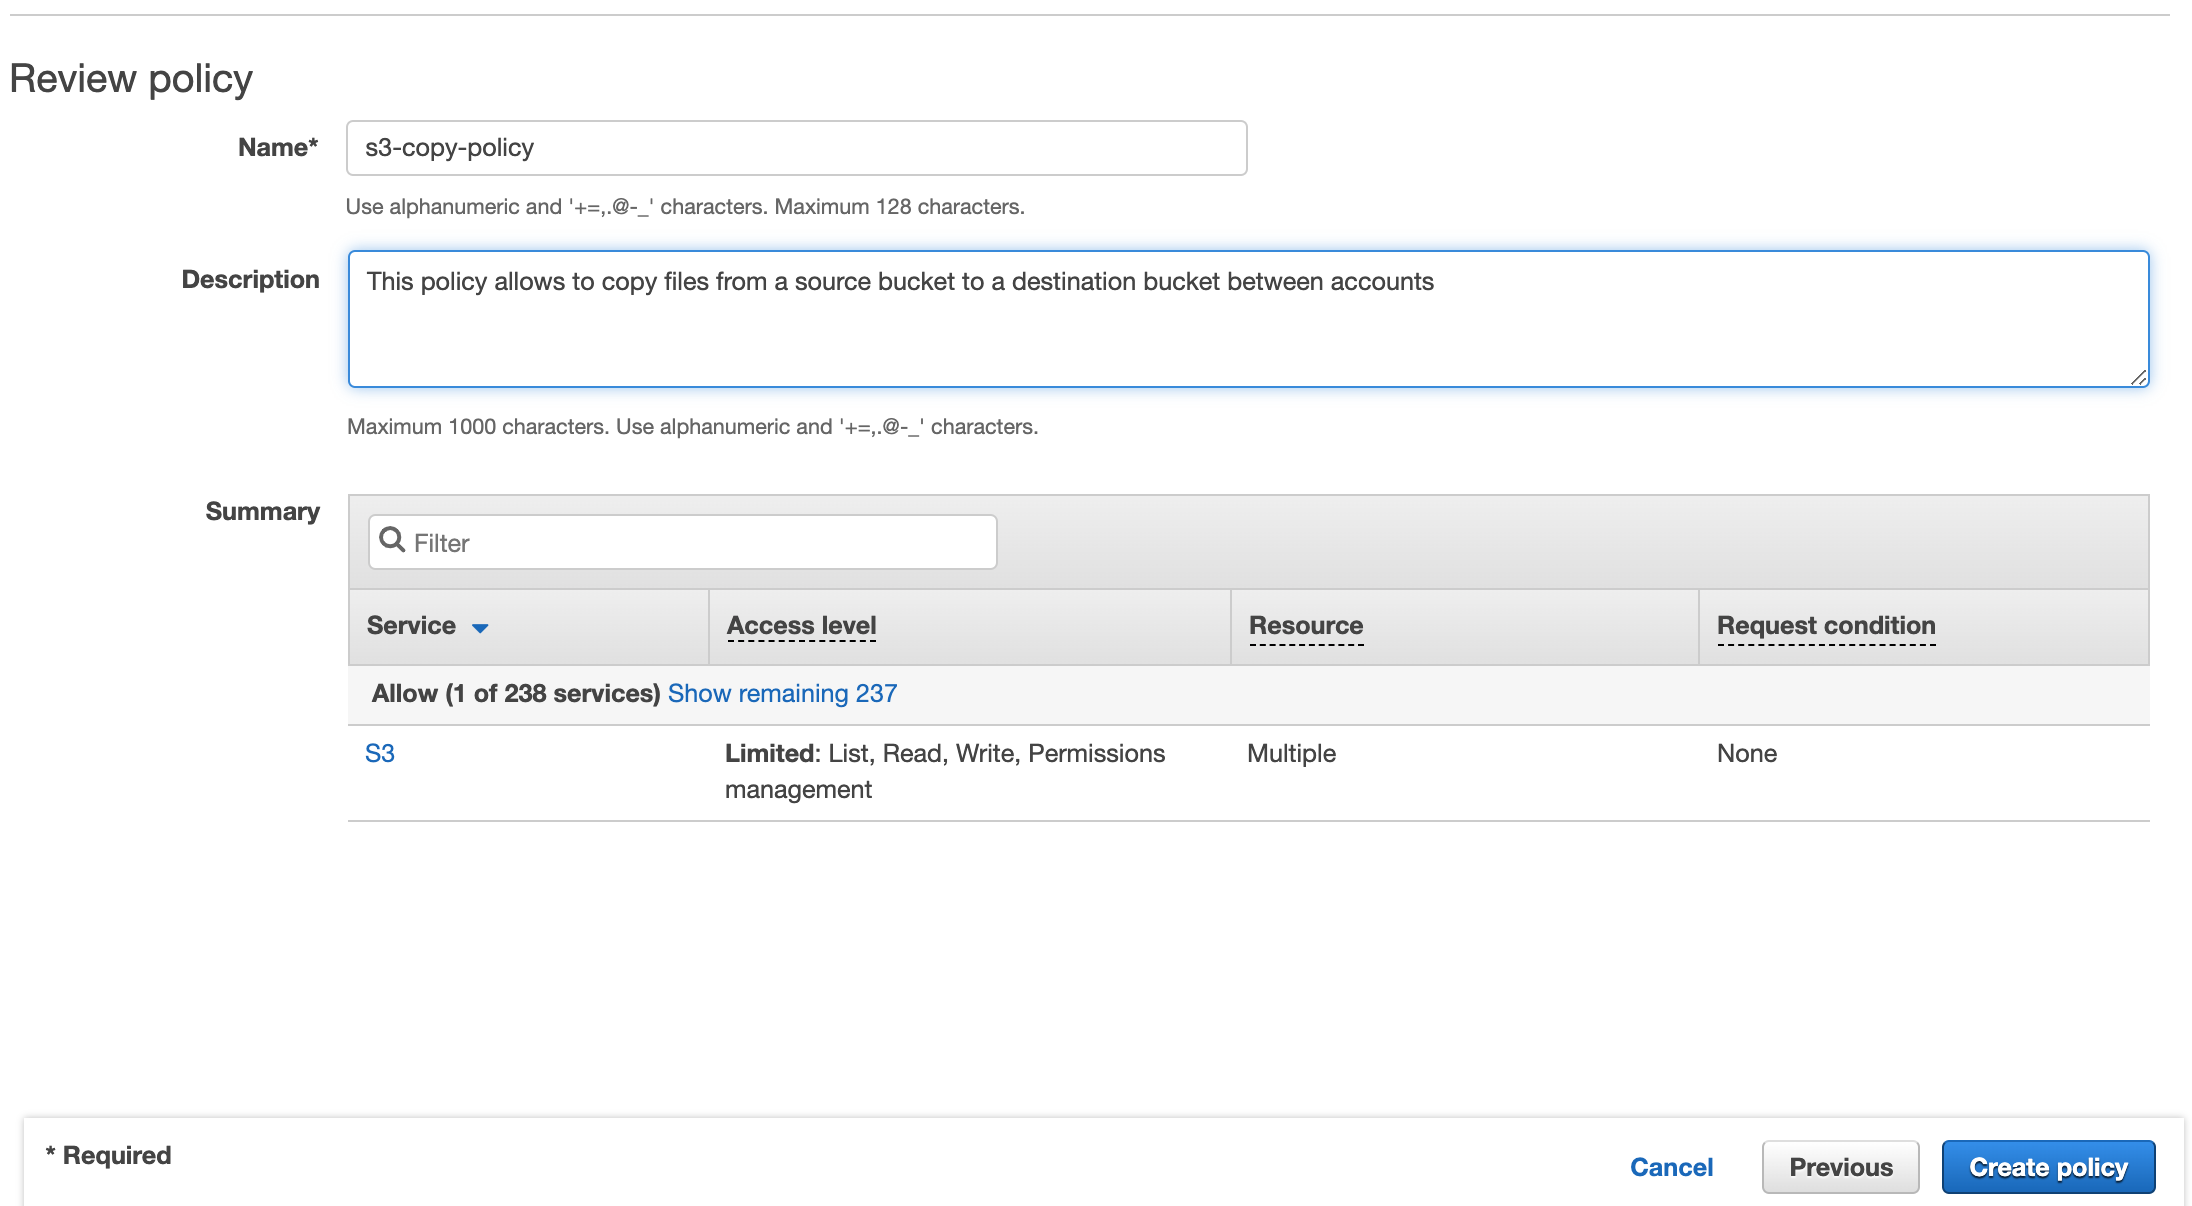
2.5. When you’re done, click on “Review policy.”
Make sure that the policy has a name that you’ll remember and then click “Create policy.”
3. Create an IAM User and Connect the IAM Policy
Now we will create a new IAM user. This user will copy the objects from the source to the destination bucket. First, we will connect the user to the policy we created. That will give the user programmatic access, and will be able to copy objects from the source to the destination bucket.
3.1. While you’re still logged in to the destination account, open the IAM dashboard again and select “Users” from the Access management drop down menu. On the Users screen, click “Add user.”
3.2. Give your new IAM user a name and select programmatic access. This is needed to access the buckets using the AWS CLI.

Click “Next: Permissions.”
3.3. Now we will connect the user to the policy we created earlier. Click “Attach existing policies directly.”
Enter the policy name in the ”Filter policies” search bar (“s3-copy-policy” in our example), checkbox the policy and click “Next: Tags”.

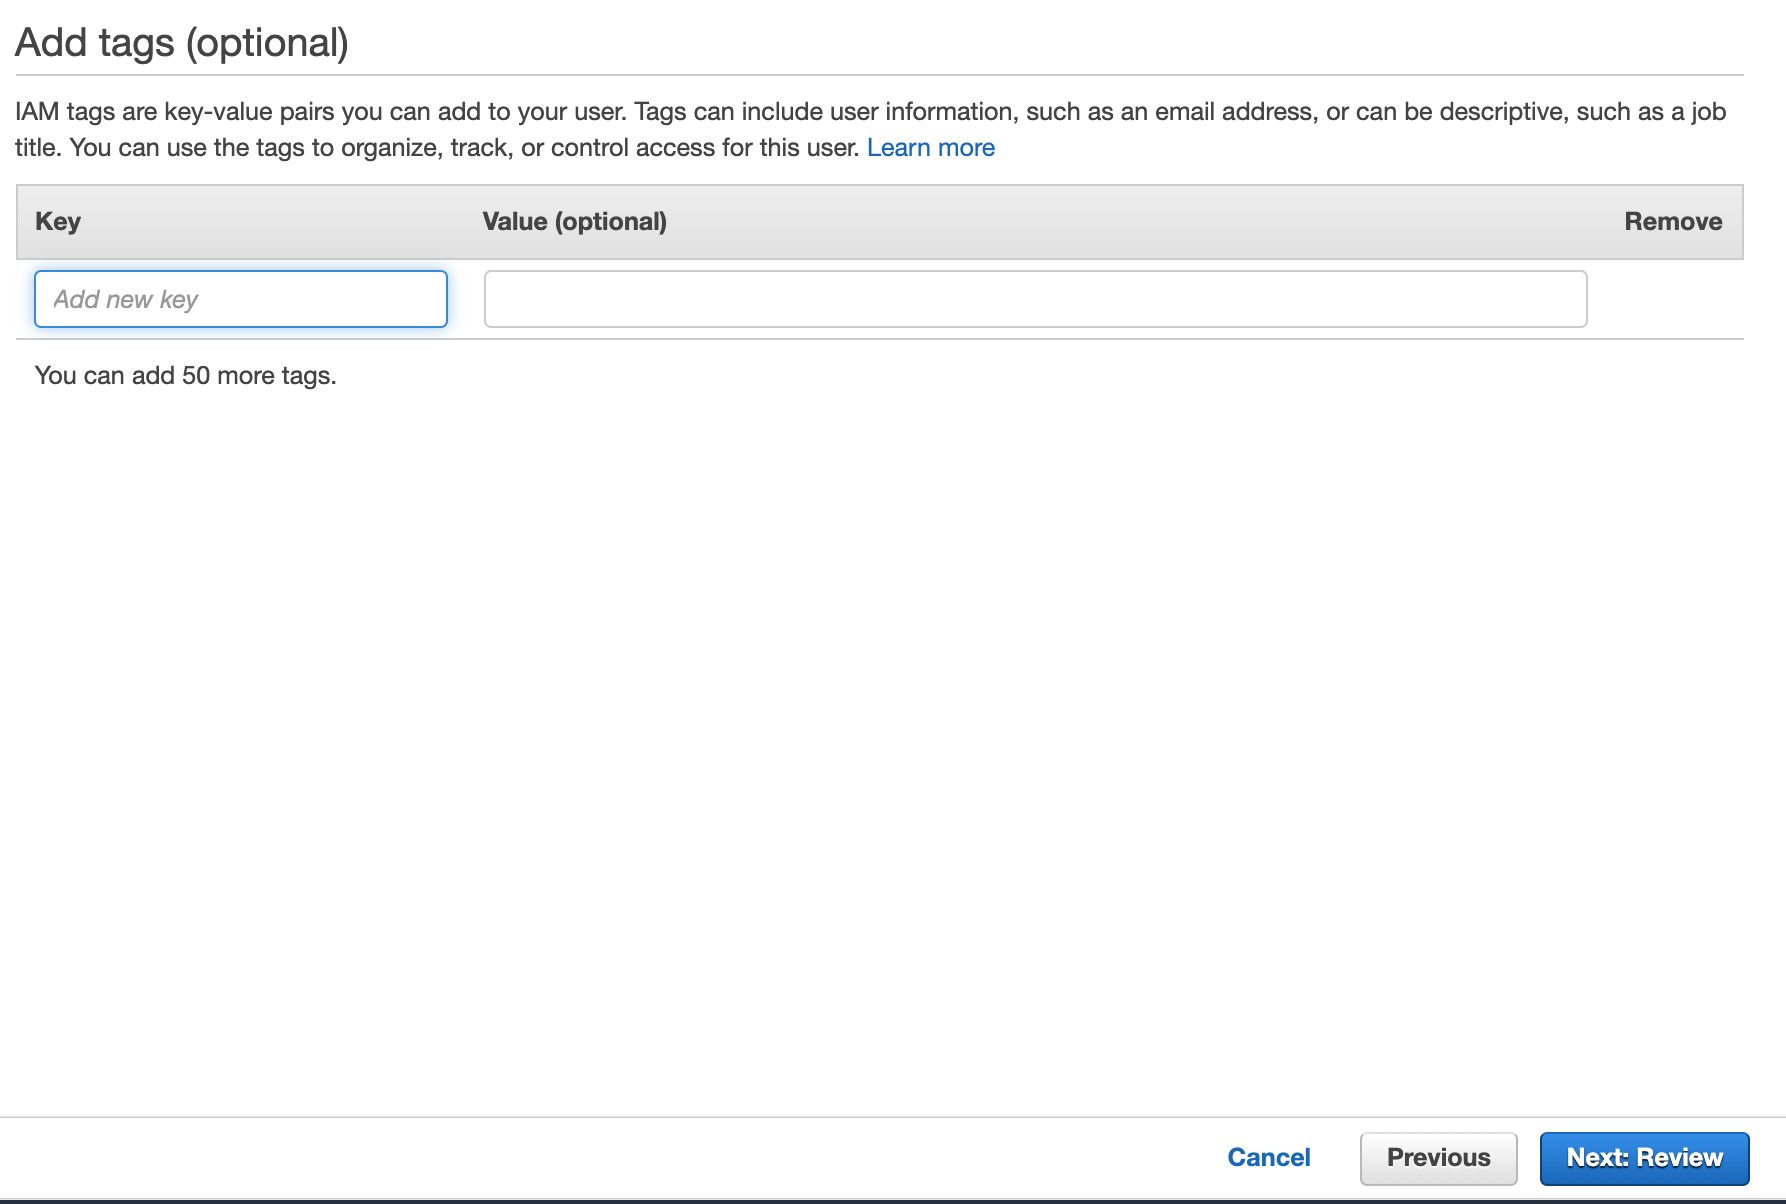
3.4. On the tags screen, click “Next: Review.”
3.5. On the review screen, make sure that all the information is correct and then click “Create user.”
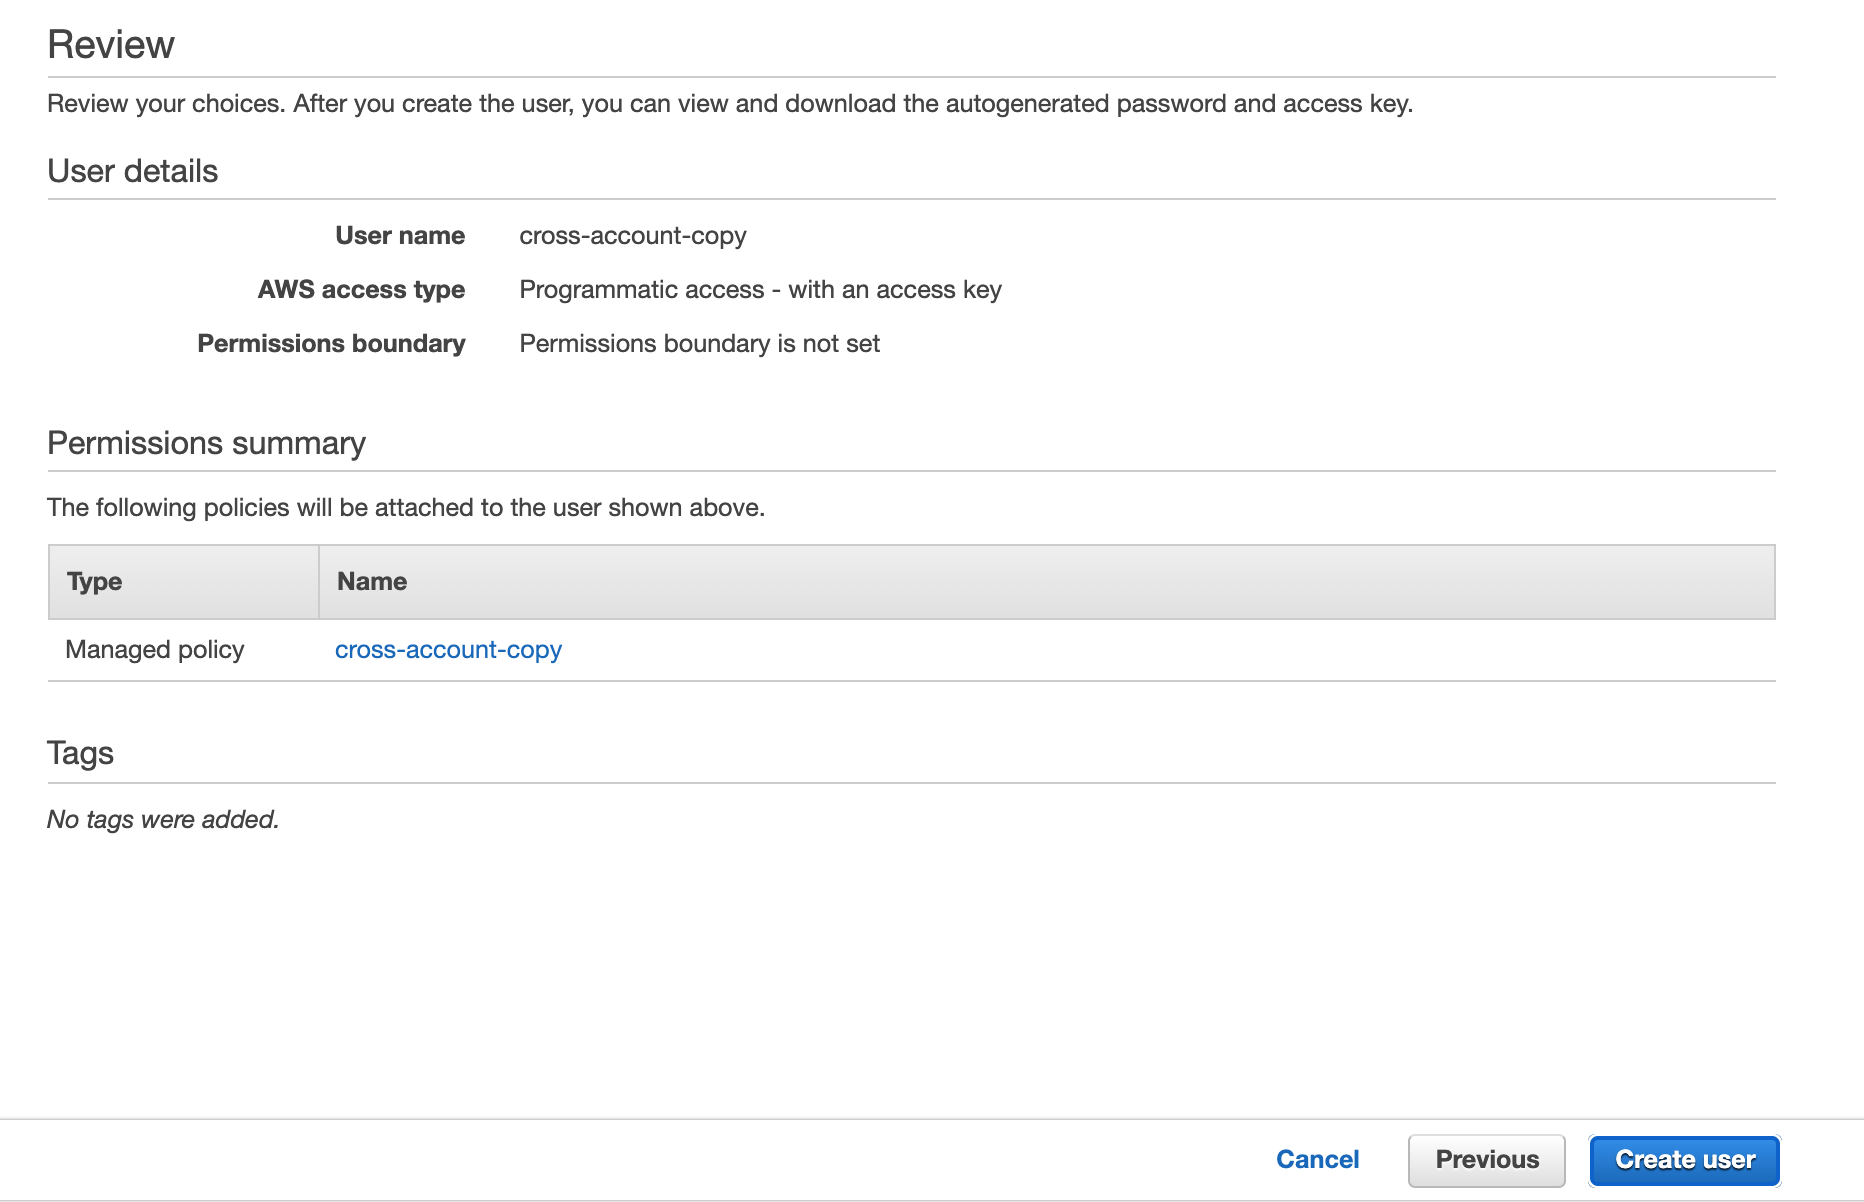
3.6. Once your new user is created, you’ll receive a success message that also includes your Access key ID and Secret access key. Make sure you store both your Secret key and the Access key ID someplace safe. These keys are going to be needed for programmatic access later.
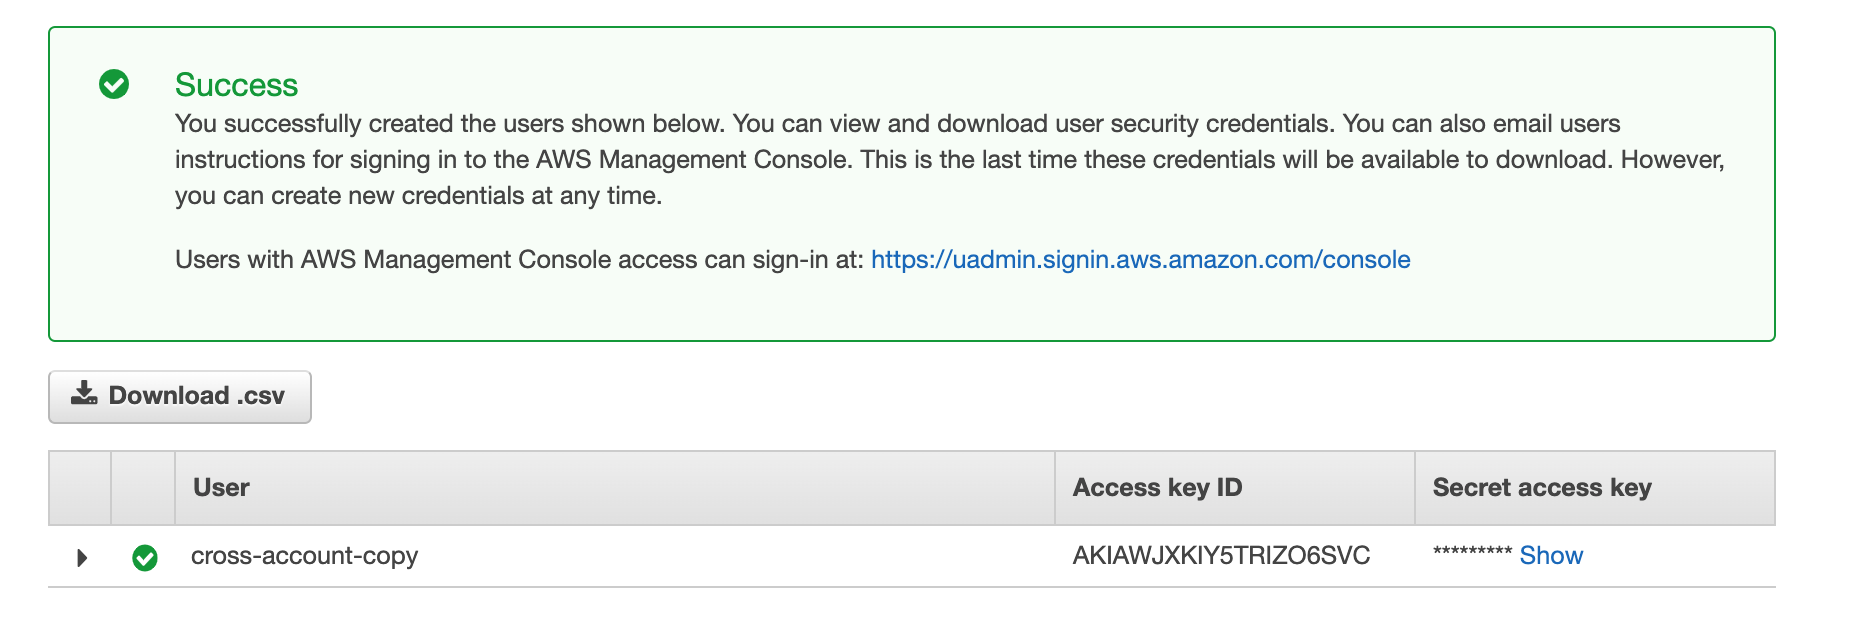
When you’re done, click “Close.”
3.7. Important: Before you log off, go to the AWS management console dashboard. Click on your user account name and then select “My Account.” Under Account Settings, find your Account ID. Store this ID. You will need it in step 4, below. You can now sign out from the destination account.
4. Create a Bucket Policy for the Source Bucket in the Source Account
Now that we have set up the destination account’s user that will copy objects from the source to the destination bucket, we have to allow the destination account to access the source bucket. This has to be configured in the source account.
4.1. First, log in to the source bucket’s AWS account.
In the Amazon S3 service, click on the source bucket name.
4.2. Click the “Permissions” tab.
4.3. Select the source bucket to create a bucket policy.
.png)
4.4. Move over to the Permissions tab and then select “Bucket Policy.”
4.5. In the bucket policy editor, enter the following code, but replace the example bucket names with your own and your destination account Account ID ( the code "AWS": "arn:aws:iam::01234567891:root":)
{
   "Version": "2012-10-17",
   "Statement": [
         {
            "Sid": "AllowCopy",
            "Effect": "Allow",
            "Principal": {
                 "AWS": "arn:aws:iam::01234567891:root"
              },
              "Action": [
                   "s3:ListBucket",
                   "s3:GetObject"
              ],
              "Resource": [
                   "arn:aws:s3:::uadmin-sourcebucket/*",
                   "arn:aws:s3:::uadmin-sourcebucket"
              ]
         }
   ]
}
When you’re done, click “Save.”
5. Copying an Object from the Source Bucket to the Destination Bucket
Prerequisite: We will use the AWS CLI tool to copy the object. To install and configure the AWS CLI, follow these instructions.
5.1. In the AWS CLI, open a command window, or terminal.
In order to be able to copy the object(s) from the source to the destination
bucket, you need the credentials of the user you created in step 3.
In Windows you can set the keys as follows:
SET AWS_ACCESS_KEY_ID=AKIAWJXKIY5E2GGG4BOR

SET AWS_SECRET_ACCESS_KEY=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
In Linux/Unix machines or Mac, you can set the keys as follows:
export AWS_ACCESS_KEY_ID=AKIAWJXKIY5E2GGG4BOR

export AWS_SECRET_ACCESS_KEY=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
5.2. Now, copy the objects from source to destination:
aws s3 sync s3://uadmin-sourcebucket s3://uadmin-destinationbucket
Summary
While copying objects between buckets owned by a single account is a regular part of using Amazon S3, it’s not as common to copy objects between different accounts. However, this important functionality does exist, and can be used for a number of important use cases, such as sharing data between different users, intra-AWS migrations for consolidating control over AWS accounts, and more.
In the walkthrough above you’ve learned how to copy objects between different AWS accounts using the S3 CLI, but there’s another way to do this with NetApp Cloud Volumes ONTAP. With Cloud Volumes ONTAP you can replicate and sync objects as well as files and block AWS EBS data across AWS accounts, regions, and hybrid or multicloud architectures. That gives you even more control over where and how you keep data in your enterprise cloud storage deployment.

