Share
Amazon FSx for NetApp ONTAP is a managed service that provides reliable and scalable file storage built on NetApp’s ONTAP system. FSx for ONTAP provides the same features and API operations of the NetApp system but integrated as a fully managed AWS FSx service, allowing for reliable, secure, and scalable storage in the cloud.
As more companies move their IT infrastructure to the cloud, storage options like Amazon FSx for NetApp ONTAP are essential. Using those resources is even easier with Red Hat Ansible Automation Platform, which offers the ability to automate provisioning and deprovisioning AWS FSx resources.
This article shows you how to automate FSx for ONTAP using the Ansible Automation Platform, giving you a repeatable and consistent way to provision and deprovision resources in AWS.
Jump ahead to a topic in this post:
- Prerequisites and Considerations
- Provisioning FSx for ONTAP Resources in AWS
- Deprovisioning
- What to Expect Next
Prerequisites and Considerations
In order to begin the process of automating FSx for ONTAP resources, there are some necessary components to facilitate this workflow.
-
The first thing to consider is the automation execution environment, a new feature of Ansible Automation Platform. An execution environment is a container that holds necessary automation content, dependencies, libraries, and the Ansible-core needed to run your Ansible Playbook.
In this case, we need an execution environment that contains the Red Hat Ansible Certified Netapp.Cloudmanager collection documentation (available at the Red Hat console). This collection allows you to create and delete Cloud Volumes ONTAP working environments, Connectors, volumes, and SnapMirror® copies for AWS, Azure, or GCP.
Create an execution environment in the Ansible Automation Platform named “NetApp EE” as an example, to perform the automation. For more information on this, check out how to create execution environments for Ansible Automation Platform here
 - Make sure your NetApp BlueXP account is available.
Go to https://cloudmanager.netapp.com/ to sign in or set one up.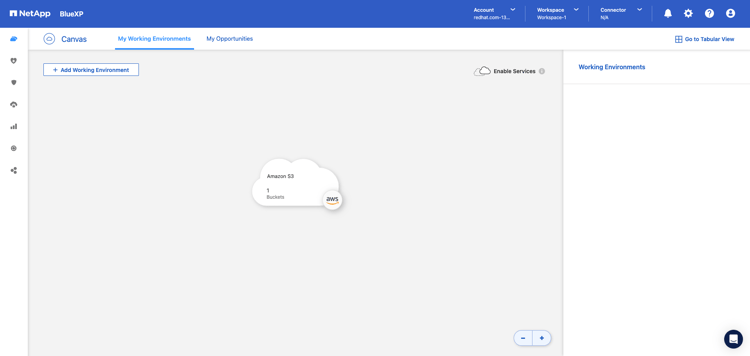
- Log into your AWS account and access the Amazon FSx Managed Service console.
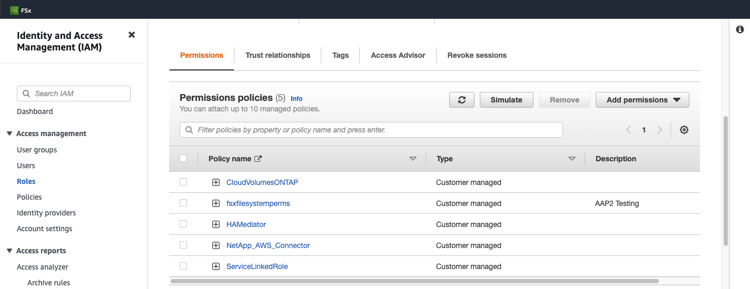
- Create a role via the IAM Console with the policies listed below, which are necessary to create and delete AWS FSx for ONTAP resources. For this implementation, a netapp_fsx role was created with the following policies:
- CloudVolumesONTAP
- Fsxfilesystemperms
- HAMediator
- NetApp_AWS_Connector
- ServiceLinkedRole
- Create a NetApp Connector (EC2 Instance) in AWS.
In this case, the Connector is running as an EC2 instance within the account and region. A connector is used to manage NetApp cloud resources using API functionality.
The Connector is configured to create ONTAP resources in the specified VPC. In this use case, the Connector is called AAPTE2. The Connector’s provisioning can also be automated using Ansible. Here’s an example playbook:
---
- name: Create NetApp AWS Connector
  hosts: localhost
  connection: local
  gather_facts: false
  tasks:
  - name: Creating NetApp AWS Connector
    netapp.cloudmanager.na_cloudmanager_connector_aws:
      state: present
      refresh_token: "{{ refresh_token }}"
      name: "{{ name }}"
      region: "{{ region }}"
      subnet_id: "{{ subnet_id }}"
      account_id: "{{ account_id }}"
      iam_instance_profile_name: "{{ iam_profile_name }}"
      security_group_ids: "{{ security_group_ids }}"
      key_name: "{{ key_name }}"
      company: "{{ company }}"
Provisioning FSx for ONTAP Resources in AWS
With all the prerequisites set up and configured, we’re ready to provision FSx for ONTAP resources in AWS. Now we can walk through automating the provisioning of working environments and volumes.
Provisioning Working Environments
In order to provision a volume, you first need a working environment where the volumes will live. The playbook below displays an example of creating a working environment.
---
- name: NetApp AWS FSx ONTAP Provisioning
  hosts: localhost
  connection: local
  gather_facts: false
  tasks:
  - name: Creating NetApp AWS FSx Working Environment
    netapp.cloudmanager.na_cloudmanager_aws_fsx:
      state: present
      refresh_token: "{{ refresh_token }}"
      name: "{{ name }}"
      region: "{{ region }}"
      workspace_id: "{{ workspace_id }}"
      tenant_id: "{{ tenant_id }}"
      storage_capacity_size: 1
      storage_capacity_size_unit: TiB
      aws_credentials_name: "{{ aws_credentials }}"
      primary_subnet_id: "{{ subnet_id_pri }}"
      secondary_subnet_id: "{{ subnet_id_sec }}"
      throughput_capacity: 512
      fsx_admin_password: {{ fsx_admin_password }}
      tags: [
        {tag_key: demo,
        tag_value: DEMO}]
It can take a few minutes for the working environment to provision. Once it’s finished, you’ll be able to find it in both the NetApp BlueXP and the AWS FSx consoles. You can create as many working environments as needed.
For storage capacity size and unit, the working environment can be configured using terabytes or gigabytes. Terabyte capacity can be set to 1, 2, 4, 8, 16 TB, and gigabyte capacity can be set as 100 or 500 GB.
The following are definitions of some of the collection module parameters, which are all described in the module documentation.
- name: Name of the working environment
- refresh_token: NetApp Cloudmanager API Token
- workspace_id: Workspace ID number found in NetApp CloudManager
- aws_credentials: AWS role created for FSx operations
- tenant_id: The NetApp account ID that the Connector will be associated with. This is only applicable to FSx.
Provisioning Volumes
Once the working environments are created, we need to create volumes within them. Storage capacity for volumes are in GBs, so in this case we’ll be provisioning NFS volumes of 100 GB.
Once these volumes are successfully provisioned, they can be mounted to the resources defined by the export_policy_ip parameter value. In the example below of creating an FSx for ONTAP volume, it will be mounted on EC2 instances that are in the 172.31.0.0/16 subnet.---
- name: Create NFS Volume on AWS FSX ONTAP Working Environment
hosts: localhost
connection: local
gather_facts: false
tasks:
- name: Create AWS FSX ONTAP Volume
netapp.cloudmanager.na_cloudmanager_volume:
state: present
name: "{{ volume_name }}"
size: "{{ size }}"
size_unit: "{{ size_unit }}"
working_environment_name: "{{ working_environment_name }}"
working_environment_id: "{{ working_environment_id }}"
tenant_id: "{{ tenant_id }}"
export_policy_type: "{{ exp_policy_type }}"
export_policy_ip: "{{ exp_policy_ip }}"
export_policy_nfs_version: "{{ exp_nfs_version }}"
client_id: "{{ client_id }}"
refresh_token: "{{ refresh_token }}"
volume_protocol: "{{ protocol }}"
snapshot_policy_name: default
provider_volume_type: "{{ volume_type }}"
Below are definitions of some of the collection module parameters:
- working_environment_name: Name of working environment
- working_environment_id: ID of working environment
- client_id: Connector ID
- export_policy_type: The export policy type, applicable to NFS protocol
- export_policy_ip: The list of IPs or subnets that will be allowed to mount these volumes
- export_policy_nfs_version: NFS volumes versions that are permitted to be exported
- volume_protocol: protocol for the volume
These are all also described in the module documentation.
Once the working environments and volumes have been provisioned, they’ll be displayed in both BlueXP and the AWS FSx consoles as shown below: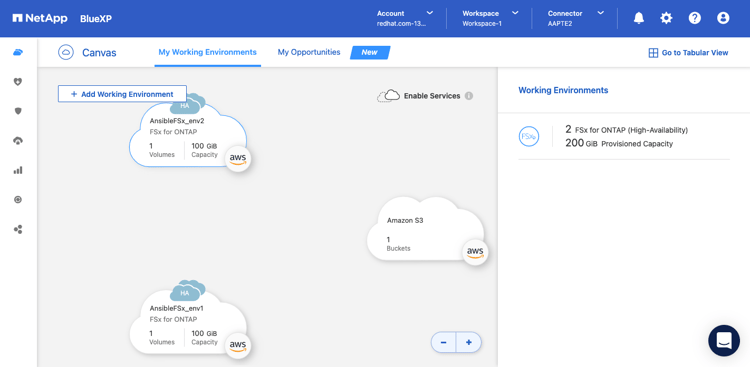 BlueXP Console Working Environment Canvas
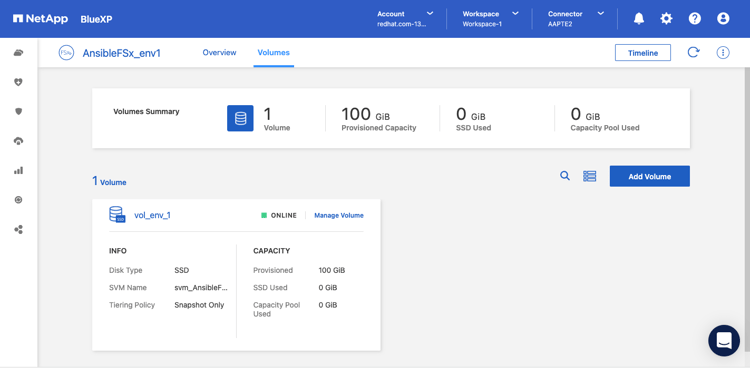 BlueXP Console Volume Management View
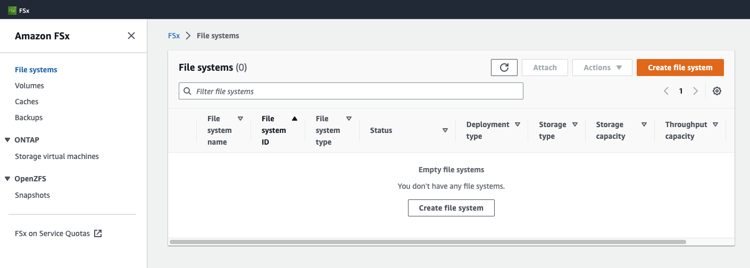
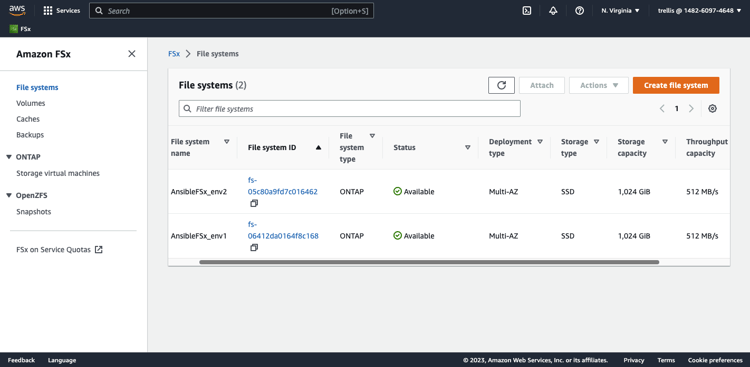 AWS FSx Console: Working Environments
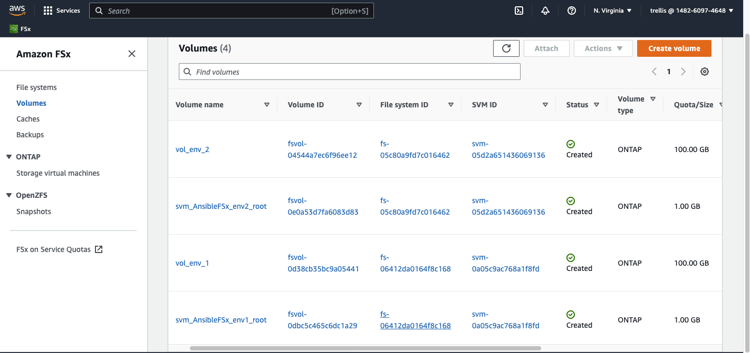 AWS FSx Console: Volumes
Deprovisioning
Since we used Ansible Automation Platform to provision our FSx for ONTAP resources, deprovisioning is pretty straightforward. We’ll utilize some of the same variables that were provided in the creation playbooks to delete the working environments and volumes.
The workflow should start with deleting all volumes first, then delete the working environments. Again, by using Ansible to automate the deprovisioning, there is a consistent and repeatable process to ensure the deletion of FSx for ONTAP resources. Here’s what the playbook for deleting volumes looks like:---
- name: Delete NFS Volume on Working Environment
hosts: localhost
connection: local
gather_facts: false
tasks:
- name: Delete Volume on Working Environment
netapp.cloudmanager.na_cloudmanager_volume:
state: absent
name: "{{ volume_name }}"
working_environment_name: "{{ working_environment_name }}"
working_environment_id: "{{ working_environment_id }}"
client_id: "{{ client_id }}"
refresh_token: "{{ refresh_token }}"
svm_name: "{{ svm_name }}"
tenant_id: "{{ tenant_id }}"
The svm_name is the storage virtual machine name, which can be found in the NetApp BlueXP Volume Management GUI.
The playbook for deleting work environments looks like this:---
- name: Delete NetApp Cloud Manager Working Env
hosts: localhost
connection: local
gather_facts: false
tasks:
- name: Delete NetApp AWS FSx
netapp.cloudmanager.na_cloudmanager_aws_fsx:
state: absent
refresh_token: "{{ refresh_token }}"
working_environment_id: "{{ working_environment_id }}"
name: "{{ working_environment_name }}"
tenant_id: "{{ tenant_id }}"
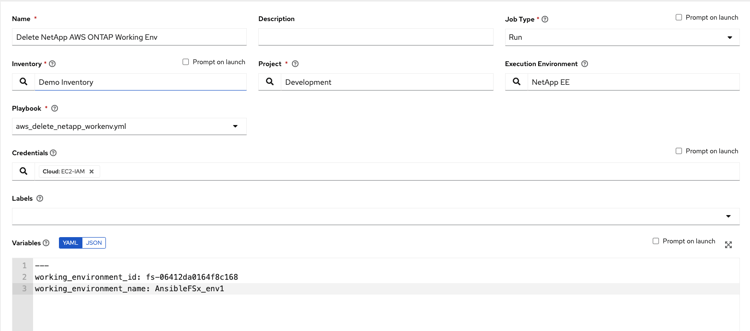 An Automation Controller job template to delete a Working Environment
What to Expect Next
Ansible has created a repeatable process of creating and deleting AWS FSx for ONTAP resources using the Ansible Automation Platform. To build upon what Ansible has already automated, we can now look into automating the creation of a SnapMirror between two volumes.
This allows you to replicate your data from a primary to secondary volume for disaster recovery purposes. This capability is part of the Red Hat Ansible certified netapp.cloudmanager collection.
Lastly, workflow templates can be created in the automation controller so that with a single automation job run, an FSx for ONTAP working environment and volume can be created in one continuous flow. Workflow templates show a visual display of automation tasks, ultimately creating an end-to-end process.

