Share
Kubernetes has fast become the platform of choice for many enterprises choosing microservices-based application deployments. Azure Kubernetes Service (AKS) is the managed service to help users onboard, deploy, and manage containerized applications with Kubernetes on Azure.
As containers are stateless, large scale enterprise AKS deployments require persistent volumes to preserve the application state. This data should also be protected from corruption or storage failures to ensure business continuity. In this blog we will explore the options of protecting your AKS cluster through native backup and restore capabilities.
Read on below as we cover:
- Persistent volumes for AKS
- Azure AKS backup and restore
- Reliable data protection with BlueXP Cloud Volumes ONTAP
- Summary
Persistent Volumes for AKS
A persistent volume (PV) exists independent of the lifecycle of a pod and is created and managed by the Kubernetes API. Stateful applications hosted in AKS would require persistent volumes attached to the cluster for the microservices to store and retrieve data.
There are different native options available in Azure to enable this, based on the data types and use cases involved. Azure Files can be used to mount SMB or NFS file shares to pods in AKS to cater to shared data requirements. Azure Blobs can also be a possible solution in this scenario by mounting them using the NFS protocol or BlobFuse. However, the most popular solution for persistent volumes is Azure managed disks.
Persistent volumes can either be statically or dynamically provisioned. For static volumes, an administrator needs to pre-provision all the volumes that will be needed, whereas dynamic volumes as the name indicates provisions volumes on demand, based on a defined StorageClass that maps to a specific Azure Storage type.
While both static and dynamic persistent volumes offer a solution to store data, neither implicitly guarantees data availability in the event of corruption or failure at the storage layer. Customers will have to implement additional data protection measures to ensure that data remains available and can be restored to a working state. As stateful applications in AKS depend on data in persistent volumes, this process becomes crucial to ensure business continuity. That’s where AKS Backup comes into play.
Azure AKS Backup and Restore
Organizations that use AKS for hosting microservices-based applications should factor in the persistent volume protection in their backup strategy. The native solution for protecting the data stored in AKS persistent volumes is Azure Backup.
What is Azure Backup?
Azure Backup is a fully managed cloud-based backup service offered by Azure. It provides a simple and cost-effective solution for protecting your data in the Azure cloud with point-in-time recovery. Azure Backup supports multiple use cases, for Azure, multicloud as well as for on-premises. In Azure the service can be used to protect VMs, File shares, HANA databases, SQL servers and Azure databases for PostgreSQL servers. The backups can be centrally managed and operated from the Azure Backup center.
How do I backup my AKS?
AKS users can turn to Azure Backup to protect Azure managed disks that are attached as persistent volumes in your clusters. The backup and restore process is initiated from the Azure Backup center.
Walkthrough: AKS Back Up and Restore with Azure Backup
In the following section we’ll show you how to back up and restore AKS persistent data using Azure Backup.
- Creating a Backup Vault
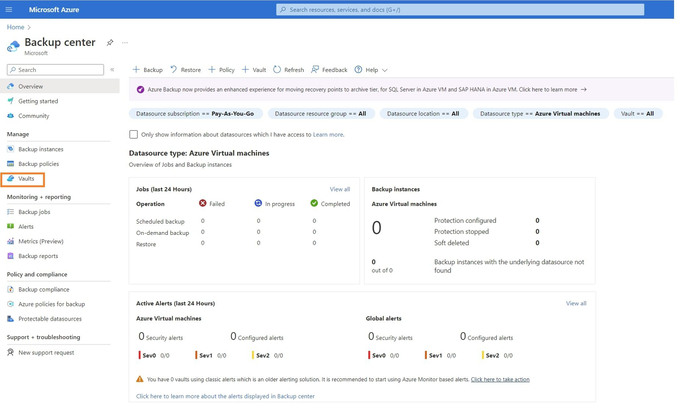
To start the AKS backup process, you first need to build a Backup vault. A Backup vault is the storage entity in Azure where the backup data is stored. Let us take a look at the step-by-step process for enabling the backup for managed disks via Azure Backup.
- Open the Azure Backup center from the Azure portal. Click on “Vaults” to create an Azure Backup vault for storing the backup.
Note that the below step is required only if you do not have an existing Backup vault that can be used for the managed disk backup process. If this applies to you, skip down to step 2.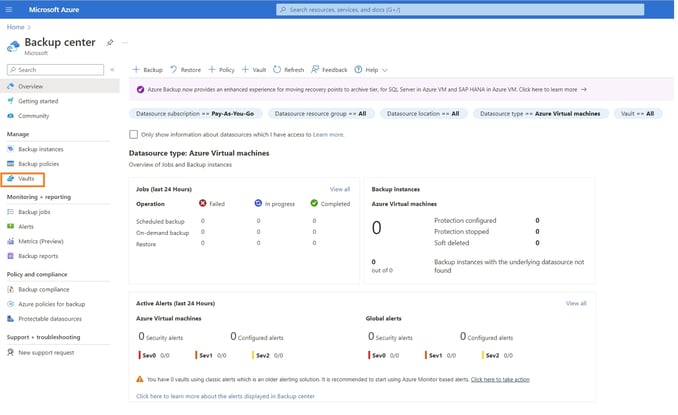
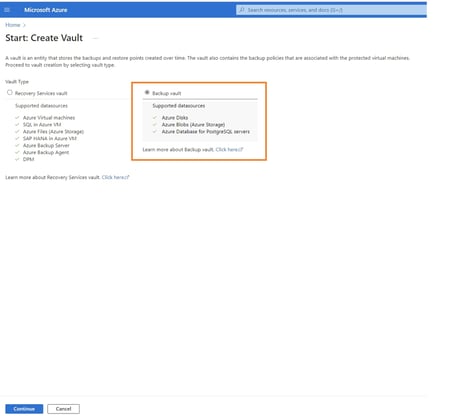
- Click on “+Vault” to create a new Backup vault.
- Select “Backup vault” and click continue.
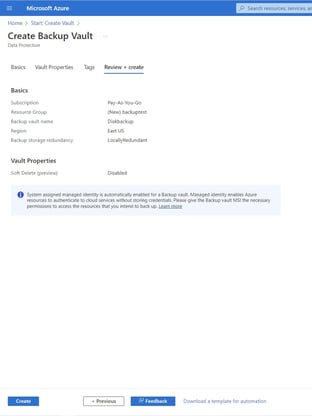
- Enter the Backup vault properties, i.e., vault name, region, resource group, and backup storage redundancy. Storage redundancy can either be locally redundant or globally redundant, based on your organization’s data resiliency requirements.
Click on “Review+create” to continue.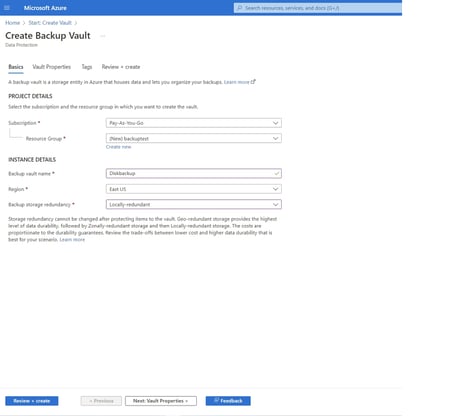
- Review the configuration and click on ‘Create” to complete the provisioning process.
- Open the Azure Backup center from the Azure portal. Click on “Vaults” to create an Azure Backup vault for storing the backup.
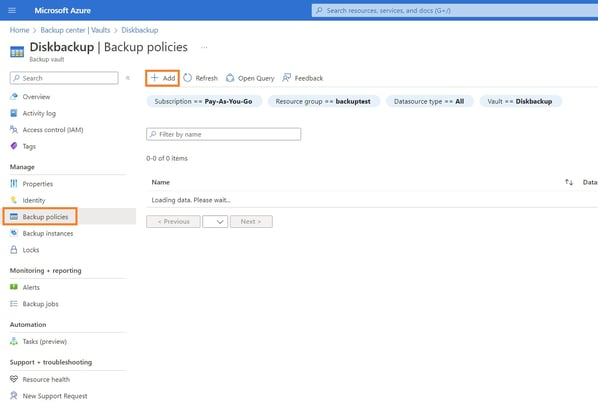
- Create a Backup Policy
Once provisioning is completed, the next step is to create a “Backup Policy.” This policy will be used to define the backup frequency and retention period of the backup.- Open the Backup vault from the Azure Backup center. Click on Backup Policies ->Add.
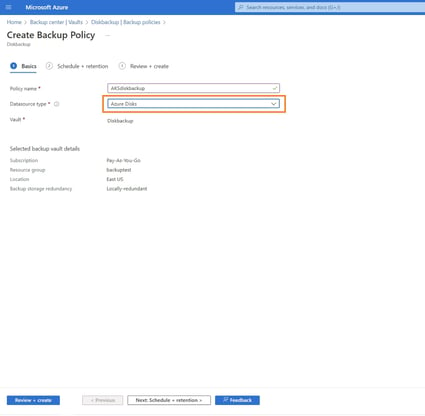
- In the basics tab, add the Policy name and select “Azure Disks” as the data source. Click on “Next:Schedule+retention” to continue.
- In the next window define the backup frequency, i.e., either daily or hourly, based on your required RPO. You can also add the retention period in this window or add a new retention rule by clicking the pencil icon.
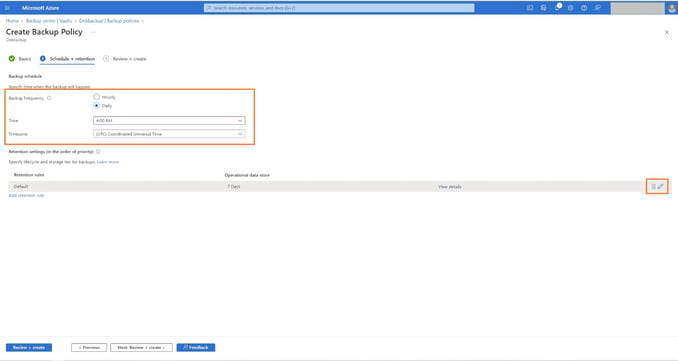
- The default retention duration is seven days, but that can be changed to suit your organization’s requirements. However, note that there is a limit of 500 incremental snapshots per disk, and Azure Backup has a max limit of 450 backups to accommodate on-demand backups as well.
Click on “Update” once the retention duration is configured.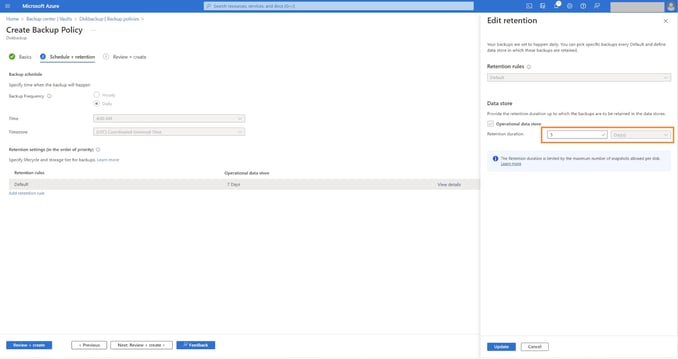
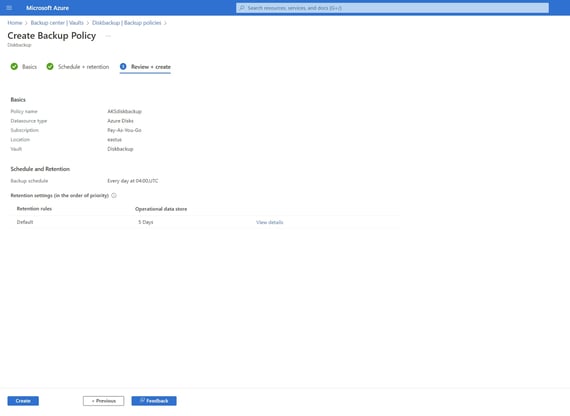
- Review the details of the backup policy and then click on “Create” to create the backup policy.
- Open the Backup vault from the Azure Backup center. Click on Backup Policies ->Add.
- Creating the Backup
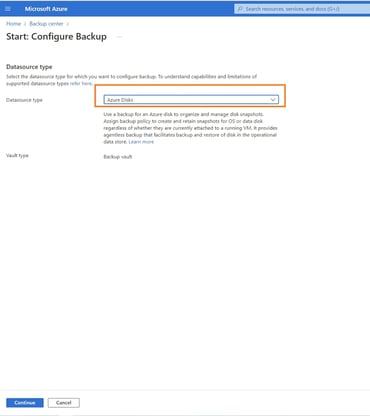
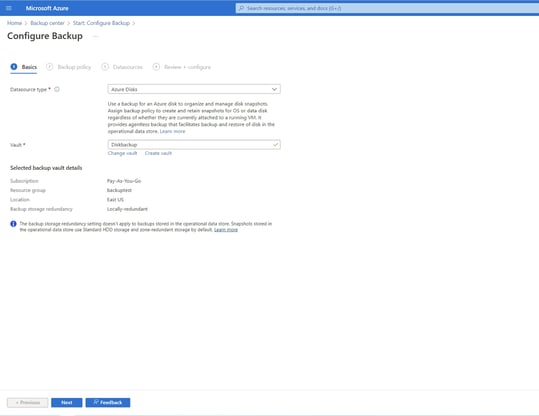
- In Backup center click on “+Backup” to configure backup of Azure managed disk that is configured as persistent volume in AKS. Select the data source as Azure disks and click “Continue” to proceed.
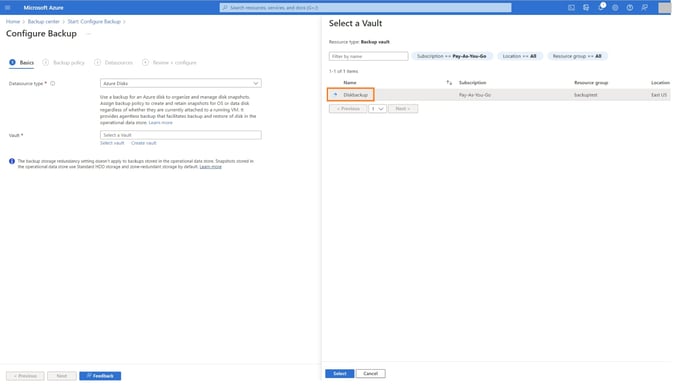
- Click on “Select Vault” and choose the Backup vault that was previously created in step 1.4, or your existing Backup vault.
- Click on “Next.”
- Select the “Backup Policy” created in step 2.5.
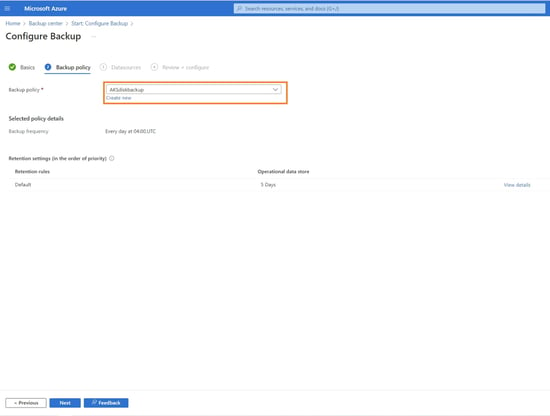
- Click on “Add” to add the disk as data source.
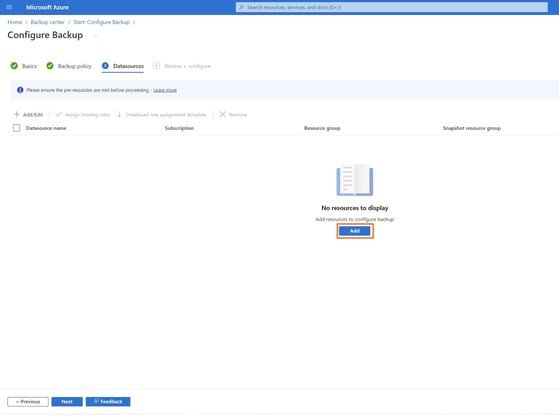
- Select the managed disk that is attached to the AKS cluster as a persistent volume.
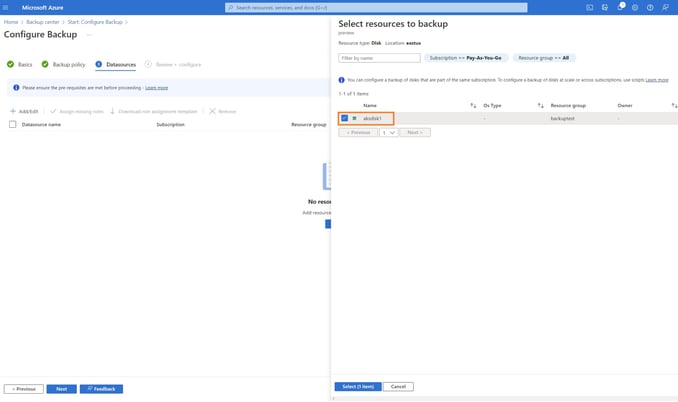
- Select the resource group where the snapshots will be stored. It is recommended to create a separate resource group for the backup to segregate the backup management. Click on “validate” to proceed.
The Backup vault managed identity should be assigned “Disk backup Reader” permission on the source disk to be backed up. Set the Disk Snapshot contributor role on the Azure Backup Service Resource group for the validation to succeed.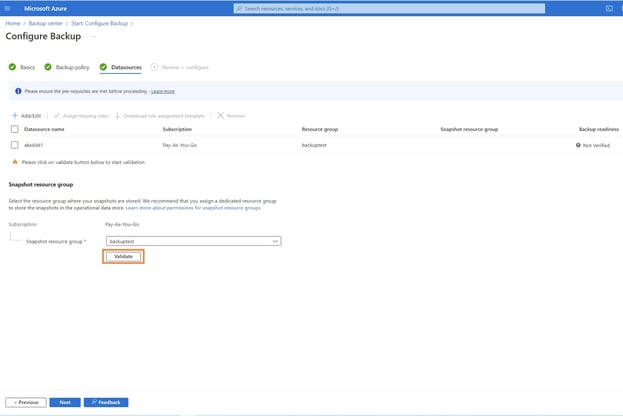
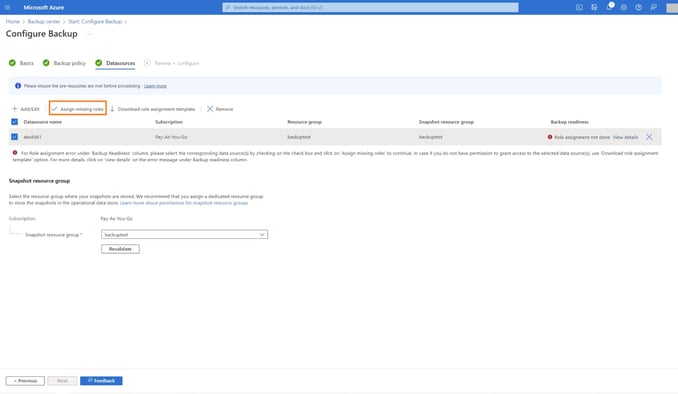
- If you get a validation error, select the disks and click “Assign Missing Roles” to assign roles.
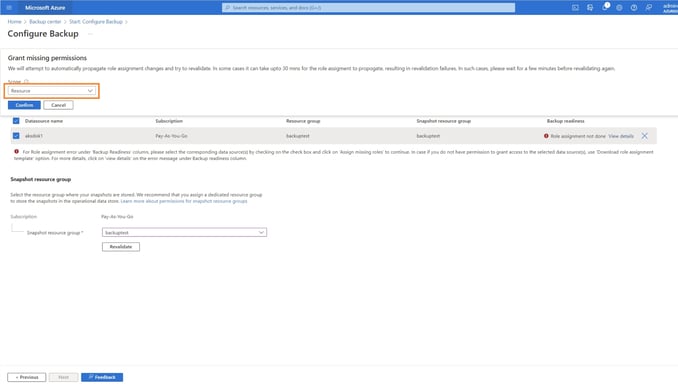
- Select the scope as “Resource” and click confirm to assign the role permissions.
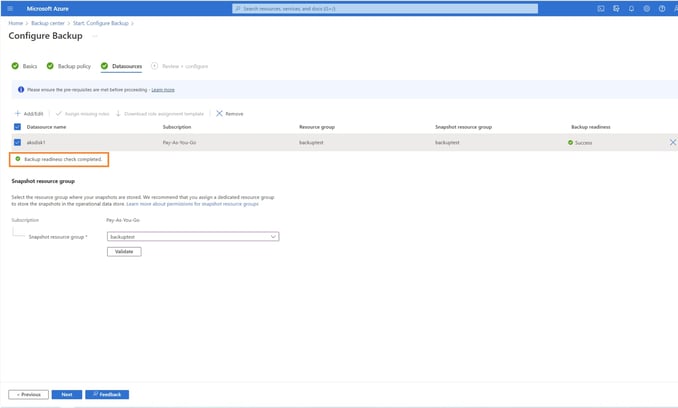
- Once the role is assigned, the backup readiness check will run automatically. Click on “Next” to continue.
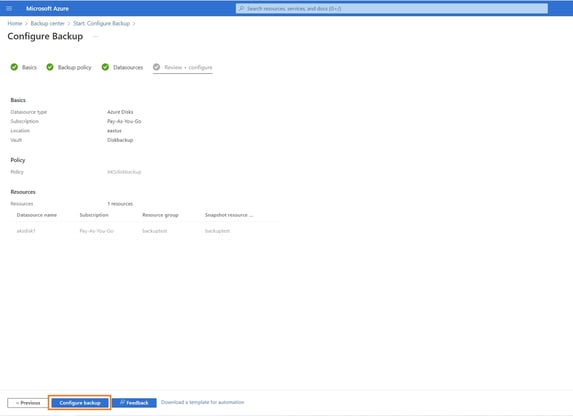
- Review the settings and click “Configure backup” to complete the backup configuration.
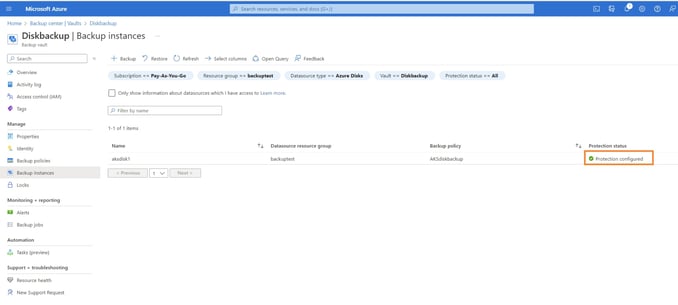
- If you browse to the Backup Vault ->Backup Instances, you can see the disk protection status.
- In Backup center click on “+Backup” to configure backup of Azure managed disk that is configured as persistent volume in AKS. Select the data source as Azure disks and click “Continue” to proceed.
- Restoring Backups with AKS
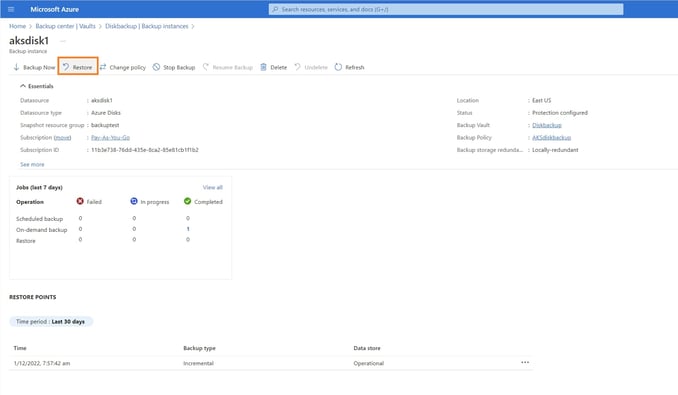
Now let’s take a look at the steps to be followed if you want to restore the persistent volume backup.- To restore the backup, browse to the Backup Vaults-> Backup instances and select the disk to be restored. Click on “Restore” to proceed.
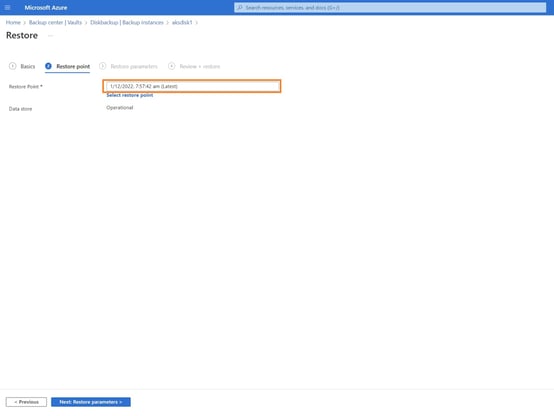
- Select the “Restore Point” to select the point-in-time backup copy that you want to restore. Click on “Next: Restore parameters” to continue.
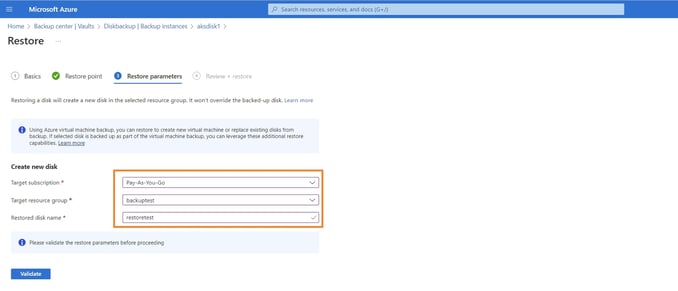
- Select the target subscription, resource group, and provide a name for the restored disk. Click on “Validate” next, and once the validation completes, click “Next:Review+Restore” to proceed.
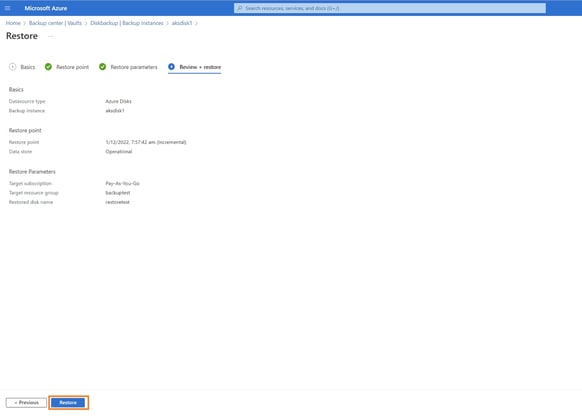
- Review the settings and click on “Restore” to start the restore process.
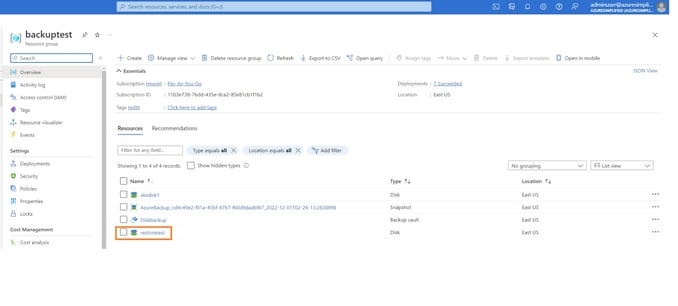
- Once the restore process is completed, you should be able to see the disk in the target resource group.
- To restore the backup, browse to the Backup Vaults-> Backup instances and select the disk to be restored. Click on “Restore” to proceed.
As part of your AKS recovery process, this can then be attached to a new or an existing cluster. For more on how to attach a persistent volume to an AKS cluster, check out Azure Kubernetes Service: Configuring Persistent Volumes in AKS.
Get More Data Protection with BlueXP Cloud Volumes ONTAP
Applications hosted on AKS can benefit from the trusted NetApp ONTAP storage protection capabilities through BlueXP Cloud Volumes ONTAP. Cloud Volumes ONTAP volumes can be mapped as persistent volumes on AKS clusters through NetApp Trident, the CSI provisioner for Kubernetes, adding unique data protection capabilities for persistent volumes not available natively on Azure.
- The data protection capabilities of Cloud Volumes ONTAP ensure that the clusters are resilient from data loss or corruption.
- You can create space-efficient backups using NetApp Snapshot™ technology and restore to target AKS clusters in any connected target environments.
- Block-level data replication through BlueXP replication can provide a number of benefits, from creating copies of volumes across different ONTAP environments for easy disaster recovery, to sharing data and collaborating across clouds.
- With the highly available Cloud Volumes ONTAP configuration, you can achieve zero data loss (RPO=0) and RTO of less than 60 seconds for your AKS persistent volume data.
Summary
Persistent volumes are an integral part of stateful applications hosted in AKS. You can leverage native storage options in Azure for provisioning this storage and use Azure Backup to protect them. You can further augment these with the enterprise-class storage capabilities and data protection features of Cloud Volumes ONTAP.
To read more about how organizations are benefiting from Cloud Volumes ONTAP for their Kubernetes deployments, read Kubernetes Workloads with Cloud Volumes ONTAP: Success Stories.

