Share
Organizations are always on the lookout for innovative solutions for workloads with file share dependencies in Azure. Azure Files is a managed file share service that can be used to provision SMB cloud file sharing in Azure.
This eliminates the need for organizations to build and manage file servers solely for the purpose of migrating workloads that are dependent on file shares. The required file shares for applications can be provisioned directly from the Azure portal or using one or the popular automation tools such as Azure PowerShell/CLI.
Azure file storage can be mapped to Windows, Linux, or MacOS machines that support the SMB protocol. File shares that can be accessed by multiple protocols are required in heterogeneous environments where Windows and Linux servers coexist. Centralized logging is a common use case where SMB file shares would be required to be mounted on Linux servers. This blog will cover the prerequisites and steps for mapping Azure files as SMB mount in the Ubuntu Linux operating system.
Prerequisites in the Linux Device
Microsoft recommends using the SMB 3.0 protocol for mounting file shares, as it supports encryption in transit. Azure Files need encryption in transit when the file shares are mounted from on-premises or from other Azure regions. SMB 2.1 can be used for machines in the same Azure region as the file share; however, this is not recommended, as SMB 2.1 does not support encryption in transit. SMB 3 with encryption is built into Linux operating systems with kernel version 4.11. This includes popular distributions of Linux like Ubuntu 16.04+ , RHEL 7.5+, CentOS 7.5+, Debian 10+ and OpenSUSE 42.3+. In this blog, we will be using Ubuntu 16.04 to run through the steps of adding Azure Files as an SMB mount
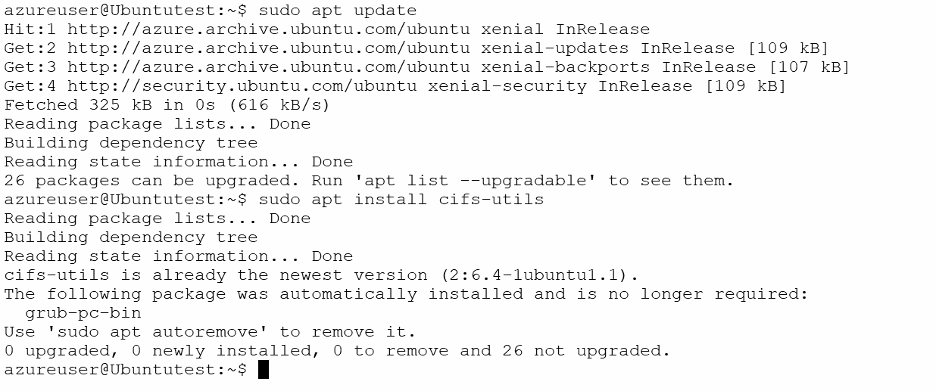
Installing the cifs-utils package is a prerequisite for mounting the share on your Linux machine. This package can be installed using the package manager utility in Ubuntu with the following commands:
sudo apt update
sudo apt install cifs-utils
How to Create a File share
Once your prerequisites are set up, you’ll start by creating the file share. For the example in this blog we are using the Azure CLI executed from Azure Cloud Shell to create the file share.
- Create the resource group for the Azure storage:
az group create --name <resourcegroupname> --location <azureregion>
Replace <resourcegroupname> and <azureregion> with the name of the resource group and the Azure region.

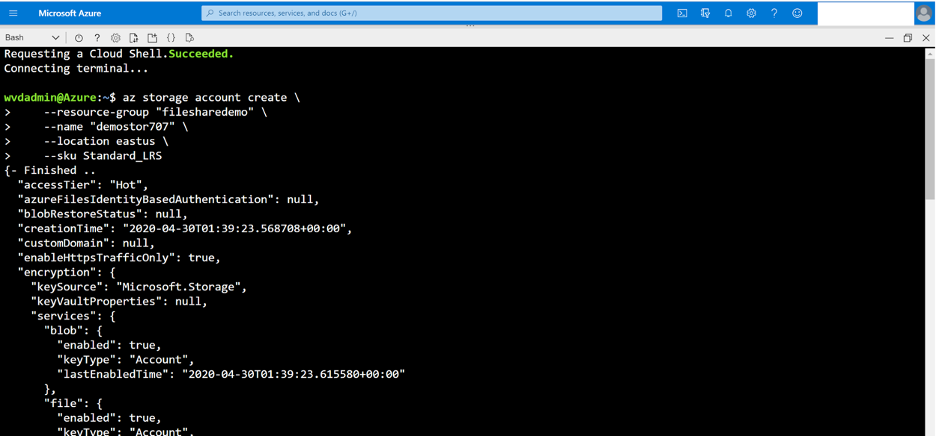
- Create Azure storage using the following command:
az storage account create \
    --resource-group "<resourcegroupname>" \
    --name "<storacctname>" \
    --location eastus \
    --sku Standard_LRS
Replace <resourcegroupname> with the name of the resource group created in the previous step and <storacctname> with your preferred name for the storage. Note that the storage account name should be unique for the command to work.
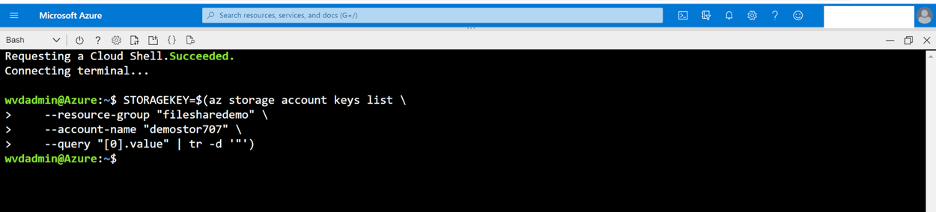
- Retrieve the storage key of the Azure storage created in Step 2 and store it in a variable named STORAGEKEY:
STORAGEKEY=$(az storage account keys list \
    --resource-group "<resourcegroupname>" \
    --account-name "<storacctname>" \
    --query "[0].value" | tr -d '"')
Replace <resourcegroupname> with name of resource group of the storage and <storacctname> with the name of the storage account created in step 2.
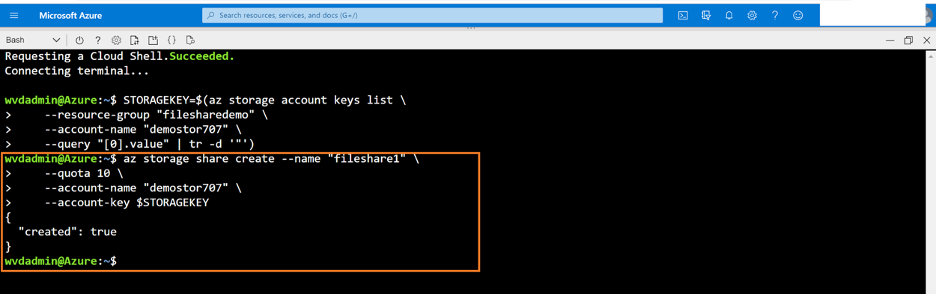
- Create your file share using the following command:
az storage share create --name "<filesharename>" \
    --quota 10 \
    --account-name "<storacctname>" \
    --account-key $STORAGEKEY
Replace <filesharename> with the name of the file you want to create and <storacctname> with the name of the storage account. Note that only lowercase letters, numbers, and single hyphens are allowed in file share names. Note that $STORAGEKEY will have the storage key that we retrieved in step 3.
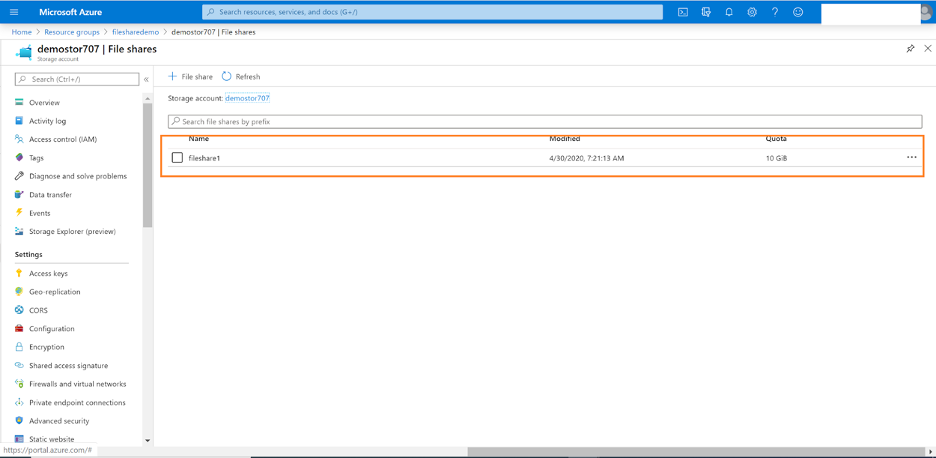
- The file will now be created. If you open the storage account from the Azure portal and navigate to File service->Fileshares, the file share we created in step 4 will be listed:
Mounting the File Share in the Linux Machine
The Linux machine should be able to communicate with the Azure file share over SMB share port 445. Once the connectivity is tested, we can create a mount point and mount the file share in the Linux OS.

- Install Azure CLI in the Ubuntu machine and connect to your Azure subscription. Read the instructions on how to connect your Azure subscription here.
- Update the following variable with the name of your resource group and the storage account name that we used in the previous section:
~$resourceGroupName="<resourcegroupname>"
~$storageAccountName="<storacctname>"
Check the connectivity to the file share over port 445 using the following commands. These commands will retrieve the file share endpoint and check connectivity from the machine using the nc command:
~$httpEndpoint=$(az storage account show \
    --resource-group $resourceGroupName \
    --name $storageAccountName \
    --query "primaryEndpoints.file" | tr -d '"')
~$smbPath=$(echo $httpEndpoint | cut -c7-$(expr length $httpEndpoint))
~$fileHost=$(echo $smbPath | tr -d "/")
~$nc -zvw3 $fileHost 445
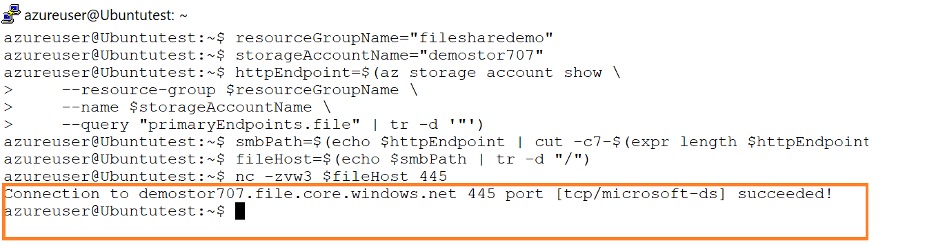
You should get a message saying the connection succeeded as output if the machine is able to connect to SMB share over port 445.
- Create an additional variable with the name of the file share that is to be mounted. This is the same file share that we created in the previous section:
~$fileShareName="<filesharename>"
Run the following command to create a folder that will be used as the mount point:
~$mntPath="/mnt/$storageAccountName/$fileShareName"
~$sudo mkdir -p $mntPath
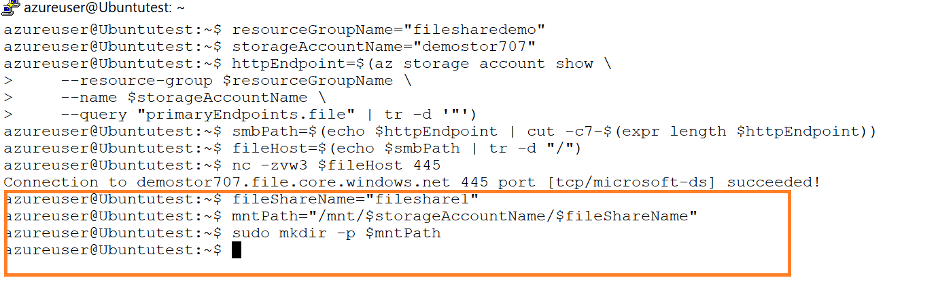
Note: The folder will be created with default permission of 0755; i.e. the owner will have read, write and execute SMB share permissions for members of the owner group, and read and execute permissions for all other users. It is recommended to further update the permissions based on the security requirements required.
- Retrieve the SMB path of the file using the following command:
~$smbPath=$(echo $httpEndpoint | cut -c7-$(expr length $httpEndpoint))$fileShareName
Retrieve the storage key that will be used to add the file share as an SMB mount:
~$storageAccountKey=$(az storage account keys list \
    --resource-group $resourceGroupName \
    --account-name $storageAccountName \
    --query "[0].value" | tr -d '"')
The mount share itself is carried out using the following command:
~$sudo mount -t cifs $smbPath $mntPath -o vers=3.0,username=$storageAccountName,password=$storageAccountKey,serverino

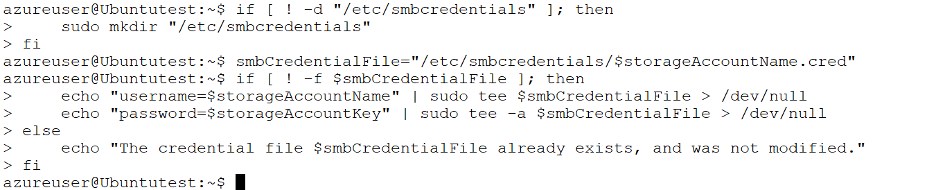
- To create a persistent mount point we need to make an entry in the /etc/fstab. This configuration needs the storage credentials to be available in a credential file.
Run the following command to create a credential file and add the storage credentials:
if [ ! -d "<credentialpath>" ]; then
    sudo mkdir "<credentialpath>"
fi
<credentialfilevariable>="<credentialpath>/$storageAccountName.cred"
if [ ! -f <credentialfilevariable> ]; then
    echo "username=$storageAccountName" | sudo tee <credentialfilevariable> > /dev/null
    echo "password=$storageAccountKey" | sudo tee -a <credentialfilevariable> > /dev/null
else
    echo "The credential file <credentialfilevariable> already exists, and was not modified."
Fi
Note: Replace <credentialpath> with a path name for the credential file and <credentialfilevariable> with a variable name to store the path name. This command leverages the $storageaccountname variable created in step 2 and $storageAccountKey created in step 4:
- Update the permissions of the credential file that was created in step 5 so that access is restricted to the root user:
sudo chmod 600 $smbCredentialFile

- Run the following commands to add the mount point information in fstab. This will create a persistent SMB mount in Ubuntu the share:
if [ -z "$(grep <smbpathvariable>\ <mountpathvariable> /etc/fstab)" ]; then
    echo "$smbPath $mntPath cifs nofail,vers=3.0,credentials=<credentialfilevariable>,serverino" | sudo tee -a /etc/fstab > /dev/null
else
    echo "/etc/fstab was not modified to avoid conflicting entries as this Azure file share was already present"
>Fi
sudo mount -a
Note: Replace <credentialfilevariable> with the credential file variable used in the previous step. This command also uses the <smbpathvariable> variable created in step 4 and the <mountpathvariable> variable created in step 3:

The command returned without any message, which means the entry was added in /etc/fstab.
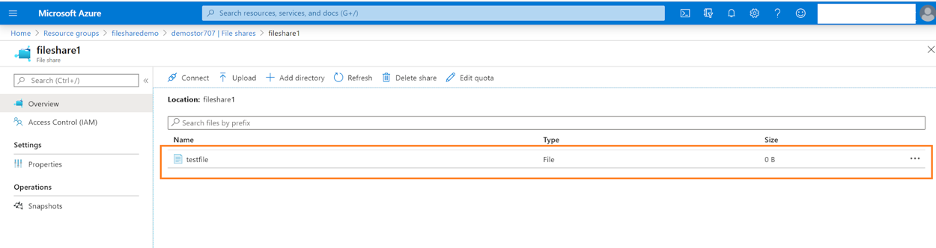
- To test the SMB mount in Ubuntu server, let’s create a test file. Use the following commands to browse to the mount point in the server and create a file:
cd /mnt/<storageAccountName>/<fileShareName>
sudo touch <testfile>
Replace <storageAccountName> and <fileShareName> with the storage account name and file share name that were used to create the mount path. Replace <testfile> with name of the test file.

- To make sure the file was created, open the storage account from the Azure portal and navigate to File service->Fileshares. The file will be listed there:
Conclusion
While this process is easy to carry out, it’s not a built-in feature with the managed file service offerings available in Azure. Organizations that are looking for integrated multiprotocol file share support can leverage NetApp Cloud Volumes ONTAP service to meet their SMB-share Linux requirements in Azure.
Beyond support for both SMB and NFS file shares deployed on Azure VMs, Cloud Volumes ONTAP also enhances Azure deployments with storage efficiencies that cut Azure storage costs for better Azure cost management, a unified management portal for configuring and managing storage systems deployed on-premises and in cloud, and data replication and snapshot technologies that can seamlessly protect and migrate SMB file shares in an Azure migration.
Cloud Volumes ONTAP is a reliable add-on to your Azure Cloud storage portfolio as it delivers enterprise data management capabilities and data protection all the while ensuring optimal storage spend.
