Share
When it comes to storing data in the cloud, organizations need flexible and scalable storage solutions that won’t impact live production workloads.
Azure offers this capability by making it possible to change the disk size of a virtual machine on the fly with live workloads, providing needed capacity without affecting user experience.
Ready to resize a disk in Azure? This blog will provide a step-by-step guide on the process of increasing the disk size in Azure without incurring any downtime.
Use the links here to jump down to the sections on:
- What Is an Azure Disk Resize?
- Expand Volumes in the OS Configuration After an Azure Disk Resize
- Looking for Even More Scalability on Azure? Try BlueXP Cloud Volumes ONTAP
- FAQs
What Is an Azure Disk Resize?
Once a VM is created in Azure, you can update both its operating system and resize any data disks attached to it, making the disk size larger. But before you make any changes to your disk size, there are some important factors to consider first:
- You can only increase the size of the disks, and once allocated that new size can’t be decreased.
- Though both OS and data disks can be resized, only data disks can be resized without downtime.
- When resizing small disks up to 4 TB or more, the VM should be deallocated first.
- Disk resizing is not supported for certain disk types. These include ultra disks, Premium SSD v2 disks, and shared disks.
- All VMs have constraints on the maximum disk size that can be attached, which means you should make sure the new disk size is supported by the VM machine type you’re using.
- You should also check the limits and quotas of your Azure subscription to support the updated disk configuration.
With those considerations out of the way, resizing a VM disk in Azure is a fairly straightforward process that can be done either via the Azure Portal, Azure CLI, or Azure PowerShell. It is a two-step process. The first part is to change the disk size itself. After that you need to make the disk available in the operating system so that applications hosted in the VM can start using the additional capacity.
How Do I Resize a VM Disk?
The first step in an Azure Disk resize operation is to increase disk size. Follow the below steps to increase the data disk size of a VM in Azure. For this example we are using the Azure Portal, though the Azure CLI or Azure PowerShell can also be used.
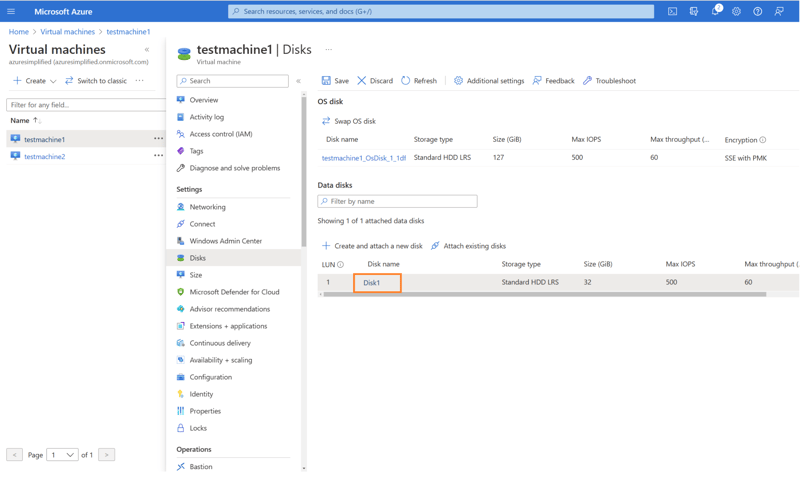
- In the Azure Portal, browse to Settings->Disks and click on the disk that you want to resize.
- When the disk details window appears, click on Settings->Size+Performance. Select the new size of the disk and click on save. In this demo, we are selecting 64 GB as the new size of the disk.
Note: You can also type in a custom disk size, if you need less than 64 GB, but do note that charges will be incurred for the predefined disk SKU size irrespective of the custom size being used.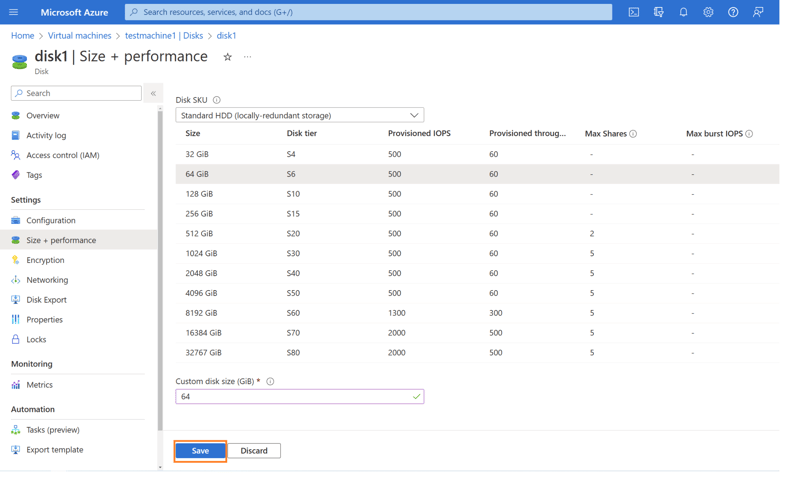
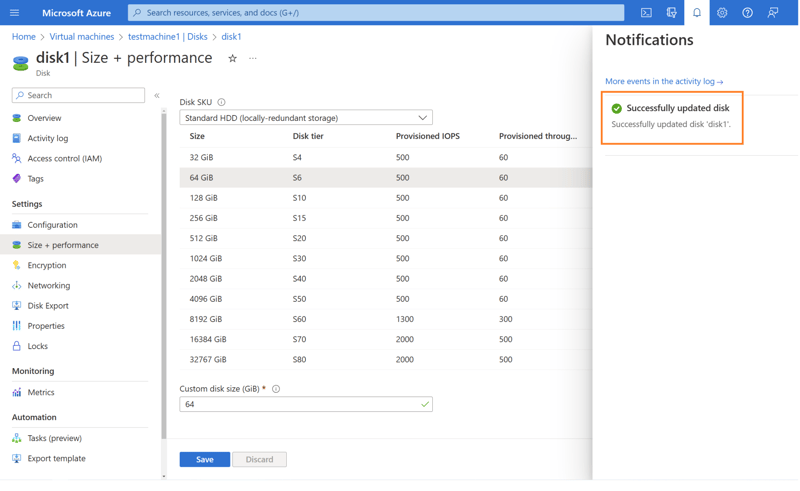
- Once the resizing is complete, you will receive a pop-up notification.
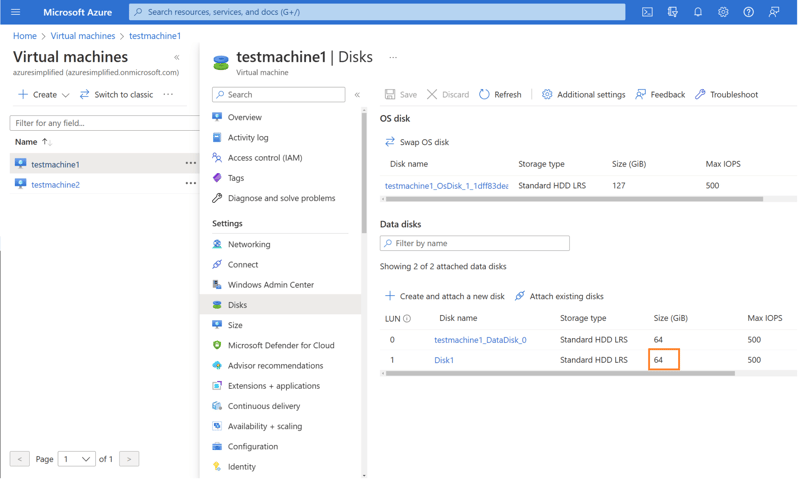
- To confirm the disk resize, browse to the Virtual machine -> Settings-> Disk. You will see that the disk size is updated to 64 GB.
Expand Volumes in the OS Configuration After an Azure Disk Resize
After completing the Azure disk resize from the Azure Portal, you will need to make some additional configurations in your OS to expand the associated volume so that applications hosted in the VMs can use this capacity.
Follow the steps given below for updating Azure disk size in Windows and Linux virtual machines, respectively.
Windows
The following steps will show how to update the larger disk size in Windows. The method to resize the disk using Server Manager is shown below. Note that you can also do the same process from the command line using the DISKPART utility.
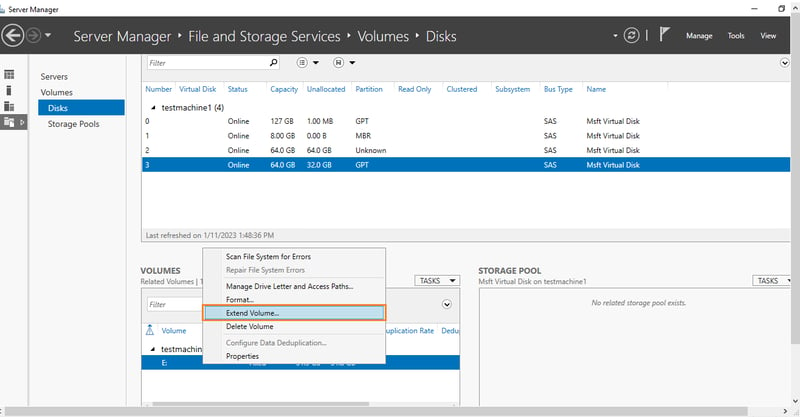
- Connect to the machine using the Remote Desktop Protocol (RDP). Open Server Manager-> File and Storage Services->Volumes->Disks. You can see that the disk has a capacity of 64 GB.
.png?width=800&height=400&name=Remote-Desktop-Protocol-(RDP).png)
- Right click on the data disk drive and select “Extend Volume” to continue.
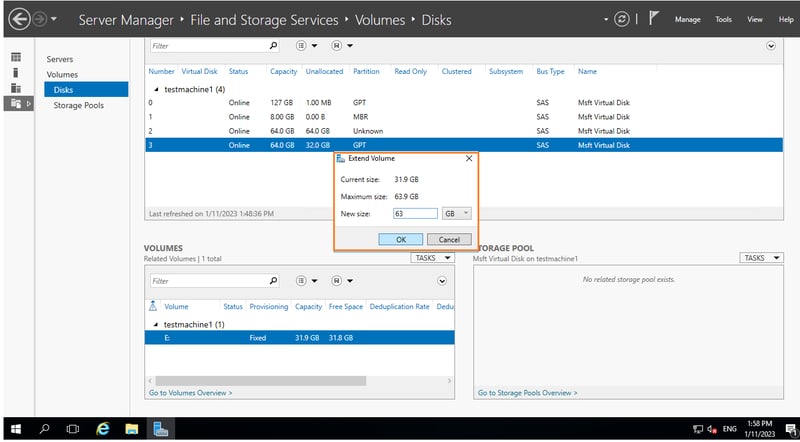
- Add the new size of the disk and click the “OK” button.
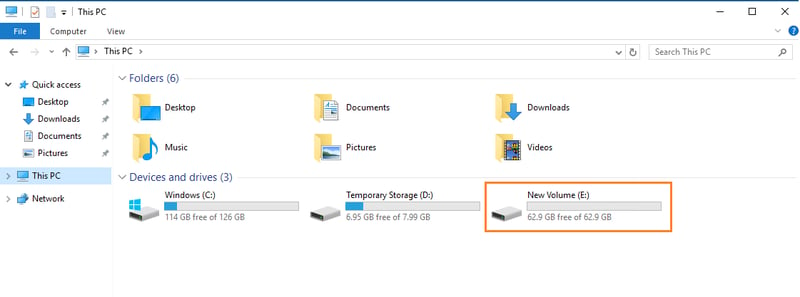
- You can see that the drive size has increased in the operating system and is available to use.
Linux
The following steps will show how to update a Linux operating system about a new larger disk size. The method shown below uses an Ubuntu server.
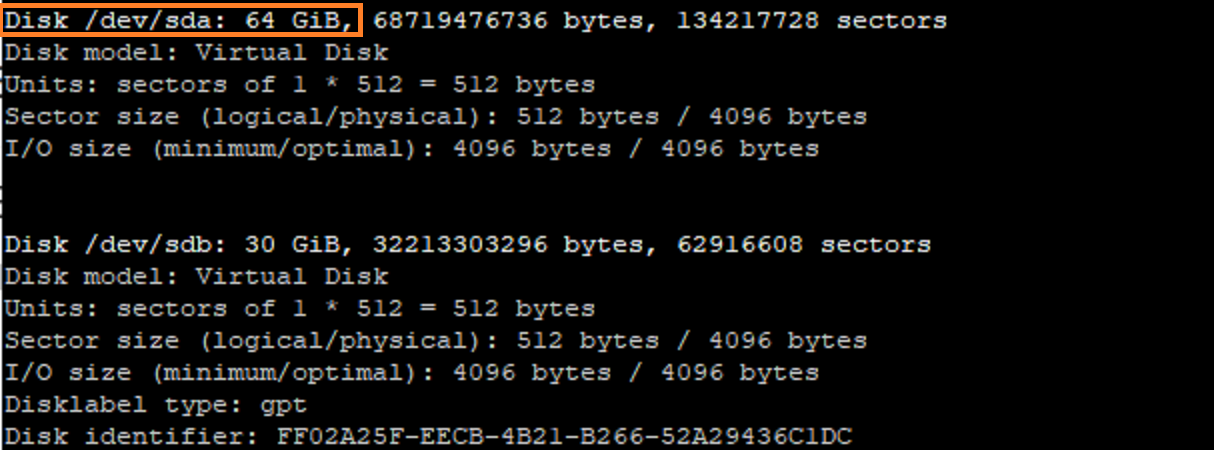
- Check the available disks of the Linux machines using the following command:
sudo fdisk -l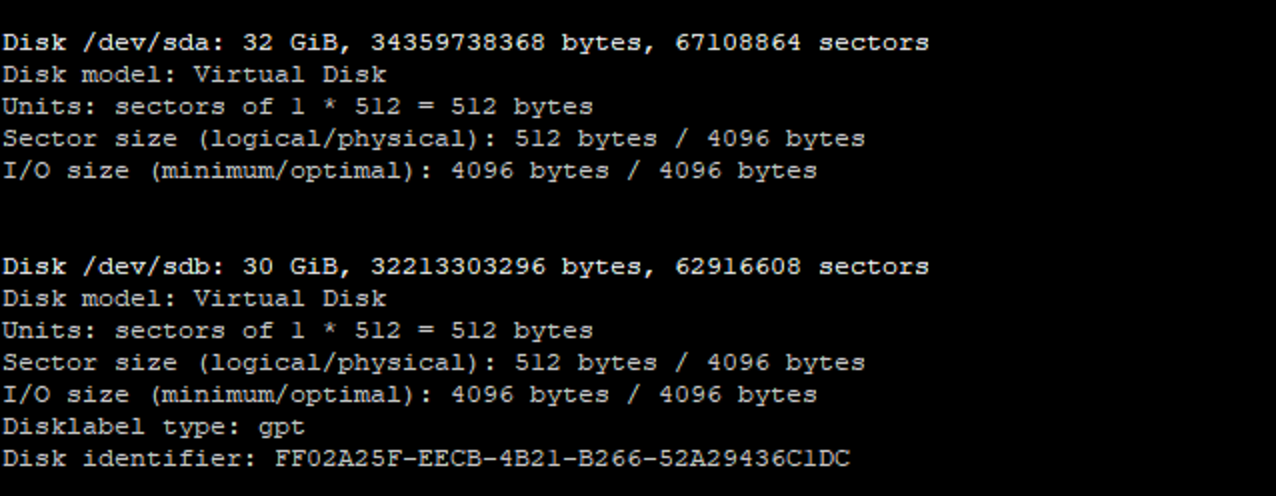
- Once the disk size is updated using the steps discussed in the section above, you can run the following command to rescan the disk:
#sudo -s
#echo 1 > /sys/class/block/sda/device/rescan
- You can see that the disk size has increased from 32 GB to 64 GB in the operating system.
Looking for Even More Scalability on Azure? Try BlueXP Cloud Volumes ONTAP
There are more ways to scale up Azure storage than just Azure disk resize jobs. NetApp BlueXP Cloud Volumes ONTAP helps to bring the power of trusted NetApp ONTAP technology to Azure to meet growing capacity demands without compromising on storage efficiency.
With petabyte scalability, Cloud Volumes ONTAP can meet the capacity requirements for most demanding workloads in Azure VMs, such as databases, DevOps pipelines, file services, and more. The data volumes created in Cloud Volumes ONTAP can be connected to Azure using the protocol of your choice, whether it’s SMB, NFS, or iSCSI.
BlueXP Cloud Volumes ONTAP augments native Azure storage with NetApp proprietary storage efficiency features like thin provisioning, deduplication, compaction, and compression. The centralized management feature of BlueXP provides full visibility and control over your data volumes not just in Azure, but in other clouds as well as on-premises systems.
If you are looking for an enterprise class data management solution, with built-in flexibility to meet your data growth needs in the cloud, BlueXP Cloud Volumes ONTAP could be the perfect fit. To find out more, check out these Azure customer success stories.

FAQs
- Does resizing Azure VM lose data?
Resizing Azure VM disks does not impact the data stored in the disks. However, as a best practice you can create a backup of the data in the disk before making any changes to it, as there is always a possibility of human errors while making disk configuration changes in the operating system. - Can I shrink the Azure disk?
No, shrinking Azure disk size is not supported. You can only resize the disk to increase its size. If you need to bring down the disk size, a workaround exists. You can copy the data to a smaller disk and attach that disk to the virtual machine. Though technically feasible, this approach needs to be evaluated on a case by case basis to ensure that your applications are working fine.
