Share
Azure blob storage is one of the popular services from Azure leveraged by customers, giving them the ability to store unstructured data at nearly limitless scale. It is an object storage service used by enterprises in a wide variety of use cases: backup, disaster recovery, long term data archival, logging and analytics, to name a few. Though these are some of the most popular use cases for Azure Blob, there is a less common use case for it: as a file system to be mounted on Linux machines, a handy tool to have in your Linux on Azure deployment.
In this blog, we will walk you through the process of mounting Azure Blob as a file system and discuss the advantages and disadvantages of this approach.
Jump down using the links below, or read on for the full details:
- When to Use Azure Blob as a File System
- Mounting Options for Using Azure Blob as File System
- How to Mount Azure Blob as File Share Using BlobFuse
- Using Azure Blob as File Systems: The Considerations
- Cloud Volumes ONTAP for File System Storage
- Conclusion: Useful If Needed, But Proceed with Care
- FAQs
When to Use Azure Blob as a File System
Object storage uses a flat namespace that may not fit in well with all use cases. Drives mounted as file systems integrate well into the operating system. Applications can access this storage without an additional overlay of transfer protocols or security configurations. In such cases, using Azure Blob storage as a drive helps quickly create a distributed file store without additional operational overhead.
Consider the case of legacy applications that are being migrated to the cloud using a lift and shift approach that need access to file shares. Refactoring a legacy code base to incorporate object storage APIs is challenging and often out of scope for such deployments. By using Azure Blob storage as a file system, these applications can be migrated without touching the code base. The applications will continue to work as they used to work on-prem as the Azure Blob will be mounted as a drive in a transparent manner as a local drive path.
Mounting Azure Blob as a drive enables its usage as a shared file system, giving multiple servers concurrent access. This is helpful for the type of files that need to be shared between different systems, such as common configuration and log files for web applications.
Mounting Options for Using Azure Blob as File System
Let’s look at some of the options available to mount Azure Blob as a local drive on Linux-based systems using Azure Virtual machines.
- BlobFuse
BlobFuse is an open source tool that uses Azure storage APIs to implement file system operations. In order to accomplish this, the tool interacts with the Linux FUSE kernel module via the open source fuse3 library in the backend.
Though it is an open-source tool, BlobFuse is endorsed by Microsoft to be used as a solution for mounting Azure storage as a file system in Linux. The tool supports all basic file system operations as well as local caching for files for improved performance.
- NFS 3.0 support for Azure Blob storage
Azure Blob storage supports the NFS 3.0 protocol which can be used to mount blobs as NFS file shares in Linux machines. This requires a hierarchical namespace to be enabled while creating the storage. The file shares can be connected to Azure virtual machines as well as on-premises storage systems when hybrid connectivity is enabled.
How to Mount Azure Blob as File Share Using BlobFuse
Azure Blob can be mounted as a file system folder in any Linux distribution using BlobFuse. In this demo, we’ll show how to mount it in an Ubuntu machine in Azure.
- Run the following commands to configure the Linux package repository for Microsoft products in the Ubuntu machine and install BlobFuse:
wget https://packages.microsoft.com/config/ubuntu/20.04/packages-microsoft-prod.deb
sudo dpkg -i packages-microsoft-prod.deb
sudo apt-get update
sudo apt-get install libfuse3-dev fuse3
Note: If prompted during the process to complete the installation and configuration, confirm by typing in “Y”.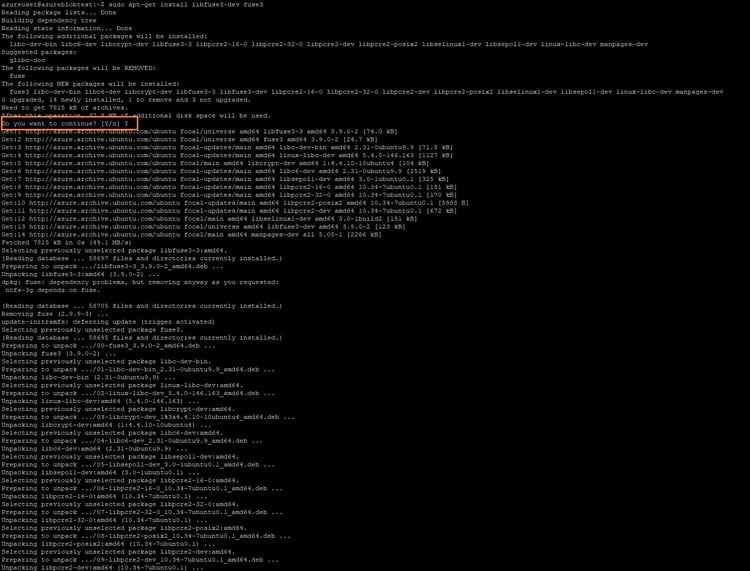
- Install Blobfuse by running the following command:
sudo apt-get install blobfuse2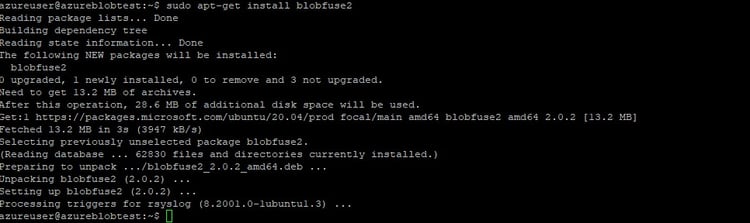
- Now we will configure caching to create a low-latency buffer to improve the mounted blob’s performance. In this demo, we’re using an Azure SSD data disk that is already attached to the VM for caching.
Create a folder for caching using the following command and assign user permission:sudo mkdir /mnt/resource/blobfuse2tmp -p
sudo chown <yourusername> /mnt/resource/blobfuse2tmp
Replace <yourusername> with the user who is doing the BlobFuse configuration. - Create a folder in the local file system to mount the blob container:
mkdir ~/blobcontainer - Create a configuration yaml file config.yml for BlobFuse, which will specify the settings to be used while mounting the blob container. An example configuration file will look as follows:
allow-other: true

logging:
  type: syslog
  level: log_debug

components:
  - libfuse
  - file_cache
  - attr_cache
  - azstorage

libfuse:
  attribute-expiration-sec: 120
  entry-expiration-sec: 120
  negative-entry-expiration-sec: 240

file_cache:
  path: /mnt/resource/blobfuse2tmp
  timeout-sec: 120
  max-size-mb: 4096

attr_cache:
  timeout-sec: 7200

azstorage:
  type: block
  account-name: blobfusetest2044
  account-key: xxxxxx
  endpoint: https://blobfusetest2044.blob.core.windows.net/
  mode: key
  container: myfilesystem
Make the following changes in the configuration file, per your environment’s settings:- In the configuration file, replace the highlighted value for path in the file_cache section with the caching folder path we created in step 3.
- In the azstorage section, replace the highlighted values with those specific to your storage as follows:
- account-name: Give the name of your storage account where the container has been created
- account-key: Replace the value with your Azure storage account key
- endpoint: Replace with name of the storage endpoint
- container: Replace with name of the container
- Mount the blob container to the folder created in step 4 using the following command:
sudo blobfuse2 mount ~/blobcontainer --config-file=./config.yaml - Browse to the folder where the blob is mounted, i.e., ~/blobcontainer, and create a new folder and files. You can browse, access, and modify the files as you would normally do in any Linux file system:
cd ~/blobcontainer
mkdir temp
echo "hello world" > temp/new.txt
- To confirm that the folder and file is created in the container that was mounted in the Linux machine, go to the Azure portal and access your storage account.

Using Azure Blob as File Systems: Important Considerations
While it is possible to mount Azure Blob storage as a file share using BlobFuse for some use cases, there are certain caveats to the approach that you need to keep in mind.
- Azure Blob was originally designed to be an object storage system and as such it will not support all the functionalities of a traditional file system. For example, hard links, atomic file renaming, and special files are not supported. Simultaneous read/write operations to a large file can also lead to inconsistencies, which is not acceptable when it comes to LOB applications.
- Network delays could impact read/write performance of data to the mounted Blob storage, especially for IO-heavy operations.
- As files in object storage are atomic, they can’t be modified as they would in a traditional file system. This can become a constraint for applications that require frequent file modification, since in those cases the entire file needs to be replaced. That will increase your storage operation overheads.
- Single blobs in Azure Blob storage have scalability limitations in terms of the maximum size and requests it can handle. Such limitations could impact the overall performance of the applications that use the mounted storage.
Considering factors such as IOPS requirements, performance, file access frequency. etc., you should evaluate whether mounting Blob storage as a file system is a good fit solution for your application.
Cloud Volumes ONTAP for File System Storage
NetApp Cloud Volumes ONTAP offers a simpler way for using file systems on Azure storage. Cloud Volumes ONTAP brings in the power of trusted NetApp storage management capabilities to the cloud and delivers advanced storage efficiencies, data protection, and optimization in Azure.
Cloud Volumes ONTAP has a wide range of features to power your file sharing workloads:
- Cloud Volumes ONTAP offers multi-protocol support over NFS, SMB, and iSCSI, making it possible to cater to different types of workloads.
- File caching with BlueXP Edge Caching and NetApp FlexCache helps bring file data closer to users across ROBO and remote workforces, improving application performance and making collaboration easier.
- High availability that goes beyond Azure’s native capabilities, with multi-AZ configuration that ensures RPO=0 and RTO<60 seconds with automatic failover and failback in the case of any disruption.
- Built-in data protection enabled through point-in-time NetApp Snapshot™ copies, full integration with BlueXP backup and recovery for incremental forever, block-level copies.
- Data tiering sends infrequently accessed data from block storage to less-expensive object storage based on usage patterns, bringing down your overall storage costs.
- Data migration via SnapMirror® replication moves data where you need it and helps with backup and disaster recovery requirements.
Conclusion: Useful If Needed, But Proceed with Care
In this blog we saw how to set up Azure Blob as a file system using BlobFuse. This can be a useful deployment option for specific use cases, such as creating distributed file systems, and storing logs, common configuration files, media files etc. However, due to the inherent limitation of using object storage as a file system, your mileage may vary.
While this approach can be handy when migrating legacy applications to the cloud which can’t be modified to use object storage directly, the overall performance of the solution may not align with enterprise LOB goals.
If you’re looking for a better way to deliver shared file storage in the cloud, try Cloud Volumes ONTAP. With native capabilities that can leverage Azure Blob storage, you’ll be able to deploy a file system that can gain important data protection benefits, better storage efficiency, and improved overall storage costs.
FAQs
- What type of files does Azure Blob support?
Azure Blob is an object storage service which can be used to store unstructured data. These could be binary and text data, such as images, videos, documents, log files, etc. The service is leveraged by organizations to create data lakes, store backups, archive data, and also for use cases such as big data analytics, where data can be at the petabyte-scale. - Can I store files in Azure blob storage?
Yes, you can use Azure blob storage to store files. There are different types of files that can be stored in Azure Blob storage, i.e., images, videos, log files, documents, etc. First you need to create a container which is a logical unit to store the files in Azure Blob storage. The files can be uploaded using multiple tools such as Azure Storage Explorer, AzCopy, the Azure portal, or programmatically using Azure storage SDKs.

