Share
NetApp AFF and SSD-backed FAS storage systems can now be seamlessly integrated with Cloud Tiering, a NetApp service that addresses the problem of discovering and shifting cold data from on-prem data centers into the cloud. Cloud tiering uses NetApp’s FabricPool technology to identify infrequently accessed data and automatically move it to object storage in the public or private cloud, including Google Cloud Storage, without refactoring the application layer.
Google Cloud Storage uses a pay-as-you-go model and offers cheaper and highly durable storage classes for unused data, enabling organizations to leverage the all-flash, high-performance capacity of their AFF or SSD-backed FAS storage system to store more data of latency-sensitive applications.
In this article we will take you step-by-step through the process of configuring NetApp Cloud Tiering which will automatically detect and seamlessly tier inactive cold data from an on-premises ONTAP cluster to your Google Cloud Storage buckets. We have divided this article into four sections:
- Creating a BlueXP Console Connector
- Preparing Google Cloud Storage
- Discovering your on-premises ONTAP cluster
- Setting up Cloud Tiering
Creating a BlueXP Console Connector
BlueXP Console’s Connector is part of the BlueXP Console infrastructure and must be deployed within your Google Cloud account in order to use most of BlueXP Console’s features, including Cloud Tiering. The Connector is responsible for securely managing resources and processes within your account. In this section will see how to deploy the Connector.
1. As a first step, you need to get situated on the NetApp BlueXP Console. BlueXP Console is the central control pane from where you can manage all of your ONTAP endpoints and data services across the hybrid cloud. Whether you have ONTAP deployed on-prem or in AWS, Azure, or Google Cloud you can manage all through BlueXP Console.
In case, you don’t already have an account, start by signing up to NetApp BlueXP.
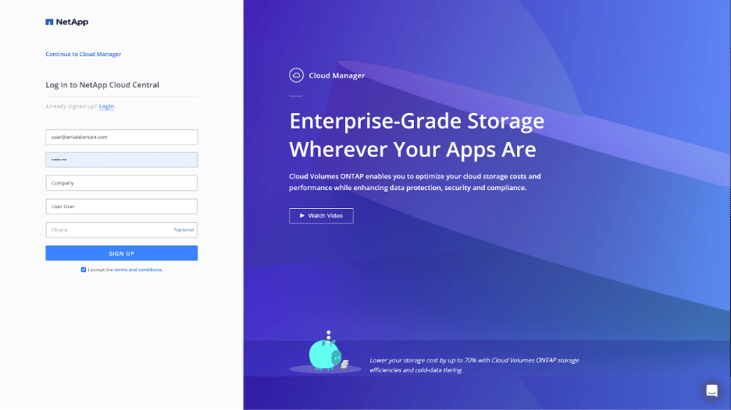
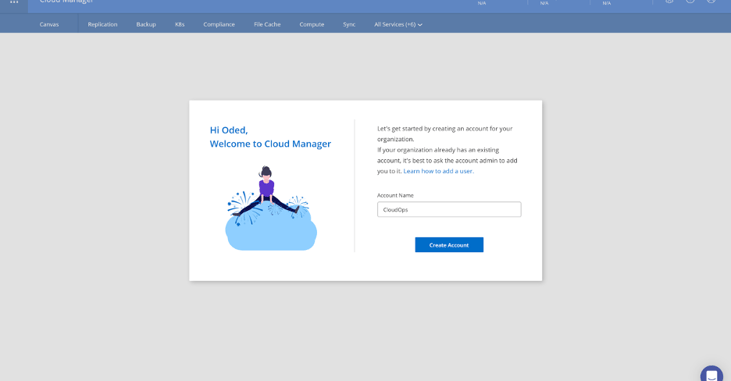
2. Once you’re signed up, you’ll be redirected to BlueXP Console and you’ll be requested to create a NetApp account. This is an account for your entire organization.
For more information about BlueXP Console accounts, please visit the BlueXP Console docs.
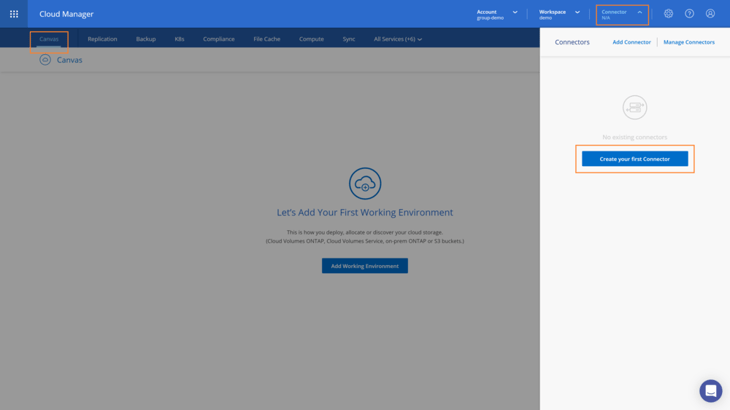
3. Once you create the account, you’ll be directed to the main BlueXP Console pane, the Canvas. Open to the Connector menu and click on Create your first Connector and then on Lets Start.
4. On the next screen, you need to choose the cloud provider where the Connector will be deployed. There are options for AWS, Azure, or Google Cloud. Click on Google Cloud Platform and then on Continue.Note: If you have already created a Connector, select a Connector deployed in Google Cloud that has network connectivity to your cluster and proceed to Preparing Google Cloud Storage.

5. In the Get Ready screen, all the requirements needed to deploy the Connector in Google Cloud are listed, including the permissions needed for your Google Service Account and for your Google Cloud user. For more information on assigning the required permissions to the Google Cloud user and creating the Service Account visit Setting up GCP Permissions on BlueXP Console’s documentation.
Click on any of the available links in the list if you need to find out more information. Once you are ready, click on Continue.
When prompted, log in to your Google account, which should have the required permissions to create the virtual machine instance. The form is owned and hosted by Google. Your credentials are not provided to NetApp.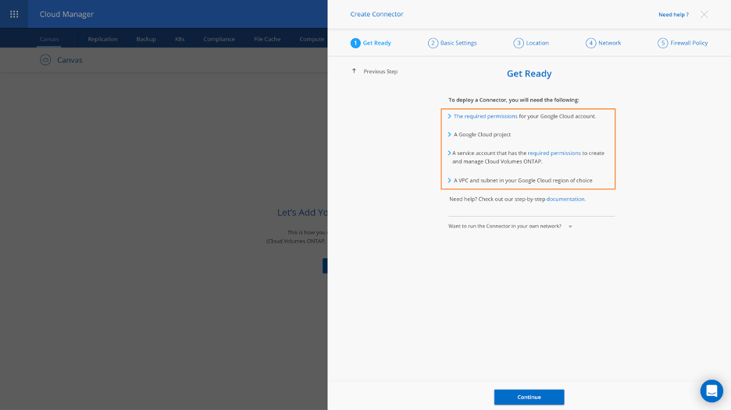
6. Next, enter the Connector Instance Name, select the Project and the Service Account (account with the NetApp BlueXP Console role - a prerequisite), and click on Continue.
7. Next, provide the Location information: specify a region, zone, VPC, and subnet for the Connector instance. Click Continue when you are done.
8. In the Network screen, choose whether to enable a public IP address and optionally specify a proxy configuration.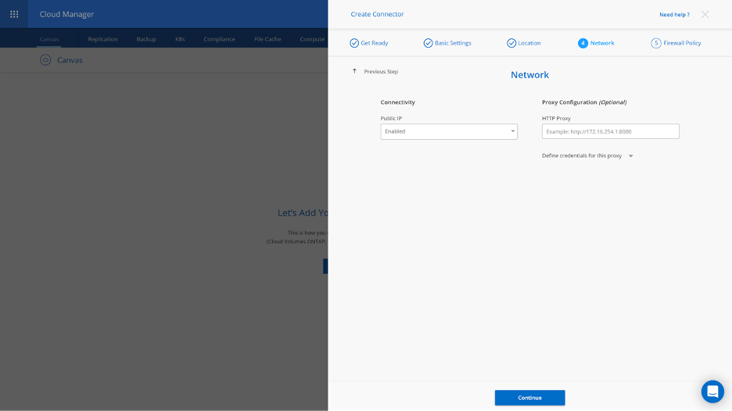
9. In the last step of the Connector deployment, choose whether to create a new firewall policy or whether to select an existing firewall policy that allows inbound HTTP, HTTPS, and SSH access.
For this example, we show how to create a new firewall policy. Click on Create when done.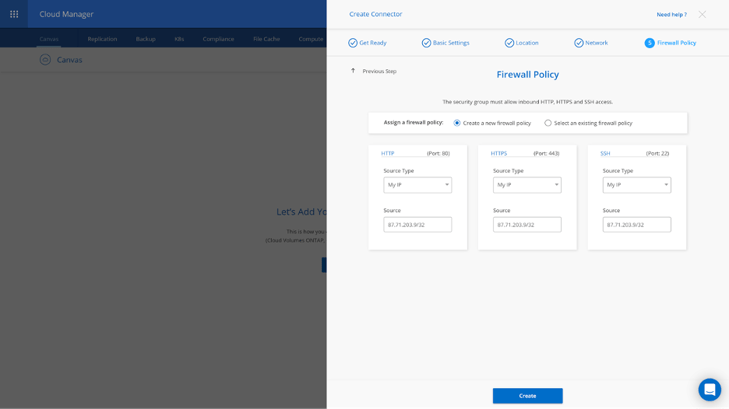
10. Once you click on Create the actual instance deployment begins. The instance is ready within 7 minutes. Do not close the page until the process is complete.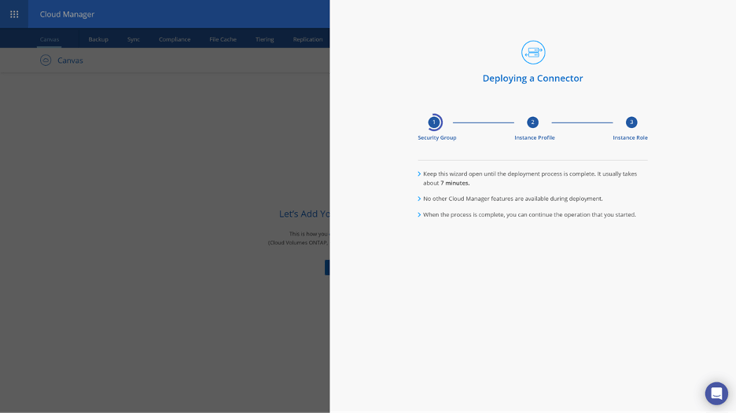
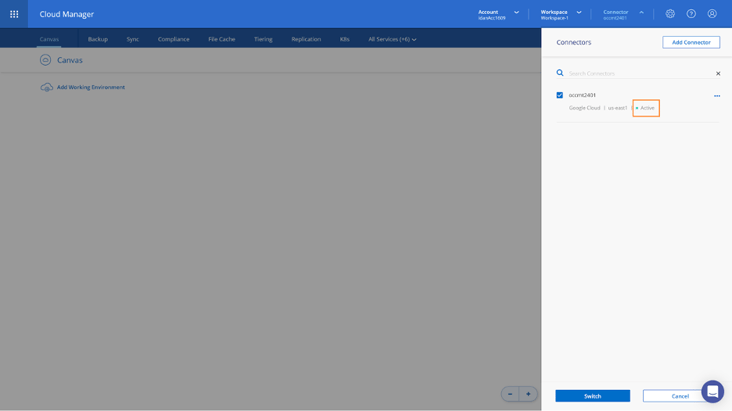
11. As the Connector deployment completed successfully, click on Continue. On the opened Connectors pane, verify that your Connector is Active (Click anywhere on the Canvas, or on the Connector menu to close the pane).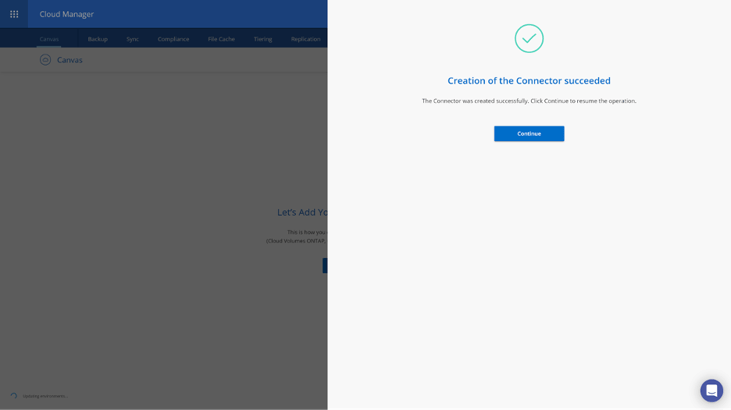
Now that the Connector was successfully deployed, we can continue to the next phase and prepare Google Cloud Storage for data tiering.
Preparing Google Cloud Storage
When setting up Cloud Tiering, you need to provide storage access keys for a service account that has Storage Admin permissions. This service account would allow Cloud Tiering to authenticate and access Cloud Storage buckets. The keys are required so that Google Cloud Storage knows who is making the request.
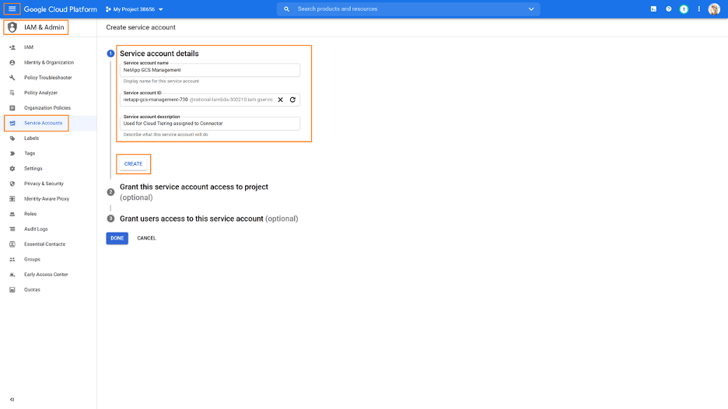
1. Log in to Google Cloud Console, select the Project where you have created the Connector in and navigate to the IAM & Admin menu. Go to the Service Account section and create a new account by clicking on CREATE SERVICE ACCOUNT. Fill in the name and description details and click on CREATE.
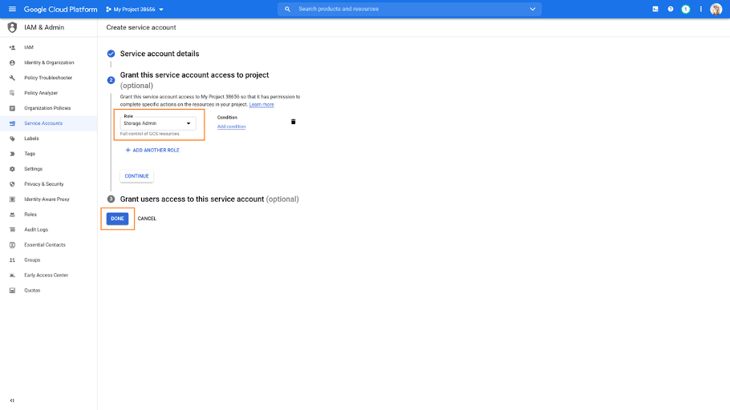
2. Next, from the drop down role box, select the Storage Admin role and click on Done. The Storage Admin role provides full control over Google Cloud Storage resources.
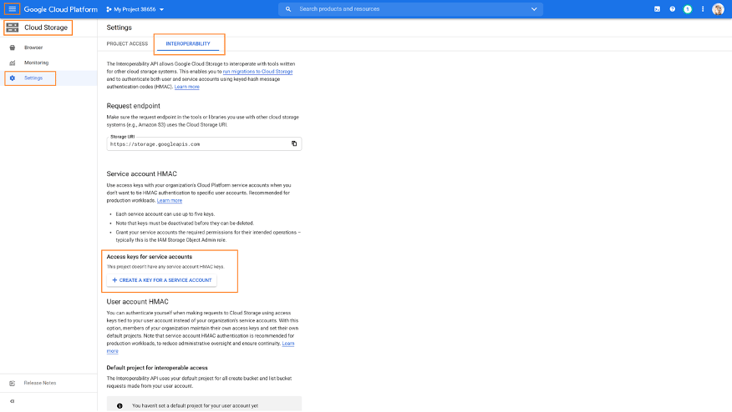
3. Navigate to Cloud Storage, on the Google Cloud Console and click on Settings and then go to the INTEROPERABILITY tab (if you haven’t already done so, click Enable interoperability access). Click CREATE A KEY FOR A SERVICE ACCOUNT, located under Access keys for service accounts.
4. Select the service account that you have created for Cloud Tiering and click on CREATE KEY.
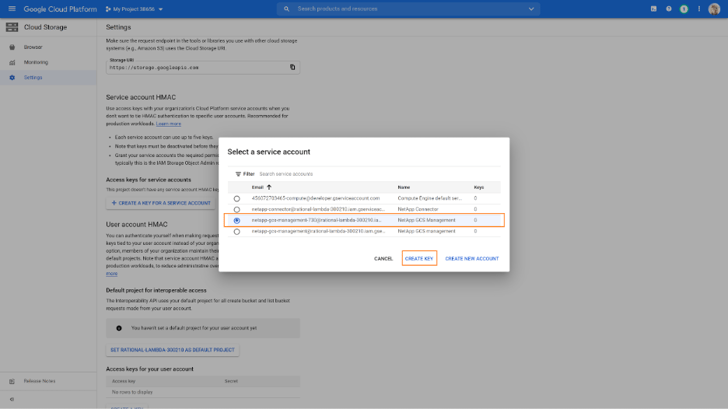
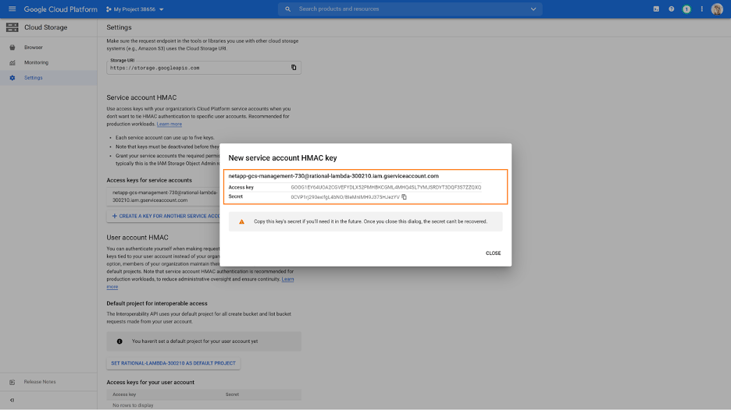
5. Next, the access and secret keys will be displayed. Copy these keys as you would use them when setting up Cloud Tiering. Click CLOSE when done.
With all the requirements in place, you can continue on to discover your on-premises ONTAP cluster.
Discovering Your On-Premises ONTAP Cluster
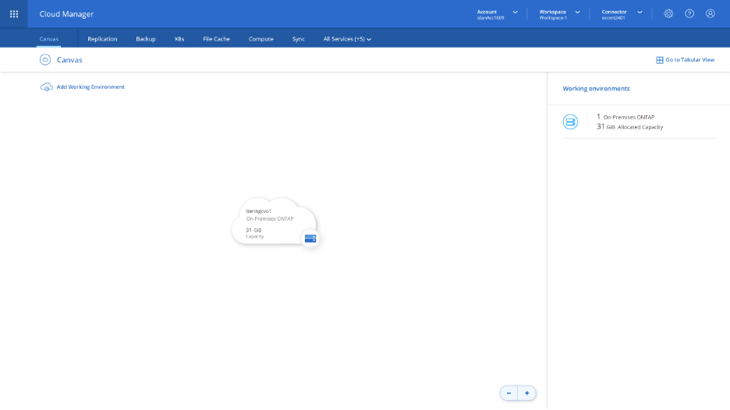
This section covers how to discover an existing on-premises ONTAP cluster and add it to BlueXP Console’s home page, the Canvas tab.
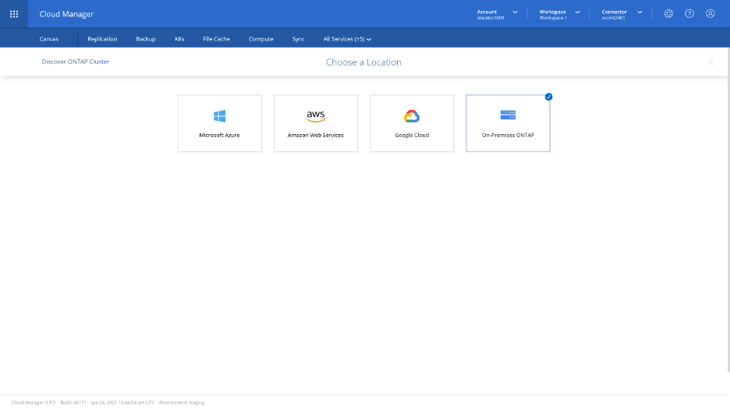
1. From the BlueXP Console Canvas, click on Add Working Environment and choose On-Premises ONTAP as the location.
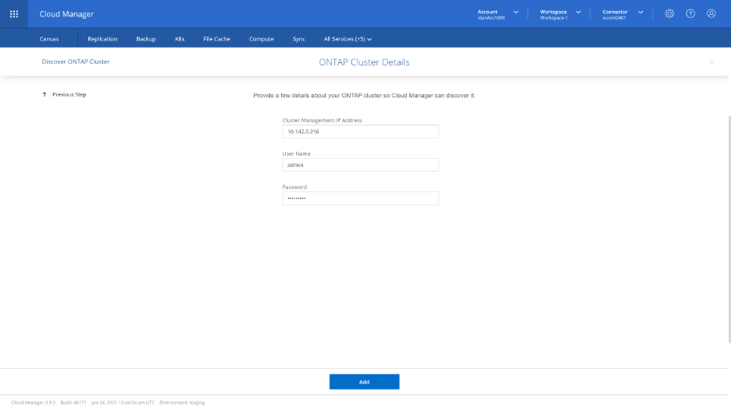
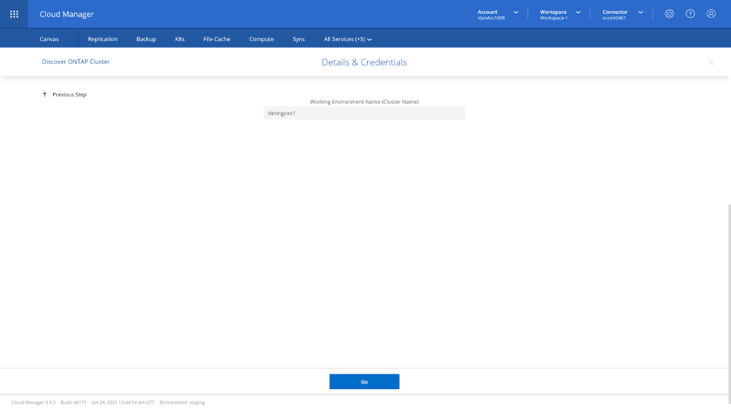
2. On the ONTAP Cluster Details page, enter the on-premises cluster management IP and admin credentials. Click Add to discover the on-premises ONTAP systems.
3. Verify the name of the on-premises working environment and click Go to add the on-premises ONTAP cluster to BlueXP Console. Once completed, your on-premises ONTAP cluster will appear on BlueXP Console’s Canvas.
We will now proceed to the last phase where we’ll setup the Cloud Tiering service and configure the volumes for tiering.
Setting up Cloud Tiering
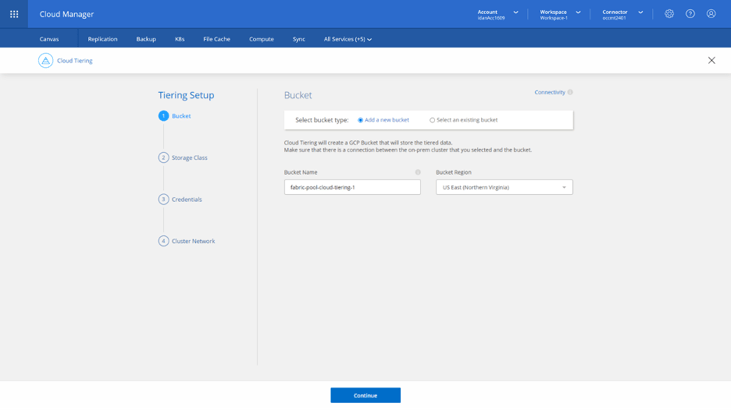
Through the Cloud Tiering setup, a Google Cloud Storage (GCS) bucket is automatically created and attached to your on-premises ONTAP cluster. In addition, during the setup, and at any point in time later, you can associate a tiering policy for each of the volumes candidate for tiering.
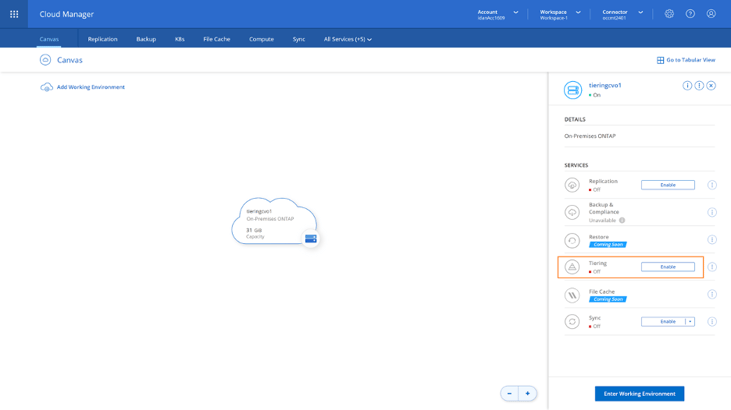
1. Click on the cluster once to open the right panel menu. This menu will show a list of services which you can enable for your ONTAP cluster. Locate the Tiering service, click on Enable.
2. This will bring you to the Setup Tiering flow (can also be started from the Tiering tab in BlueXP Console’s header menu). The first step in this flow is to choose between creating a new GCS bucket for the tiered data or using an existing one. In either case, make sure there is connectivity between your on-premises cluster and the bucket. Click on Continue when done.
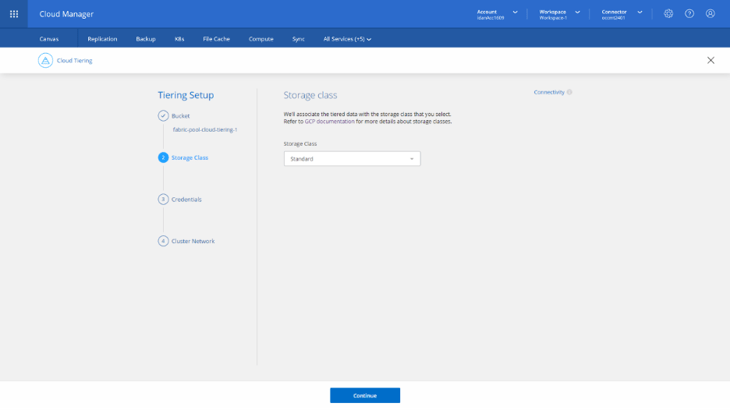
3. Next, it’s time to select the Storage Class that will be used. Cloud Tiering supports all four storage classes: Standard, Nearline, Coldline and Archive. Select the storage class you wish to use and then click Continue.
Note: Cloud Tiering always creates the bucket with the Standard storage class. In case you choose one of the other classes supported, Cloud Tiering applies a lifecycle rule that moves objects that have never been accessed in the last 30 days from Standard to the selected storage class.
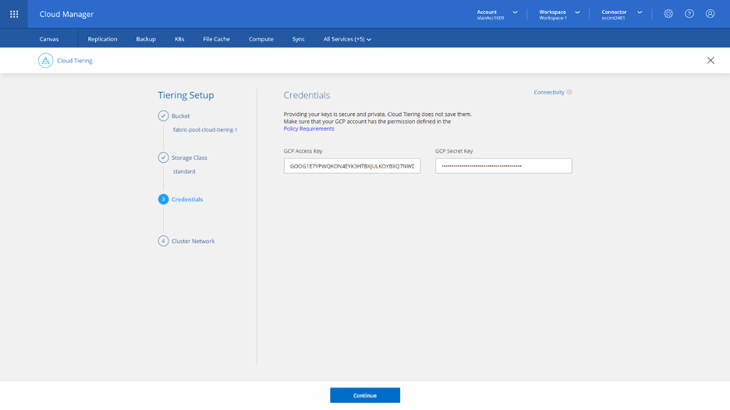
4. Next, provide the Google Cloud Access and Secret keys (previously created in Preparing Google Cloud Storage section) in order to grant access to the Google Cloud Storage resources. It’s important to note that Cloud Tiering does NOT save them. Click Continue when done.
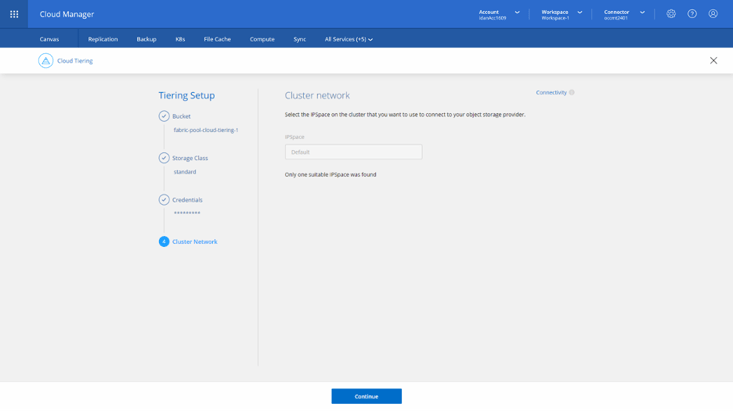
5. Next, you’ll select an IPSpace to be used by the cluster to connect to the GCS bucket. An IPSpace is a logical container that is used to create administratively separate network domains for segregating different types of network traffic. Once an IPSpace is selected, click Continue.
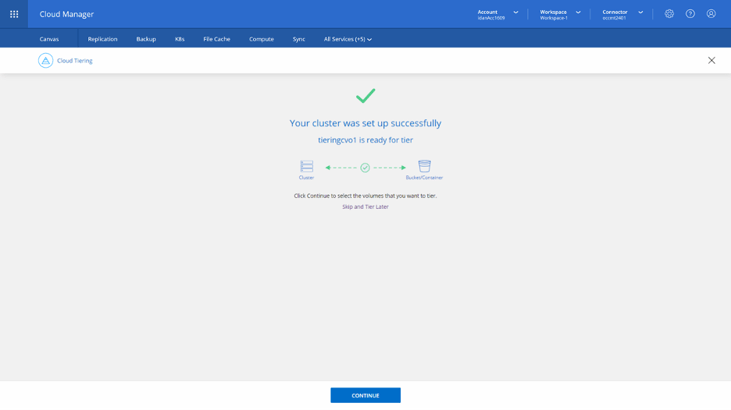
6. Once the Tiering Setup phase is completed, you’ll see the Cluster was set up successfully on the intermediate screen. Click on Continue to move to the Tier Volumes phase to configure the volumes.
7. On the Tier Volumes you will see the volumes table in your recently discovered on-premises ONTAP cluster.
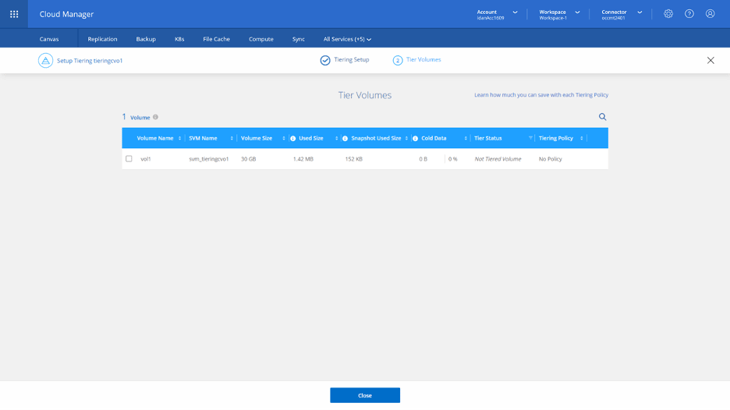
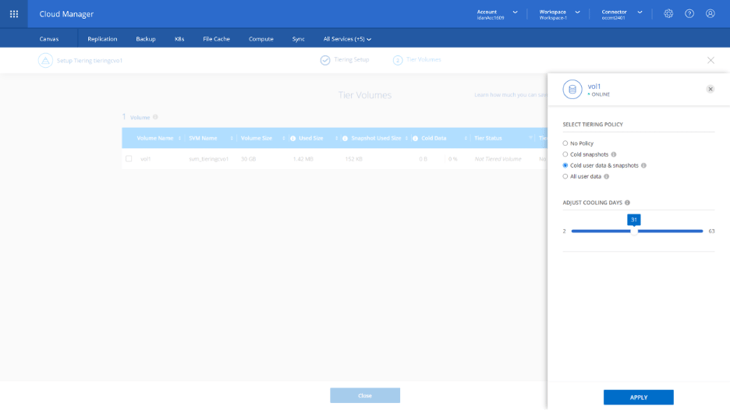
Select a volume and click the Pencil icon to the right or any number of volumes and click Modify selected volumes on top of the volumes table to configure the tiering settings. These settings include the tiering policy and the number of cooling days (determines how many days must pass before inactive data is considered cold and eligible for tiering). There are several different tiering policies to choose from.
Once set click on Apply.
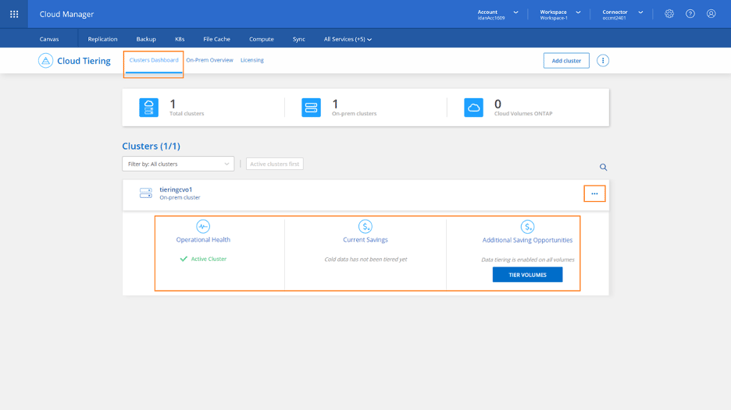
8. Once you are done configuring the tiering policies for the required volumes, click on Close and you will be directed to the main Cloud Tiering page, the Clusters Dashboard.
This dashboard will provide you with useful high-level information about current savings caused by already tiered data, potential savings for data not yet tiered and operational health. You can click on the ellipsis, on the right side of the cluster's card, and select Cluster Info to get more information.

9. To set up the aggregate’s tiering fullness threshold or activate Inactive Data Reporting (IDR) if needed, click on the ellipsis, located on the right side of the cluster’s card, and select Manage Aggregates from the opened menu.
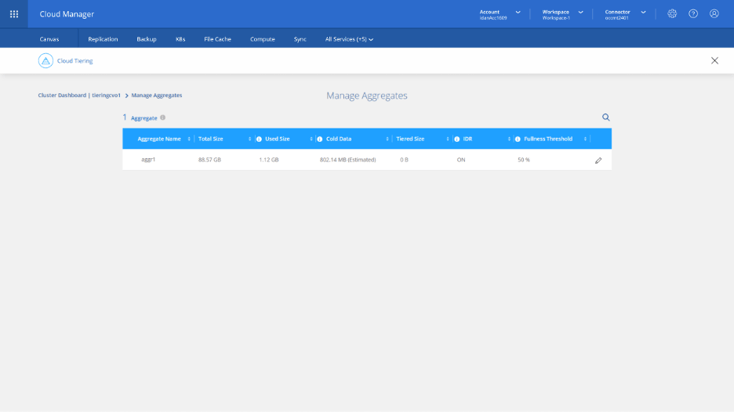
10. Click the Pencil on the far-right column of the intended aggregate to open a right pane menu where you can set the fullness threshold and IDR for that aggregate.
Cloud Tiering won’t tier data located in volumes hosted on this aggregate until the aggregate’s used capacity reaches this threshold (default is 50%). This is a very useful feature because it avoids early tiering expenses for aggregates that still have a lot of storage room in them. Click on Apply when done.

11. Once back to the Clusters Dashboard, you can click on Cloud Tiering’s On-Prem Overview tab for an aggregated view from all of your on-premises clusters. This information provides a clear tiering-related picture of your deployments and enables you to take proper actions to control your storage resources efficiently.
12. Finally, Cloud Tiering’s Licensing tab summarizes all the licensing information each cluster has, including license type and provider. For more information visit the Setup Licensing for Cloud Tiering page.

Now That Your Tiering Is Set Up...
With this low-touch automated tiering capability, Cloud Tiering for on-premises ONTAP (running on top of NetApp AFF and SSD-backed FAS systems) can act as an entry point to Google Cloud for organizations implementing a hybrid cloud architecture. In addition to addressing datacenter space concerns, Cloud Tiering also helps reduce your storage TCO and can be valuable when you are considering a shift from CAPEX to OPEX investment model for storage. For more on Cloud Tiering, visit the Cloud Tiering documentation.

