Share
In this day and age, hosting a website has never been so easy. Yet, with so many advanced and feature-rich services out there we often forget the simplest ones. The same is true when running a website built on Google Cloud storage services.
A website can be either static containing client-side technologies such as HTML, JavaScript and CSS, or dynamic using server-side scripts such as PHP, ASP or node.js. If you plan on relying on Google Cloud website hosting for dynamic websites that require server-side rendering technologies, you can check between the multiple options available which one is better suited for your case and taken into consideration different complexity factors such as scalability, storage, load balancing, etc.
However, if your website is purely static and rendered in the client side, you should definitely consider how object-based Google Cloud Storage can serve your needs. In this post, we’ll show you how to do that step by step.
What is Google Cloud Storage?
There are multiple ways to store binary files in Google Cloud: block storage, network file storage and object storage. Google Cloud Storage is the object storage service and it enables near-unlimited growth storage capacity for a low cost per GB. The files are added and retrieved via a REST API in a serverless manner, resulting in a highly efficient and low-cost storage service with a minimal operational overhead.
While Google Cloud Storage and this storage type weren’t designed specifically for hosting websites, it is a feature that is inherent to its design and can be taken advantage of to serve static content.
In this post we’ll take a close look at Google Cloud website hosting, or hosting any other static content you may want to make public, in a cost-efficient manner and with minimal operational overhead.
Steps to Host a Website on Google Cloud Storage
For the first stage of Google Cloud website hosting, start by creating an HTML file (our website) using our preferred IDE or text editor, and save it in our workstation with “index.html” as the file name, the default filename for webserver directory index.
 Create an index.html file
While you can add any html content to the file, for the purposes of this example it is recommended to start with something simple, such as the greeting message below:
<html>
<head>
</head>
<body>
<p>Hello From Google Cloud Storage</p>
</body>
</html>
Hosting the Website Files in a Google Storage Bucket
To use the Google Cloud Web Hosting feature for your static content, we start by creating a new Google Cloud Storage bucket. If you have never created a GCS bucket, you can read about how to create a Google Cloud Storage bucket and how to manage its lifecycle.
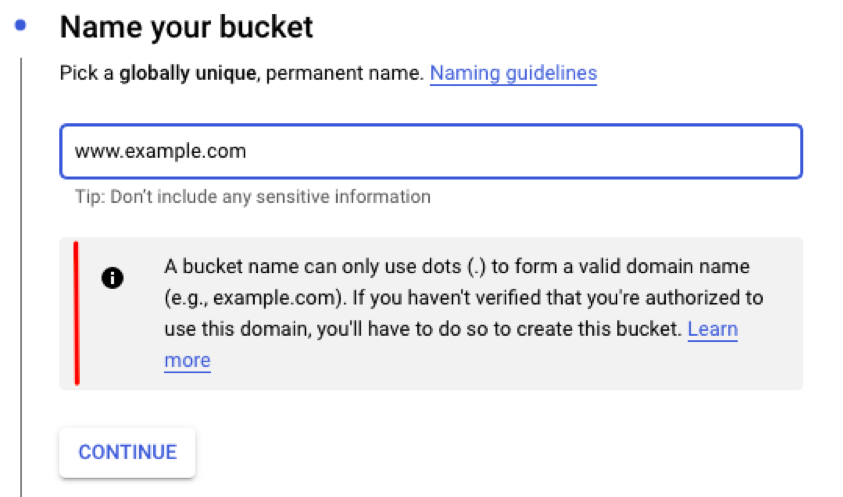
While the usual creation procedure applies and is essential the same, there is one important twist that you need to be aware if you are planning to use a custom domain name with your Google Cloud static website. The bucket name will need to match your domain name, i.e., if your domain name is www.example.com, the Google Cloud Storage bucket will also need to be called www.example.com.
 A bucket named as a custom domain requires verification
Creating a bucket named after a custom domain requires verification prior to start the bucket creation process. If you want to use a custom domain and follow that route, you will also need to create a CNAME DNS record pointing to c.storage.googleapis.com.
 Custom domain DNS CNAME record
This will automatically point the custom domain to the bucket and therefore the Google Cloud Storage Static Website we are now creating.
Using a custom domain is however not required to host static content. If you don’t want to use a custom domain you can name the bucket as you wish following the usual naming guidelines.
Enabling and Configuring the Google Cloud Storage Static Website
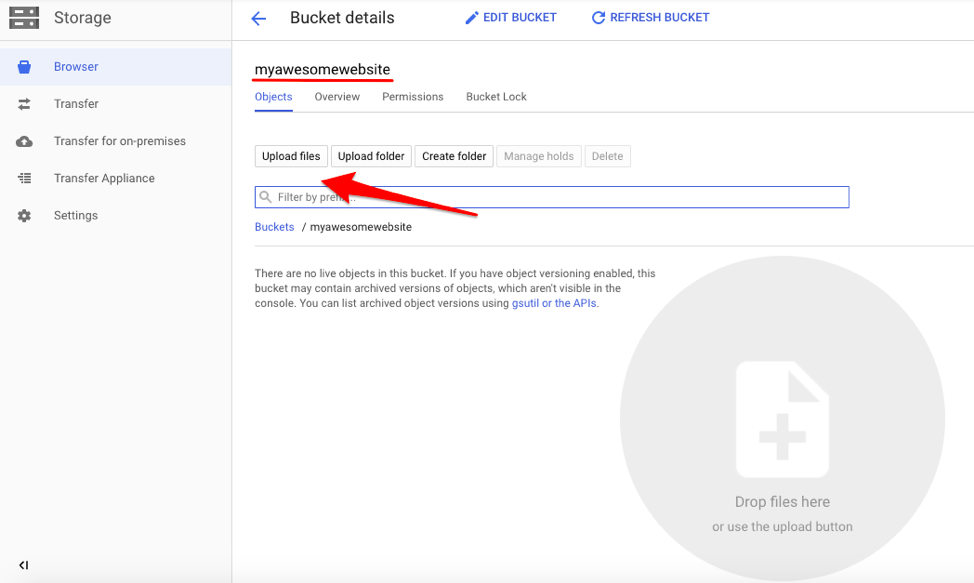
1. With your newly bucket created, upload to Google Cloud Storage the website static content, i.e., the index.html file.
 Upload the index.html file to the newly created bucket
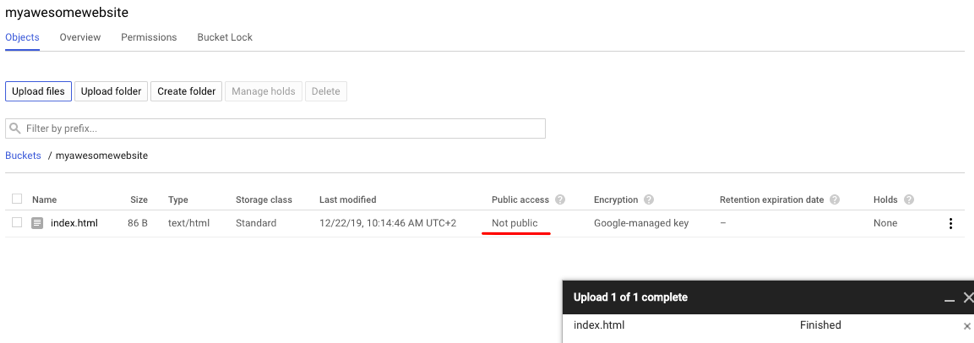
2. As expected, the permissions of the uploaded file will be defined as Not Public by default. To enable the hosting of web content, the bucket & files permissions will need to be changed to public.
 The permissions of the index.html file are Not Public by default
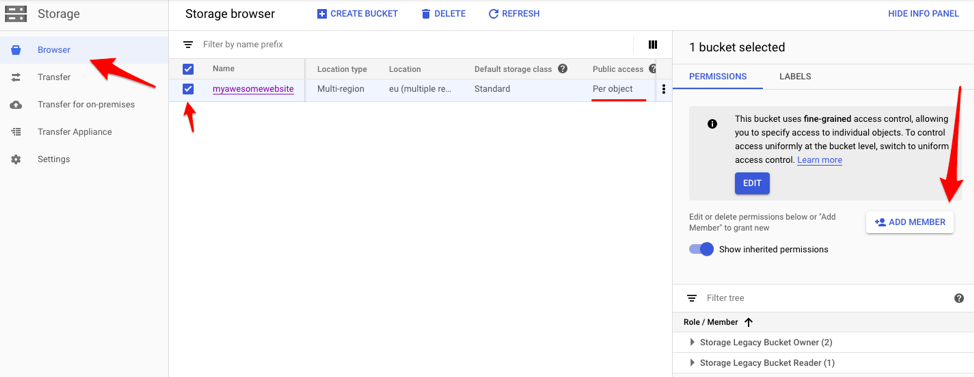
3. To change the permissions of the bucket, navigate to the Storage dashboard in the Google Cloud Platform Console. In the left-hand panel, select the option “Browser,” and select the bucket checkbox from the bucket list. On the right-hand panel, the permissions for the bucket will appear.
 Bucket permissions panel
4. Enable the public access of content by clicking “Add Member” and add a new member named “allUsers” with the role “Storage Object Viewer.” Take the changes into effect by clicking “Save.”
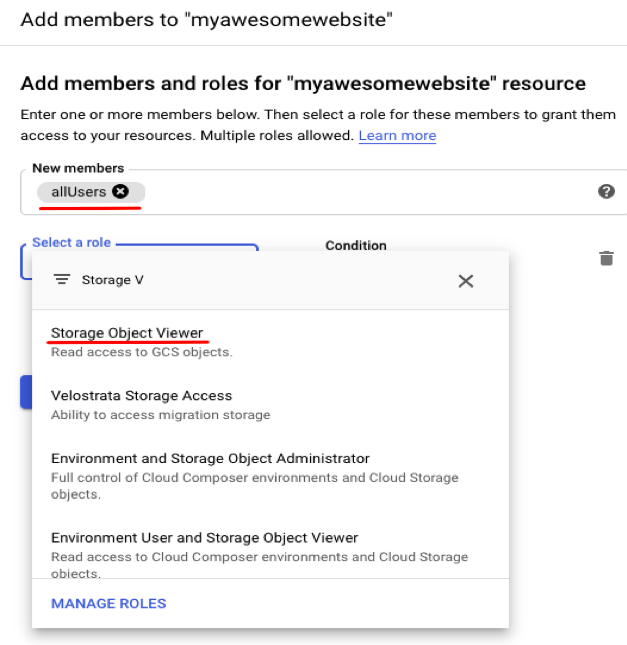 Enabling public access permissions to the bucket
5. The permission change is applied immediately and to all objects inside the bucket. A small warning icon will appear to indicate that the files within that content in that bucket can be publicly accessed.
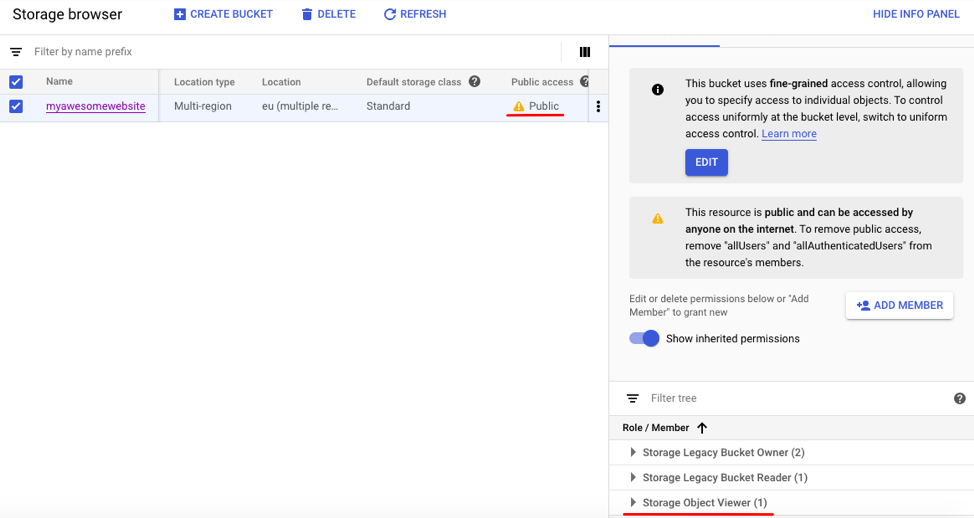 Bucket with public access enabled
Validation in the Browser and Advanced Settings
Now that your site is up and running, you should validate that it is actually working using your browser and exploring advanced settings.
1. Navigate to the website bucket and the list of objects. Since we made the entire bucket publicly accessible, each object will be marked as public. A new hyperlink will now be enabled and visible per object.
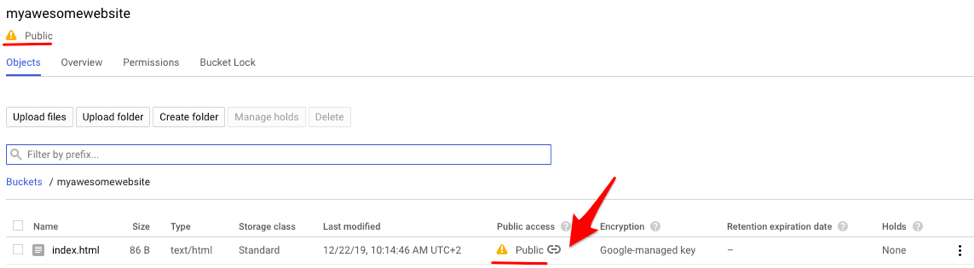
Website link in the Object panel
2. Clicking in that hyperlink will open a new tab in your browser and display your static website content.
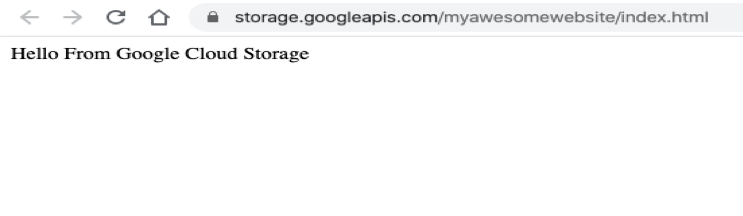 Google Cloud Storage Static Website
In this case, the url will be https://storage.googleapis.com/myawesomewebsite/index.html, and will always comply with the format https://storage.googleapis.com/<BUCKET_NAME>/<OBJECT_NAME>.
If you enabled a custom domain in the beginning, that should automatically be active and direct you to the index.html file without the need of additional configuration.
It is possible to customize certain aspects such as the object name for the main page (by default index.html) and the error page (a default page to display in case the content is not found). However, such options are not available via the Google Cloud Platform Console and will require the usage of gsutil, the command line tool. Read about how to get started with the gsutil command line tool here.
Customizing the main page suffix and error page can then be done using the following command:
gsutil web set [-m main_page_suffix] [-e error_page] bucket_url...
This and other advanced features can be explored further using the Google Cloud documentation pages.
Conclusion
The possibility to use Google Cloud Storage to host a static website is a feature often underutilized. As seen above, it is incredibly simple to enable and start using, since it is an integral part of the design of the Google Cloud Storage service.
Since the pricing of the object storage service was designed to be low (a fraction of a cent per GB), and calculated taken into account the amount of data stored (per GB) and egress bandwidth used, this is one of the most cost-efficient manners to host a static website.
Cloud Volumes ONTAP introduces a powerful data management platform and features to Google Cloud, including capabilities such as storage efficiency, data protection, Kubernetes integration and data cloning in Google Cloud.

