Share
Having a credible disaster recovery (DR) strategy is an important requirement for every organization today, especially with the increased digitization of business operations. Cloud Volumes ONTAP provides an efficient and reliable on-premises-like DR solution based on the flexibility of NetApp, combined with the scale and economics of AWS, Azure, and Google Cloud.
This blog will provide step-by-step instructions on how to deploy and configure a disaster recovery solution in AWS using Cloud Volumes ONTAP.
Get started now by using the links below to jump down to:
- Cloud Volumes ONTAP and AWS Disaster Recovery
- DR Network Prerequisites
- Discover an On-Premises ONTAP Cluster
- Create a New Cloud Volumes ONTAP Environment on AWS
- Create a Replication Relationship
- Monitor and Manage the Replication Relationship
- Conclusion
Cloud Volumes ONTAP and AWS Disaster Recovery
It’s essential for every enterprise deployment to have a disaster recovery plan. AWS enterprise-level users can turn to Cloud Volumes ONTAP for an easy-to-deploy, storage-efficient AWS disaster recovery solution. The benefits of using Cloud Volumes ONTAP for DR include:
- Easy data replication from on-premises location to a DR site in AWS.
- Quick storage failover and failback.
- Storage optimization technologies and automated data tiering to Amazon S3 help reduce storage footprint and costs.
This article provides a step-by-step guide for enterprise customers to deploy disaster recovery for their on-premises NetApp ONTAP storage environments.
Configuration Prerequisites
Before proceeding to the rest of this blog, readers are highly encouraged to refer to this blog post for the following prerequisite information:
- Key design considerations
- AWS Marketplace subscription
- AWS account and permissions
- NetApp Cloud Manager deployment
The rest of this post assumes the reader has completed the prerequisite steps outlined in the above post and has a fully functional Cloud Manager deployment in place already.
DR Network Prerequisites
In order to implement a DR solution from an on-premises ONTAP environment to AWS, we need to establish VPN connectivity to the AWS Virtual Private Cloud (VPC) that the Cloud Volumes ONTAP environment would be deployed to. In this section, we’ll show how to create the VPN configurations required on the AWS side to establish this connectivity.
AWS Networking Prerequisites
An AWS VPC is a logical construct that simulates a virtual network dedicated to your customer account within a specific AWS region that spans all the Availability Zones within that region. A VPC is logically isolated and can carry multiple subnets within itself. All compute resources deployed within a VPC will typically be associated with one of these subnets. An AWS VPC can be securely connected to an on-premises network via a Virtual Private Gateway. Additional details around these concepts can be found here.
While customers have multiple options when it comes to creating an AWS VPC and VPN configurations to connect their on-premises networks, the rest of this article will focus on using the AWS VPC creation wizard where we will walk you through the steps required to create a new AWS VPC to deploy your NetApp Cloud Volumes ONTAP device.
The VPC creation wizard makes it easy for customers to create a new VPC on AWS and create the required AWS VPN configuration items as a part of the VPC creation process.
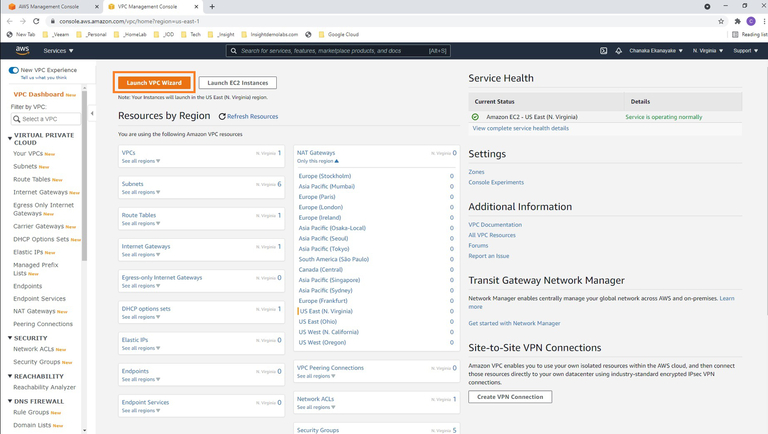
- Navigate to https://console.aws.amazon.com/vpc/, select the appropriate AWS Region, and click on the “Launch VPC Wizard” button at the top (an introduction to using AWS VPC can be found here).
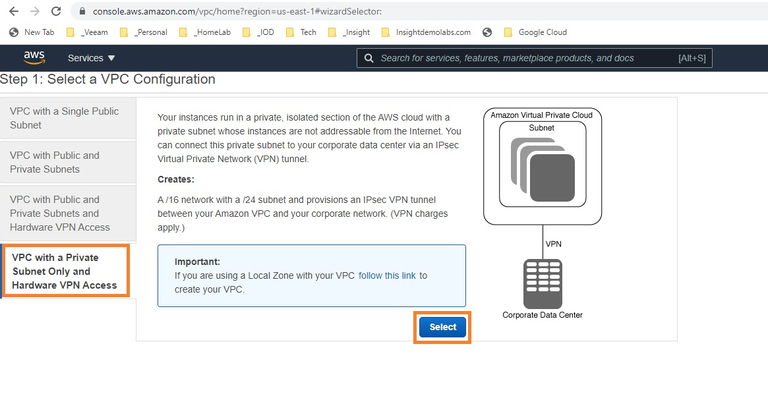
- Select the appropriate VPC configuration required and click “Select.” For the purpose of this post, we will select the “VPC with a private subnet only and hardware VPN access” configuration in order to demonstrate a typical enterprise deployment.
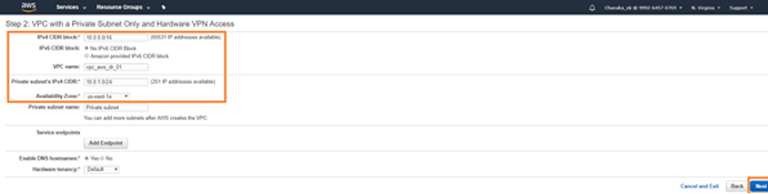
- Provide the IPV4 CIDR block details for the new VPC, VPC name, the private subnet’s IPv4 address, and the required AWS Availability Zone. Click “Next” once complete.
- Now provide the Customer Gateway IP, Customer Gateway name, and VPN connection name along with the Routing type. “Click Create VPC” when complete.
The Customer Gateway is an AWS logical construct that provides information to AWS about your physical or software device on the on-premises network where the VPN connectivity details are configured.
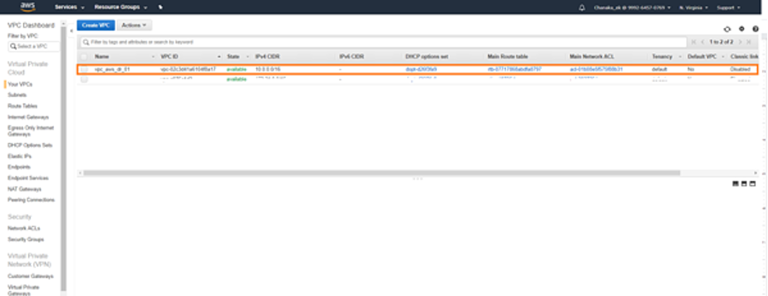
- Note that it may take up to 20 minutes to create the VPC and the required VPN configuration items. Once complete:
- The newly created VPC will be visible within the VPC dashboard
- The required VPN configurations to connect the VPC to your on-premises network are also automatically created and will be visible within the “Virtual Private Network” section of the VPC dashboard.
Note that the VPN Tunnel Details will show as “DOWN” until the VPN configurations are carried out on your on-premises VPN device and the VPN connectivity is successfully established (outside of the scope of this article).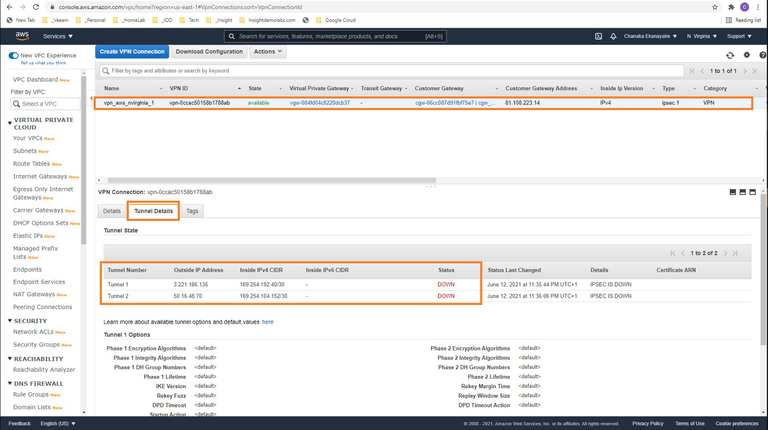
Customer (On-Premises) Networking Prerequisites
The VPN configuration required in the on-premises environment may vary depending on the VPN equipment used and specific instructions on how to achieve that are beyond the scope of this post.
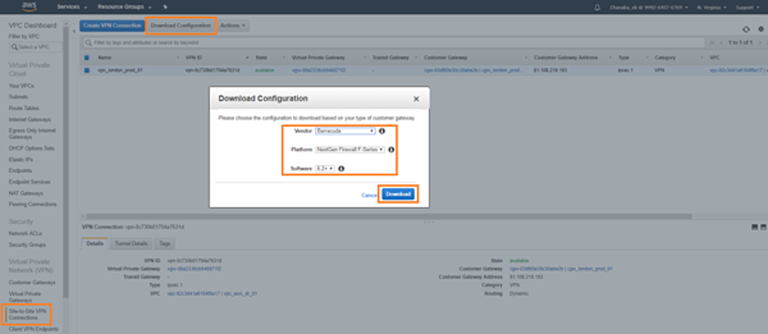
However, customers can download the AWS VPN configuration required for the on-premises VPN configuration tasks using the Site-to-Site VPN connections section of the VPC dashboard.
For this, navigate to the VPC dashboard, select the Site-to-Site VPN Connections section under Virtual Private Network on the navigation menu on the left, and click the download configuration button at the top. Customers can then select the specific configuration required based on the third-party vendor solution and the corresponding VPN device platform to be used for the on-premises VPN configuration.
Once the on-premises VPN device has successfully been configured and VPN connection with AWS VPC has been established, verify the VPN tunnels (shown in the screenshots in step 5.b above) are showing as UP before proceeding with the steps below.
Additional details on various site to site VPN topologies and configuration instructions can be found from AWS in this document and the step-by-step guide here.
Discover an On-Premises ONTAP Cluster
In this section we will show you how to discover the on-premises NetApp cluster from Cloud Manager in order to deploy a volume for disaster recovery.
- Log in to your NetApp Cloud Account on the Cloud Central portal. You will automatically be directed to the Fabric View page. Then, click on the “Go to the Cloud Manager” link under the “Cloud Volumes ONTAP” option.
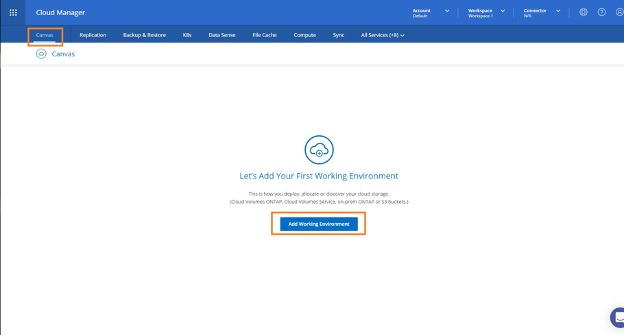
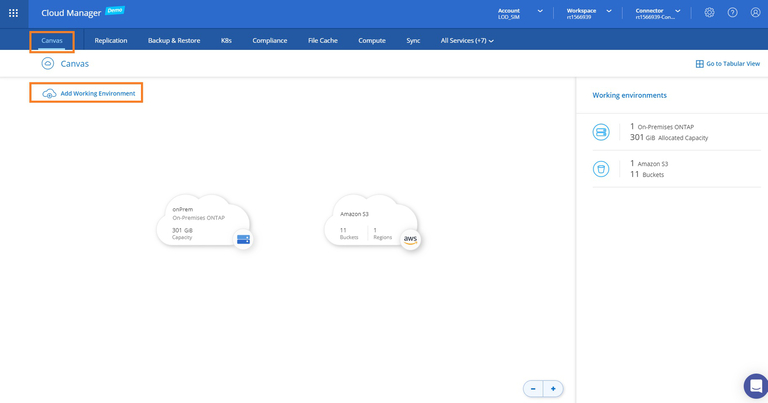
- You will now be directed to the Cloud Manager Canvas. From here, click the “Add Working Environment” button to create your first Cloud Volumes ONTAP instance:
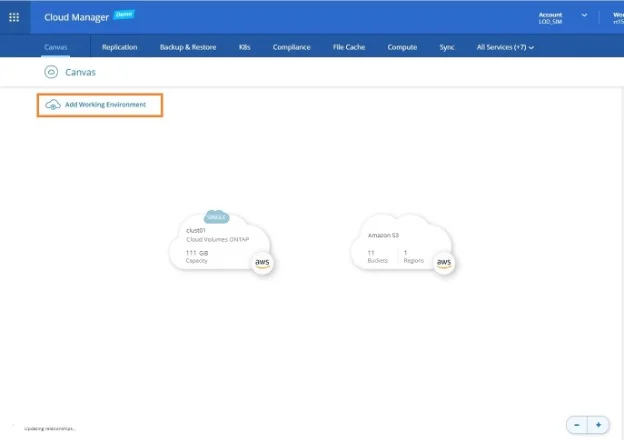
If you already have “Working environments” defined in your Cloud Manager Canvas, you may add a new working environment here for the purpose of this exercise as illustrated in the screenshot below.
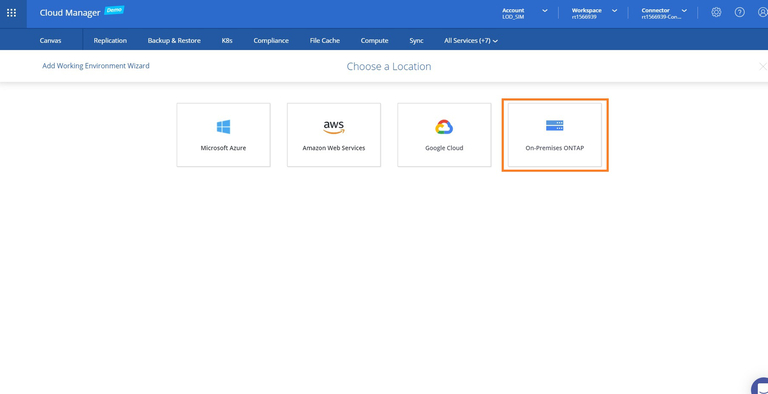
- Select “On-Premises ONTAP” to discover the on-premises NetApp ONTAP cluster.
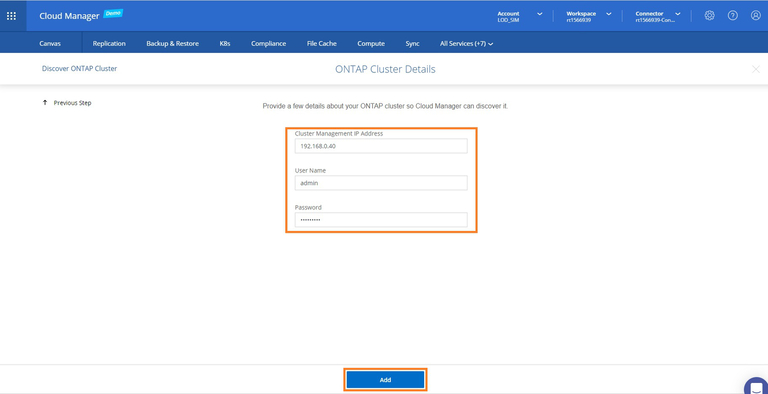
- Enter the on-premises cluster management IP details and admin credentials. Click “Add” to discover the on-premises ONTAP systems.
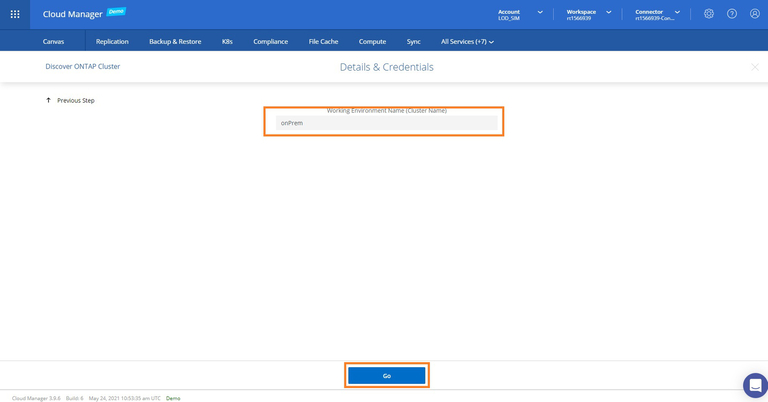
- Accept / amend the name for the on-premises working environment and click “Go” to add the on-premises NetApp cluster to Cloud Manager.
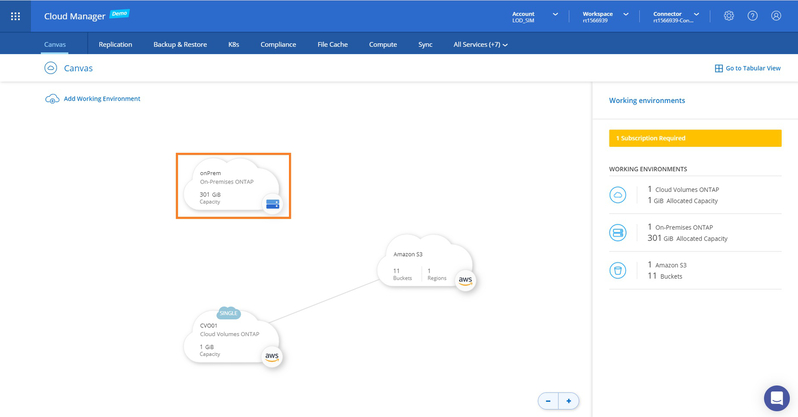
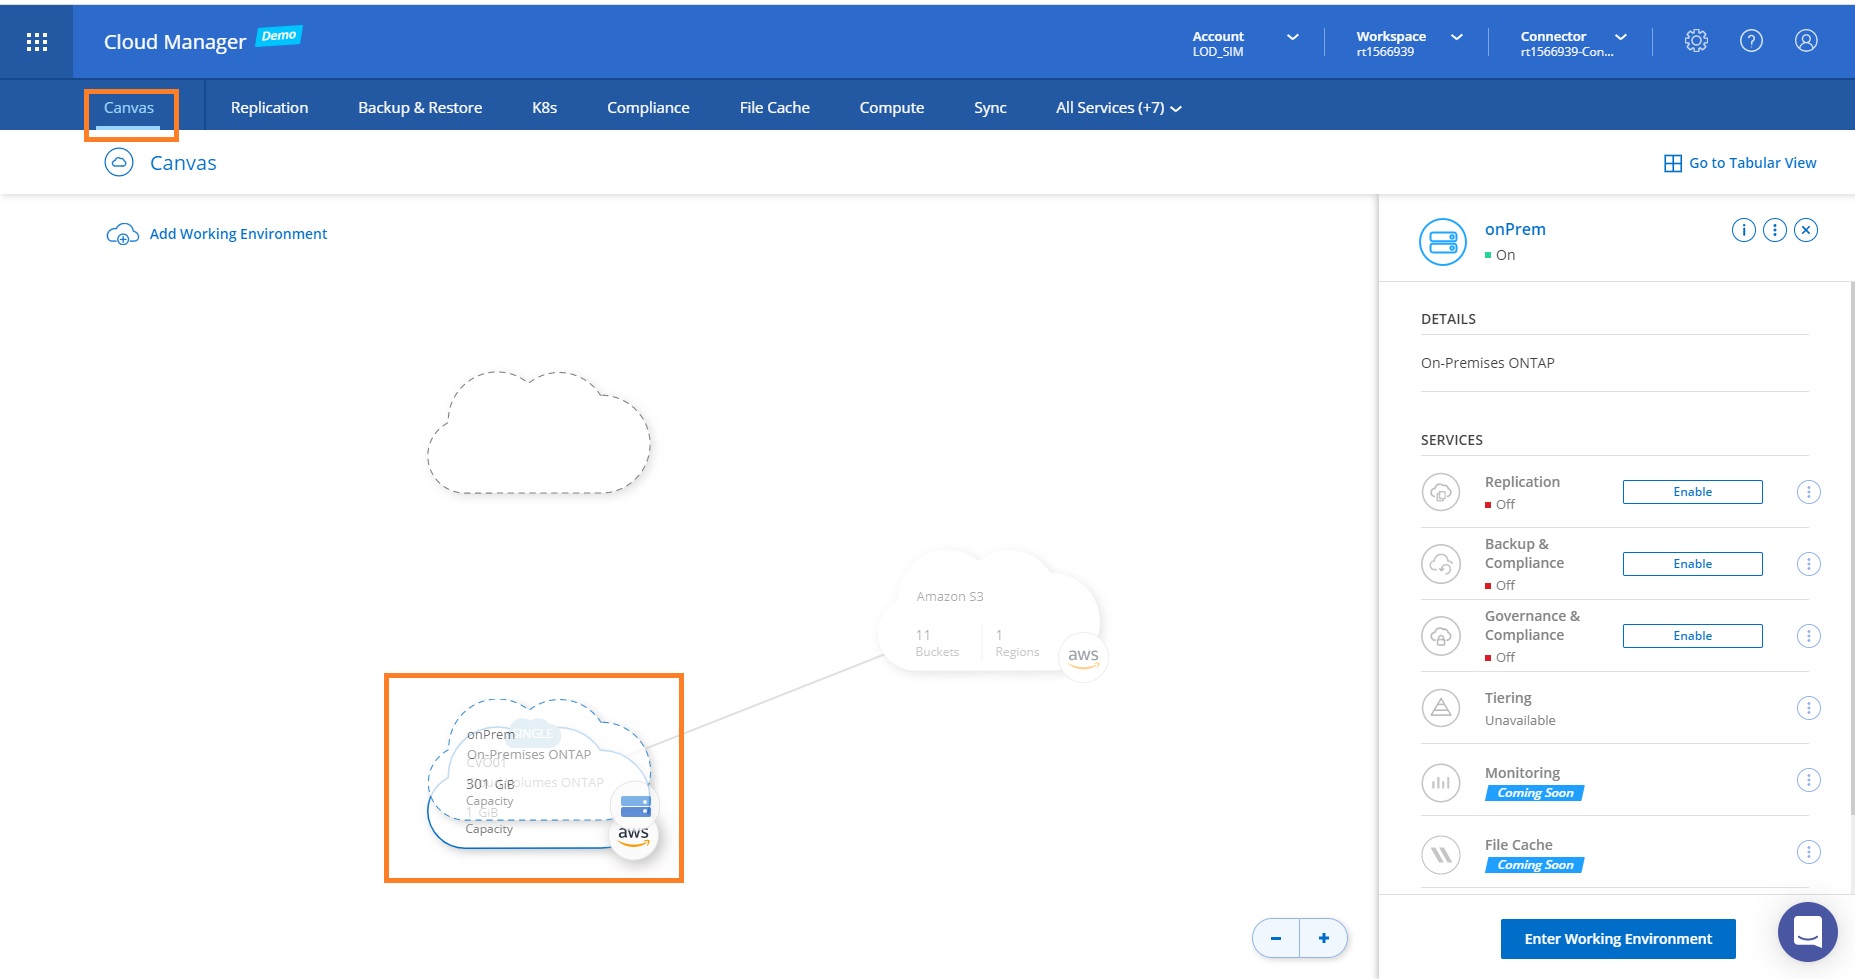
- Once complete, you will see the new on-premises environment listed within Cloud Manager.
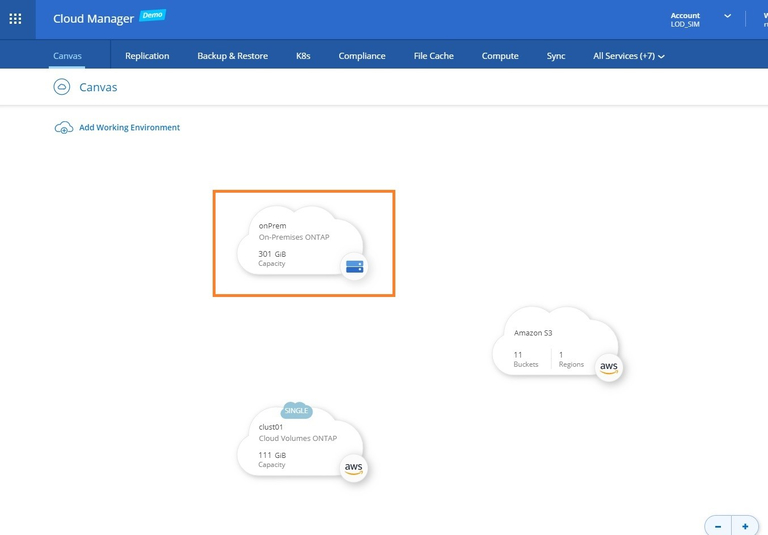
Note that while the above screenshot may show existing Cloud Volume ONTAP systems, you may not see anything other than the discovered on-premises environment on your Cloud Manager canvas. - Double-click the discovered cluster to see the volumes and determine which one you wish to replicate.

We will now proceed to creating the first Cloud Volumes ONTAP system, which will be used for the cloud-based DR copy.
Create a New Cloud Volumes ONTAP Environment on AWS
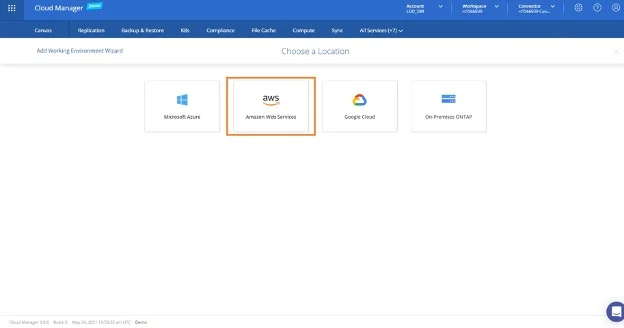
- From the Cloud Manager “Canvas”, click “Add Working Environment”:
- The first step here is to choose the cloud in which you wish to start your new environment. The available options are AWS, Azure, Google Cloud, or on-premises ONTAP. For this scenario, we are selecting the “Amazon Web Services” option.
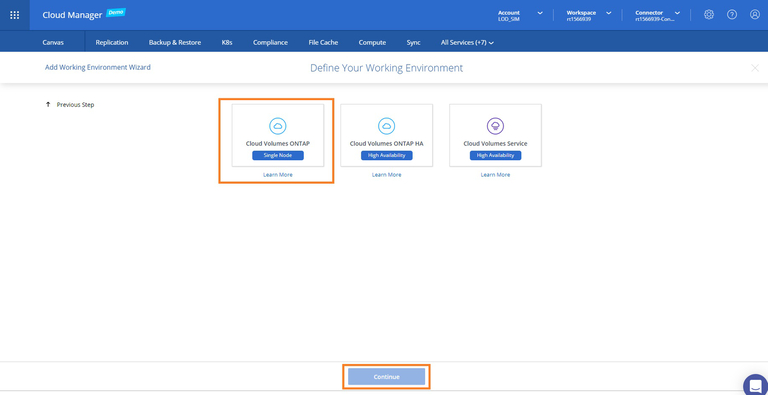
- In the next step, select between Cloud Volumes ONTAP single node or high availability mode as the deployment option. For the purpose of this illustration, we will use the single-node option.
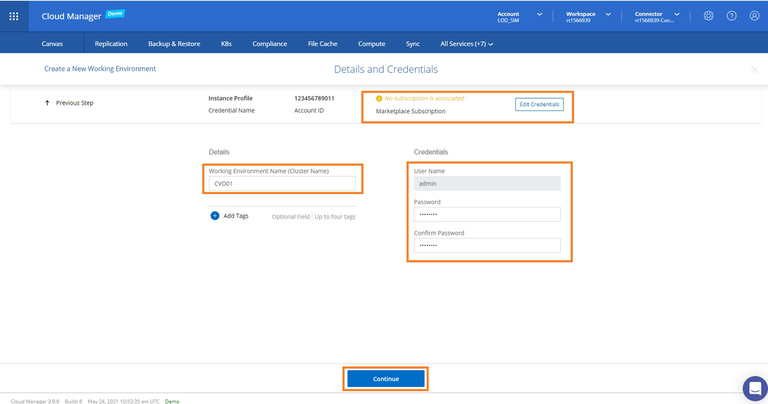
- In this step you will provide the details of the environment to be created including the environment name and admin credentials. Make sure to verify the Cloud Provider subscription to be accurate, as outlined in the step-by-step set-up guide. When you are finished, click “Continue.”
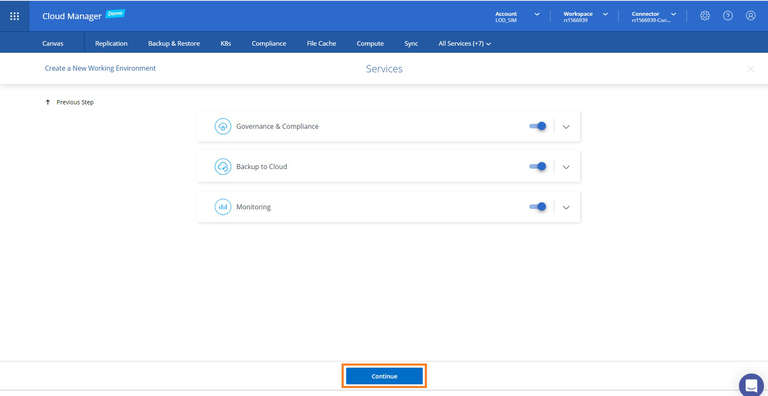
- In the next step, you can select the supplemental Cloud Volumes ONTAP services that you want to enable. For the purpose of this illustration, we will leave the defaults and click continue.
- In this step, configure the AWS Region, VPC, and the appropriate subnet for connectivity.
- If you choose to create a new security group, Cloud Manager will create a group with all the required inbound/outbound access rules.
Alternatively, you can choose an existing security group (such as the security group created for Cloud Manager deployment, which was covered in the prerequisites section on the step-by-step set-up guide) if Cloud Volumes ONTAP is also being deployed to the same AWS VPC as Cloud Manager. If you use an existing security group, ensure these security group rules are fully configured within the security group. You should also confirm that connectivity exists between Cloud Manager Server and the selected VPC.
- If you select the SSH Authentication method as the Key Pair, make sure to select the appropriate key pair that should have been pre-created, which was also explained in the prerequisite section in the step-by-step set-up guide.
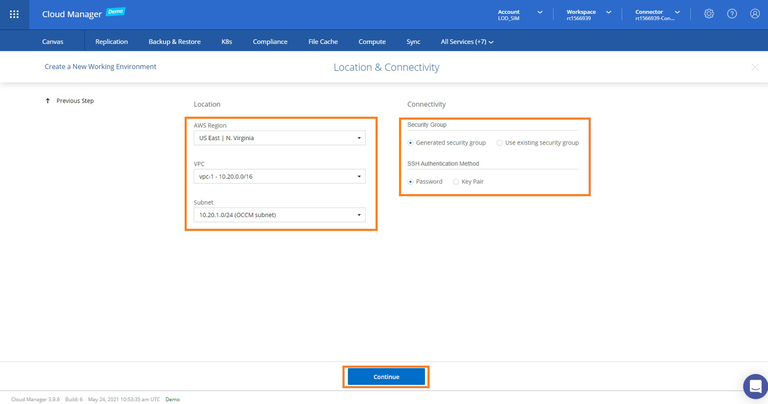
Once you’re finished, click “Continue.”
- If you choose to create a new security group, Cloud Manager will create a group with all the required inbound/outbound access rules.
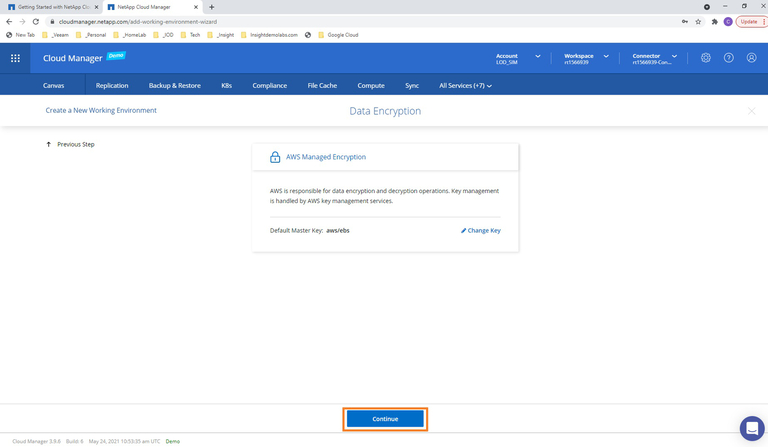
- On the Data Encryption screen, click continue to proceed with the default data encryption option applicable for Cloud Volumes ONTAP.
- In the next screen, choose your license option: Pay-As-You-Go, or BYOL to use for an existing license.
In either case, select a NetApp Support Site (NSS) account to be used with the configuration. A NetApp Support Site account is recommended for the Pay-As-You-Go option in order to activate support for your system. However, note this can be added later as an option. Activation provides access to NetApp technical support resources and software updates. For the BYOL option, a support account allows you to upload your license key and enable the subscription for the term that you purchased. This includes automatic updates for term renewals.
In this example, we will keep the default Pay-As-You-Go option.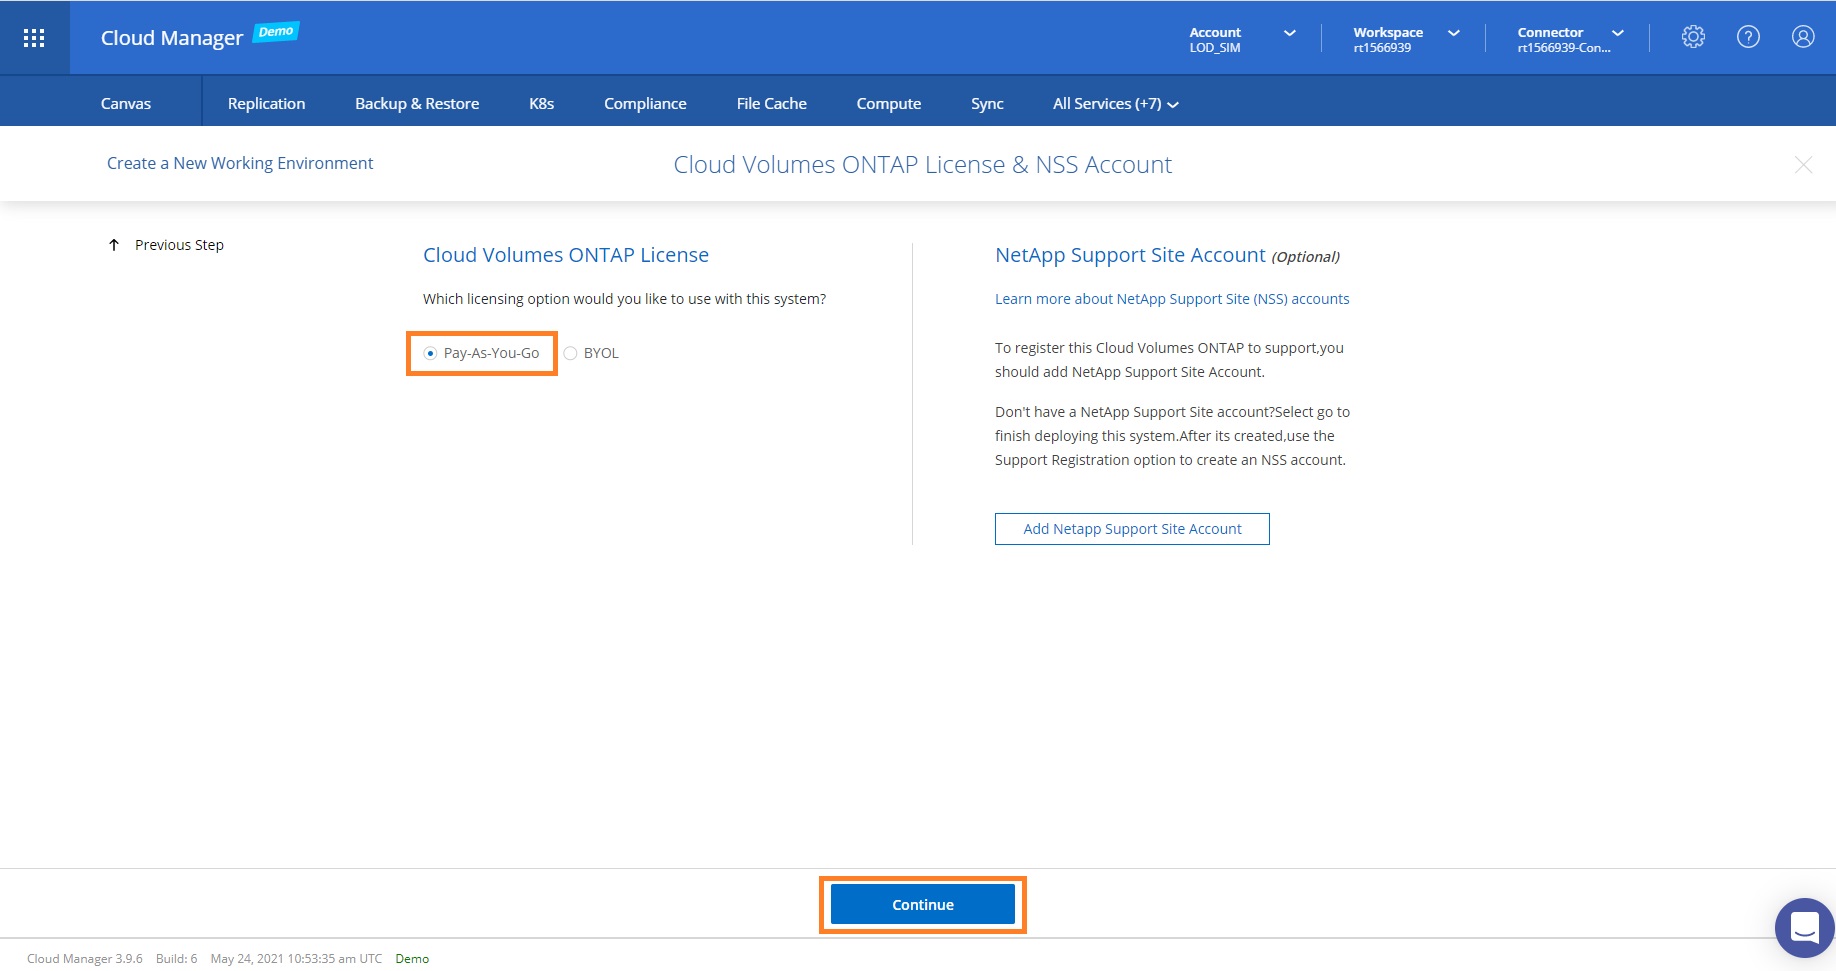
- In the next step, you can choose between several preconfigured packages available for various types of workloads.
These options include Cloud Volumes ONTAP optimized for testing purposes, database and application data production workloads, cost-effective DR, and high-performance production workloads. You can hover over each option to view the configuration parameters of each option.
Alternatively, you can click the “Create my own configuration” button on the top-right corner of the screen to define one according to your own parameters.
For this scenario we will proceed with “Cost effective DR” configuration. Select that option and then click “Continue” to proceed to the next screen.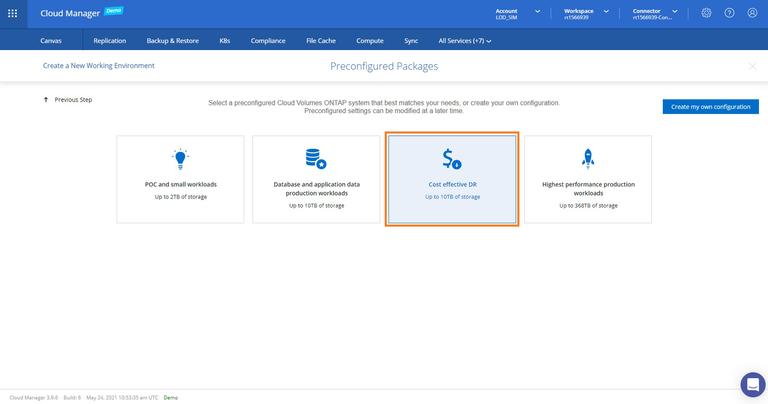
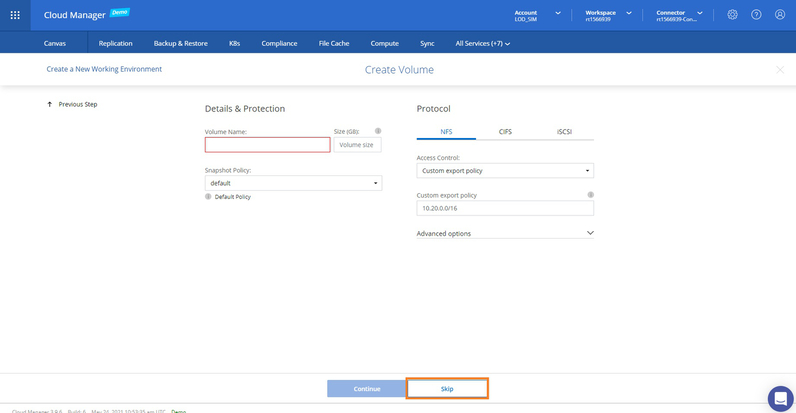
- We will skip the “Create Volume” section that appears next as we will be creating the DR replication volumes to the on-premises NetApp environment as a part of setting up the replication.
Click “Skip” to proceed.
- In this step you are asked to review the configuration settings and approve that the Cloud Manager will provision the selected AWS resources on your behalf. Tick the “I understand….” box and then click “GO.”
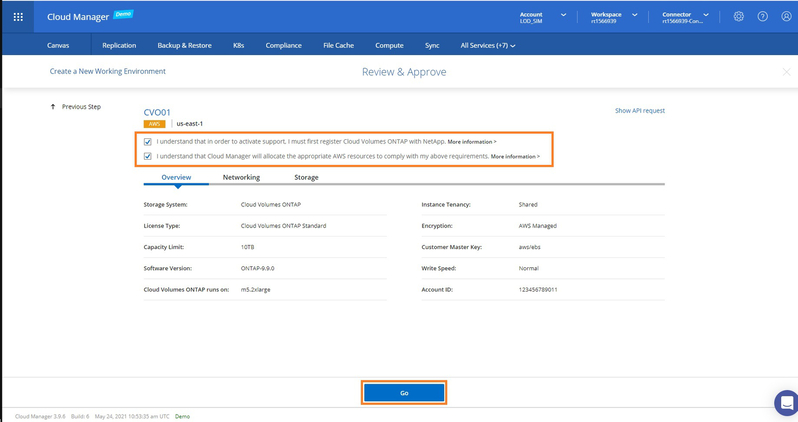
You can see that the environment is now initializing. This may take up to 25 minutes to provision.
- Once provisioned, Cloud Volumes ONTAP will be listed in the working environments along with your other ONTAP systems.
Create a Replication Relationship
Now that we have discovered the on-premises NetApp cluster and deployed a Cloud Volumes ONTAP instance to an AWS VPC for DR replication, this section will focus on creating the NetApp SnapMirror® replication relationship for enabling DR from on-premises to the cloud.
Snapshots are created automatically by ONTAP operating systems as a default backup mechanism. To configure replication between different source and destination ONTAPs, the user should configure the data replication policies that specify how snapshots will be copied over to the destination volume. The following replication policies are available:
- Backup Policy: This policy is used for copying specific snapshot copies to the destination volume, mainly for backup and long-term retention purposes, allowing you to restore to different points in time.
- Mirror Policy: Copies the newly created snapshots to the destination. This is suitable in DR scenarios, where the destination volume can be activated at any time for data access.
- Mirror and Backup Policy: As the name indicates, this option combines both Mirror and Backup policies and is useful for DR as well as long-term retention.
These policies are included in the system. Alternatively, you can create custom policies of your own.
- From the main working environments page, drag and drop the source environment (On-premises) to the target environment (Cloud Volumes ONTAP).
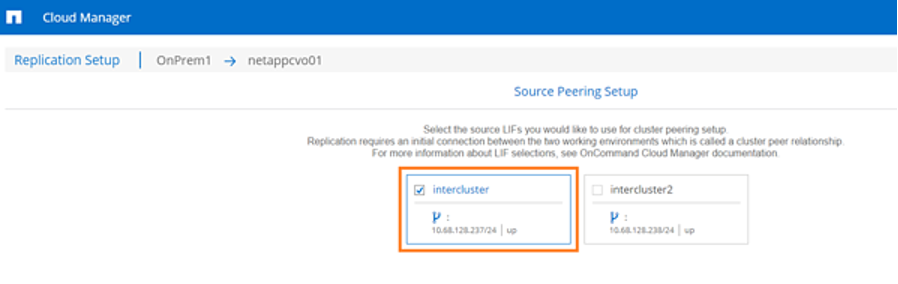
- (Optional) Depending on the number of intercluster LIFs available on the discovered on-premises ONTAP cluster, the Source Peering Setup screen may appear. If it does, on the “Source Peering Setup” page, choose the Cluster Logical Interface (LIF) you want to use for the cluster peering setup, which is the initial connection between the two working environments. Click “Continue” to proceed.
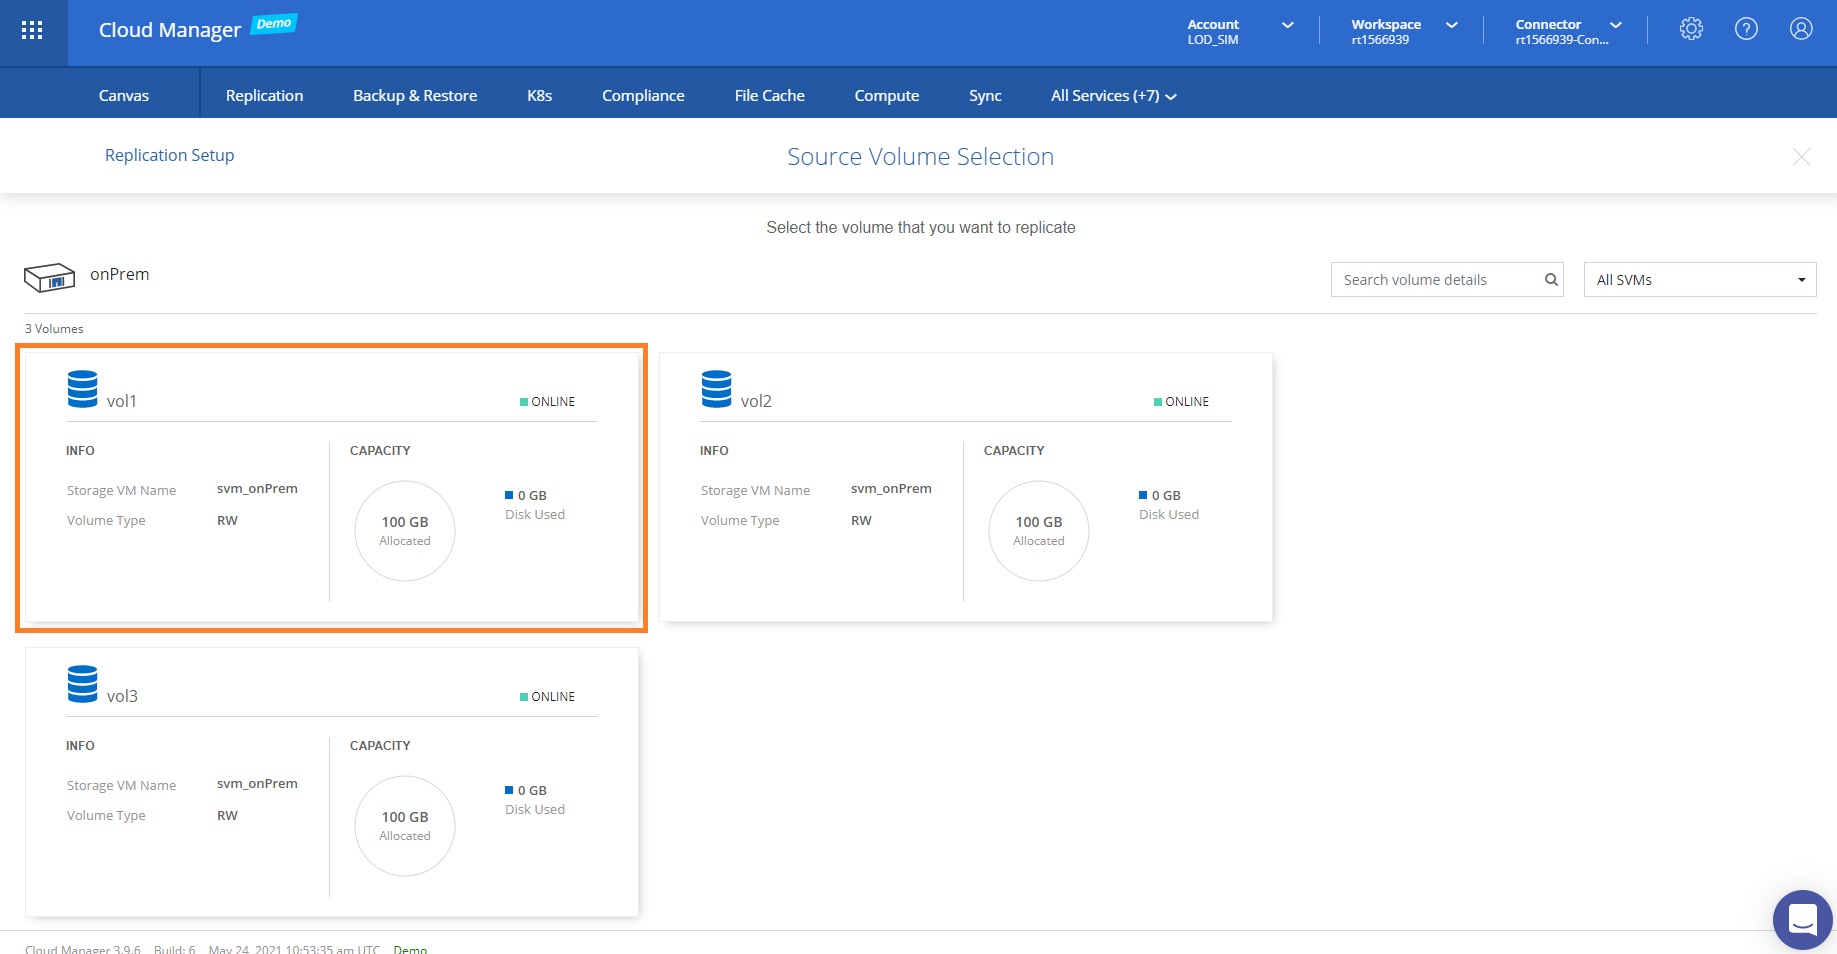
- The next screen will show the list of volumes on the source. Select the volume that you want to be replicated.
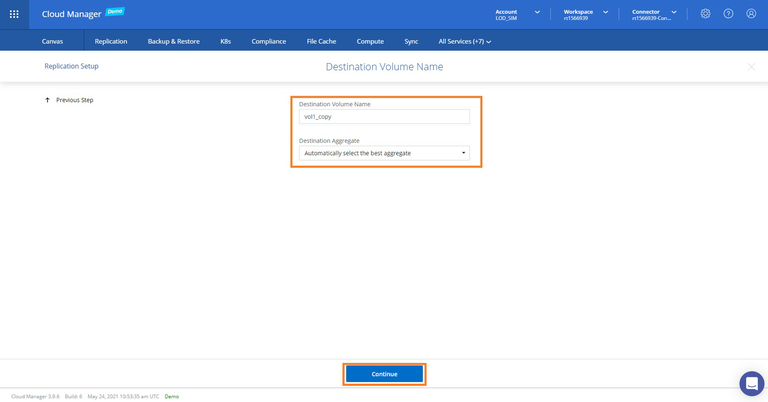
- In this step you can define the destination volume. Select the Destination disk type based on the type of disk required. Note the tiering policy will be assigned with default values according to the source. Once done, click “Continue.”

NOTE: If the Amazon S3 tiering option is enabled, ensure that the prerequisites for this are met. - Provide a name for the destination volume for the data to be replicated to your Cloud Volumes ONTAP instance and select the aggregate for the volume to reside. We will proceed with the below for this illustration.
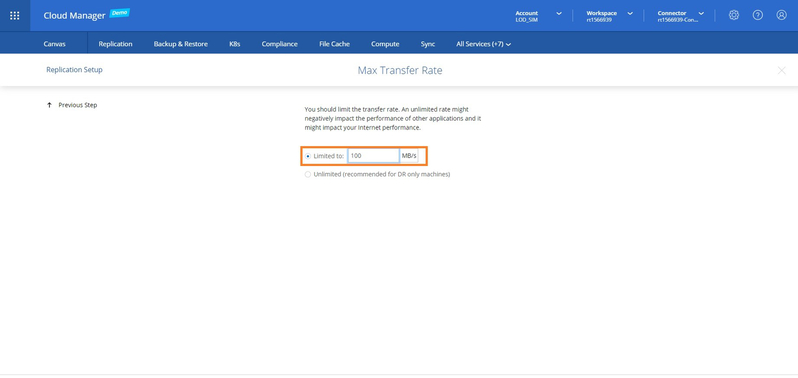
- Define the data transfer rate maximum. This setting is useful in environments with bandwidth restrictions. Select “Continue.”
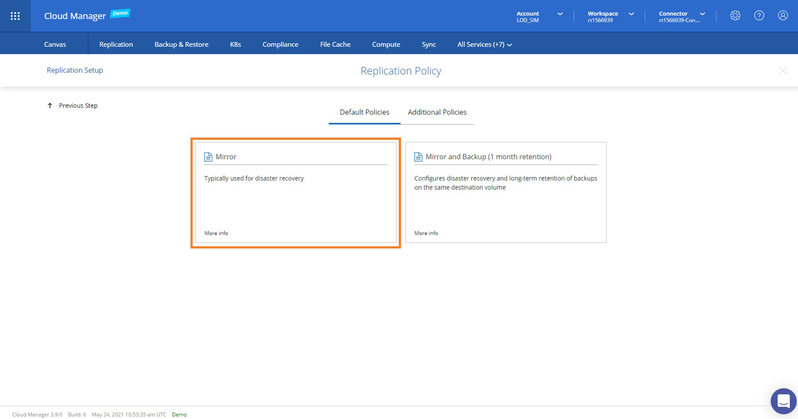
- In the next screen, select your preferred replication policy. For this scenario, we will choose the Mirror policy which is sufficient for the purposes of disaster recovery.
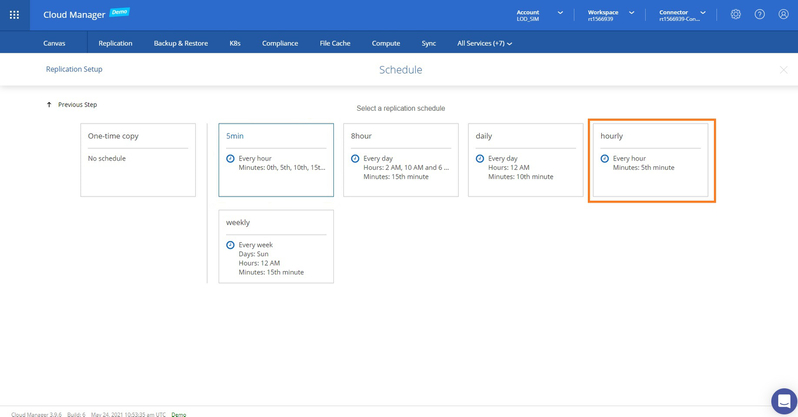
- In the “Schedule” window, choose a replication schedule based on the available options listed. This will define the data Recovery Point Objective (RPO) of your DR solution. For the purpose of this illustration, we will select the hourly option.
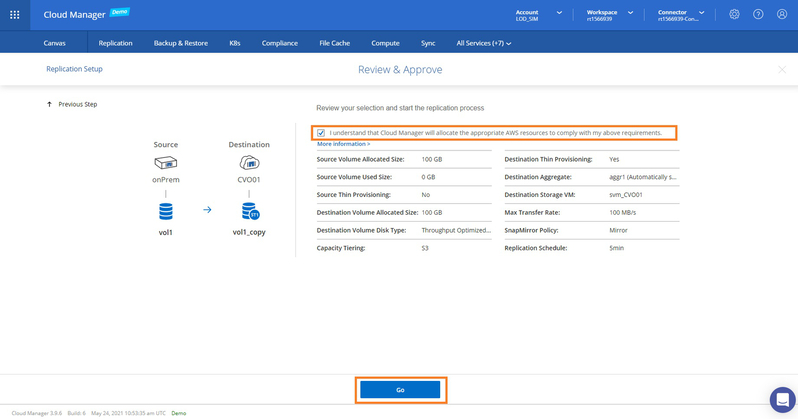
- Review the configuration, tick the “I understand…” box to approve, and click on “GO” to start the replication process.
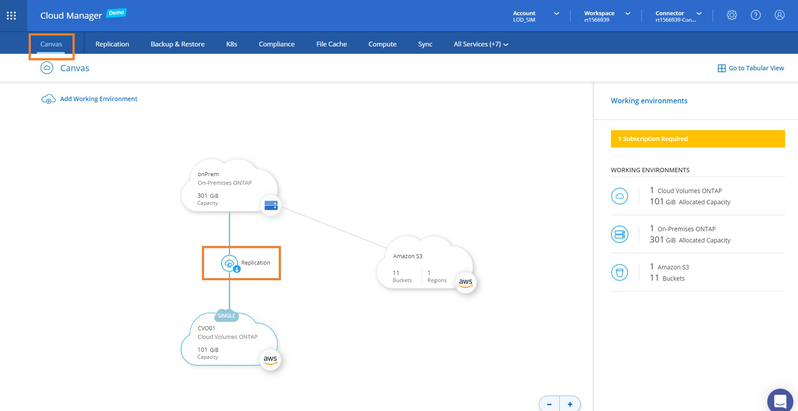
- On successful setup, you will see the below view on your Cloud Manager Canvas showing the newly started replication between on-premises ONTAP solution and Cloud Volumes ONTAP instance. Note the replication direction indicated between the on-premises ONTAP and Cloud Volumes ONTAP with an arrow.
Monitor and Manage the Replication Relationship
Once the replication is completed successfully, you can see the replication relationship in the working environments by going to the “Replication” section. This is also where you will be able to verify the replication relationship health.
As can be seen from the image below, the on-premises volume is being replicated to Cloud Volumes ONTAP in AWS.
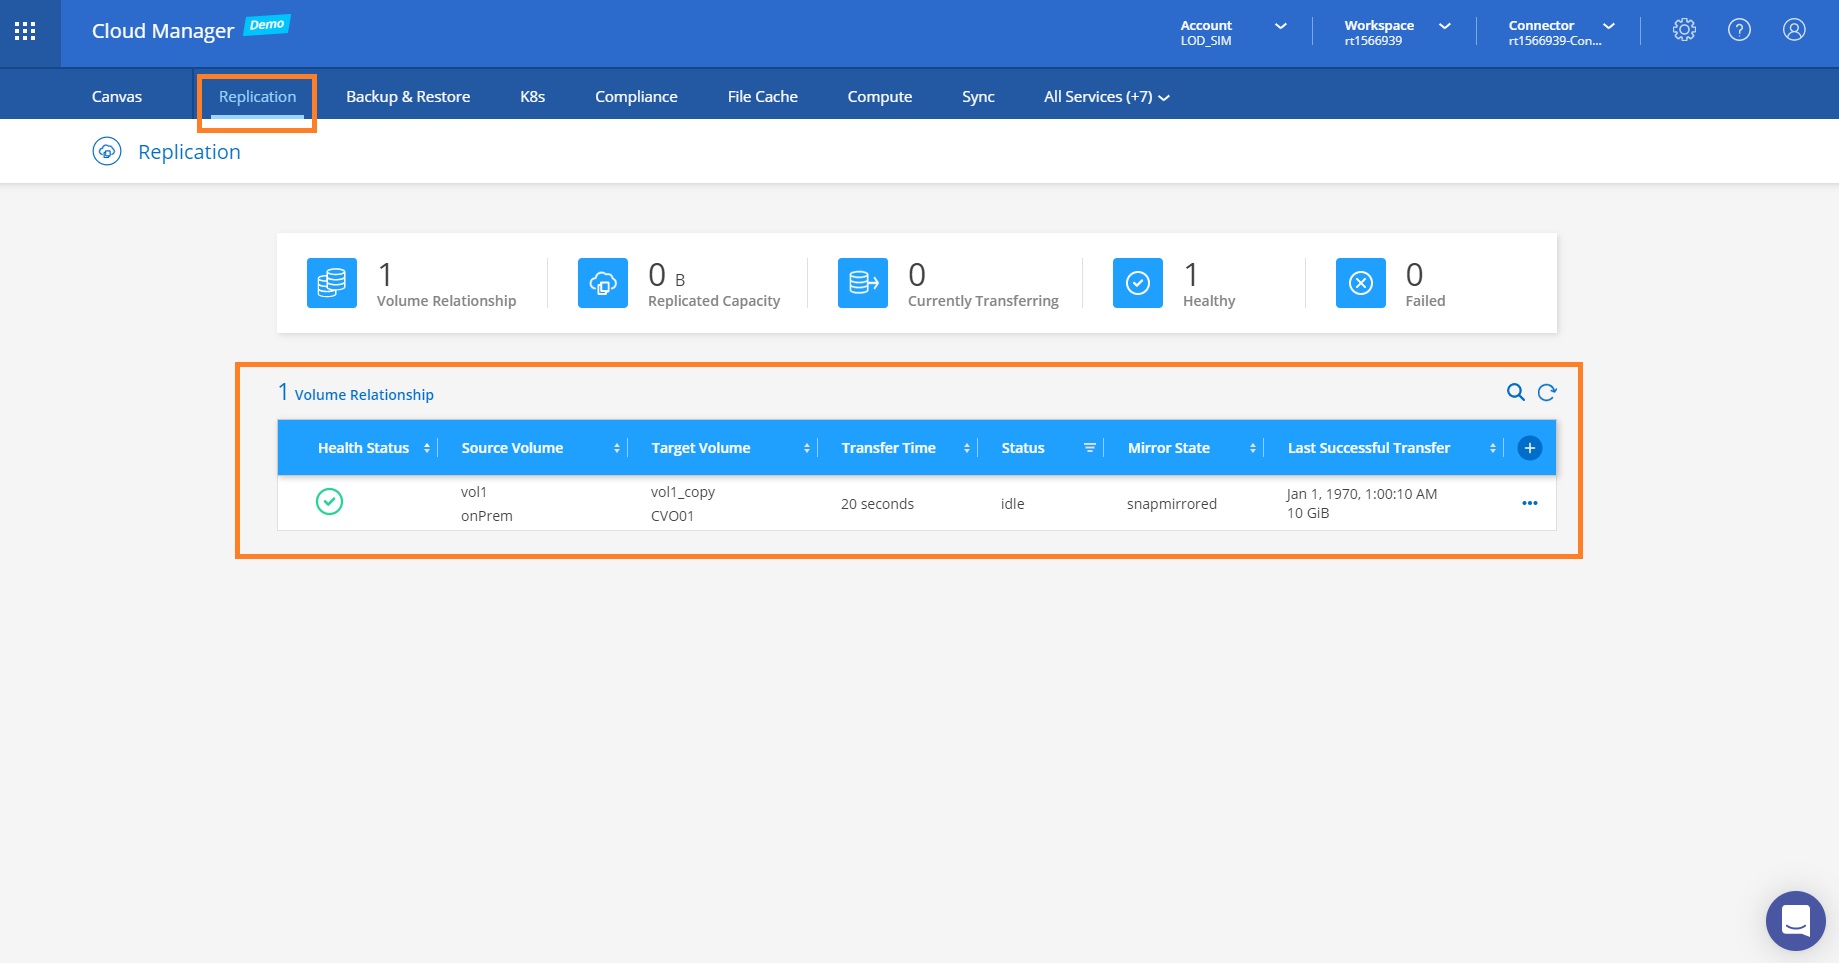
You can manage the replication configuration from the Cloud Manager management window using the Replication Status tab view. Click the icon on the left of the relationship line to view various options. For example, you can break the replication, reverse synchronize the data (used during a failback operation), edit the sync schedule, and more using this view.

Conclusion
Cloud Volumes ONTAP offers a cloud-based disaster recovery solution for your storage. The solution can be configured for AWS disaster recovery as well as for Azure disaster recovery, which is outlined in this blog post. As a central part of a disaster recovery strategy, it offers better protection and security when compared to traditional disaster recovery solutions and caters to multi-cloud and hybrid-cloud architectures for enterprises.

.png?width=75&height=75&name=yuval-on%20demand%20(1).png)