Share
Since its first implementations around 15 years ago, virtual desktop infrastructure (VDI) has become an ideal solution for organizations which have dynamic workforces. Users need to access their applications and workstations from multiple locations, not only while they are on the company’s premises. They also need to access their resources from a diversity of devices such as personal laptops, tablets, and smartphones. VDI makes this possible.
With the ongoing work disruptions, VDI solutions are more crucial to enterprise operations than ever, since a majority of the workforce is working from home and accessing company resources securely from those disparate locations.
With the Amazon WorkSpaces Desktop-as-a-Service (DaaS) solution, AWS has a VDI solution ready to be deployed in minutes. Since performance in VDI deployments is a key factor, storage used by the VDI infrastructure plays a critical role. This is where NetApp Cloud Volumes ONTAP comes in.
By providing a high performance storage service which can deliver multi-protocol access over NFS, CIFS/ SMB, and iSCSI, Cloud Volumes ONTAP can help protect your VDI deployment while also adding storage efficiency features that will help you lower your overall TCO.
This article is a walkthrough on how to deploy WorkSpaces VDI in AWS using Cloud Volumes ONTAP as the underlying storage to achieve a complete and robust solution.
Prerequisites for Deploying a VDI Environment on AWS
One of the advantages of deploying WorkSpaces is that there are almost no prerequisites to get started. In this article we are going to show you how to deploy WorkSpaces by taking the Advanced Setup option. Below are the only two prerequisites you will need:
- An AWS VPC (Virtual Private Cloud): At least one VPC already created within your AWS account in a region which supports the WorkSpaces service. Find out about VPC requirements for WorkSpaces here.
- Subnets: At least two different subnets in the same CIDR IP range, each in different Availability Zones, within the VPC you created.
- NetApp BlueXP Console: BlueXP Console deploys in AWS, making it possible to provision your Cloud Volumes ONTAP file shares. Follow the instructions in this post to set up your BlueXP Console instance.
Deploying a VDI on AWS Step by Step
Log in to your AWS account, select a region which supports the service, and go to WorkSpaces in the main AWS Services tab. Click on “Launch WorkSpaces” and choose the “Advanced Setup” option.
WorkSpaces use directories to manage user, group, and VDI desktop information and permissions in the same way as on-premises desktops often use Active Directory for access permissions and desktop management. You need to deploy a directory first before launching the VDI environment.
Creating the Directory
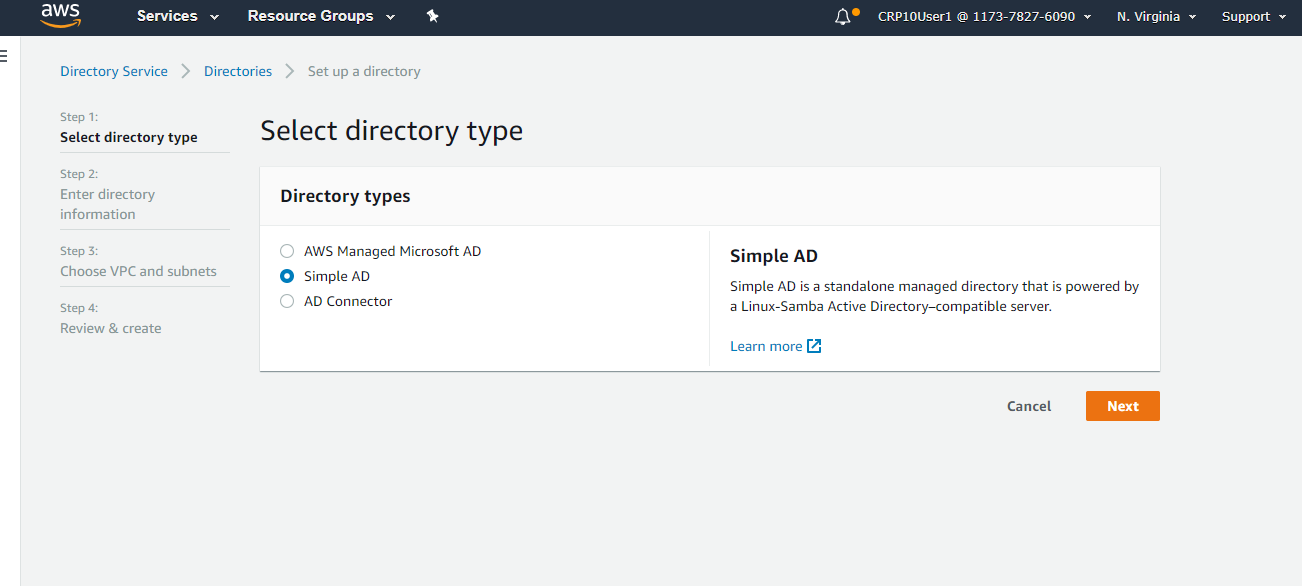
1. In the Advanced Setup screen, select the type of directory to be deployed. There are three options:- AD Connector: Use your existing on-premises Microsoft AD for users to login to WorkSpaces using their on-premises credentials to access on-premises resources from their VDI desktops.
- Microsoft AD: Deploys Microsoft AD hosted in AWS.
- Simple AD: Creates a directory compatible with Microsoft AD and Samba 4.
Choose the best directory option based on your deployment requirements. For the purpose of this demonstration, we are going to create a Simple AD directory. Click “Next.”
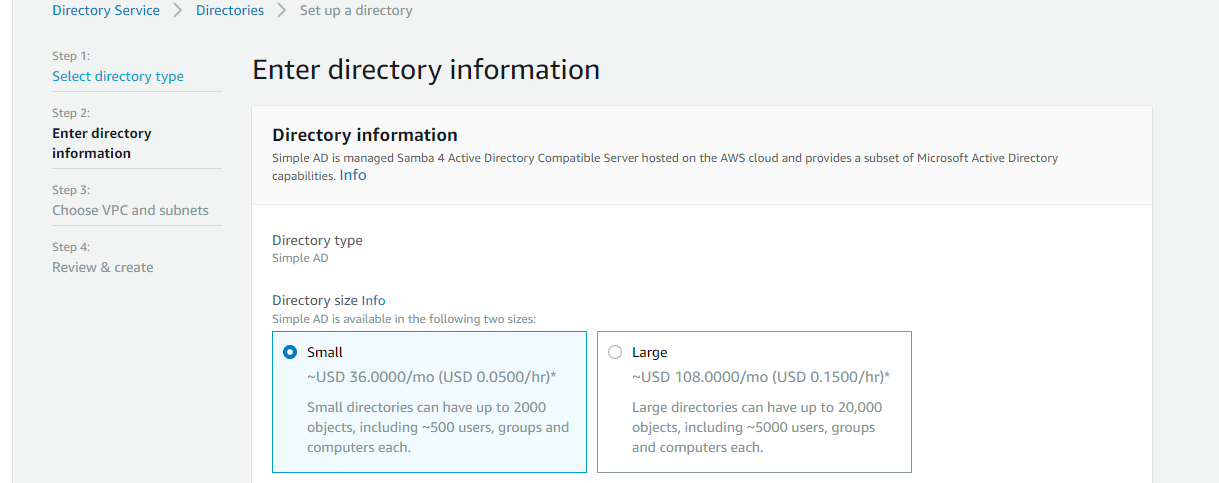
2. To finish creating the directory, select a size for it and click “Next.”
3. After selecting the directory size you need to enter the directory details, including:
- Organization name.
- Directory DNS name: This is a qualified DNS name that is going to be resolvable inside your VPC, and will be the one to which the Cloud Volumes ONTAP instance will be joined.
- Administrator password of the directory. Store this password as you are going to need it to join other instances to the domain.
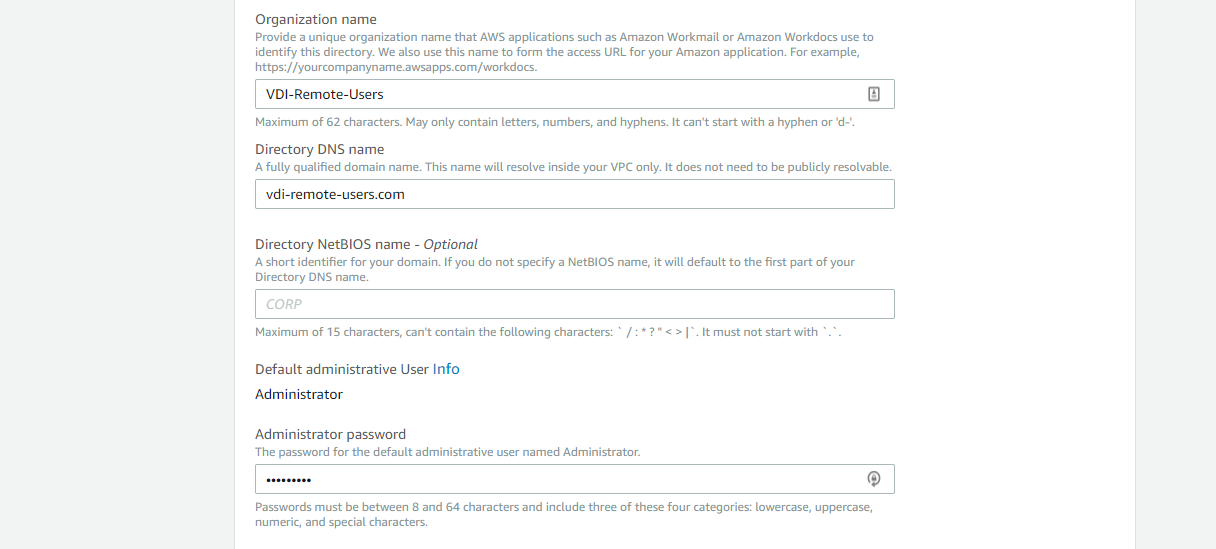
Hit “Next” to proceed to the next screen.
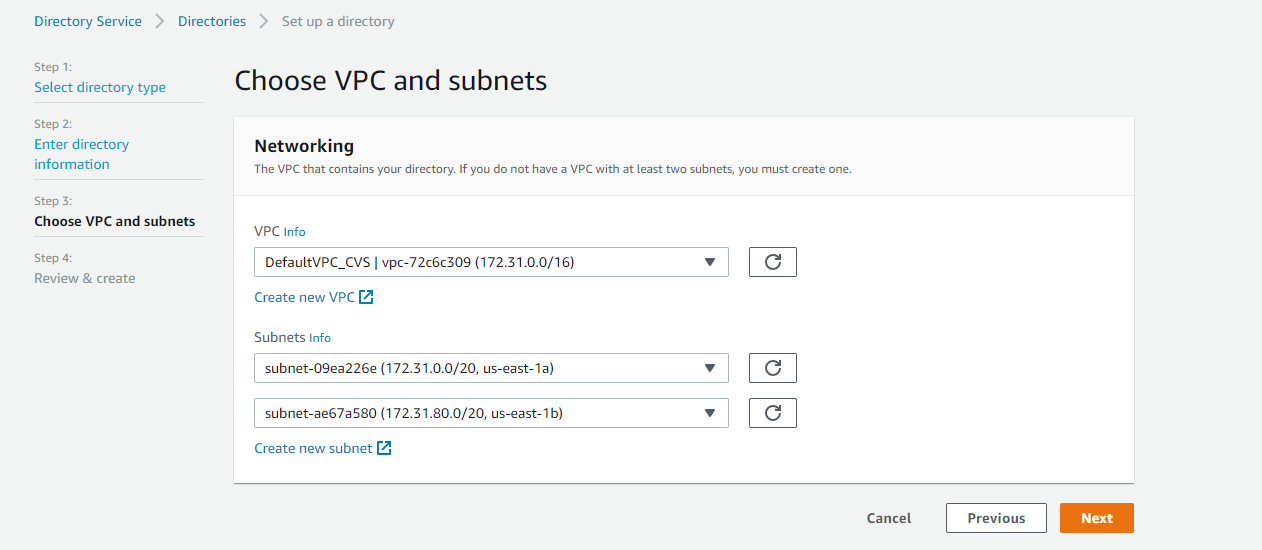
4. In this step you set the networking configuration for your directory. Select the VPC and two subnets in different Availability Zones. When the directory is created, two domain controllers are created with it, each on one of these subnets.
Hit “Next” to proceed.
5. On this screen, review all the information provided so far. When you are done, click on “Create Directory.”
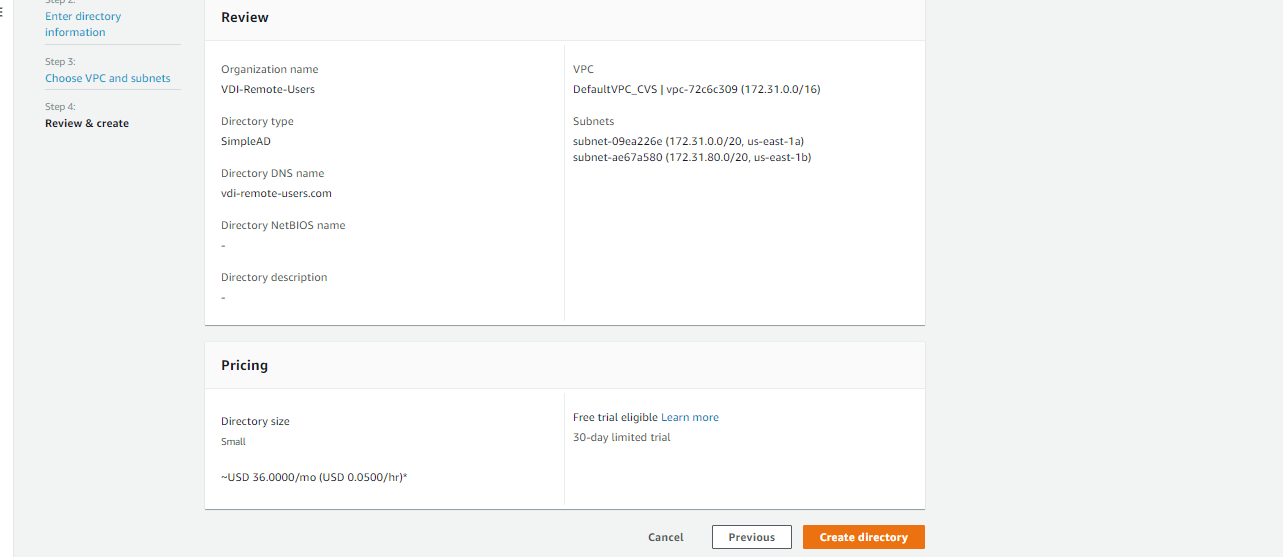
Once the Simple AD is created you will see the status listed as Active.
Launching the WorkSpaces VDI Desktop
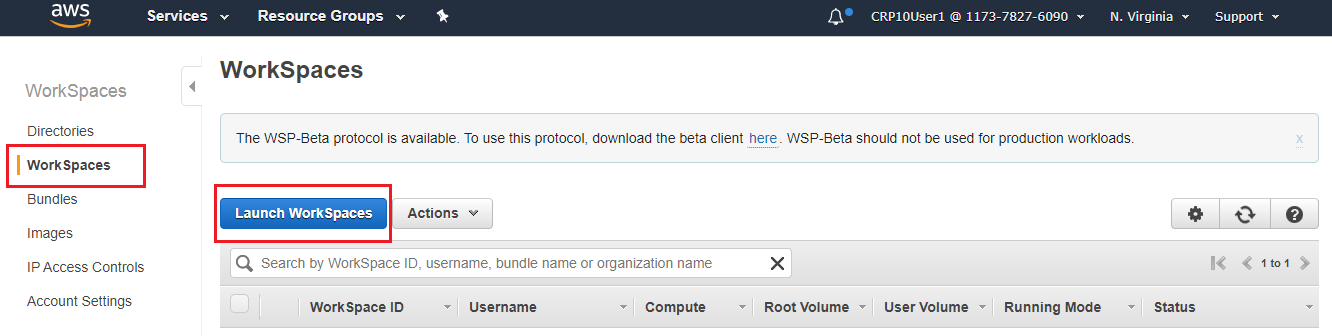
Now you are ready to launch your first WorkSpaces VDI desktop. To do this, in the main WorkSpaces console, select “WorkSpaces” from the menu on the left and then select “Launch WorkSpaces.”
1. You will now begin creating your first AWS Virtual desktop. In this screen you need to:
- Select the directory which your new Virtual Desktop is going to join.
- Select two subnets within the VPC where your WorkSpaces are going to live. By default AWS assigns the same two subnets in which the directory controllers reside.
- Self Service Permissions: This option allows the end user to increase the desktop volumes’ size or to rebuild their WorkSpaces without requesting the Admin’s permission.
- Enable Amazon WorkDocs, a scalable cloud storage option in AWS where you can store, edit and share files.

2. In this section you provide access to the WorkSpaces for one or more users. If you selected the AD Connector option when creating the directory in step 1, all your on-prem users will be displayed in the list. You can just select and add them. Otherwise, just create the new user by providing username, first name, last name, and email address:
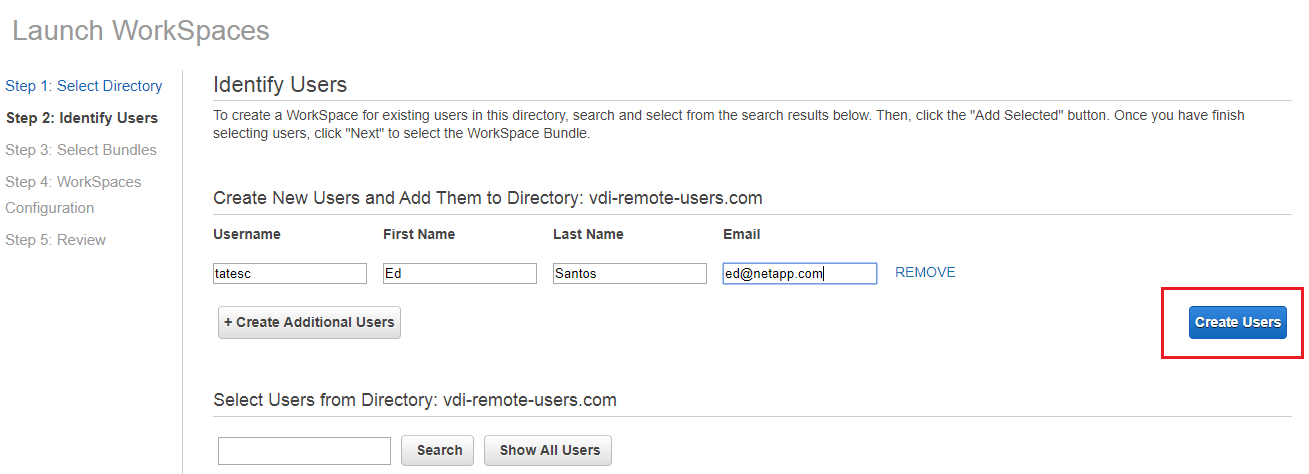
When you are done adding users, click on “Create Users” and “Next.”
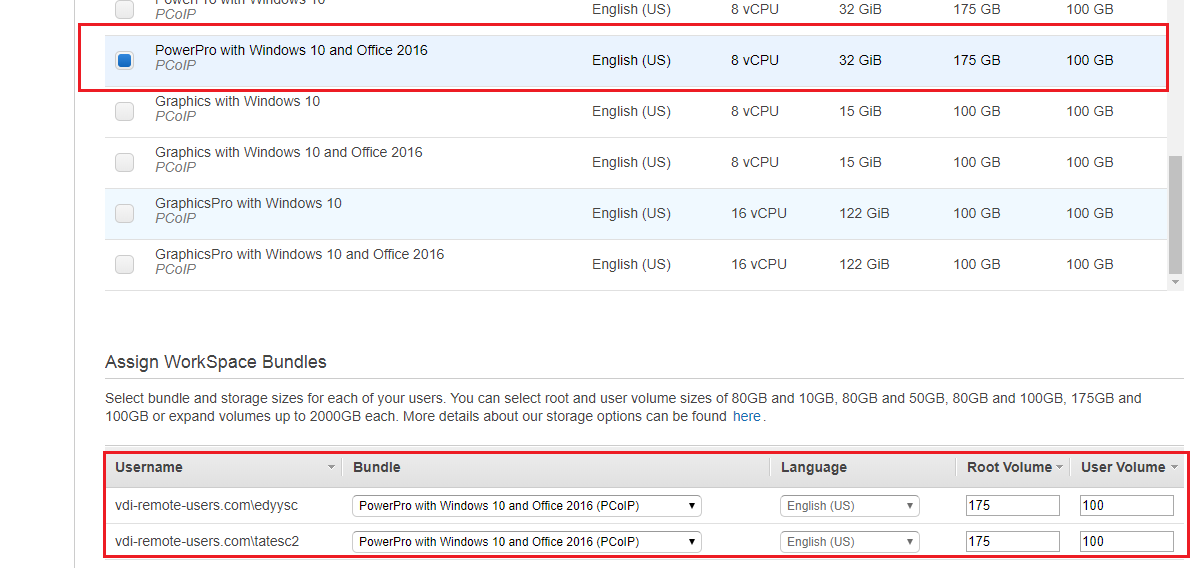
3. You will now select your WorkSpaces Bundle, which is the combination of operating system, compute power, storage, and software resources that are pre-installed in your WorkSpaces. Read about each type of WorkSpaces bundle here.
VDI on AWS supports Windows and Linux desktops. Additional software packages you may purchase for your Windows VDI include Office 2016 and other utilities. You may also bring your own software packages and install them later after the VDI environment has been deployed. You can assign different bundle types for each user included in the previous step or you can choose one bundle from the upper list and apply it to all the users:
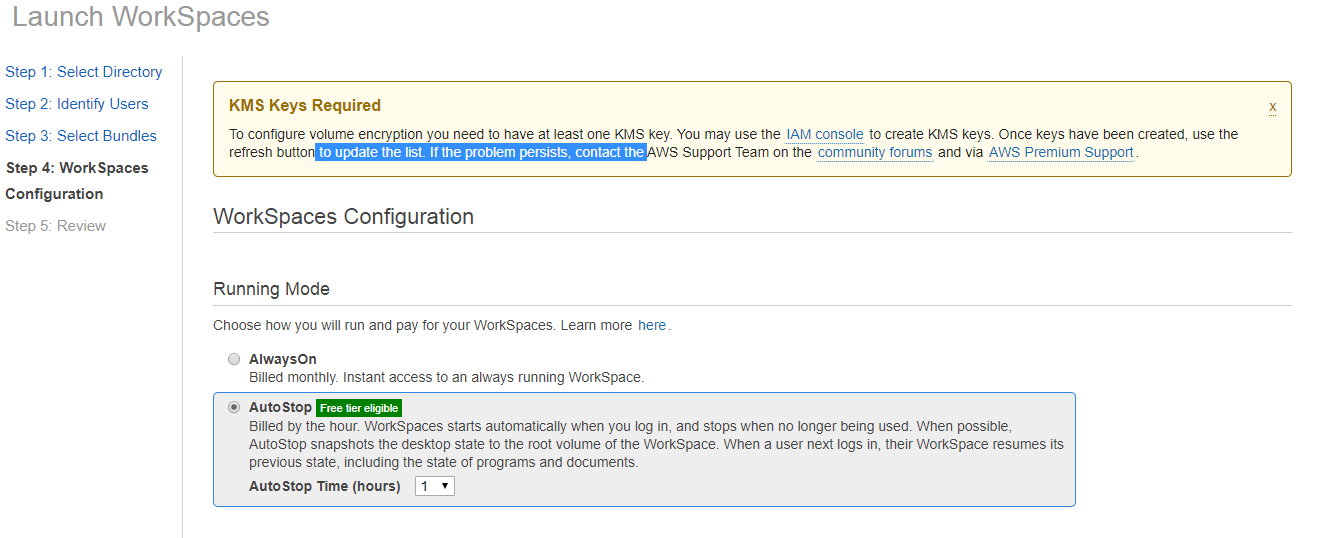
4. In the next screen you provide the WorkSpaces configuration, which includes:
- Running Mode: AlwaysOn or AutoStop. With AutoStop you can choose the idle time in hours before it stops running.
- Root volume and User volume encryption.
- Tags: tag your WorkSpaces if you want to organize and manage them. These tags will also appear in AWS cost allocation reports.
When you are done, click on “Next Step.”
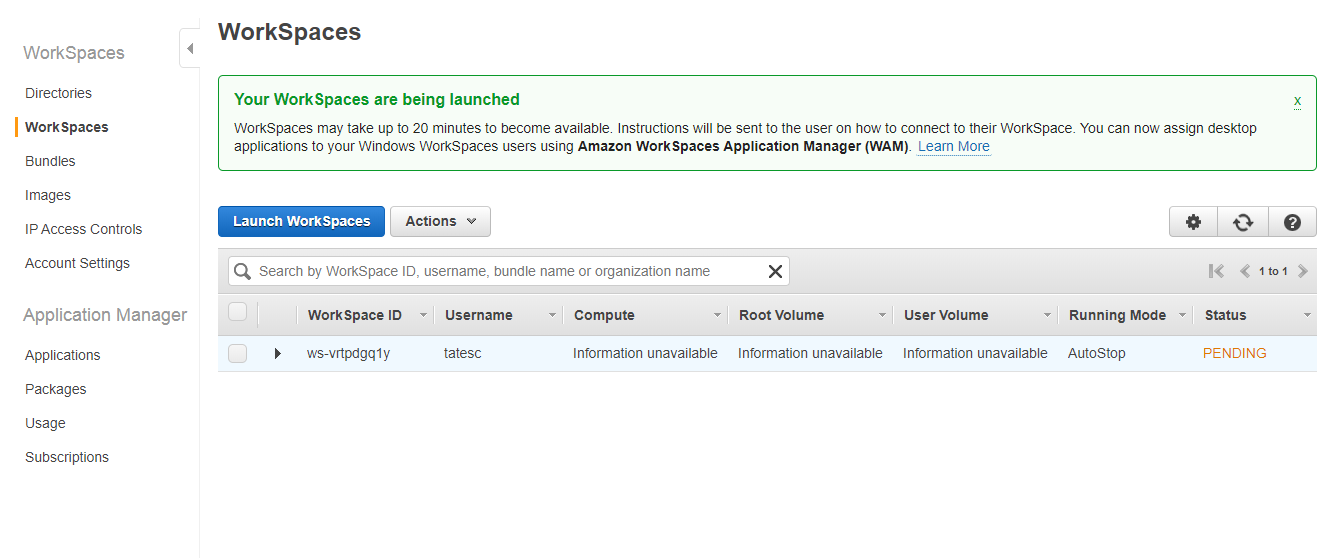
5. On this last screen you will review all the information you provided. Review it carefully and hit “Launch WorkSpaces” when you are ready. You are taken to the main WorkSpaces dashboard where you will wait while everything gets created:
How Clients Access the VDI Desktop
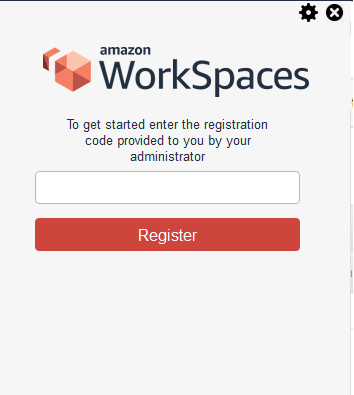
Once the VDI environment has been created, all the users added in step 2 above are going to receive an email with instructions on where to download the WorkSpaces Client to access their Amazon virtual desktop and how to log in for the first time:

With the registration code that came in the email, the users can register to the desktop. Now any time they need to access it, they just have to open the WorkSpaces Client:
Adding even more mobility for access to resources, Windows WorkSpaces now supports access through Chrome and Firefox browsers. You can find out how to enable WorkSpaces with Chrome and Firefox here.
Integrating Cloud Volumes ONTAP with the VDI Environment
Cloud Volumes ONTAP integration with VDI on AWS is done in two steps:
1. Create the Cloud Volumes ONTAP instance with a volume.
2. Map the volumes via NFS or CIFS/ SMB to WorkSpaces.
Creating the Cloud Volumes Instance from BlueXP Console
Follow the steps below to create the Cloud Volumes instance which is going to provide the storage for all your WorkSpaces:
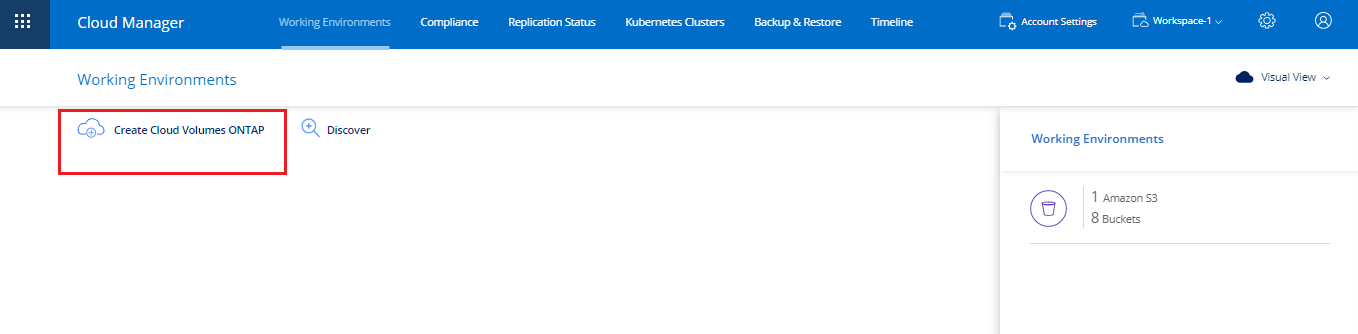
1. Login to your NetApp BlueXP account > Fabric View > Cloud Volumes ONTAP > Create Cloud Volumes ONTAP.
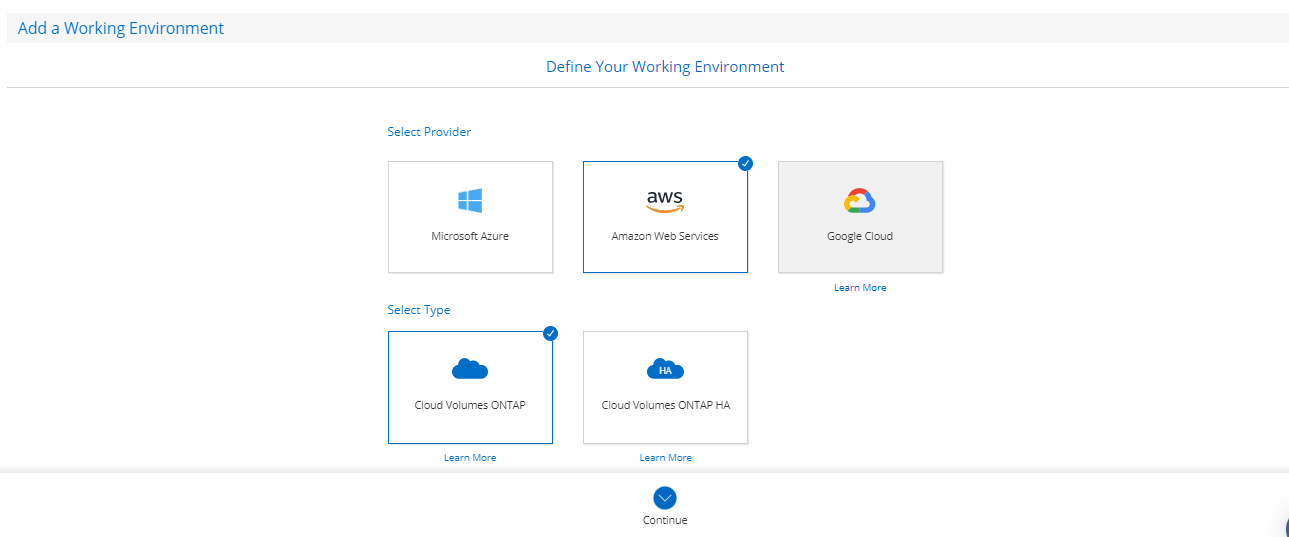
2. Select AWS as the cloud provider and choose the type of Cloud Volumes ONTAP you want. For the purpose of this demonstration we are choosing the single node setup:
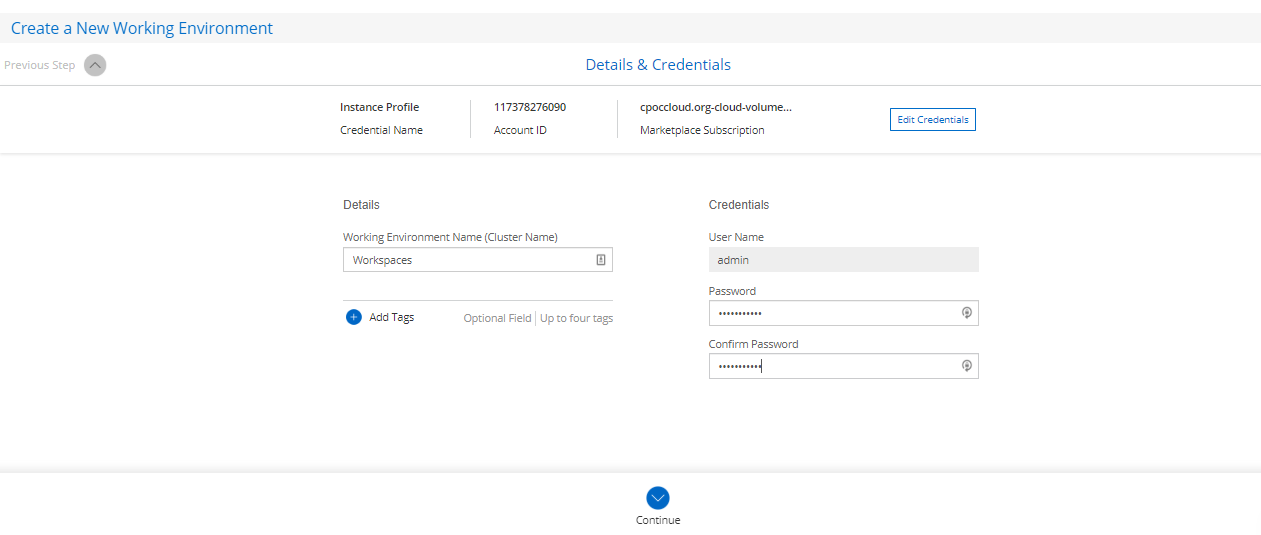
3. Enter the new working environment’s Name and Admin credentials.
When you are done, click “Continue.”
4. In the next screen you have the option to enable add-on services such as Cloud Data Sense or backups to Amazon S3.
When you are done, click “Continue.”

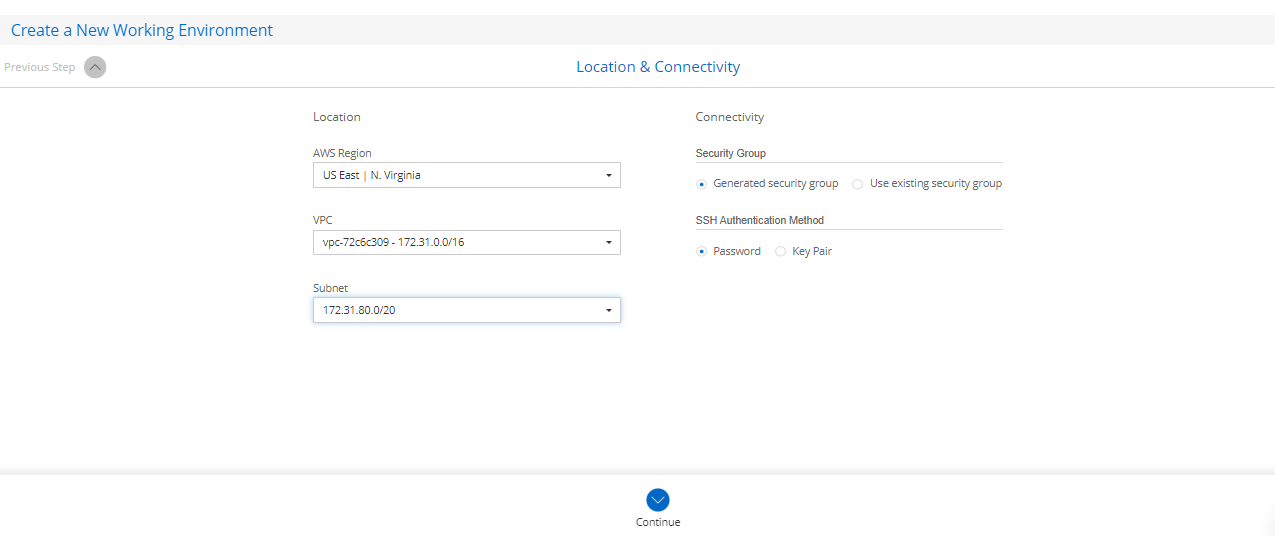
5. In the next step, Location and Connectivity, you need to provide the following details:
- AWS region: Choose the same region where your WorkSpaces deployment is located.
- VPC and subnet: Select the same VPC where VDI on AWS resides. Place the Cloud Volumes ONTAP instance on one of the same subnets as well. This improves the response times.
- Security Group: Select the Generated security group (unless you have your own already configured).
- Select the SSH authentication method.
When you are done, click “Continue.”
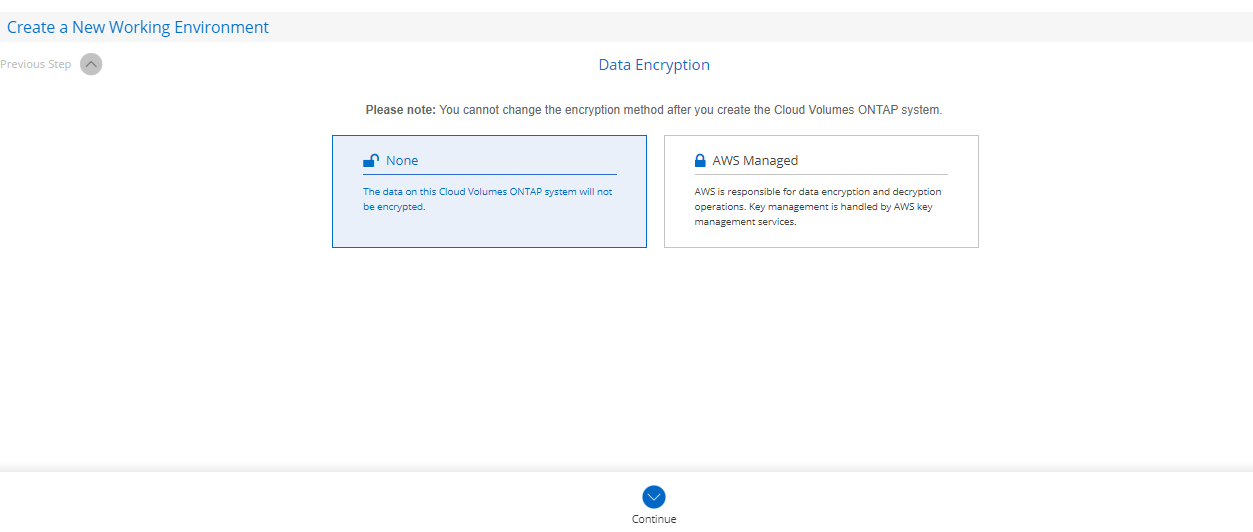
6. Choose whether you want your Cloud Volumes ONTAP volumes to be encrypted, and click “Continue”:
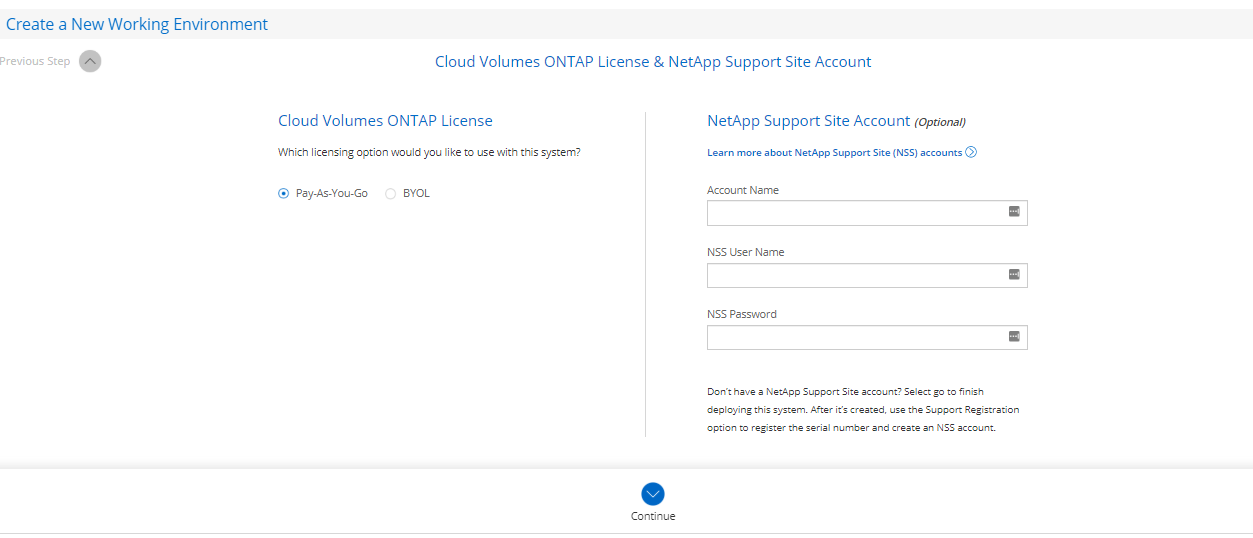
7. Select the licensing model (Pay-As-You-Go or BYOL) and provide your NetApp Support Site account credentials if any:
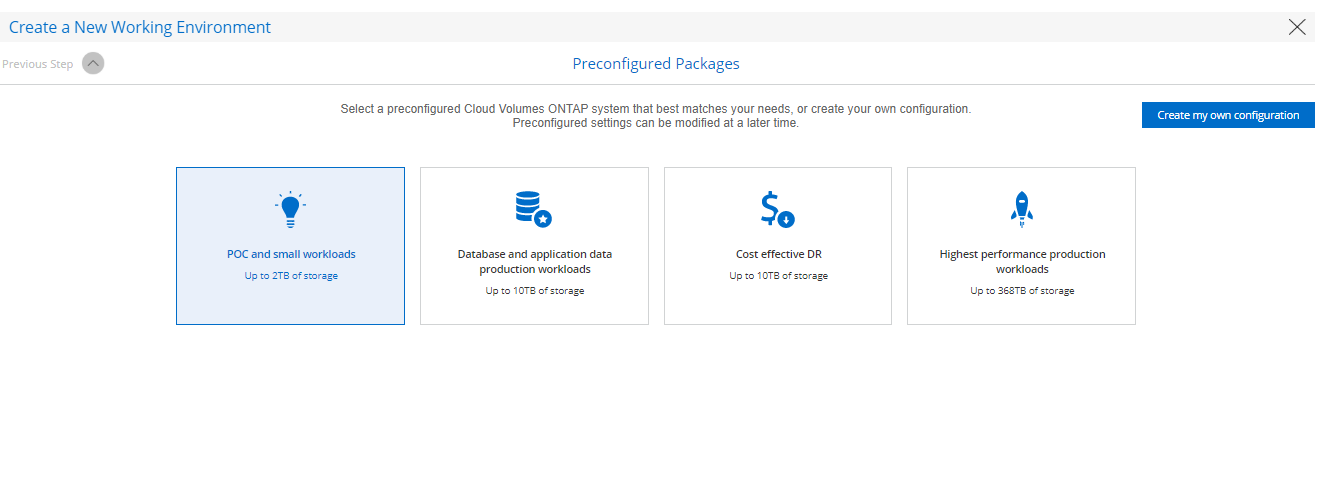
8. Select the type of Cloud Volumes ONTAP Preconfigured Package. The options differ when it comes to storage capacity and performance. You can also create your own configuration. For this example, we chose the small workloads:
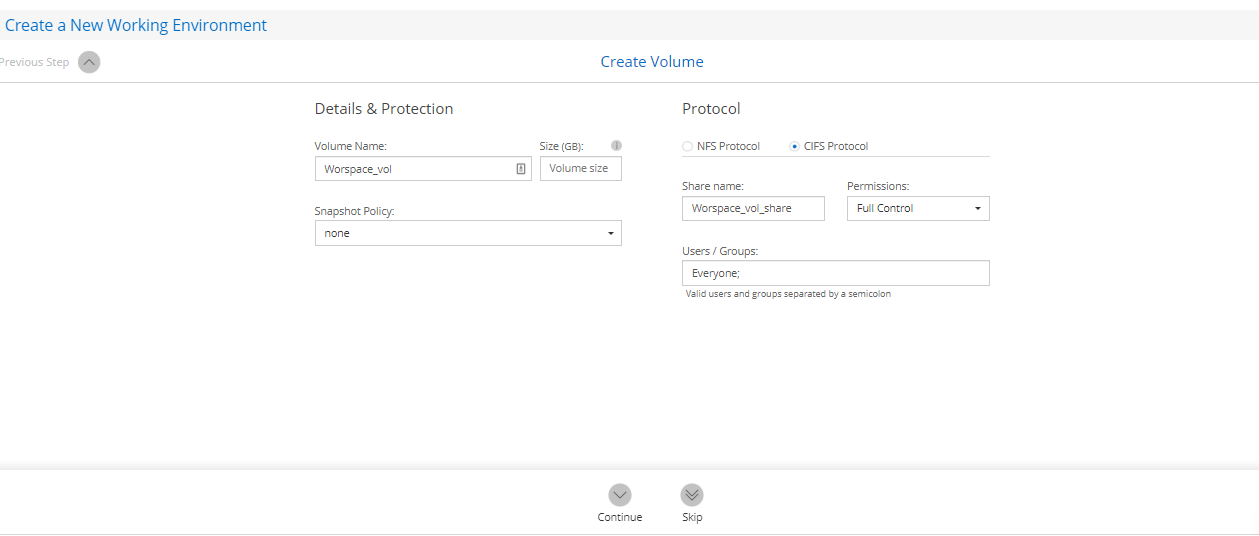
9. Now we are ready to create our first volume. This volume is going to be exported as a file share to your VDI desktops.

For this example, we are going to export a CIFS/ SMB share, but you may also export a share through NFS. Here you enter:
- Volume name, size, and snapshot policy.
- CIFS/ SMB or NFS protocol (we are choosing CIFS/ SMB).
- Share name, permissions, and users or groups able to access it.
When you are done, click “Continue.”
10. You are now taken to the CIFS setup screen. Here you need to provide the following details:
- DNS Primary and Secondary IP address: Enter your directory IP address. The directory is going to forward all DNS requests to the default Amazon-provided DNS server, unless you have a specific configuration for DNS.
- Active Directory Domain to join: Enter the DNS domain name you specified for the AD directory previously created.
- Credentials authorized to join the domain: This includes the name and password of a Windows account with privileges to join the CIFS server to the domain. You can use the admin credentials previously configured for the AD directory.

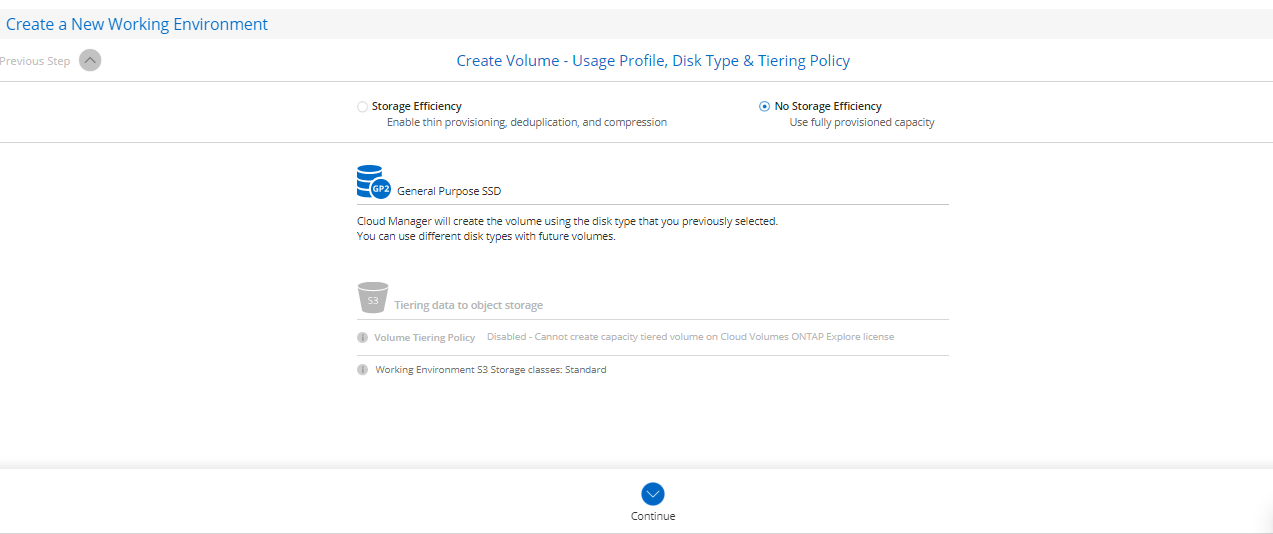
11. Now we need to determine the volume’s usage profile, disk type, and tiering policy. In this section you have the option to enable storage efficiencies which include thin provisioning, deduplication and compression:
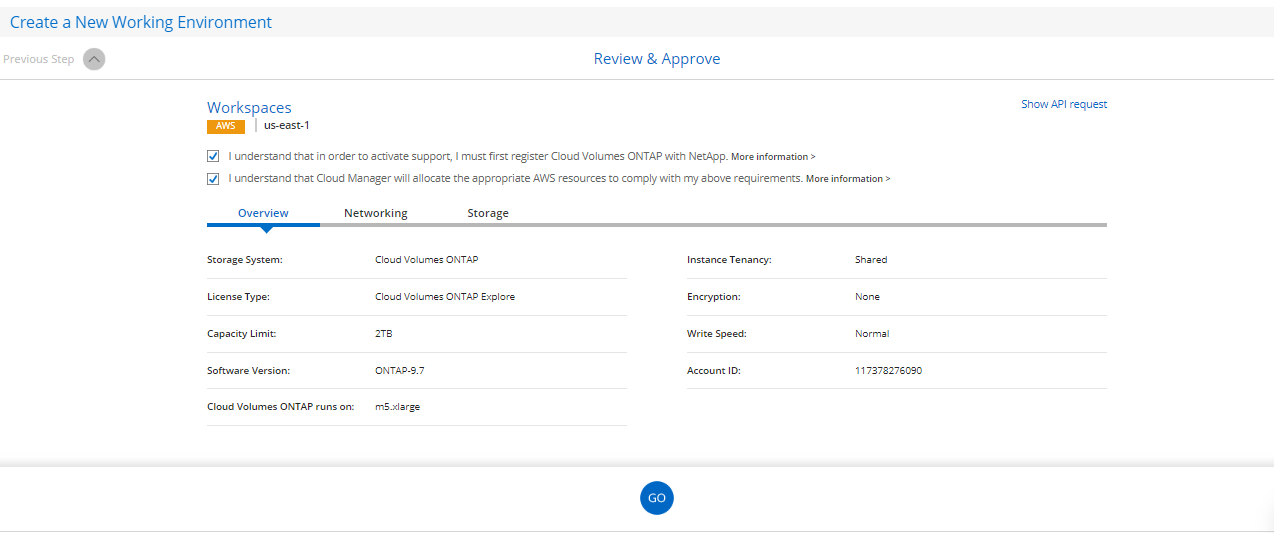
12. In the last screen you review all the information previously entered. Tick the approval boxes and hit “GO.” Now just wait for the Cloud Volumes ONTAP instance to be created (it takes about 20 minutes):
13. Once successfully created, the new Cloud Volumes ONTAP instance will show up within your working environment as a cloud icon:
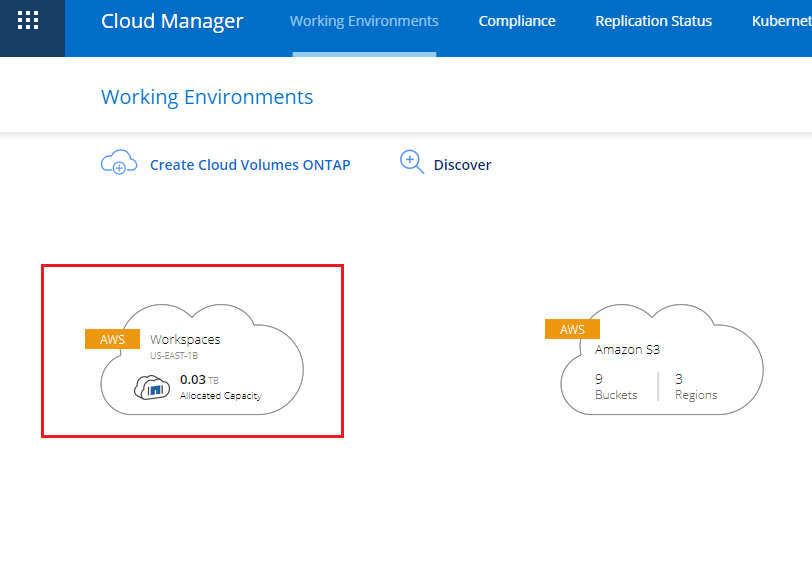
Now that we have both, WorkSpaces and Cloud Volumes ONTAP up and running, we need to map the volume to the VDI desktops so they can start making use of the Cloud Volumes ONTAP storage.
Mounting the Volume to WorkSpaces
Now that our Cloud Volumes ONTAP volume is created, we need to connect it to the WorkSpaces deployment.
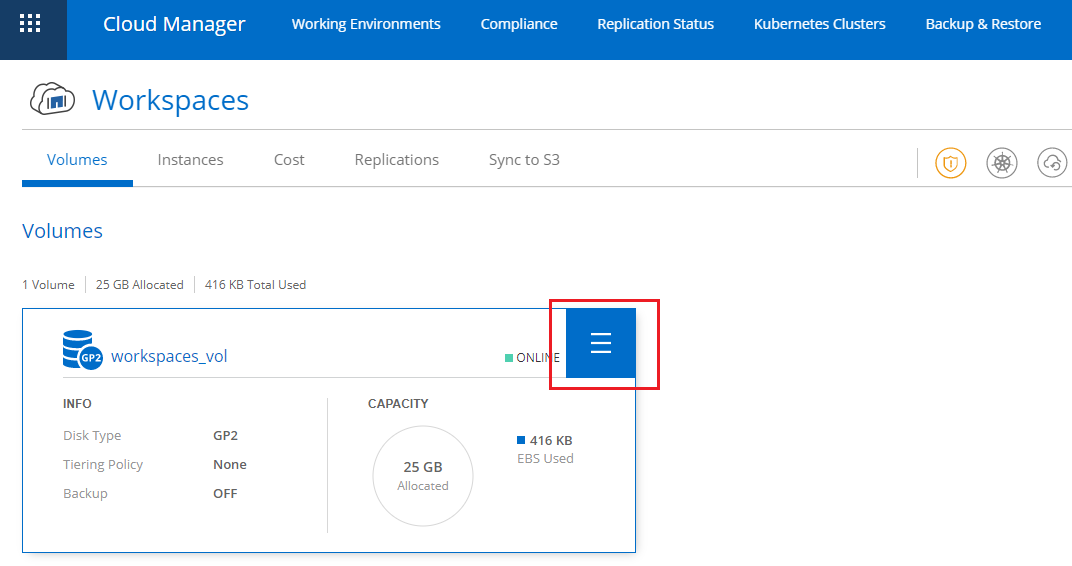
1. Double click on the Cloud Volumes ONTAP instance which just got created.
2. Once inside the Cloud Volumes ONTAP instance screen, click on the hamburger icon menu in the right as shown below:
2. Select the Mount Command from the menu options:
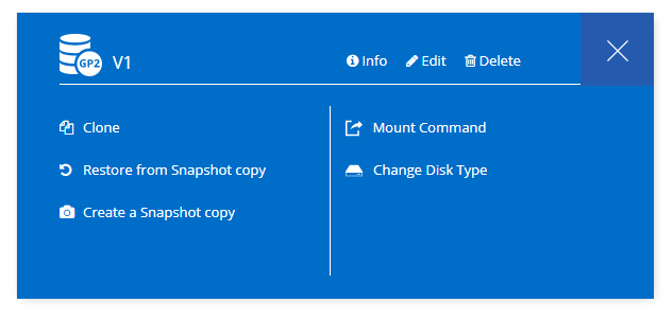
3. Select Copy in order to copy the mount command that will be used later in the WorkSpaces client:

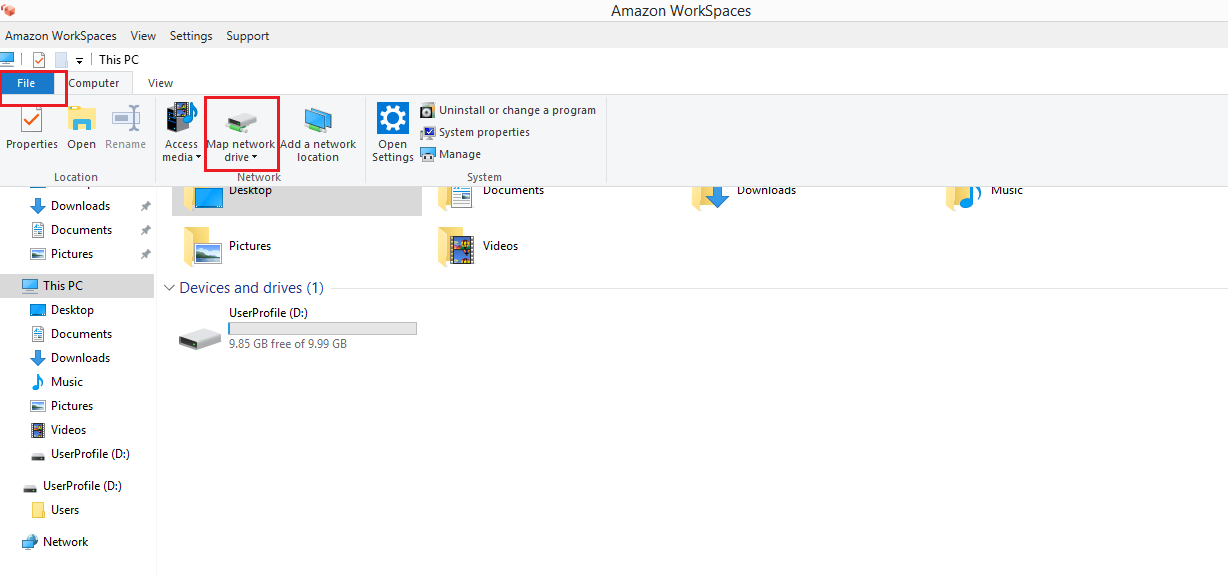
4. Open your WorkSpaces client and go to file explorer. Select “File” and then “Map Network Drive” as shown below:
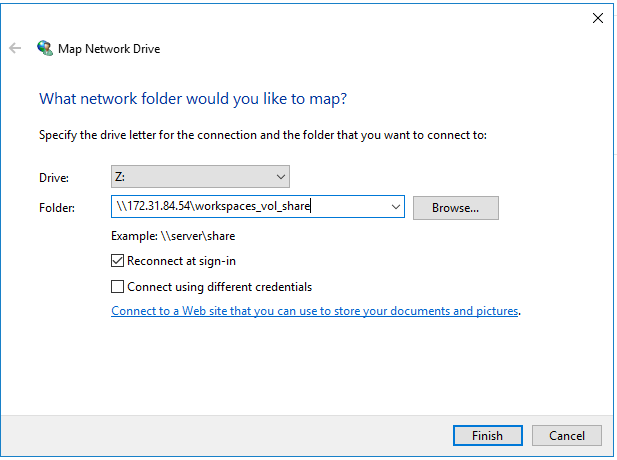
5. Paste the mount command obtained previously:
This will mount the share to the Z: drive on your VDI desktop:
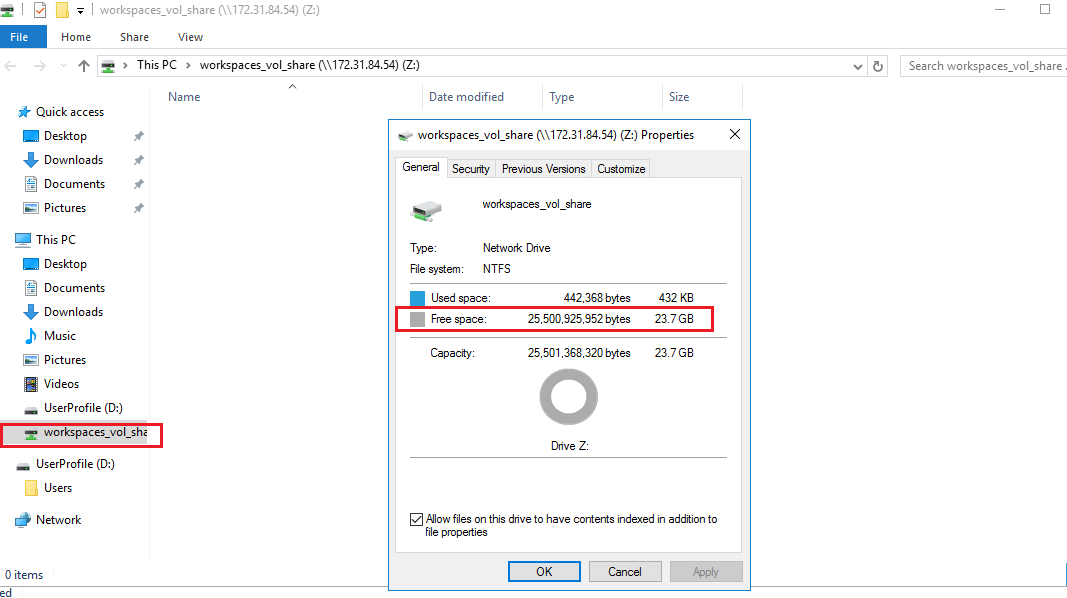
You can now use the storage provided by Cloud Volumes ONTAP on your WorkSpaces desktops.
Additional Notes on AWS VDI Deployments with Cloud Volumes ONTAP
- Both Windows and Linux desktops can access the same volume via NFS or CIFS/ SMB simultaneously as Cloud Volumes ONTAP allows multi-protocol access.
- To share for multiple Windows desktops you can make use of Group Policy Objects to map the network drives to entire groups of users. You can find more information here.
- Linux desktops won’t adhere to Windows Group Policy Objects. Read here on how to enforce a common policy for Linux clients.
- Make use of home directories so you can create just one share where users only see all their data, and only their own data.
Conclusion
A VDI enables an organization’s entire workforce to access resources remotely from a variety of devices and locations, giving a flexible muscle to achieve the required productivity, especially in the current times of disruption where work from home is so widespread.
An AWS VDI deployment integrated with Cloud Volumes ONTAP storage provides a VDI solution with no impact on performance and with added values from NetApp such as data protection, storage efficiencies, cloning, high availability, and multi-protocol access.
If you’re also running Azure as part of your deployment, see how to integrate Cloud Volumes ONTAP with VDI Windows environments on Azure here.
Sign up for a Cloud Volumes ONTAP 30-day free trial today to benefit from this service for your deployment of VDI on AWS.
