More about Infrastructure as Code Azure
- Azure SQL & PowerShell: How to Automate SQL Deployment
- Azure Resource Manager (ARM) Benefits and Best Practices
- How to Automate Azure MySQL Deployment Using Azure CLI
- Ansible & Azure: Automating the Basic Building Blocks of the Azure Cloud
- Azure Resource Manager Templates: A Guide to Efficient Automation in Azure
- Terraform on Azure: Platform-Agnostic Automation in the Cloud
- Azure Quickstart Templates: How to Use Them to Make Cloud Storage Easier
- Infrastructure as Code: Azure Tips to Save You Time and Headaches
Subscribe to our blog
Thanks for subscribing to the blog.
May 13, 2020
Topics: Cloud Volumes ONTAP AzureAdvanced9 minute readAutomation
Microsoft Azure provides hundreds of Quickstart Templates for getting started with automating your cloud storage infrastructure. The cloud storage templates are in-depth and provide almost all of the configuration you need to set up your environment quickly and efficiently. Quickstart templates are a big part of establishing an Infrastructure-as-Code Azure strategy and moving towards cloud automation.
In this tutorial you will be focusing on the cloud templates and how quick-start templates make deploying easy, efficient, and sustainable. You will also see an automated approach to setting up your cloud storage and combining it with the power of NetApp Cloud Volumes ONTAP for Azure.
What are Azure Quickstart Templates?
Azure Quickstart templates are popular for anyone getting started with Azure Resource Manager (ARM) templates. They are completely open-source and available on a few different platforms. The first platform we'll take a look at is the Azure Quickstart Templates website, which is where you will find an extensive library of how-to’s with Quickstart templates.
Let’s take a look at the various locations in which you can get a pre-made Quickstart template to use as-is or to modify to suit your organization’s specific needs.
Storage Templates on the Azure Quickstart Templates Webpage
On the Azure Quickstart Templates page, you will find several resources for almost every type of Azure service. This section will show you how to find and select one of these Quickstart templates.
1. Go to the Azure Quickstart Templates page.
In the search bar, simply type in “storage” and you will be presented with a list of all the Quickstart templates that have to do with creating storage accounts or that Azure storage is a required resource for.
-(2).png)
2. Click on the result for Visual Studio Development VM. At the time of this writing it was the first item on the search result list.
Note that this template is for creating a VM and a storage account for the VM.
.png)
Storage Quickstart Templates on GitHub
Another great library of Quickstart templates is on GitHub. GitHub has hundreds of Quickstart templates to get started.
1. In this Google search, you will see several URLs pointing to GitHub, all with different cloud storage templates to start using.
Click on oms-azure-storage, as shown in the screenshot below.
%20(1).png)
2. You will be presented with a GitHub repository. The two primary template files are the azuredeploy.json and the azuredeploy.parameters.json. These template files contain the configuration needed to create cloud storage.%20(1).png)
Turn an Existing Quickstart Template into Your Own
In the previous section, you saw how to get started searching for Quickstart templates. Now we will clone a template in order to later change it per our requirements.
Cloning the Repository
Cloning the repository is how you retrieve the code from GitHub to start using the Azure Quickstart template.
Note: If you do not have GitHub access set up on your computer, follow these instructions for a getting started guide with GitHub cloning.
1. From the repository page, click on the azure-quickstart-templates.
%20(1).png)
2. Click on the green “Clone or download” button:%20(1).png)
3. Copy the HTTPS link that will be provided, as shown in the screenshot below. This link is the direct link to the Git repo that you will clone in the next step.
.png)
https://github.com/Azure/azure-quickstart-templates.git. Git will then look for the remote repository and clone it onto your local machine.
Examining the Quickstart Template
Once the Git repo is cloned to your local machine, you should now have all of the files available to examine.
1. In your terminal, navigate to the directory where you cloned the Azure Quickstart Templates Git repo.
Open the azuredeploy.json file in the 101-storage-account-create directory with your favorite code editor. The screenshots will be using Visual Studio (VS) Code. You’ll see in the following screenshot what the azuredeploy.json file looks like. This ARM template creates a single storage account. This is a great example of an ARM template.
%20(1).png)
- Open the azuredeploy.parameters.json file.
Here is where you can create parameters that are expected to change per deployment or per environment. The parameter file is where to put metadata that isn't static.

Deploying Cloud Storage with Quickstart Templates
In the previous section you learned how to clone an existing Quickstart template and what template is needed to create a storage account in an environment. Next, you will create a storage account using the Azure CLI and the ARM template.
If you do not have Azure CLI configured on your computer, follow these instructions on setting up the Azure CLI before proceeding.
1. Open a terminal window and change directory (cd) to the directory that contains the cloned 101-storage-account-create directory.
cd /azure-quickstart-templates/
2. You will use the az group deployment resource to create the storage account. Run the code below to create the storage account in the Azure portal.
az group deployment create -g your_resource_group_name --template-file azuredeploy.json --parameters azuredeploy.parameters.json
After the code successfully runs, you will get an output similar to the screenshot below which means the storage account was created.
.png)
Accessing the Newly Created Cloud Storage
In the previous section you learned how to create a storage account by using ARM templates. The ARM templates for creating many resources, including storage, can be found on GitHub which is where the storage account ARM template was created from.
Now that the storage account is created, let’s take a look at how you can access the storage again. The two ways you will access the storage are by the Azure portal and the Azure CLI.
Access the Cloud Storage in the Azure Console
Open a web browser and go to the Azure Storage account service portal to view the newly created storage account.
Once in the portal, ensure that all subscriptions and resource groups are selected as shown in the screenshot below.

The newly created storage account will now be present like in the screenshot below.
.png)
Access the Cloud Storage in the Azure CLI
In this section you will access the cloud storage with Azure CLI.
1. The storage account can be accessed via the storage switch in Azure CLI.
Open a terminal window and run the following command to see the metadata of the storage account.
az storage account show --name storemfwmw3heqnyuk
2. After running the above AZ command, you should see a screenshot similar to the one below that shows the storage accounts metadata.
.png)
Using Quickstart Templates with Storage Containers
In this section you will see the containers section of Azure storage accounts and create a new container.
1. Open up a web browser and go to the Azure Storage account service portal.
2. Click on the storage account that you created in the previous section Deploying Cloud Storage with Quickstart Templates. Once you click on the storage account, you should see the storage account similar to the screenshot below.
.png)
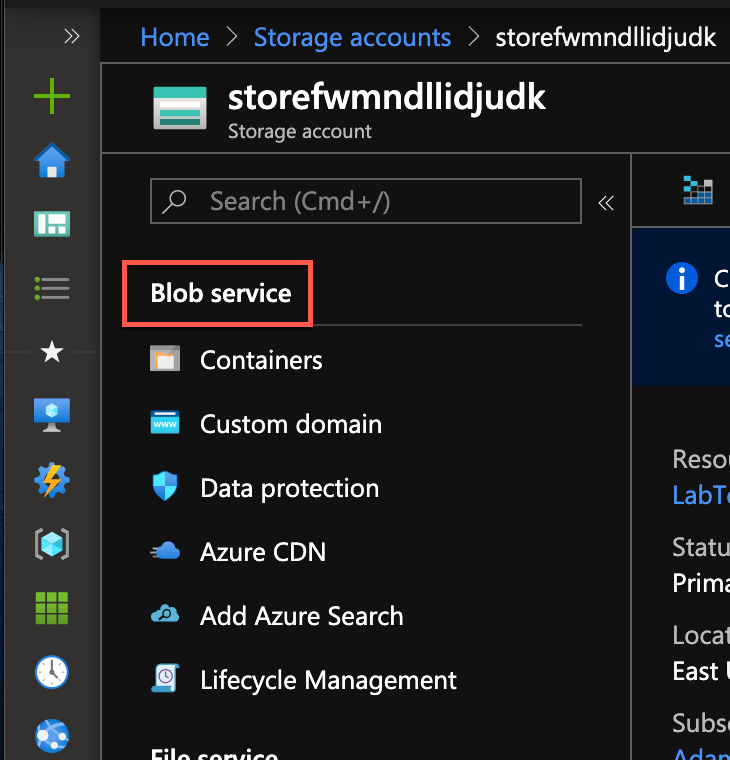
3. To access the containers in a storage account, first go to “Blob Service” and then click on “Containers.”
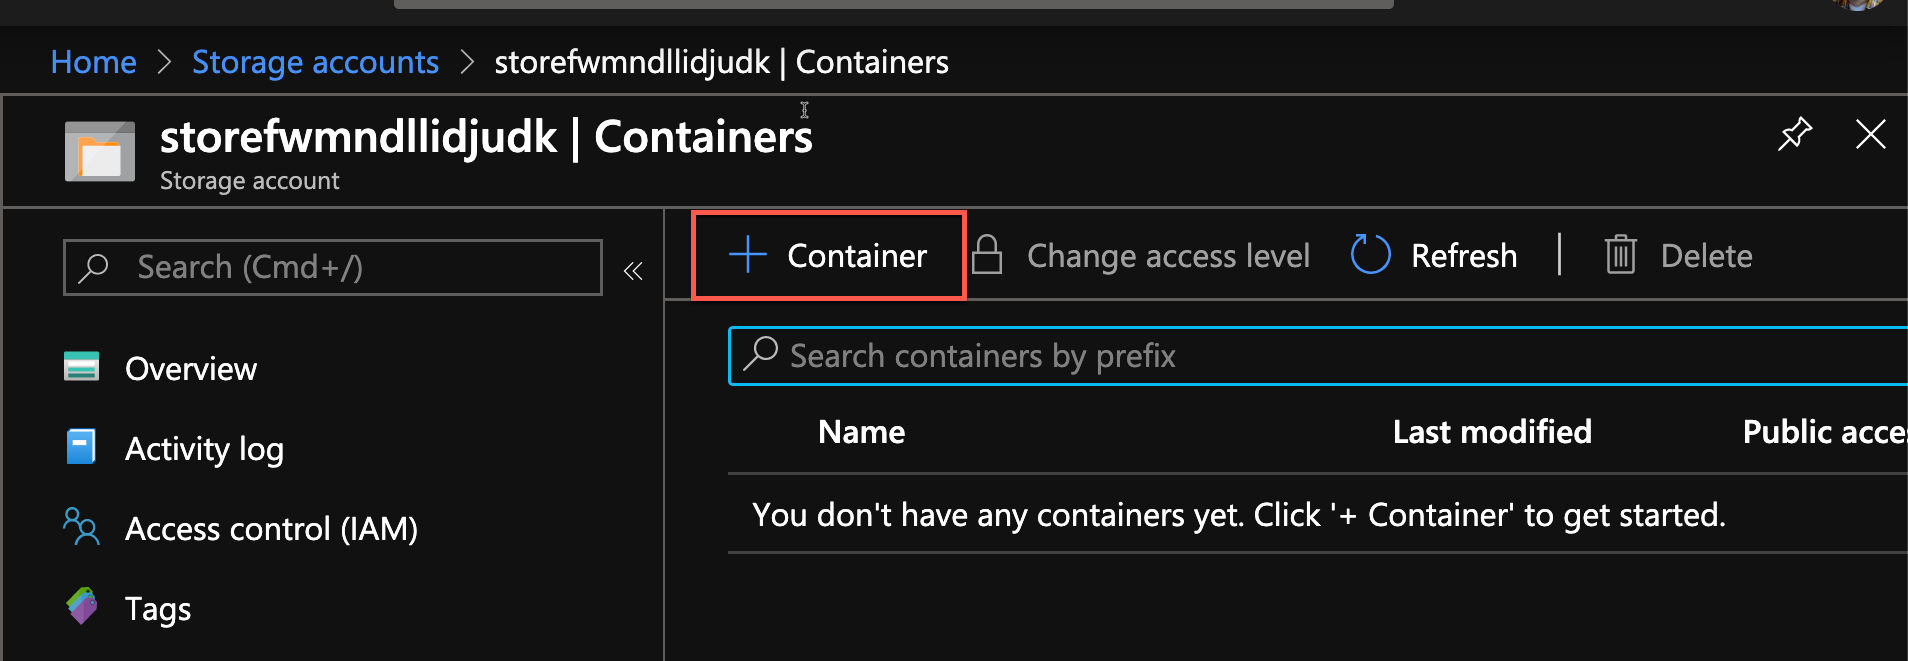
4. As shown in the screenshot below, no containers currently exist. By default, when you create a storage account, no containers get created.

5. To create a container, click the “+ Container” button.
6. You will be presented with a “New container” pane to the right with two options. Here, add a name and the access level.
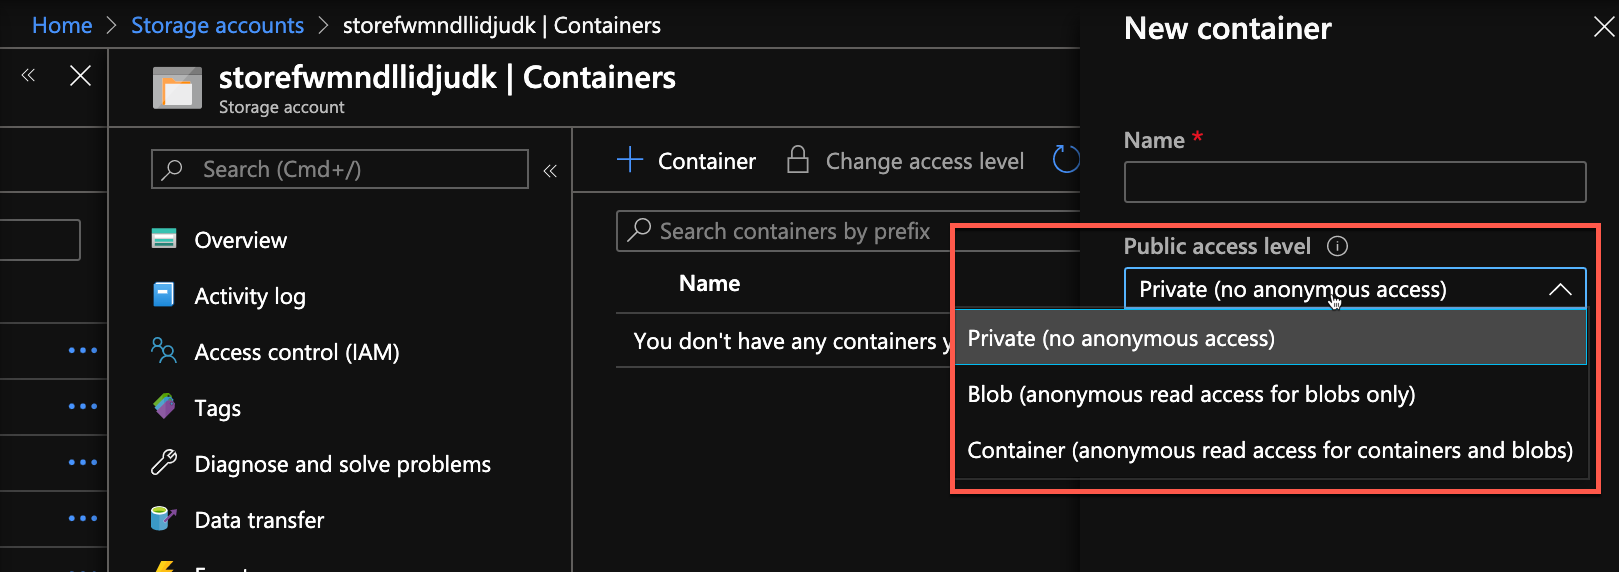
The private access level means no anonymous access, which allows only specific, added users to see the contents of the container. Blob access means read-only for the blob contents of the container. Container access means anonymous read-only for both container level and blob level access.
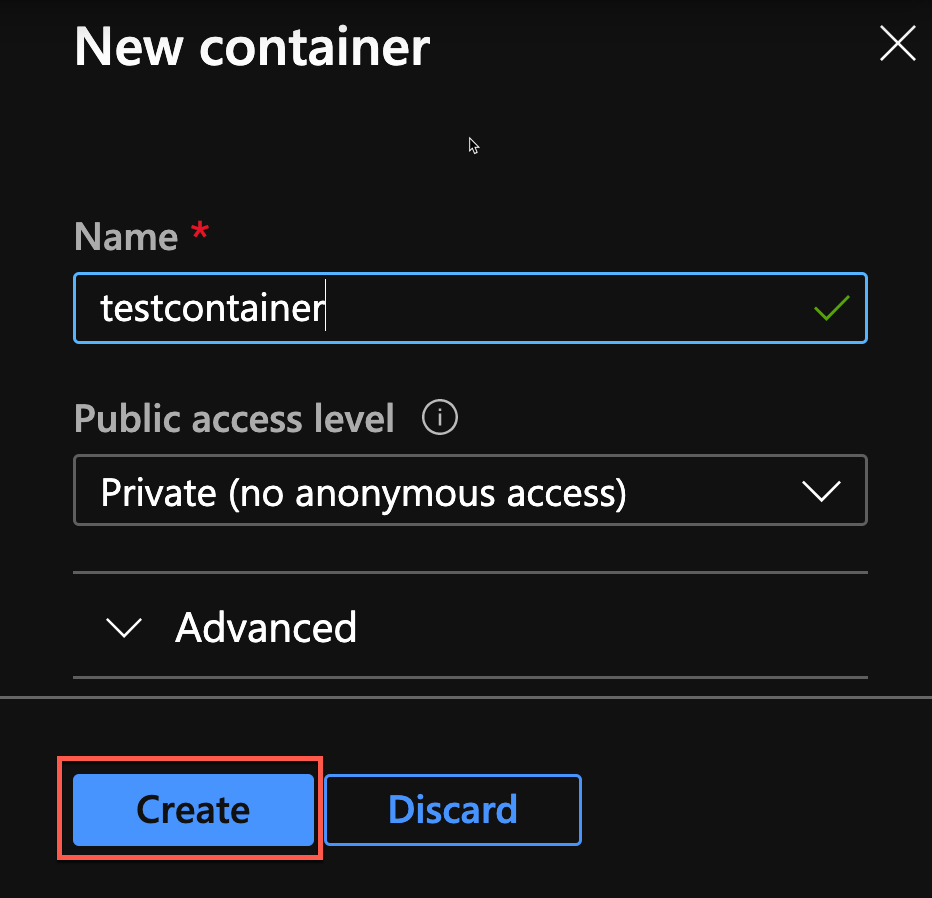
7. Choose private level access to confirm no anonymous users can see the container and name the container. For this example, we have named it testcontainer. Please note that this name is not mandatory.
To finish, click the blue “Create” button.
8. You will now see a container created in the storage account.

Access the Cloud Storage in the Azure CLI
In the final section you will take a look at permissions that are attached to the storage account by default when a storage account is created.
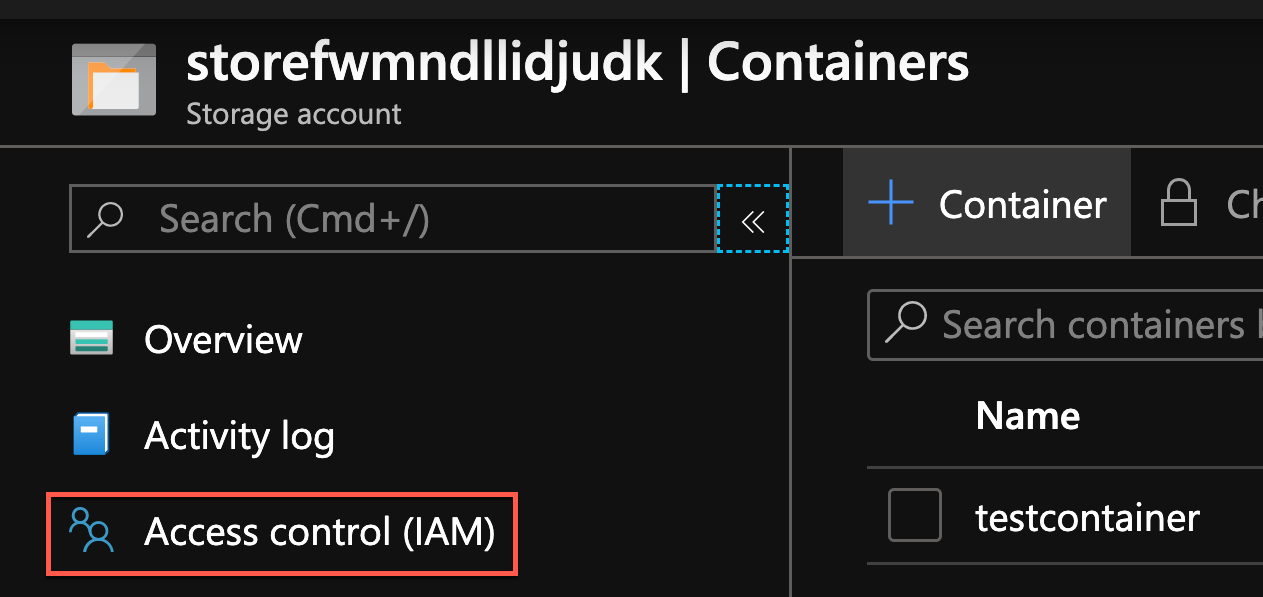
1. While still in the storage account panel, go to “Access control (IAM)” as shown in the screenshot below.
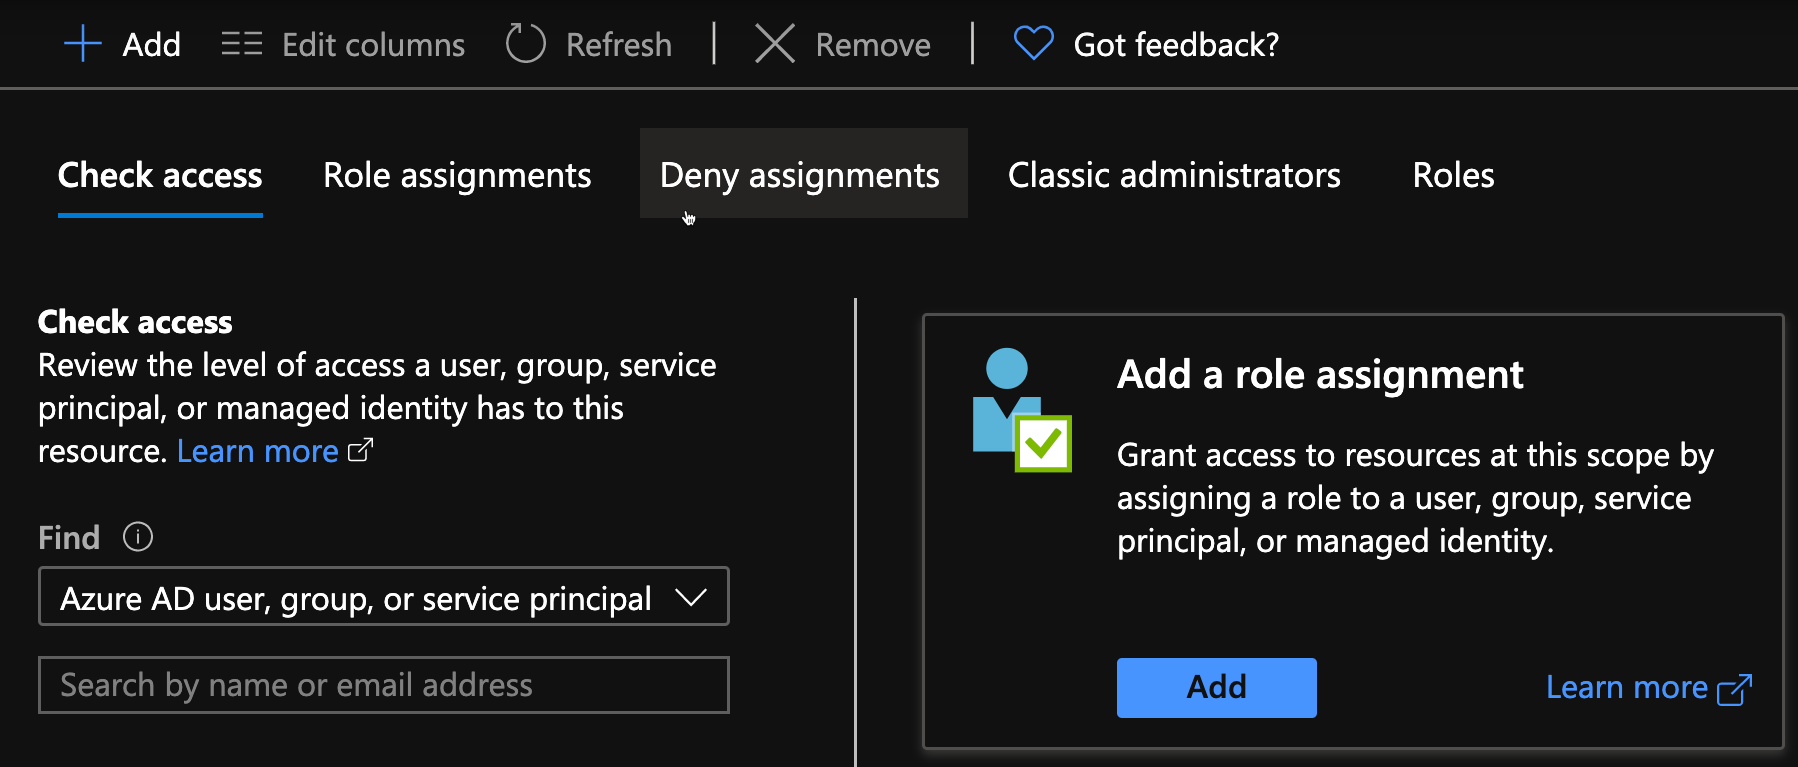
The IAM section is where you can find all of the storage account permissions for who has access and what level of access.
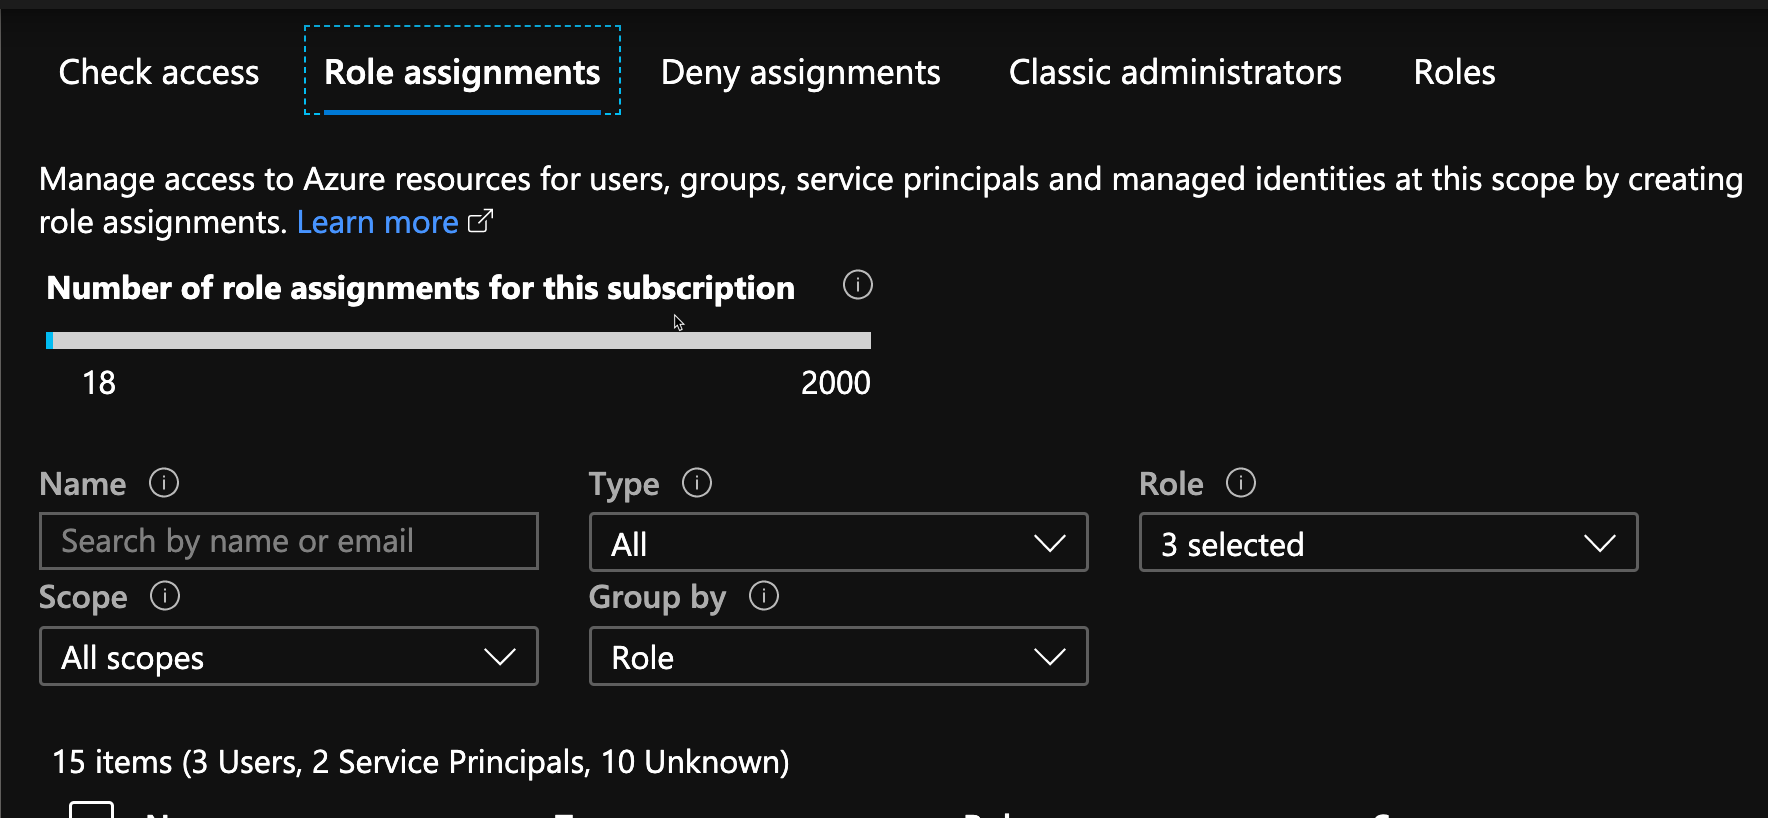
3. Click on “Role assignments” and you can see access assigned per service principal for the storage account.
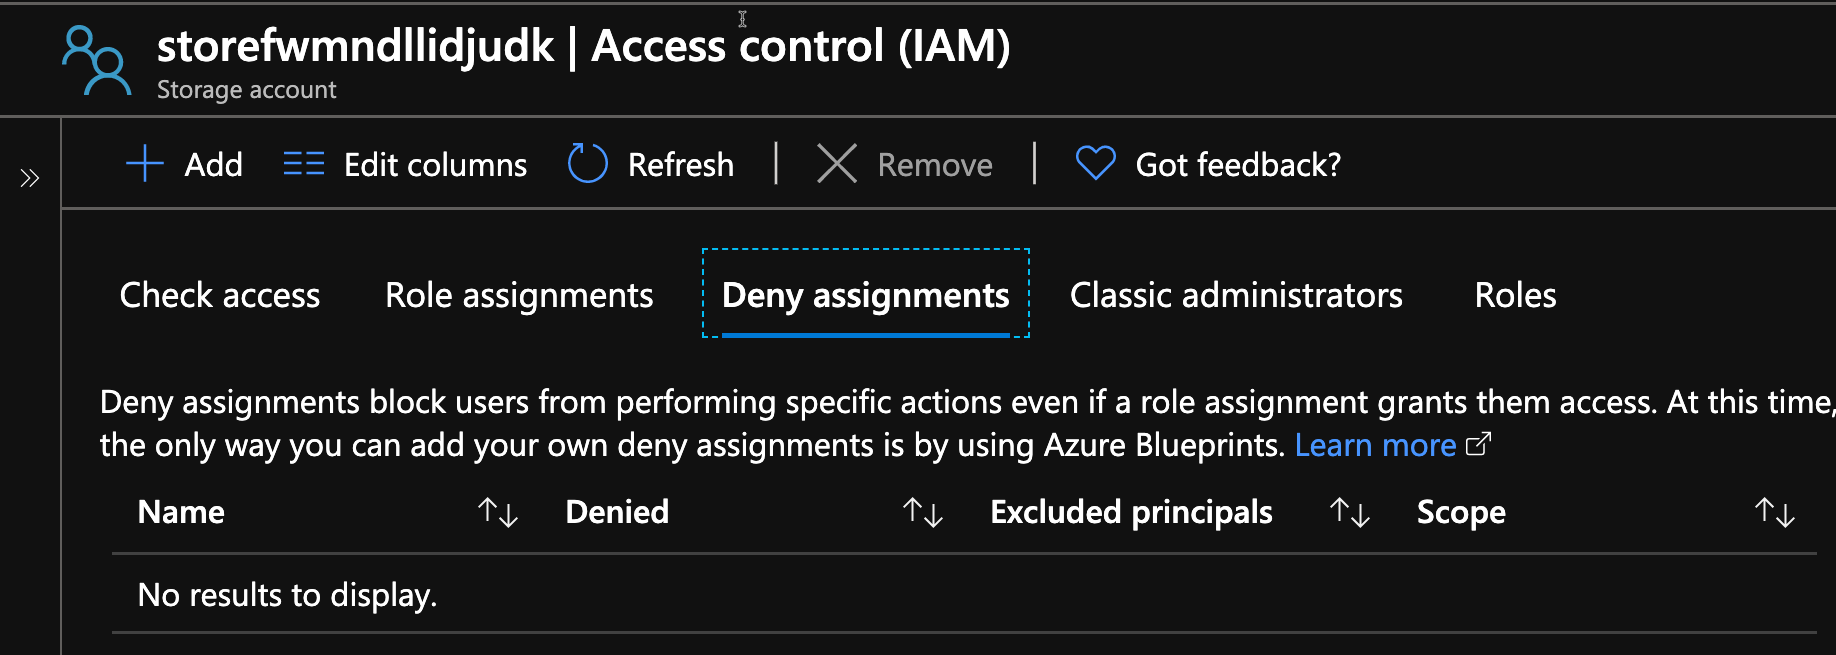
4. Click on “Deny assignments” and see there are no deny assignments. This is where you can block users from performing specific tasks like access containers or specific blobs.
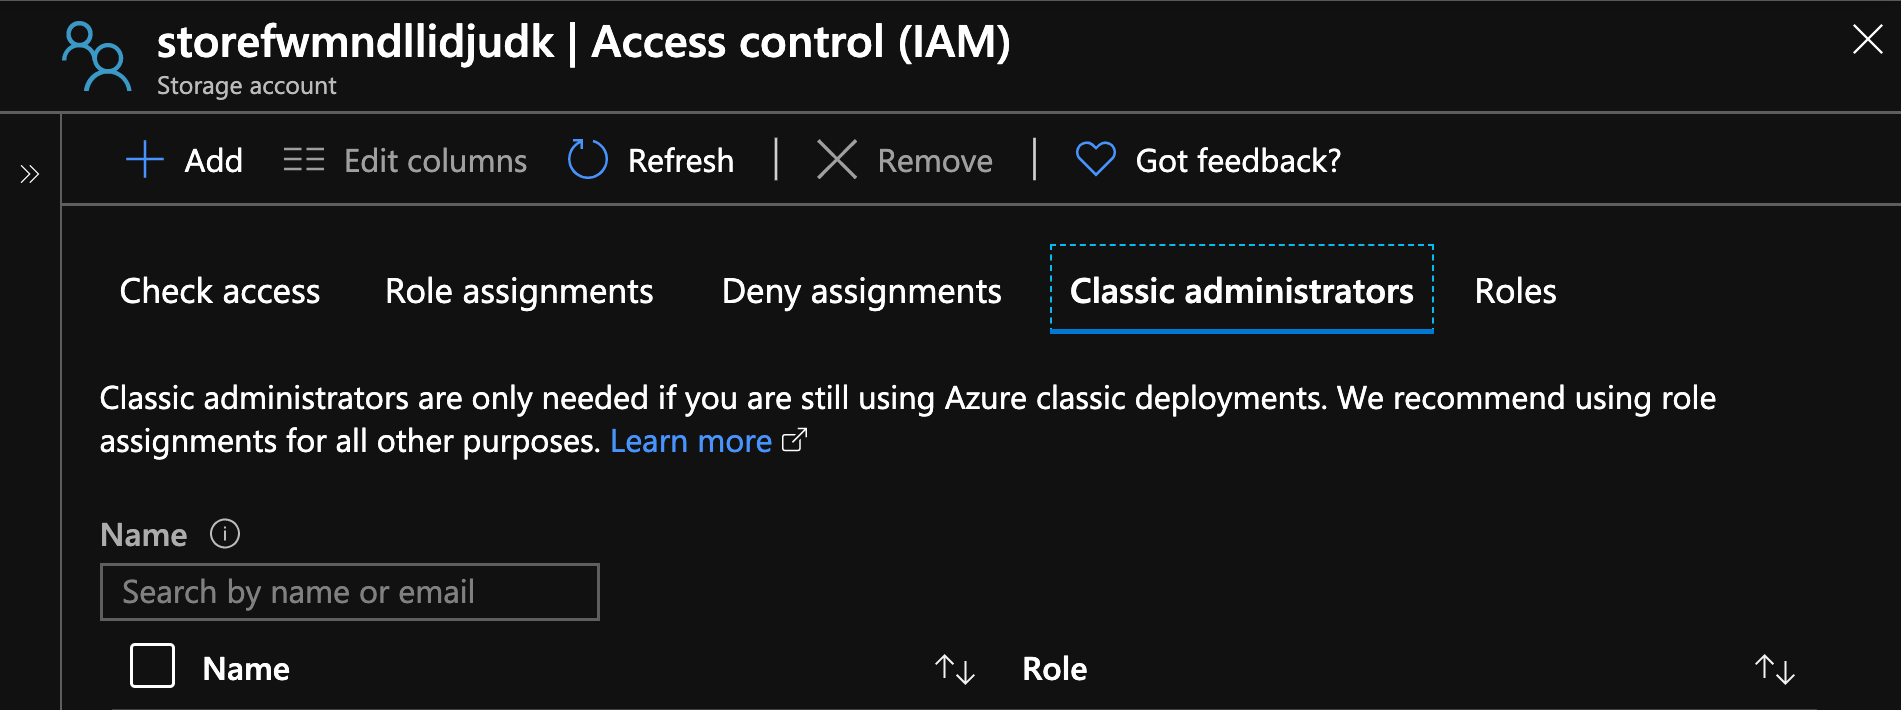
5. Click on “Classic administrators” and you will see users that have access to the storage account based on name or Microsoft login.
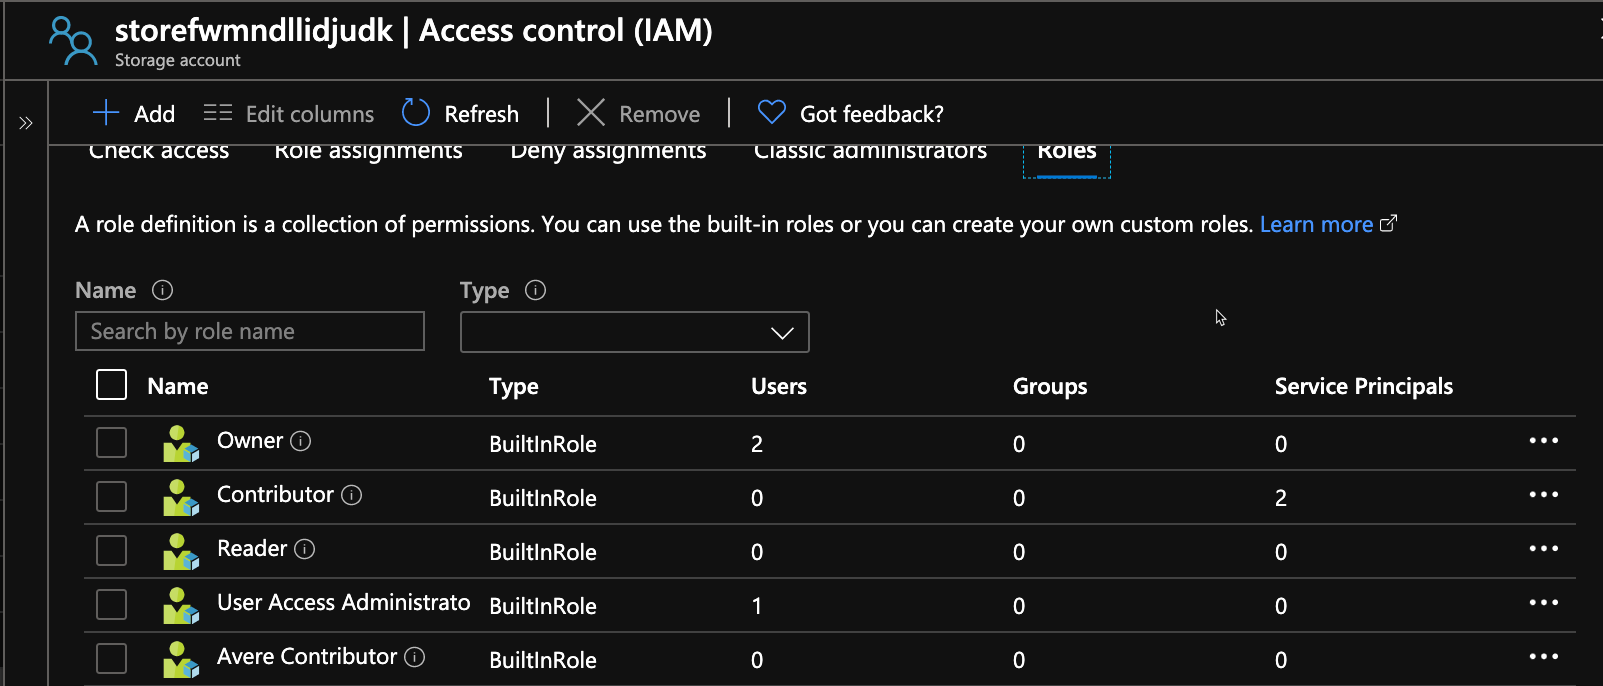
6. Click on the Roles option. These are standard security permissions for users based on ownership, read-level access, groupings, and service-level access.
Summary
In this tutorial, you took a hands-on approach to create an Azure storage account with Quickstart templates. You saw Quickstart templates on the Azure Quickstart Templates webpage and on GitHub. You learned that the code posted is open-source and able to be used by anyone. You then cloned the Quickstart templates repository from Github and opened the 101-storage-account-create directory to look at how the templates were configured. Finally, you created the storage account with Azure CLI.
While Quickstart templates give you an easy way to deploy your Azure cloud storage, combining them with NetApp Cloud Volumes ONTAP for Azure makes provisioning, scheduling, and automating Azure storage faster and at lower cost. Cloud Volumes ONTAP gives Azure users capabilities to automate storage provisioning through IAC, storage efficiencies that will lower Azure data storage costs, and options to protect your deployment, including the dual-node high availability configuration.
To try Cloud Volumes ONTAP to support your Azure deployment, sign up for a free trial here.

