More about Infrastructure as Code Azure
- Azure SQL & PowerShell: How to Automate SQL Deployment
- Azure Resource Manager (ARM) Benefits and Best Practices
- How to Automate Azure MySQL Deployment Using Azure CLI
- Ansible & Azure: Automating the Basic Building Blocks of the Azure Cloud
- Azure Resource Manager Templates: A Guide to Efficient Automation in Azure
- Terraform on Azure: Platform-Agnostic Automation in the Cloud
- Azure Quickstart Templates: How to Use Them to Make Cloud Storage Easier
- Infrastructure as Code: Azure Tips to Save You Time and Headaches
Subscribe to our blog
Thanks for subscribing to the blog.
January 26, 2021
Topics: Cloud Volumes ONTAP AzureDatabaseAdvanced6 minute readAutomation
MySQL has fast emerged as one of the most popular choices for relational databases in Azure. This has been fueled mostly by an increase in open-source workloads. Azure Database for MySQL delivers this database as a managed service where the underlying infrastructure is managed by the Azure platform. But as more and more organizations are adopting Infrastructure-as-code for Azure deployment, automating databases has also become the need of the hour.
This blog will show you how to deploy Azure Database for MySQL from Azure CLI. You can use these commands in your CI/CD pipelines as a script to align it with your existing IAC and DevOps practices.
Jump down to the Azure MySQL Deployment Walkthrough section for the how-to instructions.
Azure Database for MySQL: Features
Azure MySQL packs in multiple enterprise-class features that can ease the process of deployment, maintenance, and management when compared to do-it-yourself MySQL deployments. Some of these features include:
- On-demand scalability.
- Integration with Azure monitoring for ease of operation and visibility.
- Multiple SKUs to suit different workloads types, providing flexibility.
- Automatic patching, upgrades, and security for the underlying hardware, operating system, and database, reducing overhead.
- Built-in backup and point-in-time restore capabilities for data protection.
- Integrated security features for protecting data-at-rest and in-transit.
Azure Database for MySQL can be deployed in one of two different modes: Single Server or Flexible Server (currently in preview).
Single Server deployment is recommended for cloud native applications, where the requirements for database customization are minimal. Database administration tasks such as patch management and updates are offloaded, letting customers focus on developing their applications. The service provides assured high availability with 99.99% SLA across a single availability zone.
Flexible Server mode, which is currently in preview, can be deployed across multiple availability zones and offers more flexibility and customization of MySQL settings.
Azure MySQL Deployment Walkthrough
Prerequisites
You can run the commands in this tutorial after installing Azure CLI or execute them from Azure Cloud Shell. You will also need contributor access to create the resource group and a MySQL instance.
How to Deploy Azure MySQL
In this section we will show you how to deploy and configure your Azure MySQL server and database.
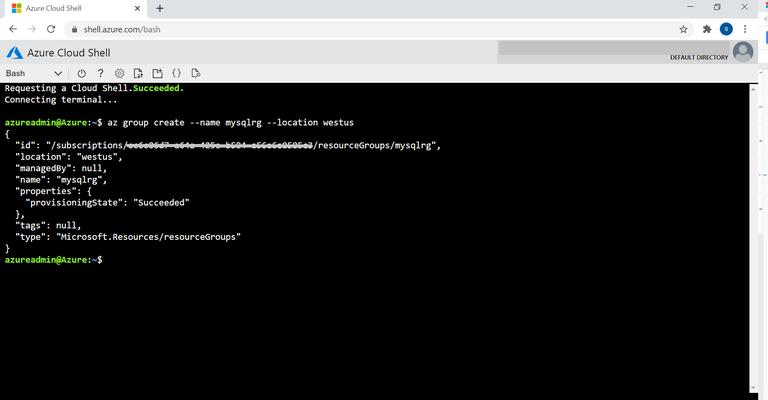
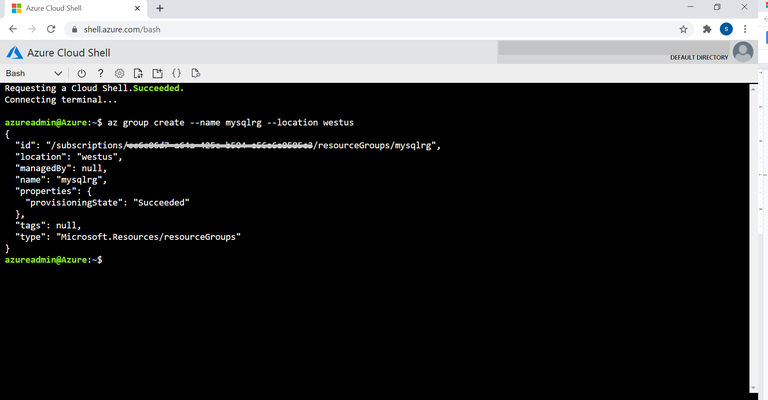
1. As the first step, create the resource group for deploying Azure MySQL using the following command:
az group create --name <resource group name> --location <Azure region>
Replace highlighted values with name of your resource group and target Azure region, respectively, as in the sample command given below:az group create --name mysqlrg --location westus
2. Create MySQL server using the following command:
az mysql server create --resource-group <resource group name>
 --name <MySQL servername> --location <Azure region>
 --admin-user <name of server admin user> --admin-password
<server admin user password> --sku-name <MySQL SKU name>
Replace the highlighted values as specified here:
- <resource group name>: The name of resource group created in step 1.
- <MySQL servername>: A unique name for your MySQL server. The name should have a min of 3 to max of 63 characters. You can only use lowercase letters, numbers, and the special character, hyphen (-).
- <Azure region>: The Azure region where the MySQL server will be created.
- <name of server admin user>: Administrator user name. The following usernames are not allowed: - admin, guest, administrator, public, and azure_superuser.
- <server admin user password>: The administrator’s password. This should be between 8 and 128 character long and include uppercase letters, lowercase letters, and non-alphanumeric values.
- <MySQL SKU name> Name of the MySQL SKU in the following format: <pricing tier_computeGeneration_vCores>.
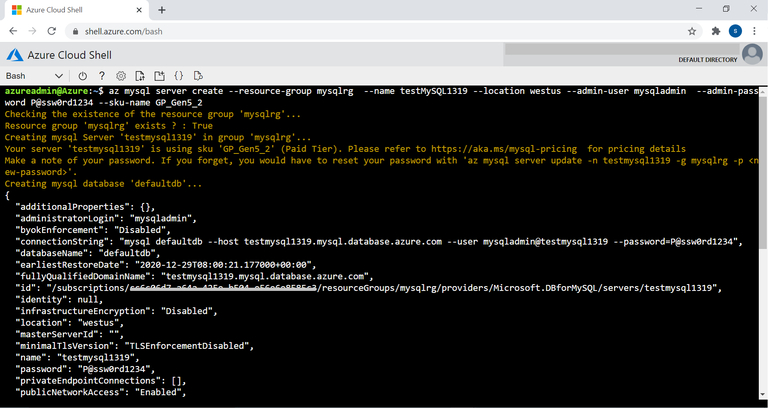
You can see how this should all look in this sample command for creating a MySQL Server:az mysql server create --resource-group mysqlrg --name testMySQL1319
--location westus --admin-user mysqladmin
--admin-password P@ssw0rd1234 --sku-name GP_Gen5_2
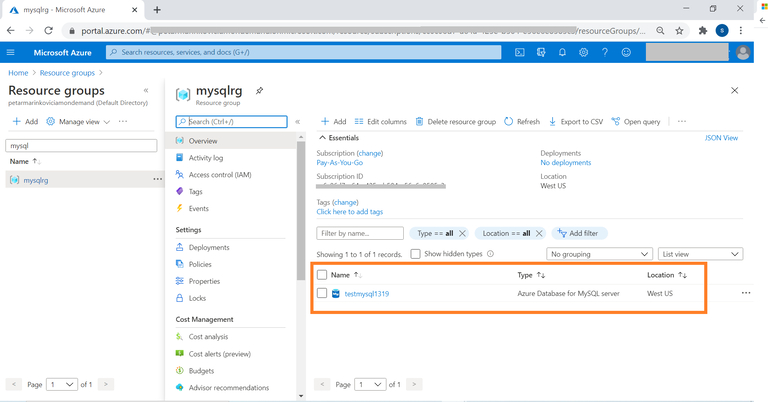
3. Head to the Azure portal and select the resource group. You will see that your MySQL server is now provisioned.
4. By default, the server is not accessible from the public internet. You should configure a firewall rule to enable access from required IP addresses using the following command:
az mysql server firewall-rule create --resource-group
<resource group name> --server <MySQL servername> --name
<firewall rule name> --start-ip-address <IP address to be allowed/start IP of IP address range>
--end-ip-address <IP address to be allowed/start IP of IP address range>
Replace highlighted values in order.
- <resource group name>: The name of the resource group where MySQL server is deployed.
- <MySQL servername>: The name of MySQL server created in step 2.
- <firewall rule name>: The name of the firewall rule.
- <IP address to be allowed/start IP of IP address range>: The IP address from which access should be enabled, or the starting IP address of the range of IPs which you want to have access to the MySQL server. (Note: You can find your current public IP using this website).
- <IP address to be allowed/start IP of IP address range>: Repeat the IP address if it’s a single IP or use the ending IP address if you’re configuring access for a range of IP addresses.
A sample command for this code is given below:az mysql server firewall-rule create --resource-group mysqlrg --server testMySQL1319
--name firewallrule1 --start-ip-address 52.173.245.249
--end-ip-address 52.173.245.249
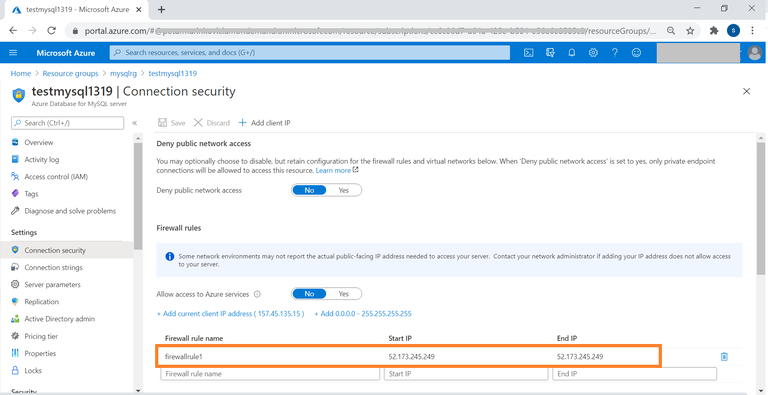
5. Now head to the Azure portal. Browse from MySQL server->settings-> Connection security. You can see that the rule allowing access from the IP address has been created.
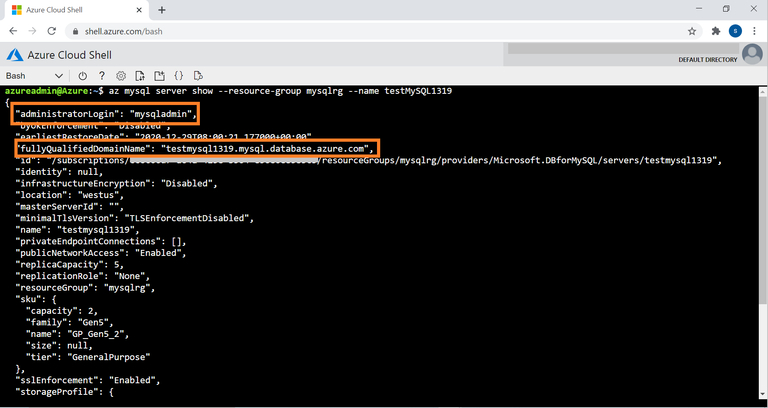
6. To manage the MySQL server, you will need to connect to it via the MySQL command line. You can get the connection info for your MySQL server using the following command:
az mysql server show --resource-group mysqlrg --name testMySQL1319
Write down the FQDN and the administrator login highlighted in the screenshot below for connecting to the server later.
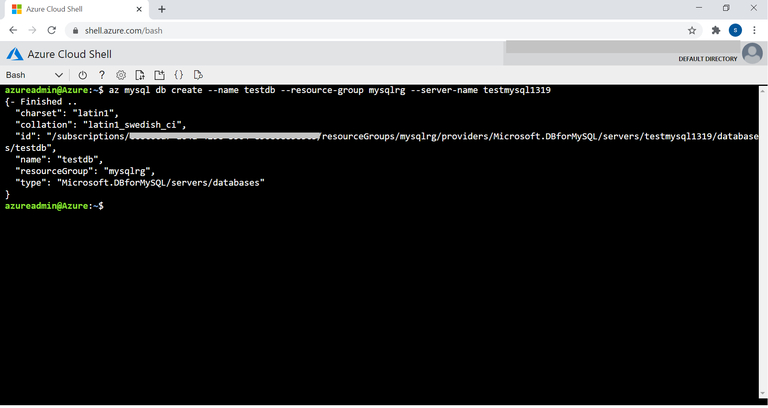
az mysql db create --name testdb --resource-group mysqlrg --server-name testmysql1319
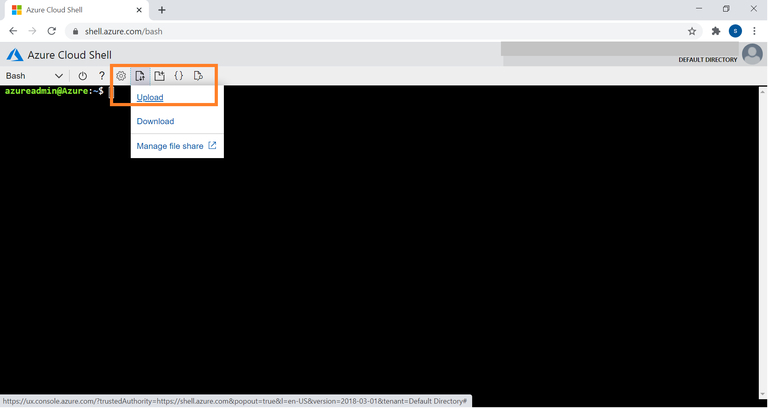
8. For managing the server and to run MySQL commands, you will have to download the certificate from this website. Upload it to Cloud Shell using the upload option before connecting to the MySQL server.
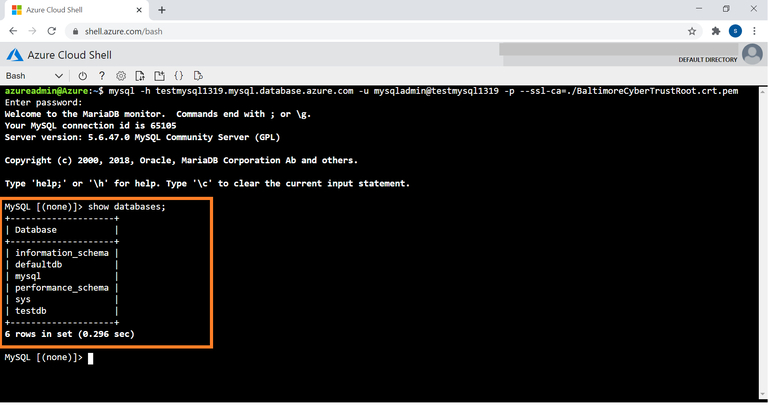
9. To connect to the MySQL server, download and install the MySQL command line tool here, or you can run these MySQL commands from Cloud Shell where it is preinstalled:mysql -h testmysql1319.mysql.database.azure.com
-u mysqladmin@testmysql1319 -p --ssl-ca=./BaltimoreCyberTrustRoot.crt.pem
The highlighted values are the MySQL FQDN and the administrator login from step 6 above. Enter your password when prompted to connect to the MySQL server.
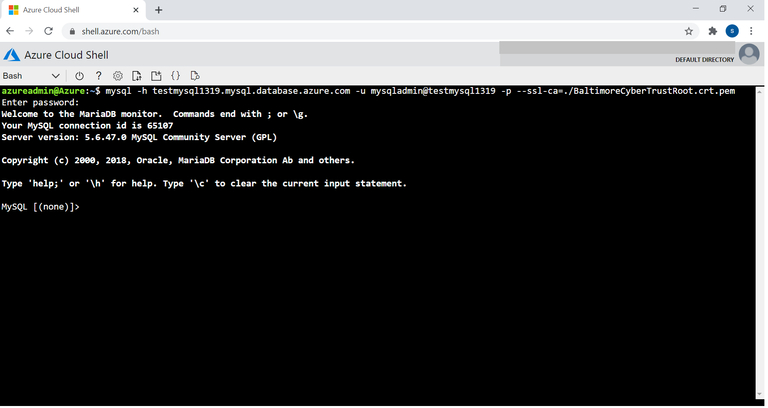
10. Once the Azure MySQL connection is established, you will be able to run database management commands. A sample command given below:
MySQL [(none)]> show databases;
Conclusion
Managed DBaaS solutions, including Azure MySQL deployment, enable quick set up and ease the management overhead, however many organizations prefer the IaaS deployment model for more control it provides over the end-to-end stack.
In this blog we showed how to deploy Azure Database for MySQL from Azure CLI. You can use these commands in your CI/CD pipelines as a script to align it with your existing IAC and DevOps practices.
Cloud Volumes ONTAP can be used as a storage management solution for IaaS deployment to deliver advanced features when compared to the native storage services. Cloud Volumes ONTAP helps in addressing database workloads challenges in the cloud, and filling the gap between your cloud-based database capabilities and the public cloud resources it runs on.
Learn more from our customers stories in Database Case Studies with Cloud Volumes ONTAP.


