Share
Considering the diversity of attack vectors in the cloud, fine-grained security configurations have become non-negotiable. In this blog we will explain some of the options available for customers to enable secure access to Azure storage.
Below we’ll cover these topics which can jump down to clicking these links:
Azure Storage Security at a Glance
Data in the cloud has to be protected, both at-rest and in-transit. Previously, we covered this in our blog on Azure storage best practices. As a brief recap, these best practices include configuration of soft delete for Azure Blob data, configuring immutability policy to ensure Write-Once, Read-Many (WORM) state, network access restriction through service endpoints, and the Shared Access Signature (SAS) configuration for limiting storage access window.
Other ways to enable Azure storage access control include:
- Role-based access control (RBAC) custom roles
- Attribute-based access control on blobs
- Stored access policies
Let’s take a look at each of these approaches below.
1. Custom Roles for Setting Up Azure Storage Access Control
The most commonly used method for implementing Azure storage access control is through RBAC. Azure RBAC defines two different roles: built-in roles and custom roles.
How Do I Restrict Access to Storage on Azure?
You can restrict access to your Azure storage using RBAC. Azure RBAC built-in roles, as the name suggests, have a set of pre-configured permissions that decide what action can be performed by users assigned to the role. If the permissions for predefined roles are too broad, custom roles can be created with a restricted set of permissions. This helps in implementing the principle of least privilege. Custom roles can be built ground up or created by editing and removing excess permission from existing predefined roles.
Let’s look at the steps for defining a custom role (from an existing built-in role) and assigning it to a storage account.
1.1 From the Azure portal, browse to subscription -> Your subscription -> Access Control (IAM) -> Roles -> Select the built-in role you want to use. Then select “Clone” from the menu on the right-hand side. In this case we are selecting the “Storage Account Contributor” account. 
1.2 Give a name to the custom role and click “Next.” 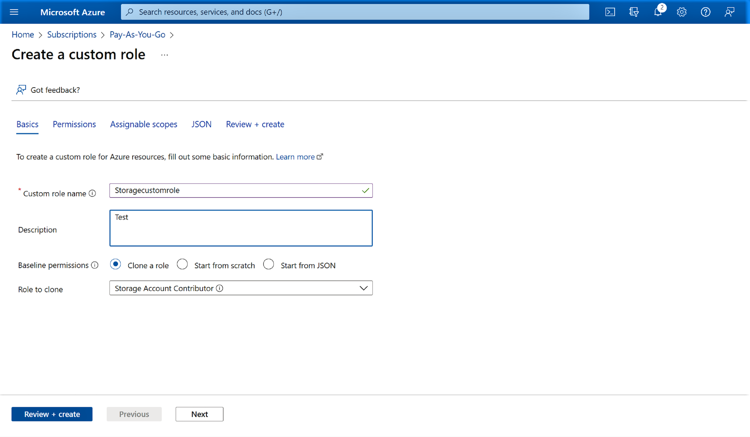
1.3 In the next window, you can Add or Remove permissions. For this sample configuration, we will remove a permission to implement the principle of least privilege.
We will remove the permission to add the storage to a subnet, a configuration that should ideally be managed by network administrators. Select the permission, click on the delete button on the right-hand side, then click “Next.”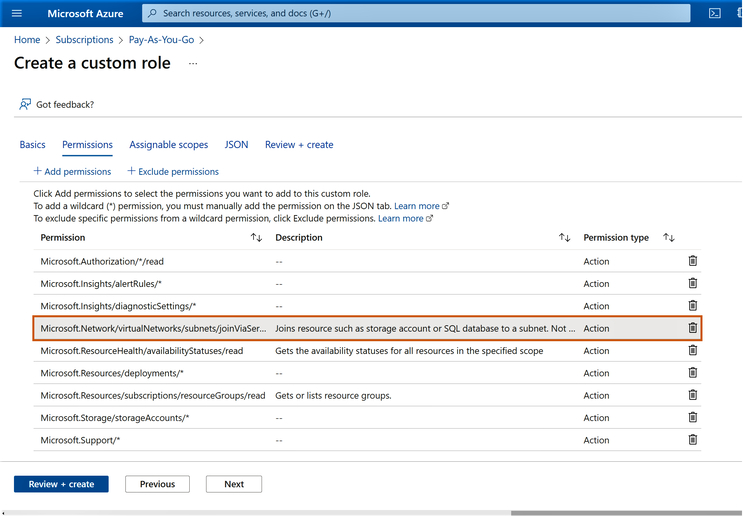
1.4 In the next window, define the scope of the role, i.e., either management group, subscription, or resource group. In this case, we will keep it at the default setting, which is the subscription level. Click “Next” when you are done.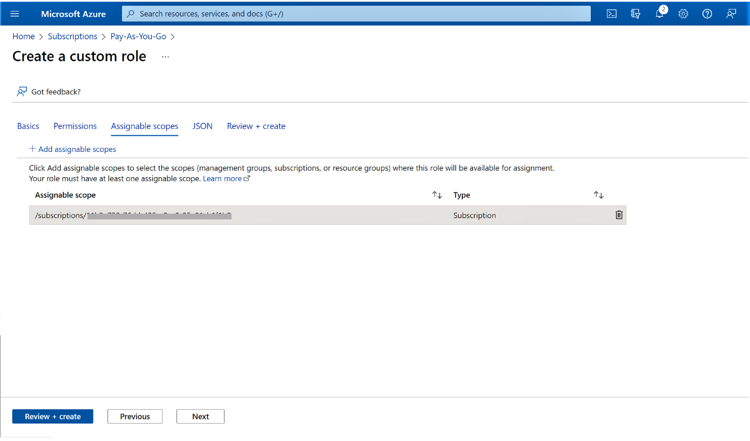
1.5 You can download the custom role JSON in the next step, if required. This can be leveraged for automation purposes or to further update the role in the future. Click “Next” to proceed.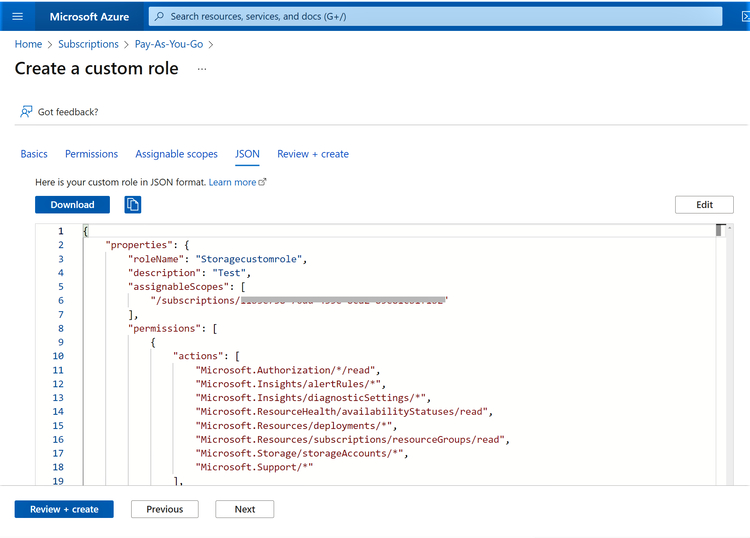
1.6 Review the permissions and scope in the next window. Click “Create” to provision the custom role.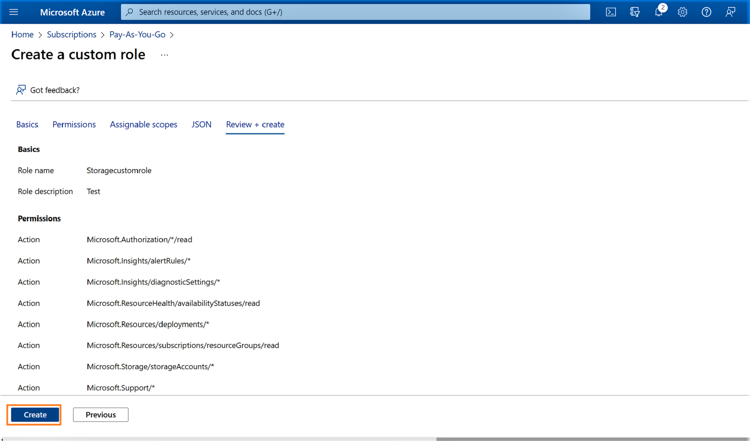
1.7 Click “OK” on the notification that confirms the custom role creation.
1.8 From the Azure portal, browse to the storage account -> Access Control (IAM) and click on “Add role assignment” to assign the newly created custom role.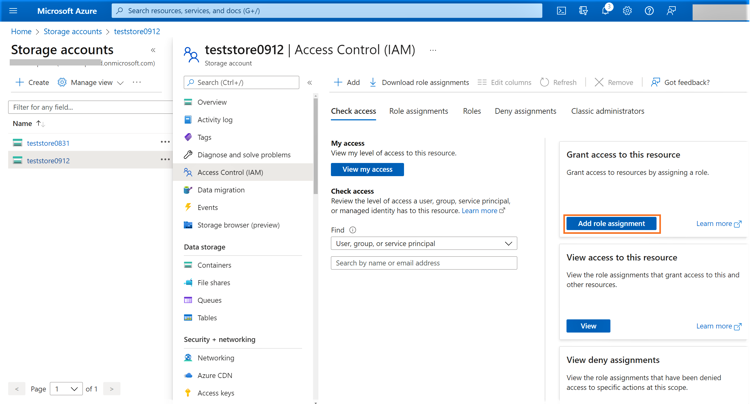
1.9 In the next window, search for the custom role that we had created earlier and select it. Click “Next” to proceed.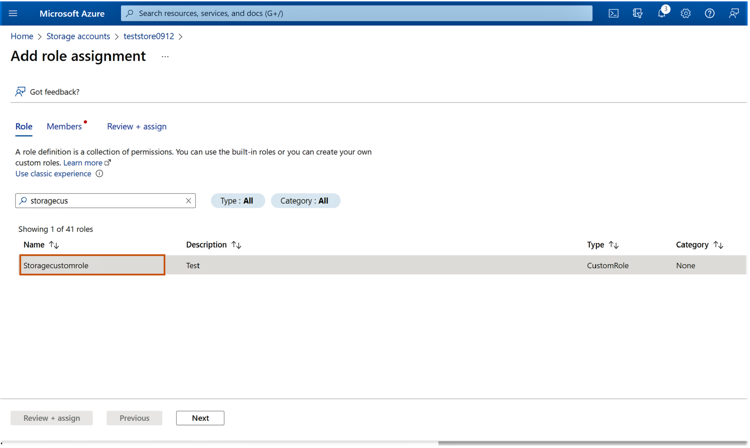
1.10 In the next window click on “+Select members” to add the users who should be assigned the role. Click on the user to add that member to the role.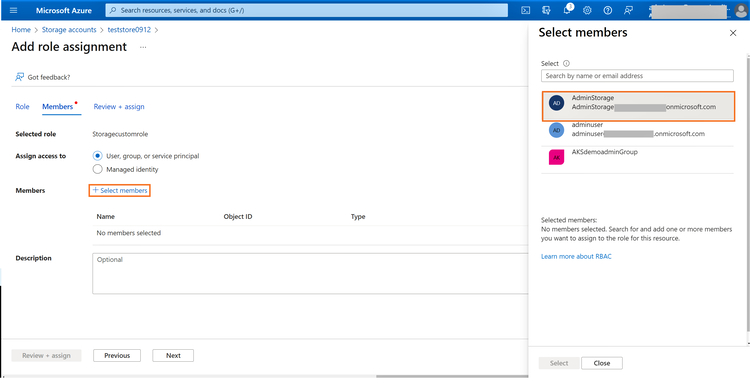
1.11 Click “Select” once the user is added.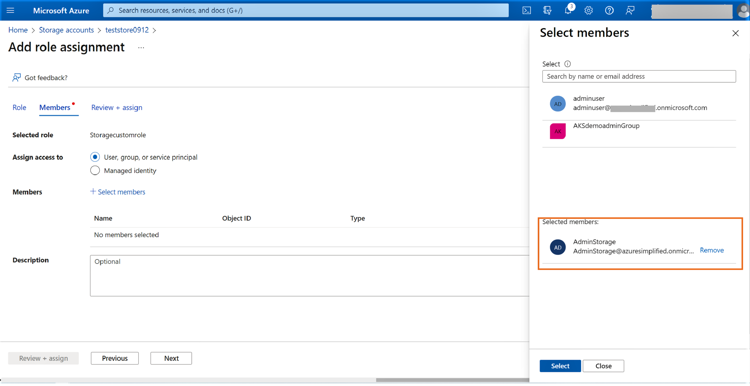
1.12 Click “Next” once the user is listed in the configuration window.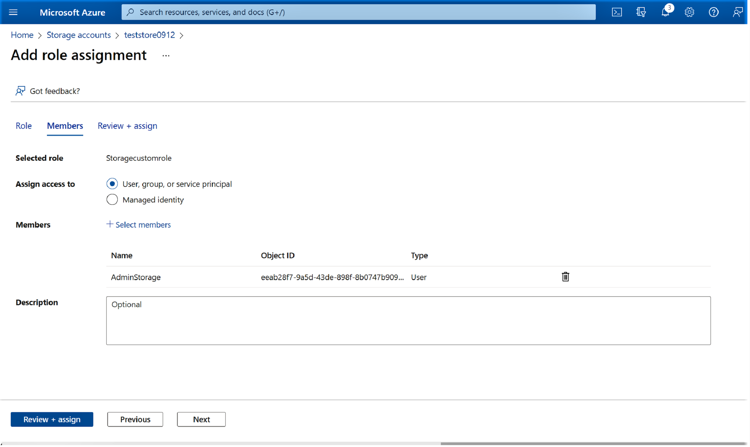
1.13 Click on “Review+assign” to complete the custom role assignment for the selected user in the target storage account.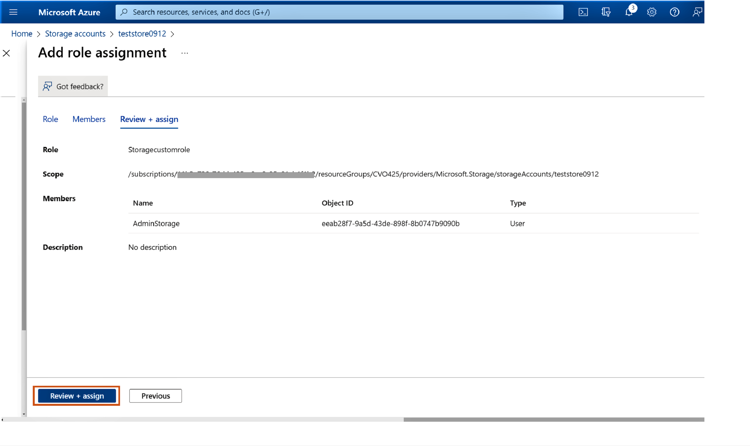
2. Attribute-Based Access Control (ABAC) for Azure Cloud Storage Security
Azure attribute-based access control (ABAC), which is currently in preview, enables customers to include additional conditions for accessing resources along with RBAC. The conditions implemented by ABAC depend on specific attributes of Azure resources for access to be enabled for assigned roles.
ABAC is supported for Azure Blobs with both built-in and custom roles that can perform storage blob data actions. The built-in roles with these permissions included are the Storage Blob Data Contributor, Storage Blob Data Owner, and Storage Blob Data Reader roles.
ABAC enables customers to implement finer access controls based on defined conditions. For example, using ABAC you could restrict access to blobs with specific tags or restrict access to blobs stored in specific containers. ABAC is also helpful in scenarios where you want to reduce the number of role assignments by introducing attribute-based conditions.
To configure ABAC based on tags, the blobs should have blob index tag enabled. Blob index tag is currently only supported for general-purpose v2 storage accounts. Let’s look at the steps to add a blob index tag followed by configuration of role assignment that uses ABAC.
2.1 While uploading blobs to Azure storage, click on “Advanced” and head down to the blob index tags section. Add tags for the key and value, then upload the file.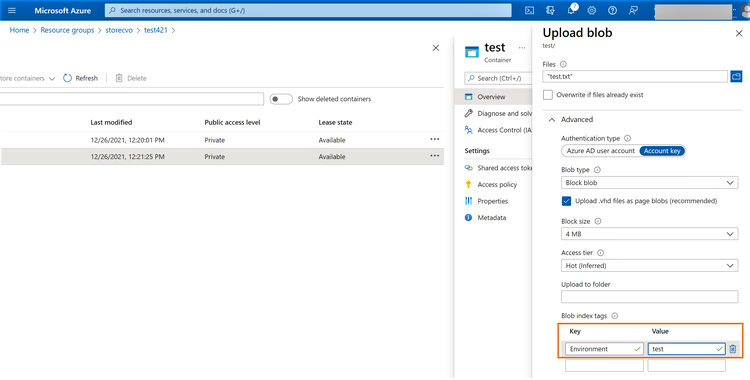
2.2 From the Azure portal, browse to the Storage -> Access control (IAM) -> Add role assignment. Here you will select one of the roles that has storage blob data access. In this example we are going to select the “Storage Blob Data Reader” role.
Click “Next” when you are done.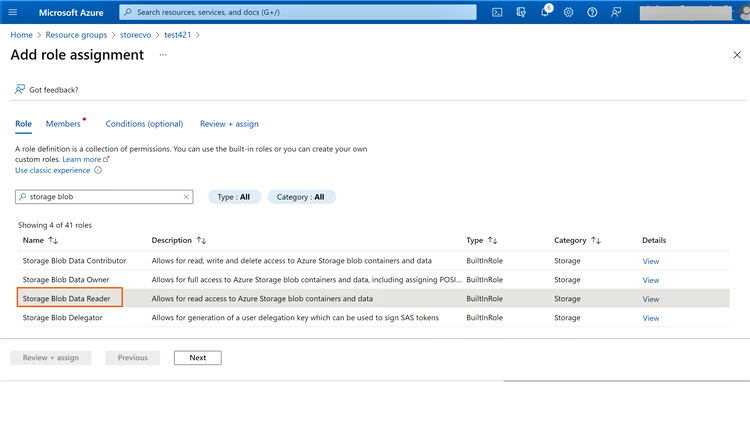
2.3 Click on “+Select members” and select the user to be added. Click on “Select” and then click “Next.”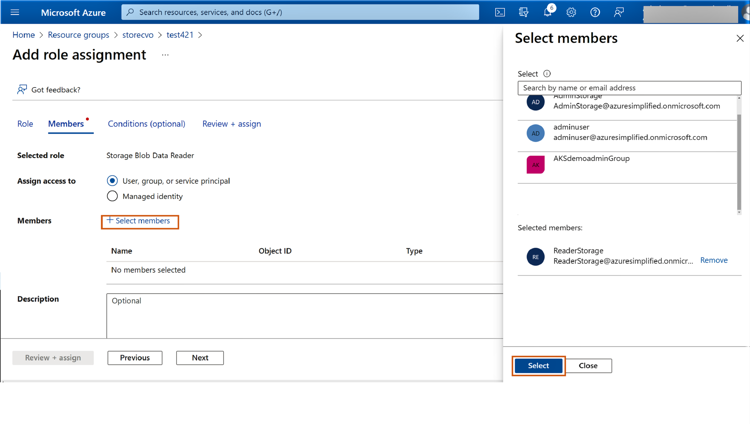
2.4 On the next screen, click “+Add condition.”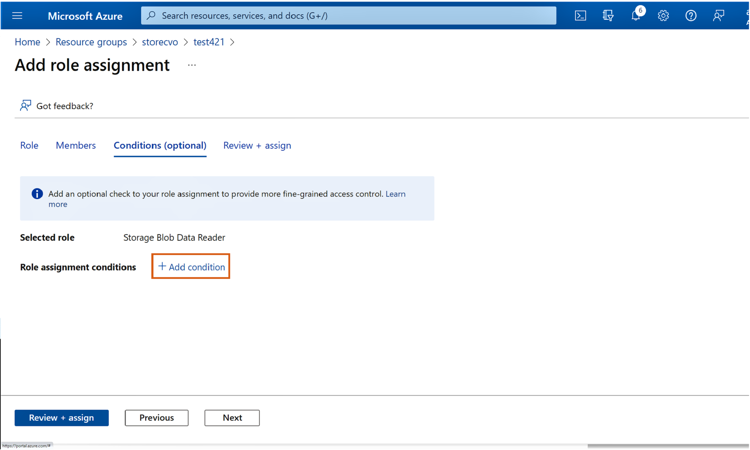
2.5 In the next screen, add a condition. Click on “Select actions.”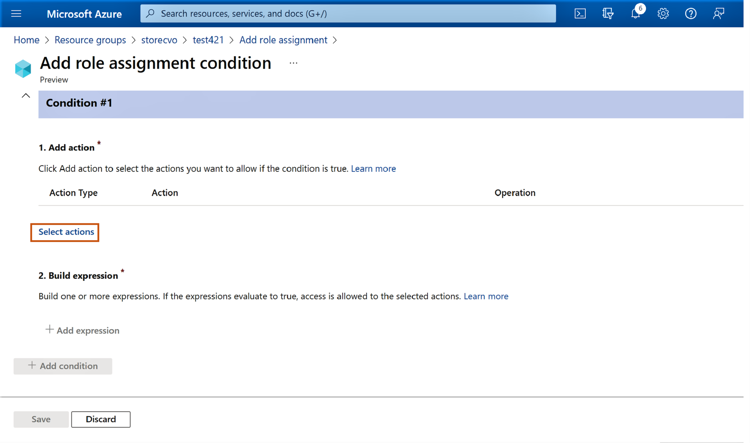
2.6 Select the checkbox “Read content from a blob with tag conditions” and then click “Select.”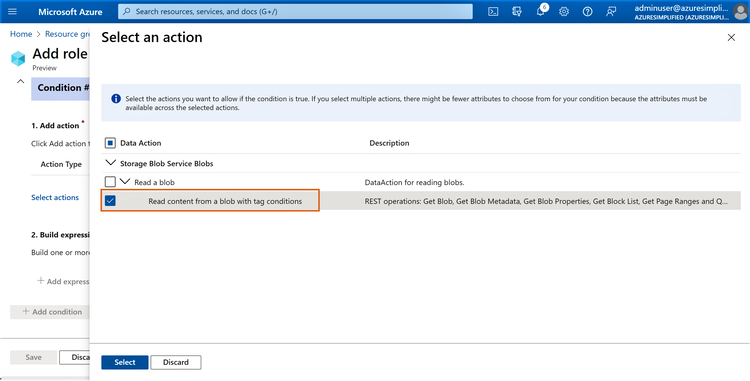
2.7 Click on “+Add expression.”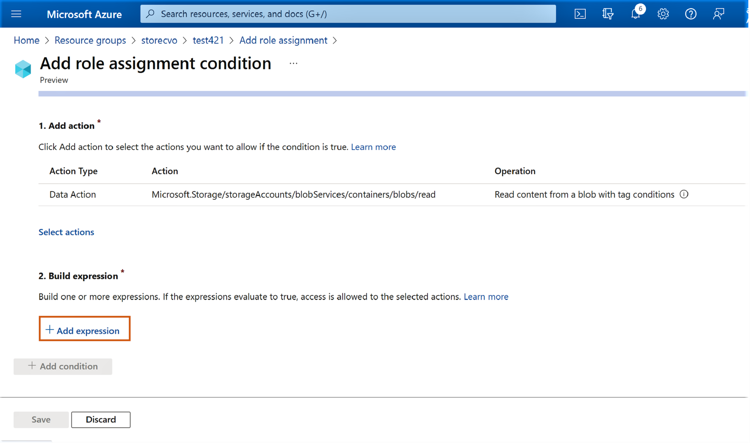
2.8 Add the following values to build the expression:
- Attribute Source: Resource
- Attribute: Blob index tags [values in key]
- Operator: StringEqualsIgnoreCase
- Key and Value: Provide the values added in step 1 for the blob
Click “Save” and then click “Next.”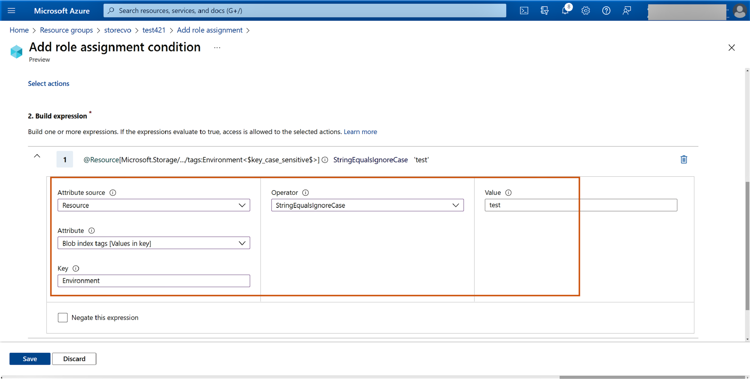
2.9 Click on “Review+assign” to review the conditions and complete the role assignment.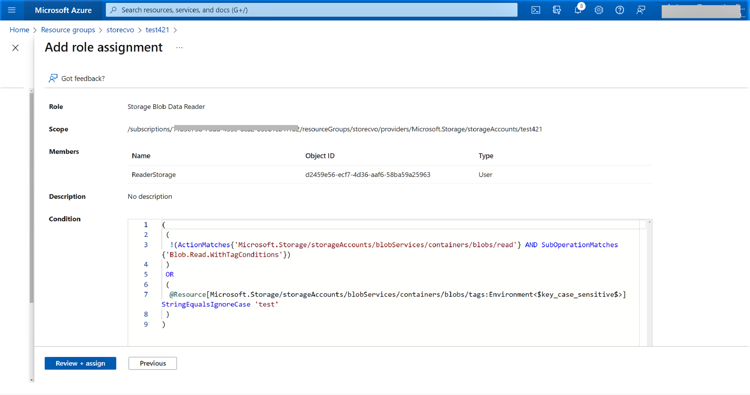
Now the ABAC role assignment is completed, and the Storage Blob Data Reader role access is further restricted to blobs with the predefined blob index tags.
3. Azure Storage Permissions and Stored Access Policy on Azure Blob Storage
Shared access signatures (SAS) are used to provide token-based and timebound Azure Storage permissions. This method avoids the blanket permissions usually provided by using an Azure storage access key.
Customers can create a service SAS to delegate access to any one of the storage services, i.e., Azure Blob, Table, Queue, or Files. Additionally, a stored access policy can be used to group Shared Access Signatures and implement an additional layer of access control.
Stored access policies can be used for management activities like changing start/expiry time of a SAS. They can also be used to edit the permissions of a signature or even to revoke a SAS after issuing it. Container ACL operations are used in the backend to implement stored access policies for Azure Blob storage.
Let’s look at the steps to configure a stored access policy for a container in Azure Blob storage.
3.1 From the Azure portal, browse to Storage -> Select and find the container where the policy needs to be set. In the menu on the right-hand side, click on “Access policy.”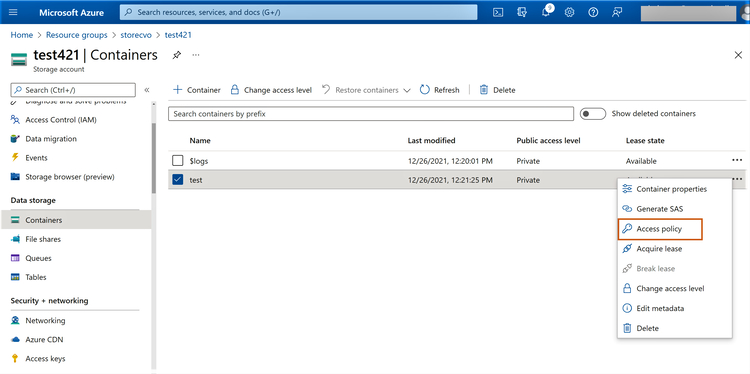
3.2 In the next window click on “+ Add Policy”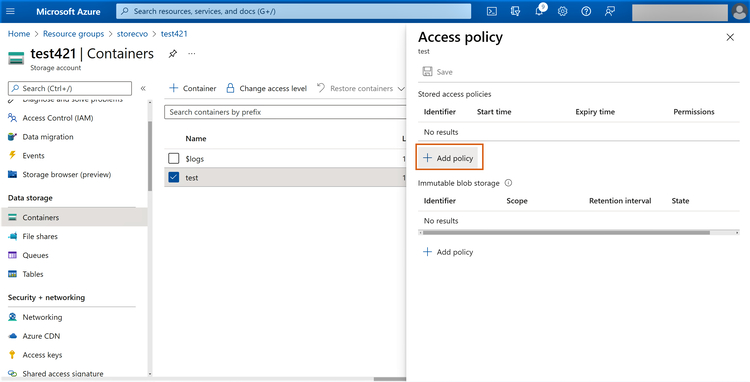
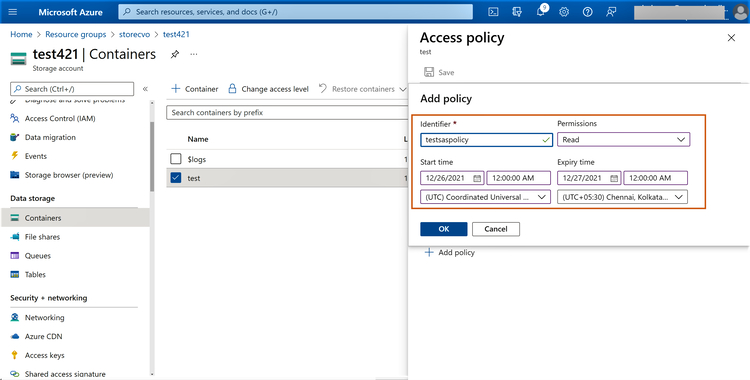
3.3 Configure the stored access policy settings as follows:
- Identifier: Provide an identified for the policy (this will later be used during SAS creation)
- Permissions: Choose the permissions that should be allocated to the SAS (i.e., Read, Add, Create, Write, Delete, List)
- Start time and expiry time: This indicates the duration for which the SAS will be valid
3.4 Click on “Save” to complete the configuration.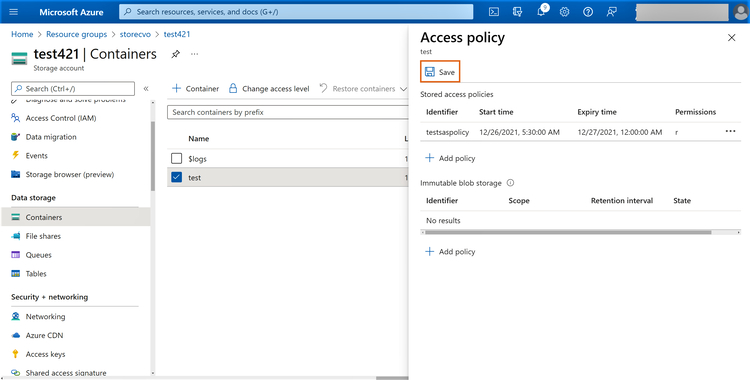
3.5 From the Azure storage explorer tool, browse to the target container, right click -> Get Shared Access Signature, and then select the stored access policy that was created in the previous step.
Click create to complete the provisioning of SAS using the stored access policy.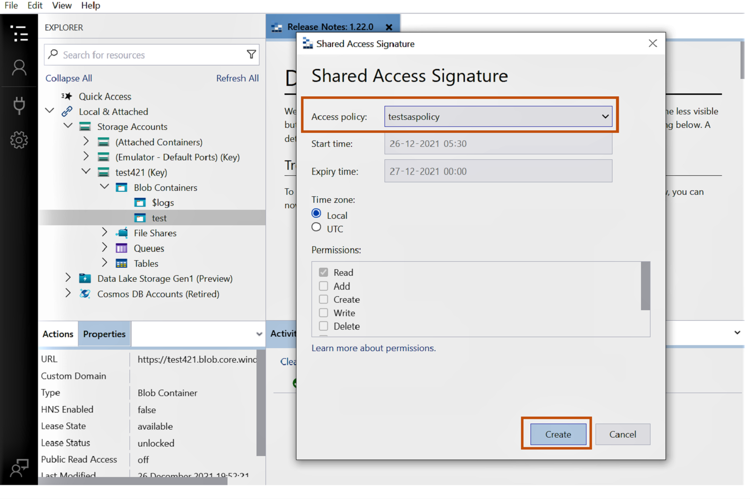
3.6 In the pop-up window, you will now be able to copy the newly created SAS.
You should now have a few methods to help set up secure access to your Azure storage resources. But what further security steps can you take to enhance your Azure storage security?
Enhancing Azure Storage Security with Cloud Volumes ONTAP
In this blog we have discussed the different options available for securely accessing Azure storage. You can further enhance the security of your cloud storage by using NetApp Cloud Volumes ONTAP to bring enterprise-scale data management features to Azure and enhance your cloud storage capabilities and ROI.
Cloud Volumes ONTAP comes with built-in data security features such as encryption and ransomware protection. Leveraging SnapLock® technology, Cloud Volumes ONTAP ensures the write-once, read-many (WORM) state of the storage and makes it immutable from attacks. In addition to native integration with Azure security features like NSG, it also supports access restriction through NTFS and EXT ACLs. The VScan antivirus feature of Cloud Volumes ONTAP protects data from virus attacks and malicious codes.
Read our blog on enterprise data security to understand more on how Cloud Volumes ONTAP can boost your cloud storage security.
FAQs
What is access control in Azure?
Access control in Azure refers to the required guardrails on who can access what resource in an Azure subscription. Azure uses role-based access control (RBAC) built on Azure Resource manager to implement access control. Using RBAC, users can implement the principle of least privilege for your Azure resources.
A role in Azure RBAC defines a collection of permissions, i.e., read/write/delete etc. Roles are assigned to security principals, which could be a user, groups, managed identities, or a service principal that need access to an Azure resource. Based on the permissions defined in the roles, the security principal is allowed or denied permissions for specific actions on the target Azure resource. Azure has multiple built-in roles that are created with predefined permissions. If these built-in roles are too permissive, you can create custom roles with more fine-grained access restrictions.
What Is ACL in Azure Storage?
Access control lists are used to restrict access to files and directories in cloud storage. It works at the control plane, and verifies that the user trying to access the data is authorized to do a specific action. In Azure storage these restrictions are implemented using Role based Access Control (RBAC) for Blob storage. Either built-in or custom roles can be used to assign the required permissions. While General purpose blob storage is used for typical unstructured data use cases, Azure offers a specialized storage called Azure Data Lake Gen2, which is built on Azure Blob storage for enterprise big data analytics.
ADLS Gen2 users can also use access control lists (ACLs) to implement POSIX-like Read/Write/Execute permissions in addition to Azure RBAC). These ACLs can be configured at the directory or file level in storage containers to implement Azure Storage access control.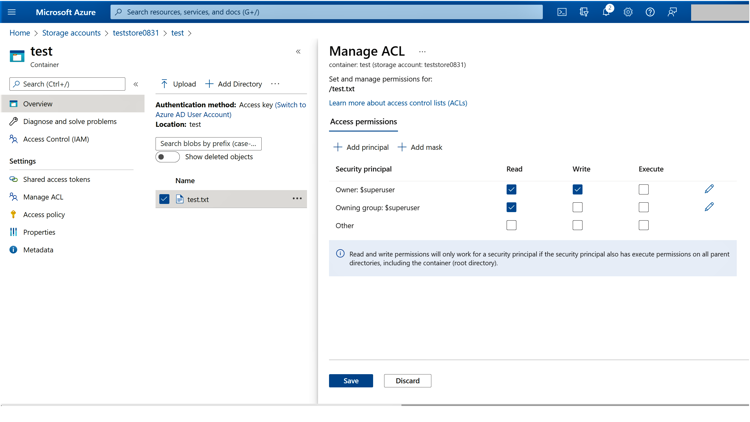
Managing ACLs with ADLS Gen2

