Share
According to the cloud’s industry-wide shared responsibility model, it’s the customers’ responsibility to leverage the security tools and services offered by the cloud service provider to make sure data stays safe. How can you approach your storage security as an Azure user?
Like all cloud service providers, Azure provides a set of storage-level best practice configurations that can be implemented to protect data at rest and in transit. This blog will elaborate on how some of these best practices can be implemented to ensure security of your Azure Cloud storage accounts.
To jump down to the instructions that you need now, use the following links:
- How to Use Soft Delete
- How to Configure Immutability Policies
- How to Restrict Access Using SAS
- How to Restrict Network Access Using Service Endpoints
- More Azure Security Options with Cloud Volumes ONTAP
Azure Security Best Practices Overview
The Azure storage security best practices listed below will ensure that your data is protected, whether it's at rest in Azure cloud storage or being accessed by your applications over the network.
Use soft delete for Azure Blob data
Accidental deletion of data, either due to application issues or manual errors is one of the common data protection challenges faced by cloud storage admins. These incidents can be severe security threats, as mission critical data can be lost in the process. To solve this problem, Azure created the soft delete feature for Azure Blob.
Soft delete protects your data and snapshots in Azure blob storage from being accidentally deleted. With this feature enabled, objects in blob storage can be recovered within a configured retention period using an undelete blob operation. The data can be restored from one of the previous versions of the blob using copy blob operation.
Configure immutability policies
Having your mission-critical data being modified by rogue actors is another serious Azure storage security threat that could have long lasting impacts on your production applications. To combat this threat, you can configure immutable policies for your blob storage to store such critical data in Write Once, Read Many (WORM) state.
This feature is especially useful in industry vectors such as healthcare, finance, banking, and other industries where legal and compliance requirements mandate that data be stored in a tamper-proof manner. The immutable policies can be configured to be time-based, where the data is retained for a defined time period or configured for legal hold where the retention interval is unknown. In case of legal hold policies, the data will remain immutable until the hold is removed.
Restrict access using SAS
Shared Access Signature (SAS) helps to implement fine-grained Azure access control to storage accounts by restricting access through a token with specific query parameters. SAS tokens can also be configured to expire after a specified period or restricted to access specific resources, such as single objects within blob storage. This makes SAS the recommended best practice to be used for configuring Azure storage access, unlike storage access keys, which provide total access to the entire storage account permanently.
Restrict network access using service endpoints
Service endpoints enable secure connectivity for resources in a VNet to Azure Storage accounts over Azure’s backbone network. In place of a public endpoint of storage, service endpoints configure a private IP in the VNet which can be used by resources in the network to access data in storage accounts. As the traffic is not exposed to the internet with this method, it offers a secure method for application components to communicate with each other and is a recommended best practice in Azure application architectures.
How to Use Soft Delete
Now we’ll show you how to use soft delete to prevent your data in Azure Blob storage from being accidentally deleted.
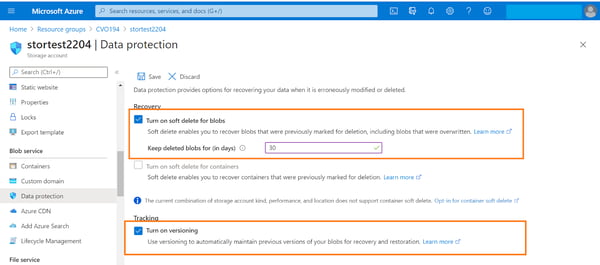
- From the Azure portal, open the storage account -> Blob service -> Data protection. Enable the following options and click on “Save.”
- Turn on soft delete for blobs and provide the number of days for which the deleted blobs should be kept. This will allow you to recover deleted blobs within that specified number of days.
- Turn on versioning. This will help to restore previous versions of blobs. It is recommended to enable this option instead of taking blob snapshots as the snapshot process is manual.
Note: The container soft delete option offers protection from accidental deletion at the container level. It should be noted that this feature is currently in preview and is available in a limited number of Azure regions: France Central, Canada East, and Canada Central.
How to Configure Immutability Policies
Below are the steps for configuring the immutability policy for an Azure storage container so that the data stored in it will be non-modifiable and non-erasable for the duration you specify in the policy.
1. From Azure portal open the storage account -> Blob service -> containers. Double click the container where the policy should be configured.
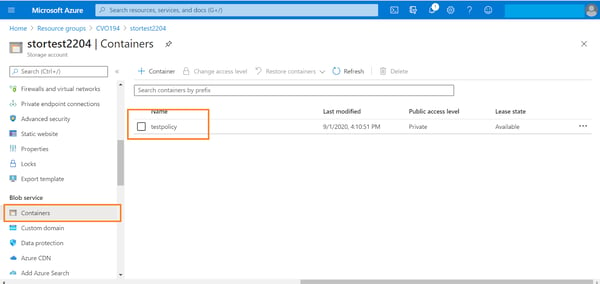
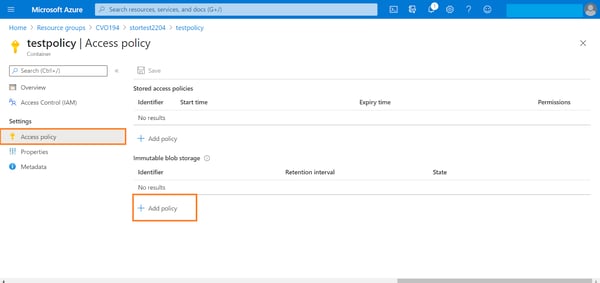
2. From the container settings -> Access policies. Click on “+Add policy” option listed under the Immutable blob storage section.
3. In the configuration window for adding a new policy, select the type of policy you want to use from the drop-down menu. The policy can either be time based or policy based. In this example, we will create a time-based retention policy which makes data immutable for a specified duration of time.
Select “Time-based retention” from the drop-down list.
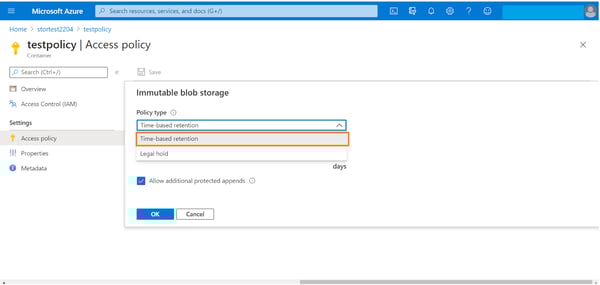
4. Select the retention period, which can be a value between 0 and 146000 days (fyi, that’s equivalent to 400 years). Also enable the “Allow additional protected appends” option. This will allow you to create new append blobs in the container, and allow new blocks of data to be appended to the existing append blobs. Note that existing blocks would still remain immutable, only new blocks can be added.
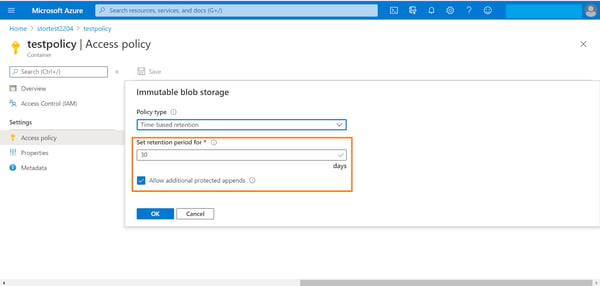 Click on ok to add the Azure security policy.
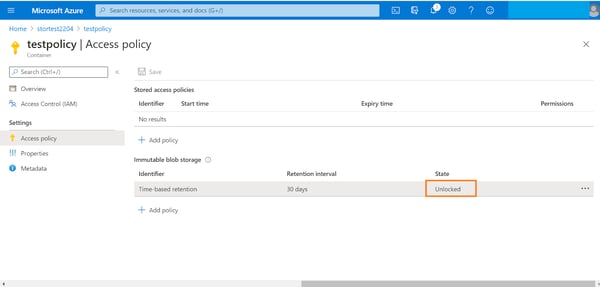
5. You will see that the newly created policy will now be shown as unlocked in the portal. The status of policy is unlocked by default to enable testing and make changes.
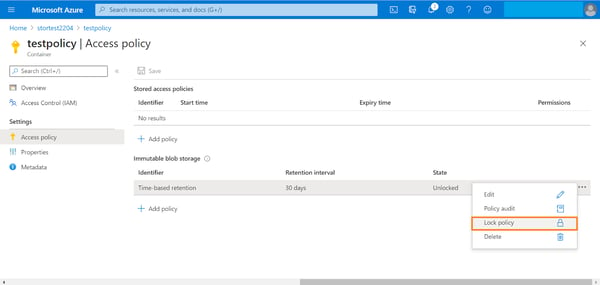
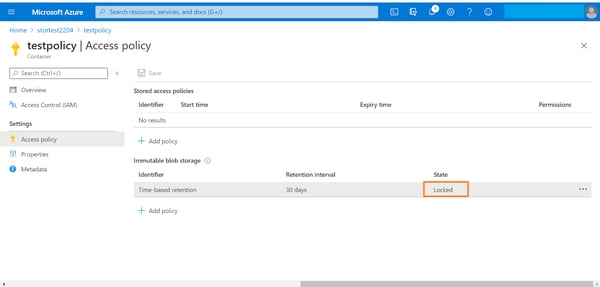
6. To lock the policy, right click the ellipsis associated with the policy and click on “Lock Policy.”
7. Type “yes” in the confirmation box and then click “Ok.” Note: the retention policy is irreversible once confirmed. You can only extend the retention period if required.
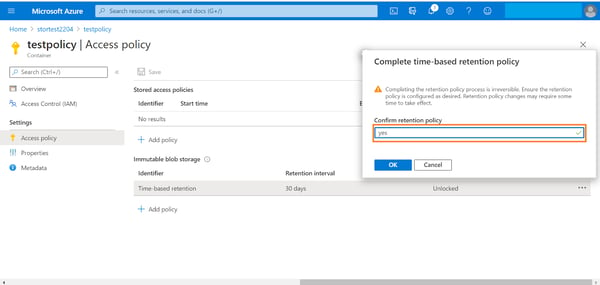
8. You can see that the retention policy status is now changed to “Locked.”
How to Restrict Access Using SAS
A shared access key can be created either using a user delegation key associated with an Azure AD credential or using the storage account key, restricting access to specific storage accounts or objects within the storage account. In this example we will walk you through the process of creating an SAS signed using a storage account key.
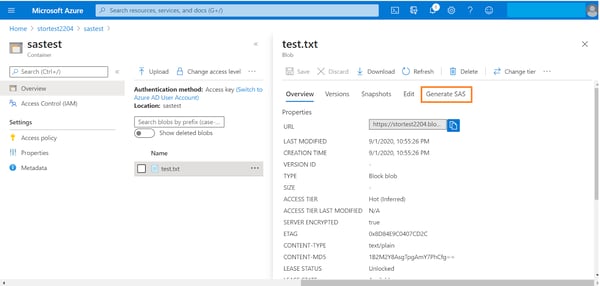
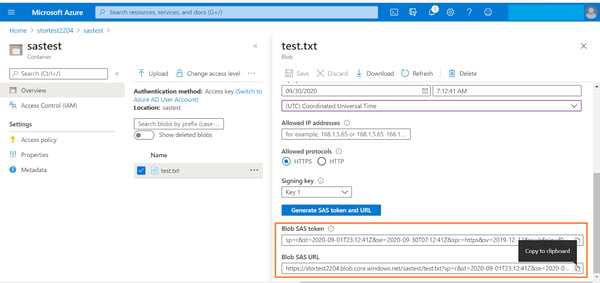
1. Browse to the Azure storage account -> double click the storage container -> select the blob. Click on the “Generate SAS” option.
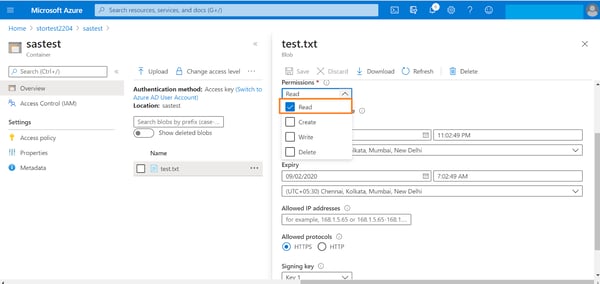
2. Select the permissions to be provided to the SAS from the drop down list.
3. Configure the following options associated with the SAS:
- Validity of the SAS by providing a start date/time and end date/time.
- Optionally, provide a list of IP addresses from which the SAS requests should be accepted.
- Select from https/http protocol for access.
- Select the signing key from one of the two storage access keys.
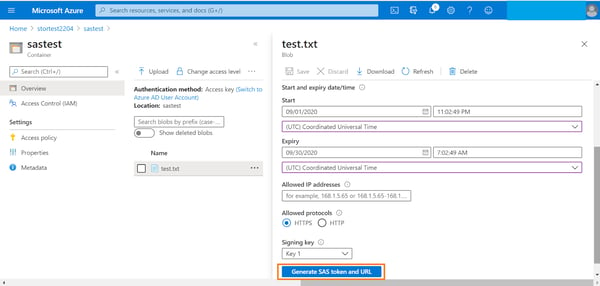
When you’re done, click on “Generate SAS token and URL.”
4. Scroll down to view the generated token and URL. Copy the values to integrate them with application code or to make API calls to read the blob data.
How to Restrict Network Access Using Service Endpoints
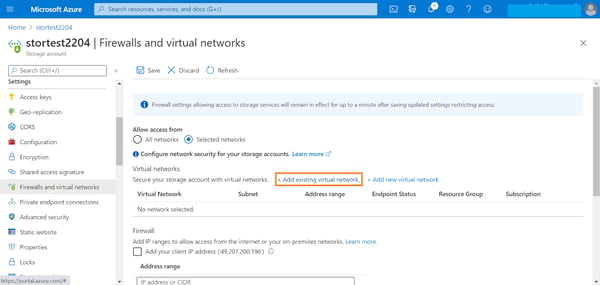
By default, storage accounts have public endpoints that are accessible from the internet. To restrict access to a specific subnet in an existing VNet using service endpoints, complete the following steps.
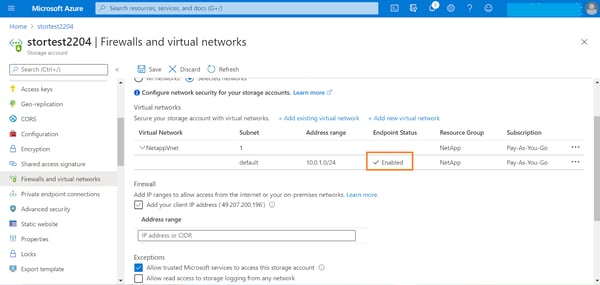
1. From the Azure portal, browse to storage account->Settings->Firewalls and virtual networks. By default, access will be set to “All networks.” Change this setting to “Selected networks” and click on “Add existing virtual network” to restrict access to Azure endpoints.
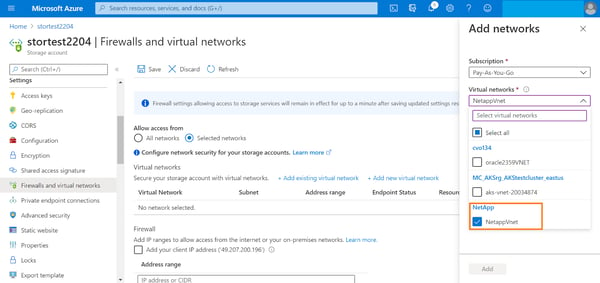
2. Select the target VNet from the drop-down list. VNets in the same region as the storage will be listed here.
3. Select the subnet from the dropdown list and click “Add.”
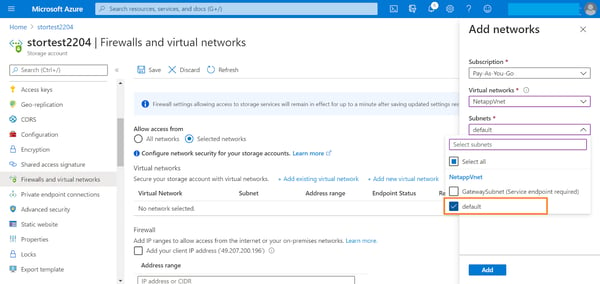
4. You can see now that the service endpoint for the storage from the subnet is enabled. Click on “Save” to complete the configuration.
Getting More Azure Security with Cloud Volumes ONTAP
We just saw how to implement some of the native Azure storage security best practices. You can further enhance the security of your Azure cloud storage by leveraging advanced data management and security features offered by Cloud Volumes ONTAP for Azure.
Cloud Volumes ONTAP brings the benefits of NetApp ONTAP data management solution to Azure and delivers enterprise-class storage accessible by Azure workloads over iSCSI, SMB/ CIFS, or NFS protocols. By adding Cloud Volumes ONTAP to your cloud storage portfolio, your applications benefit from several proprietary security features integrated with the service.
Encryption: Encryption at rest is enabled by default for storage accounts in Azure. As Cloud Volumes ONTAP uses Azure storage in the backend no additional configuration is required. Cloud Volumes ONTAP also supports NetApp encryption solutions called NetApp Volume Encryption and NetApp Aggregate Encryption that can leverage external key management solutions.
Virus Scanning: Cloud Volumes ONTAP offers an enterprise class third party Virus scanning feature called Vscan which can be used to protect data in ONTAP volumes from virus attacks or malicious code. The service can be scheduled as per specific requirements of the organization, providing the flexibility to define scope of the scan and even limit it to specific files in the volume.
Snapshots: Cloud Volumes ONTAP protects your data from ransomware attacks through NetApp snapshot policies that create point-in-time, read-only copies of data that cannot be infected through malware. In case of a malware attack, organizations can recover data from one of these snapshots.
File Access Notification: ONTAP’s FPolicy solution helps to protect from ransomware by blocking common ransomware file extensions. File operations are blocked based on these file extensions as a preventive measure to protect from common ransomware attacks.
WORM: For immutable storage, the Cloud WORM feature integrated with Cloud Volumes ONTAP prevents ransomware attacks from modifying your mission-critical data stored in Cloud Volumes ONTAP volumes. This is different from Azure’s Immutability Policies, which act at the container level. Cloud Volumes ONTAP allows for a more focalized protection.
Compliance: Cloud Compliance is an add-on component for Cloud Volumes ONTAP that uses AI-driven contextual analysis and categorization of personal or sensitive information in your cloud-based data to help comply with data privacy regulation such as GDPR and CCPA.
Ransomware Prevention: Cloud Volumes ONTAP provides line-of-defense utilities against ransomware attacks with built in security features.
Read Enterprise Data Security with Cloud Volumes ONTAP to learn more.
Security in the cloud is something to take seriously. Cloud Volumes ONTAP along with Azure storage security best practices can help to ensure data security for all your workloads in Azure.

