Share
The data that an organization controls is as unique as the organization itself. That means when it comes to data governance, not every tool will be able to find and report the data that’s really relevant to that organization.
NetApp has solved that problem with the new custom classification feature for NetApp Data Sense, the technology behind BlueXP classification.
This new feature from NetApp allows users to define specific criteria that Data Sense can search for, identify, and report on when running scans. It gives users a flexible solution to fit their unique data governance needs.
To find out more, read on, or click the links below:
What Is Custom Classification?
Custom classification is a new feature for Data Sense, the technology behind NetApp BlueXP classification. Data Sense gives users an easy way to gain data governance across the entire data estate by automatically scanning data repositories using an AI-driven, context-aware algorithm. The scans identify specific data points, map that data, and report the results in easily readable dashboards and reports.
Until now, the Data Sense AI was designed to search for specific terms and data characteristics, such as data type, file size, permissions, and sensitive data, including a range of PII and any sensitive personal information, such as biographical details. It would also detect data by category type, such as "HR," "Finance," etc. The new custom classification feature gives Data Sense users the ability to train the Data Sense AI to identify specific data points and define categories that aren’t part of the technology’s out-of-the-box search parameters.
Your custom terms and categories can be found through the use of a “regular expression,” or REGEX for short, as well with a keywords list or by training the Data Sense AI to identify similar terms.
Say, for example, you work for an organization that needs to be able to identify all the data that contains mentions of the expression “purple monkey dishwasher.” You can now input that term into Data Sense and have it regularly identify where all the data that contains the term “purple monkey dishwasher” resides, how much of it you have, and how it’s categorized.This term can be any subject matter that pertains to your business, such as specific employee, project, or document names, up to a maximum of 70 characters.
There are many uses for custom classification. This can also be trained to look for PII, such as governmental ID numbers, making it easier for organizations with widely dispersed global footprints to easily locate data that may need to comply with localized regulations.
You’ll see your new custom classified term listed among the results in the relevant panels and widgets in the various dashboards and reports presented by Data Sense. In this screenshot below, you can see the results for the custom searches that are titled “Managers Names,” “Product Number,” and “Internal ID.”
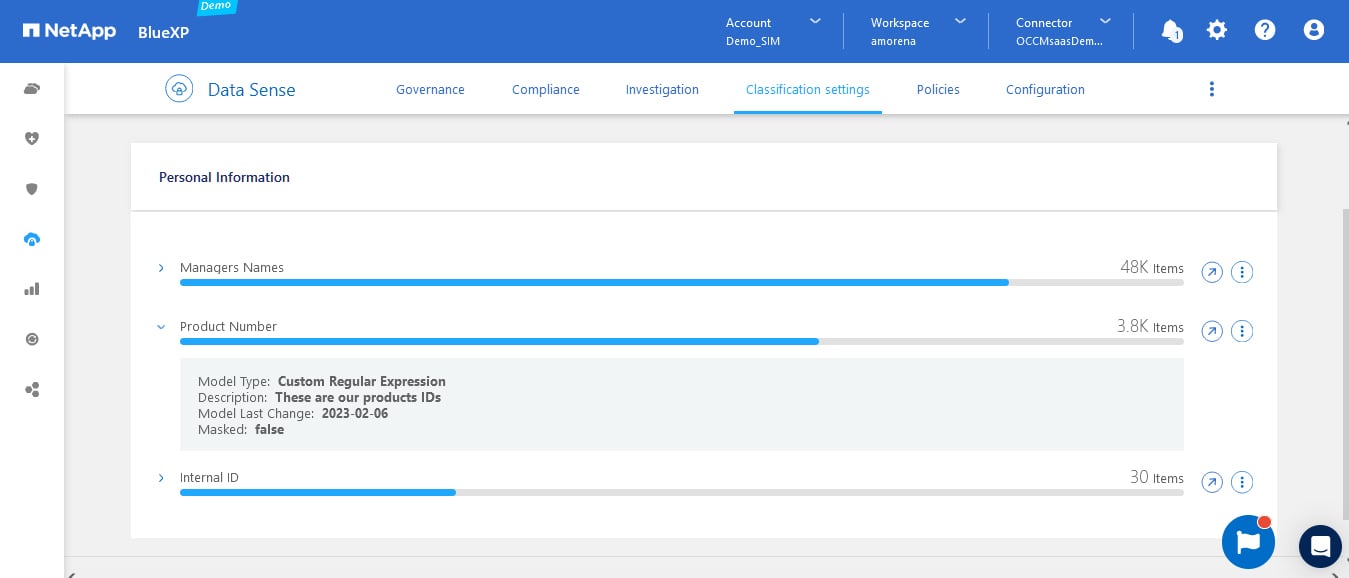
Clicking the custom classifier itself will expand the meta details about the classifier. To see all the results the scan found for that classifier and where they reside, click the arrow icon in the circle to the right.
Adding custom classifiers can be done directly through the BlueXP UI. Once the new criteria is added, you’ll see it as an option among the classification settings on the dashboard (we’ll show you how to do that in the next section).
In case that expression needs to be refined or changed at any point, you can easily edit the expression to train Data Sense to look for the updated term. If there’s a term that you no longer need to keep tabs on, you can also easily delete custom classification terms, also using the dashboard.
How to Use Custom Classification
In this section we’ll outline some of the basic steps that you can set up to start using custom classification.
How to Add a New Custom Identifier
Adding new custom identifiers to Data Sense is the core of the new feature. Here’s how you can do it.
- From the main Data Sense dashboard, look for the new Custom Classification widget. In it, you’ll see a button labeled “Training Wizard.”
Click “Training Wizard” to start setting up your new custom identifier.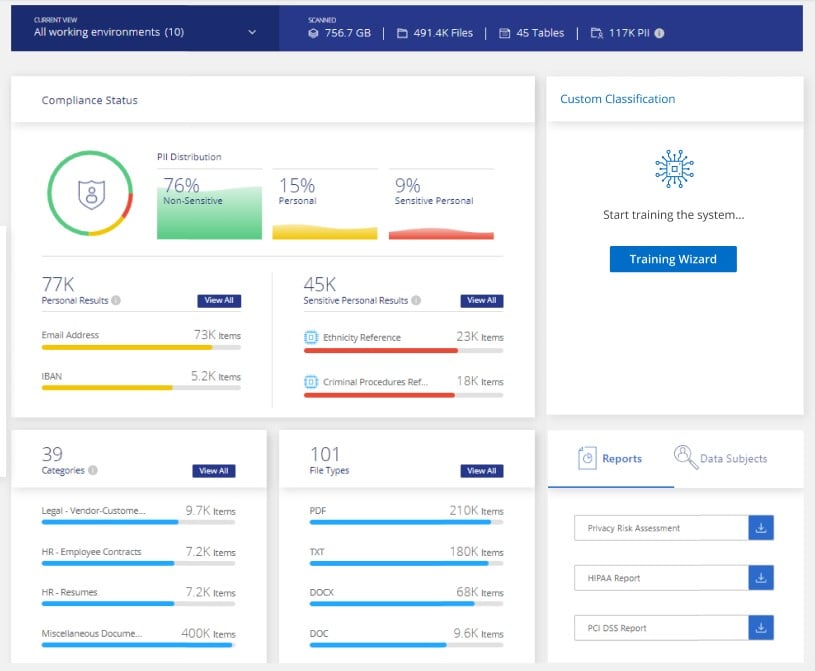
- The training wizard opens up on the right, whether you open it up from the dashboard or the compliance tab.
- The wizard will prompt you to add a new classifier to the system. This is a three-step process.
The first step is to choose if the identifier will be defined as personal information identifier or a new category in the system.
If you are adding a personal information identifier, it means that the information might be sensitive, so we also allow masking the detected results in the system. Tick the box if you would like to mask your new identifier.
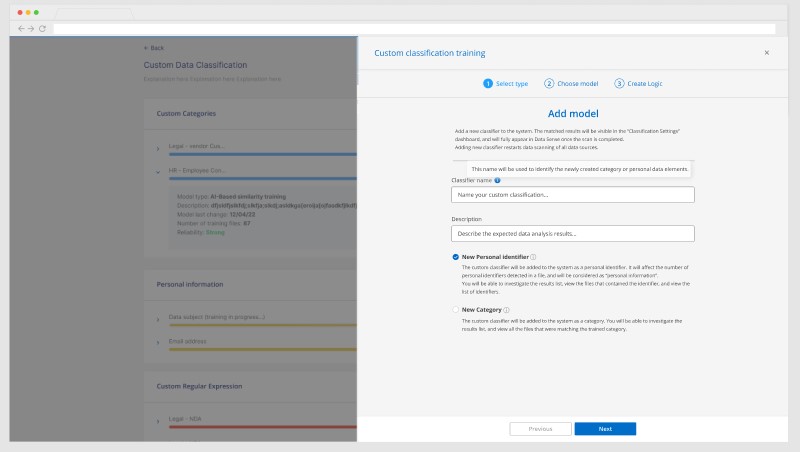
Click “Next” to proceed. - In the second step, we will add the model.
 Adding a new model with the wizard.
In the first field, “Classifier name,” enter a name for the classifier term that you would like to train the AI to detect. Note that this name does not necessarily have to correspond to the exact term that you will train the AI to search for, it’s basically just a title for the corresponding search term you’re going to add in an upcoming step.
In the next field, “Description,” add a description of the classifier. This description can be up to 300 characters long. This can be useful to explain the purpose of the custom classifier.
Next, choose whether your classifier is a “New Personal Identifier” or a “New Category.”- A new personal identifier will be added to the existing PII that Data Sense is trained to find out of the box, and the scan results for that term will appear with the other PII.
- A new category custom classifier will create a new category of data for Data Sense to look for, and search results for any files matching that term will appear under the category.
When you’re done, select “Next” to continue.
-
In the third and final step we will create the logic that the AI will use to pinpoint the custom classifier.
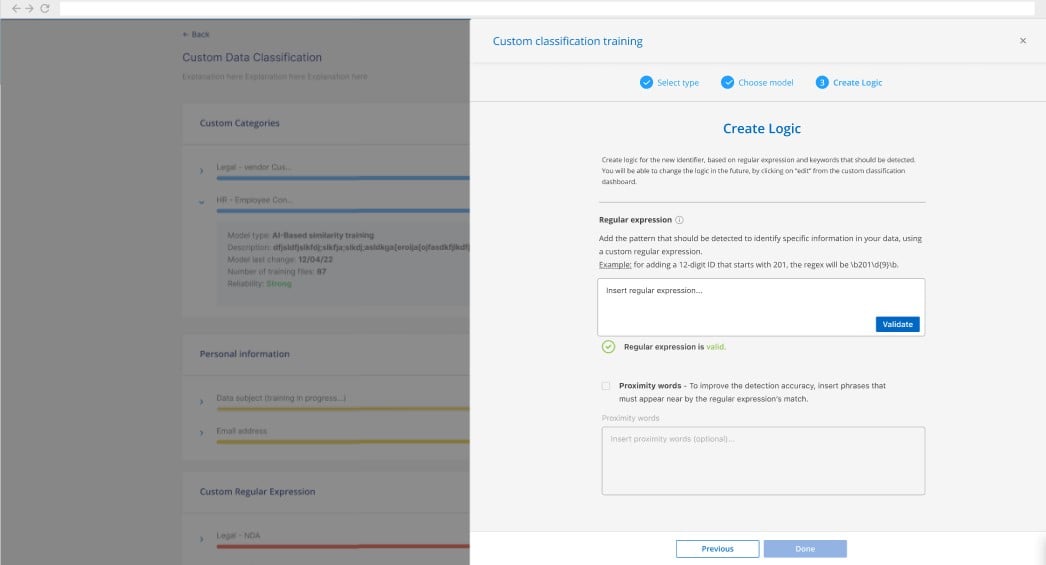 The “Create Logic” step.In this case we are adding a custom regular expression. Note that custom keywords and custom categories can also be added in this step.
First, add the regex that you want the AI to search for in the first field. Click “Validate” when your expression is added. The system will then respond if the regex is acceptable.- If the regex is valid, you will receive the message: “Regular expression is valid.”
- If the regex is invalid, you will receive an error message: “Error: Regular expression invalid. Please change the input.” If you receive this message input a new regex for the system to validate.
- If the regex is acceptable but is a bit too wide to find highly accurate results, you’ll receive a warning: “Warning: Regular expression is valid but might be too wide.” You’ll still be able to proceed, regardless of the warning, but you may want to refine your term for better results.
Similar responses will be given to you when inputting new custom keywords and categories, as well.
You can tick the proximity words box and enter related words to help guide the search towards the custom result you want the AI to identify. This will help improve the accuracy of searches.
When you have a valid expression, you can click “Done” to finish the custom classifier creation process. A new scan will begin automatically and return results as soon as it’s complete.
In the next sections we’ll see where those results can be seen.
Where to Find Classification Results
Your custom classification results can be found in a few different places in the Data Sense UI inside of BlueXP. Let’s take a look at them each below.
The New “Classification Settings” Dashboard
With the launch of the new custom classification feature, Data Sense now has a Classifications settings dashboard. This can be found in the menu at the top of the Data Sense UI in BlueXP.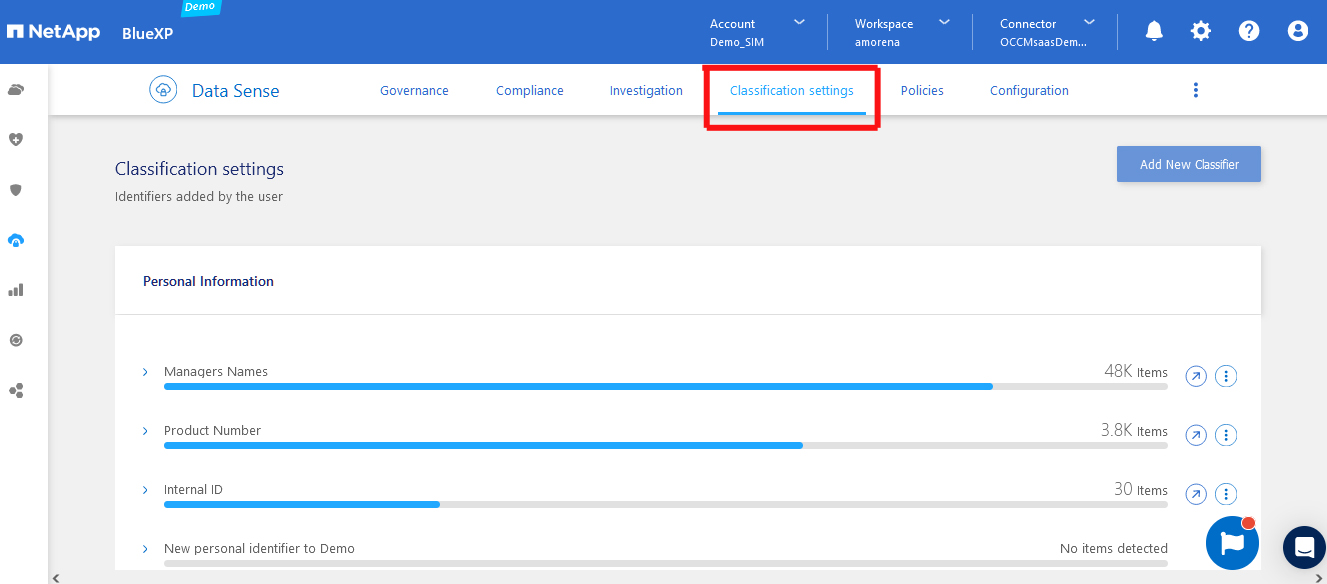 The Classification settings tab is new to the Data Sense UI on BlueXP.
As mentioned above, clicking a classifier will show more information about the classifier itself, including the model type (i.e. the regex itself), the description, and the last time the model was changed/creation date.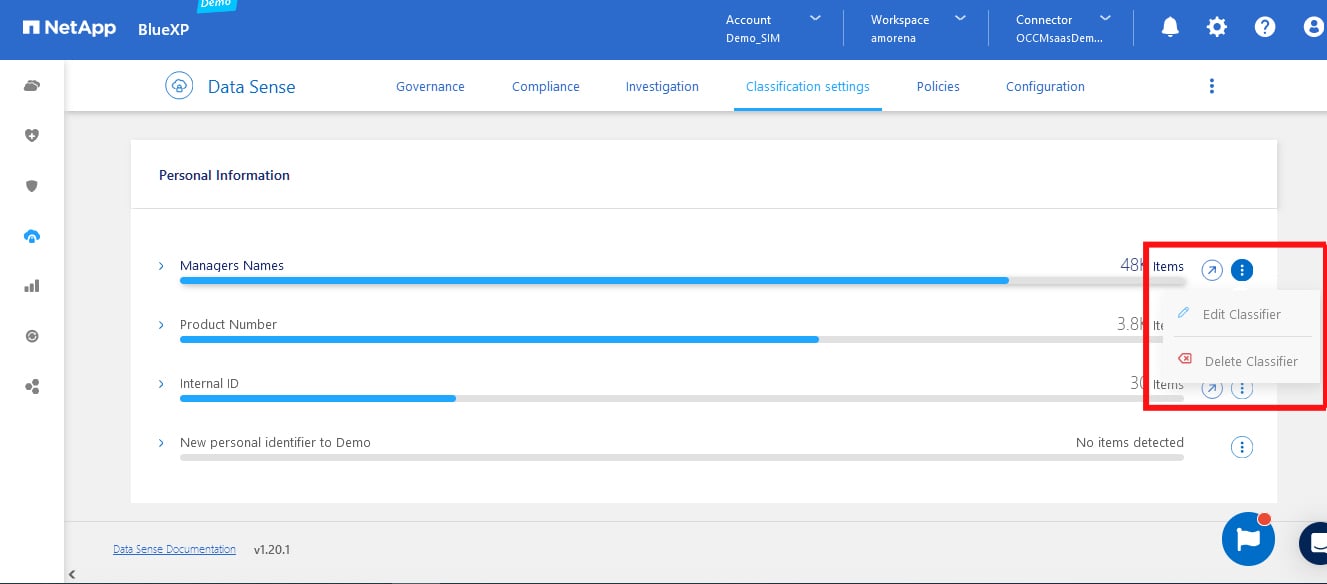 The menu to the right of the classifier will allow you to edit or delete the classifier.
If you choose to delete a custom classifier, a pop-up dialog will appear asking for you to confirm the deletion. Note that this is a permanent action, so be sure before you commit. The dialog box to delete a custom classifier
The Original Compliance Dashboard
You will also be able to see your custom classifications on the Compliance dashboard inside of the BlueXP UI for Data Sense. At the top right of the dashboard you’ll find the “Custom AI Classification” widget, where the top five largest custom classification terms will appear.
You can click “View All” on this widget to open up the new Classification dashboard where you can view the full results of all your custom classifiers in one place.
The “Custom AI Classification” widget on the Compliance dashboard.
Matching results will be visible in the Classification settings dashboard and will fully appear in Data Sense once the scan is completed.
Adding a new classifier will begin a new data scan across all your data sources, so you can get immediate results based on the new terms.
Conclusion
Your organization isn’t the same as the one across the street, so why should your classification tool be the same? NetApp now has a way to help you find the information that makes your organization unique, no matter where it’s stored in your data estate.
Adding custom classifications is easy, and adds much more flexibility to Data Sense. It’s a utility that can be useful both for organizations looking for a data governance tool and for those who have relied on Data Sense for years.
